BEARDSNEST MANOR - Construction Of The Chicken Pen Phase 1
Hi all, my name is Nytehawker.This is my first entry into the DIY Hub. Recently we left the big city behind and began the exciting adventure of country farmsteading. Our farmstead has been dubbed "BEARDSNEST MANOR" so any posts you see from me relating to our hobby farm life will contain that word so hopefully people will recognise when I am posting about such!
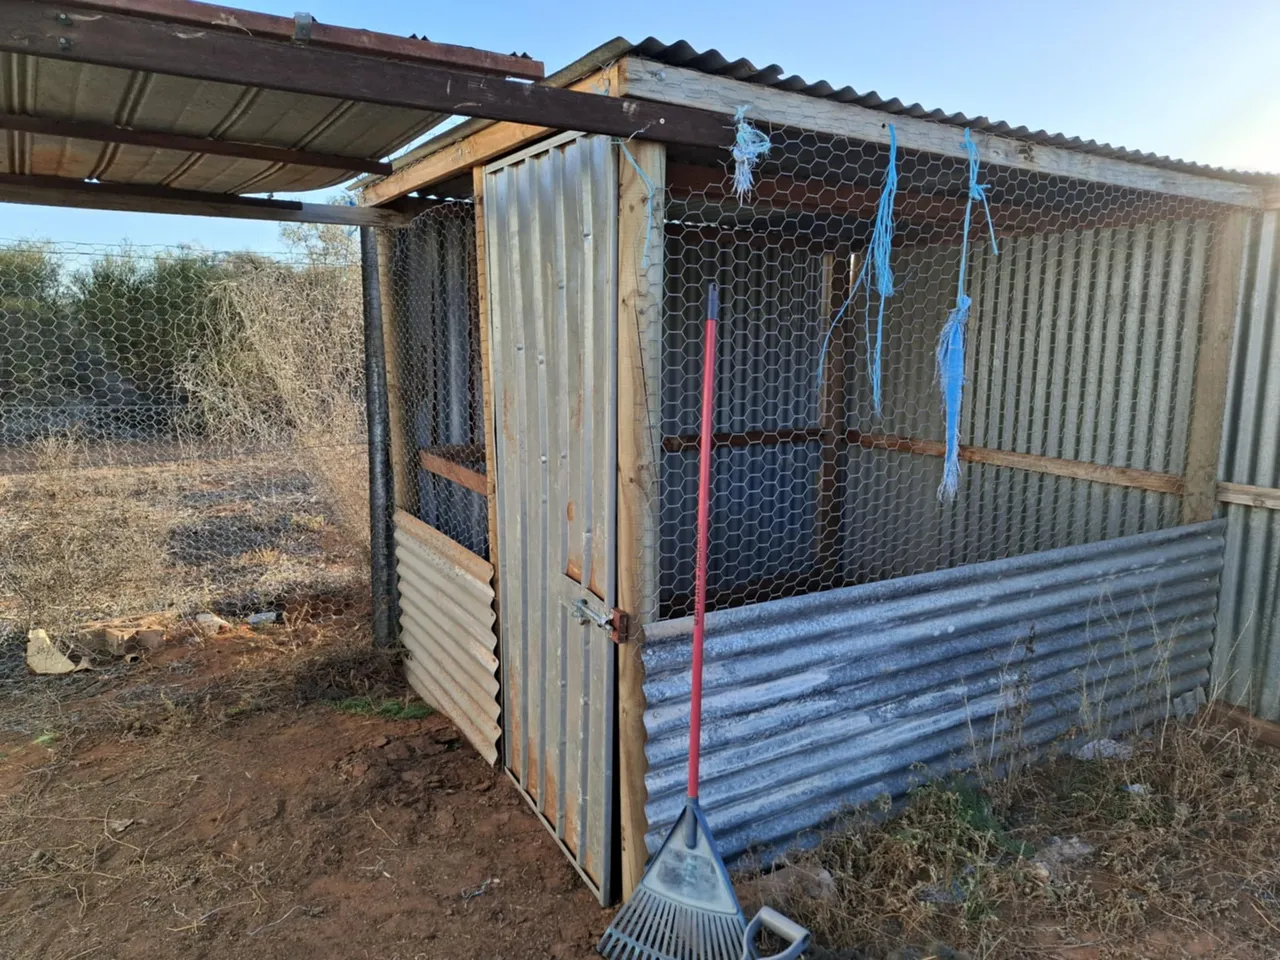
Today I want to show you Phase 1 of repairing and constructing a chicken coop with NO prior experience, no manual and no youtube! Just brain power and envisionment!
Rebuilding The Original Coop
The first step was to work out how to quickly get the first coop back in operation. This would be by far the easiest part of the project as the original pen was almost complete. Obviously it had been a functional coop in the past and needed some TLC.
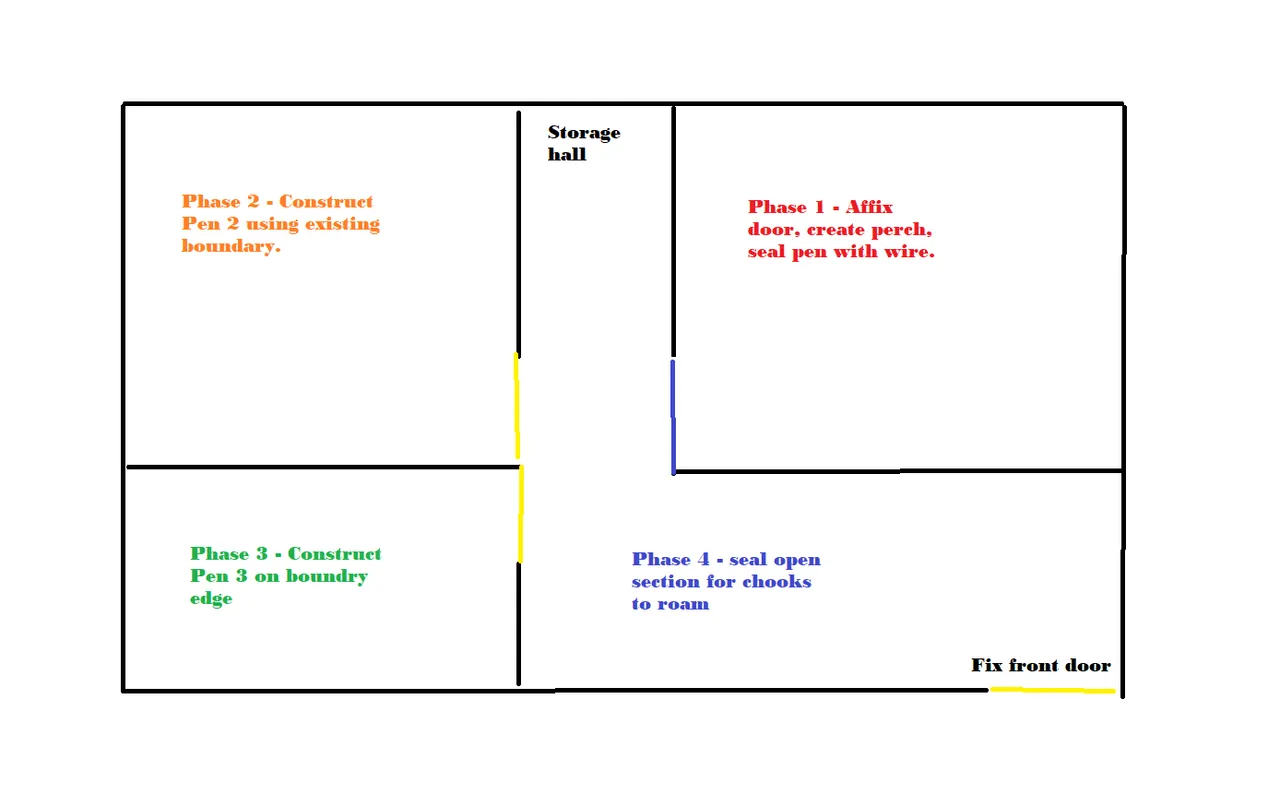
I brainstormed how I would work at doing this in phases.
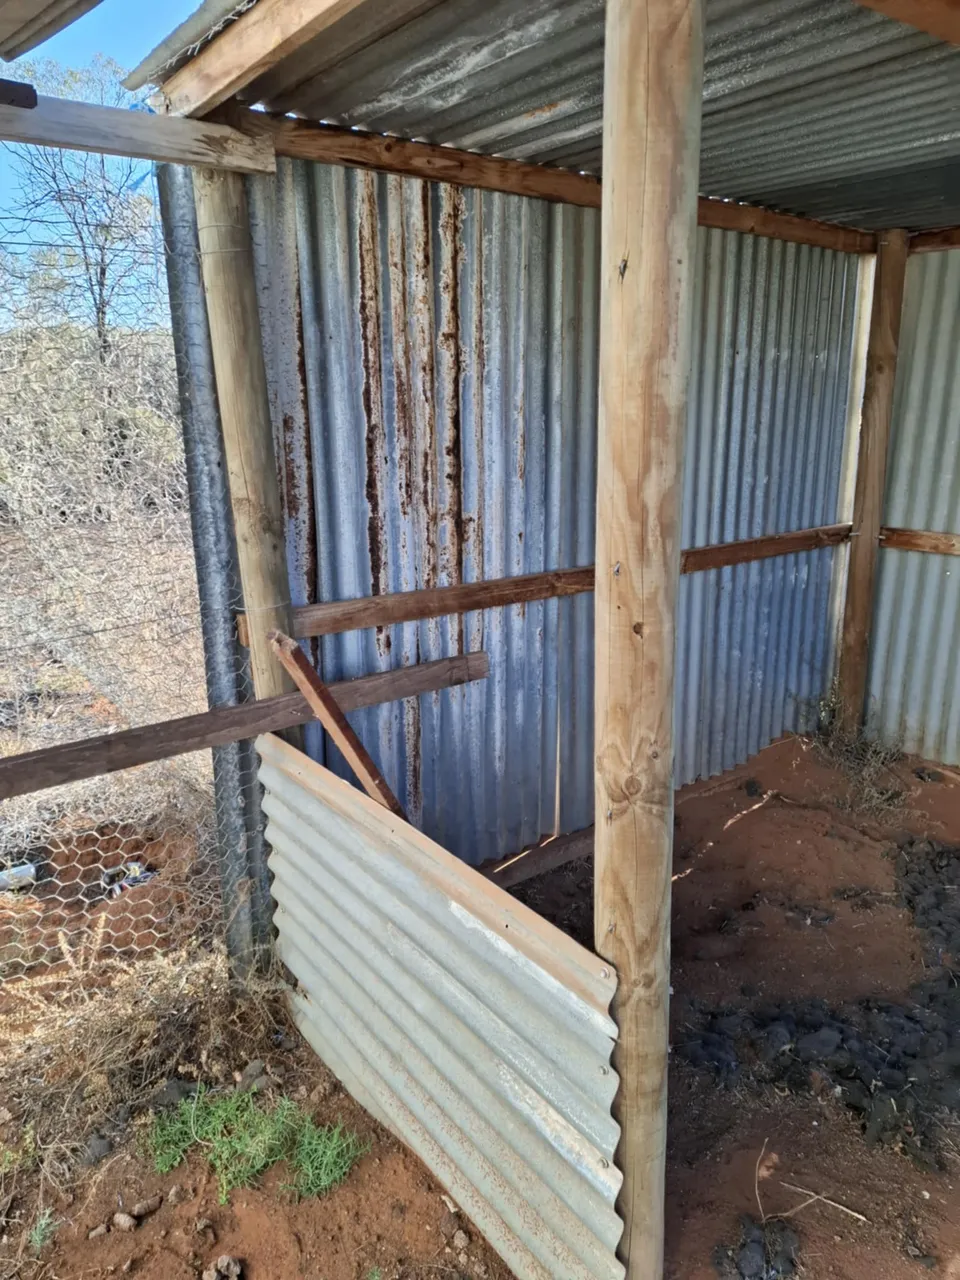
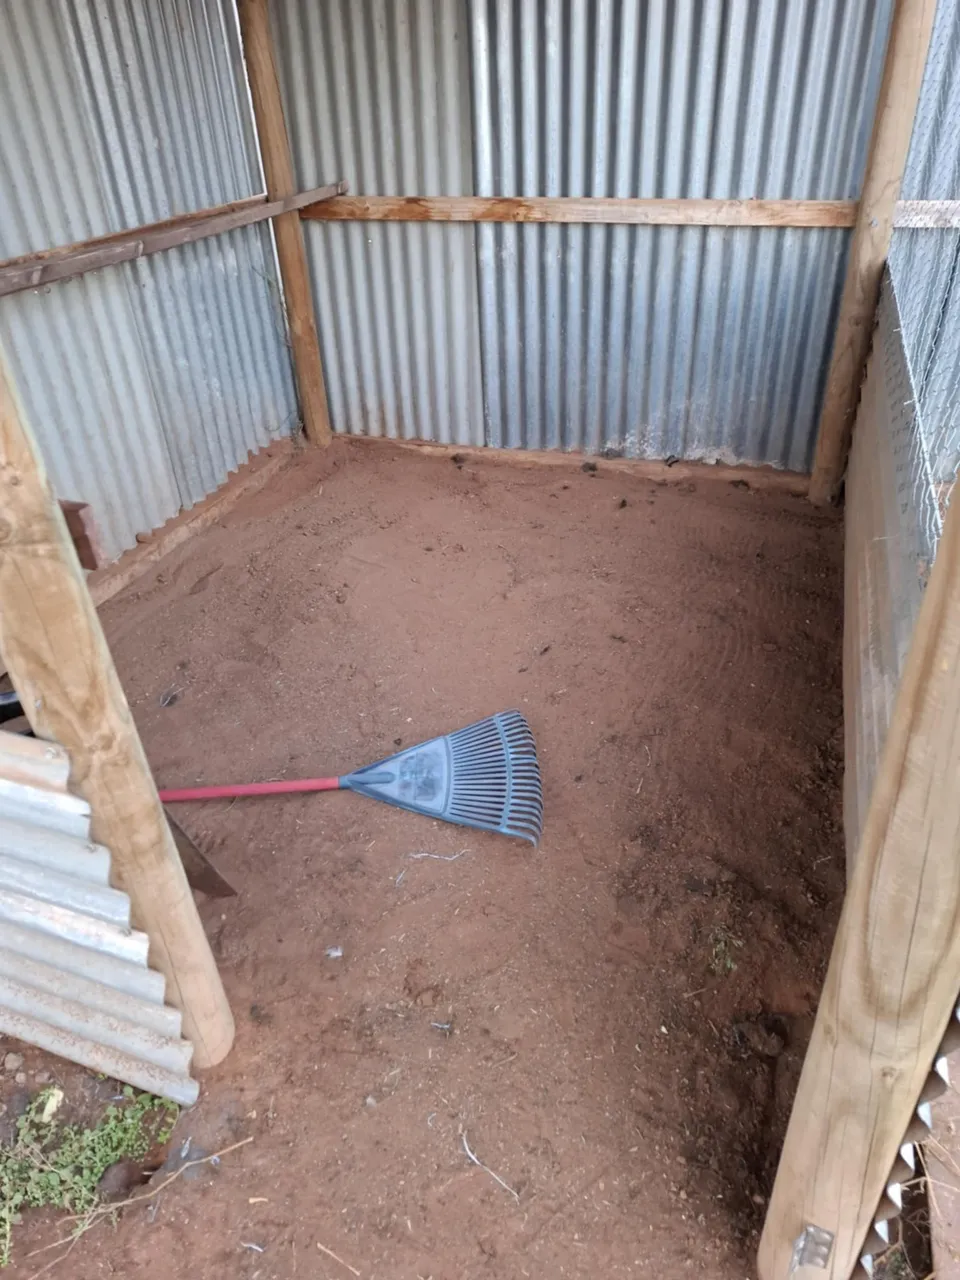
STEP 1 - Clean The Pen
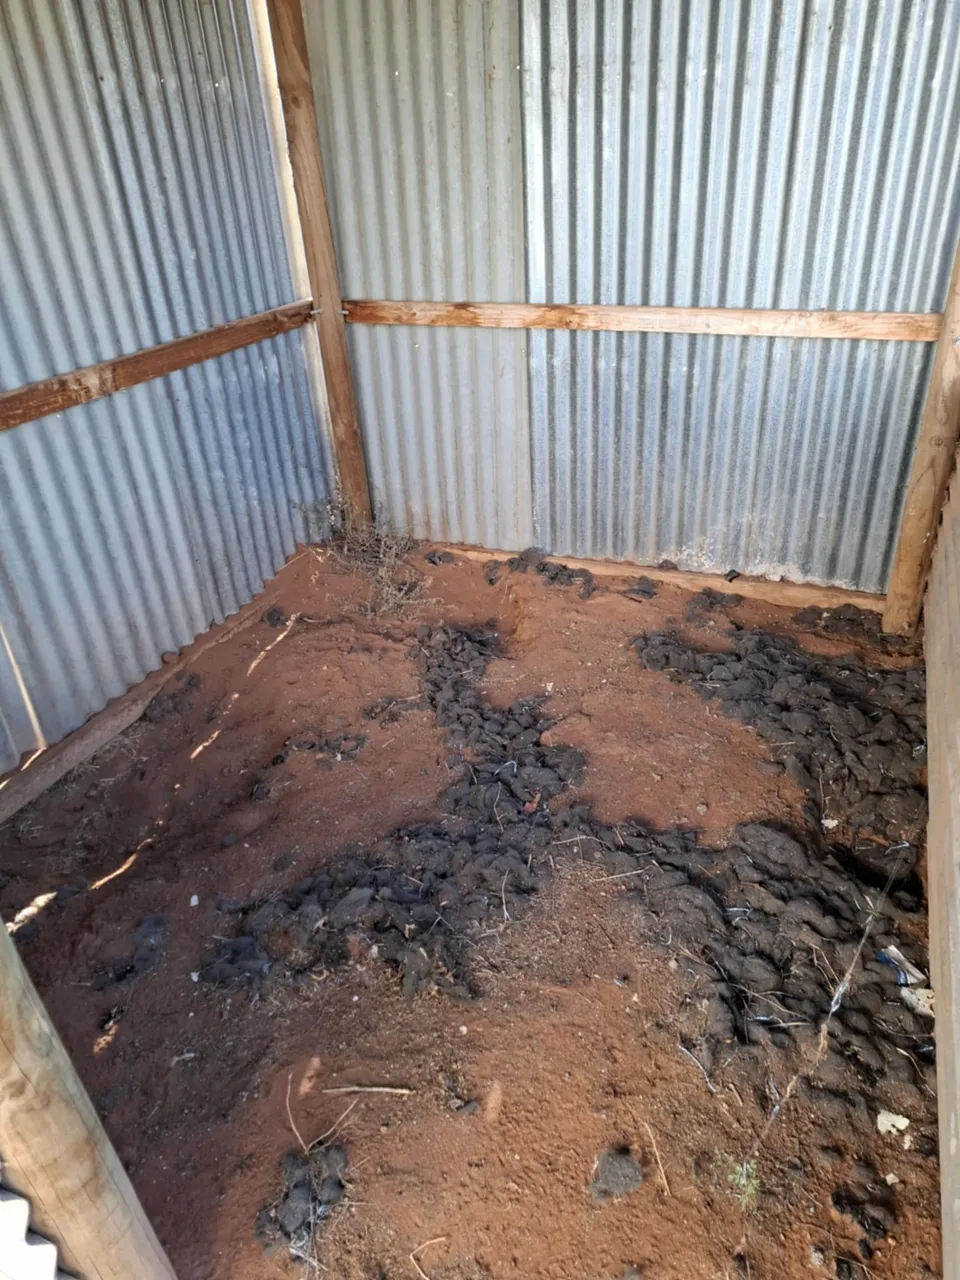
The pen was full of torn up material. I'm guessing it was some form of insulation. Once raked out, I realised there was uneven ground so I levelled that out also.
STEP 2 - Build The Perch
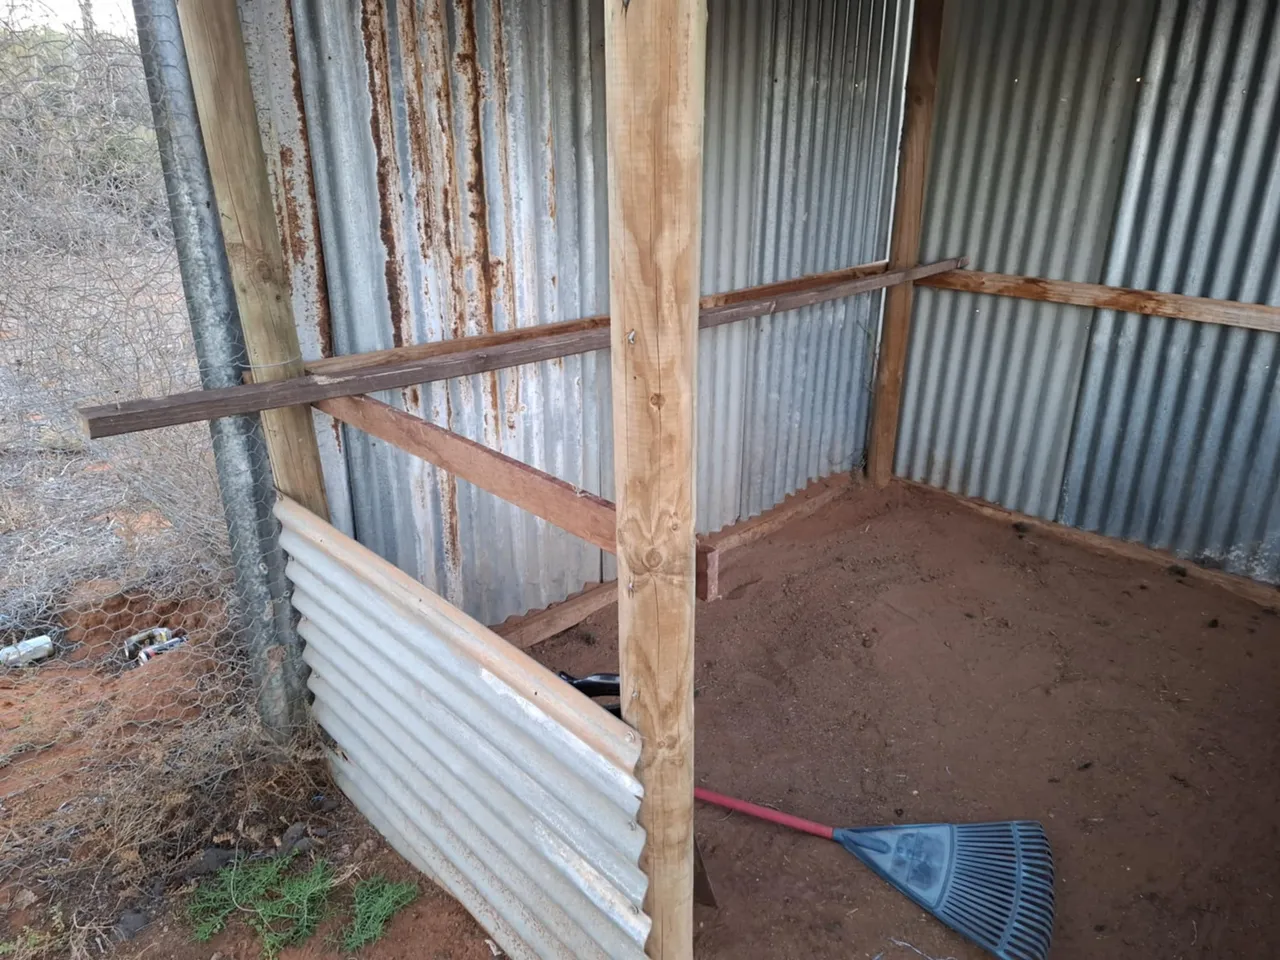
Using existing wood from around the house and pen, I made a couple of perches. I lined the wood up and cut to size before seating. I quickly discovered the best way to do this was using star screws with my newly purchased Ozito Drill and Driver! I decided if and when I make mistakes, at least I could simple pull the screws back out!
STEP 3 - Hingeing The Old Pen Door

Hingeing this door was maybe the easiest part as it easily fit in nicely. Whoever used this door previously did the hinge the wrong way so I had to drill out the old screws from the hinges. After that I simply flipped the old top hinge a placed it down the bottom and text screwed it back to the metal and used a new hinge for the top. NOTE: You can see one of the old hinges still on the wrong side of the right post. Opening this door must have been a pain opening the door from that side. I'm not even sure how they made it work tbh!
STEP 4 - Seating The Lock
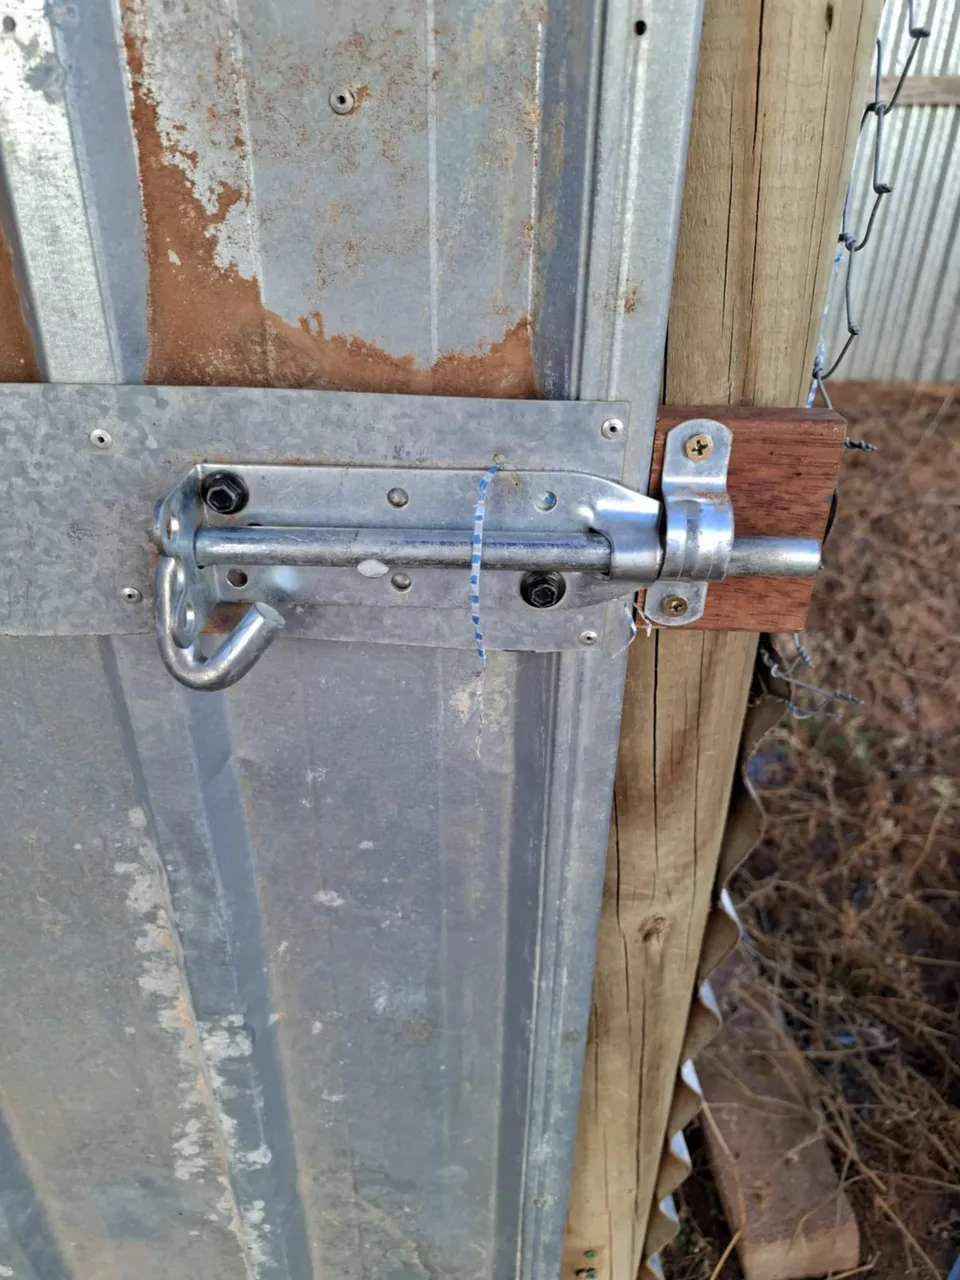
I cut a small piece of wood to level out lock and used an old Pipe Clamp I found laying around and seated it level to create a lock for the pen.
STEP 5 - Chicken Wire
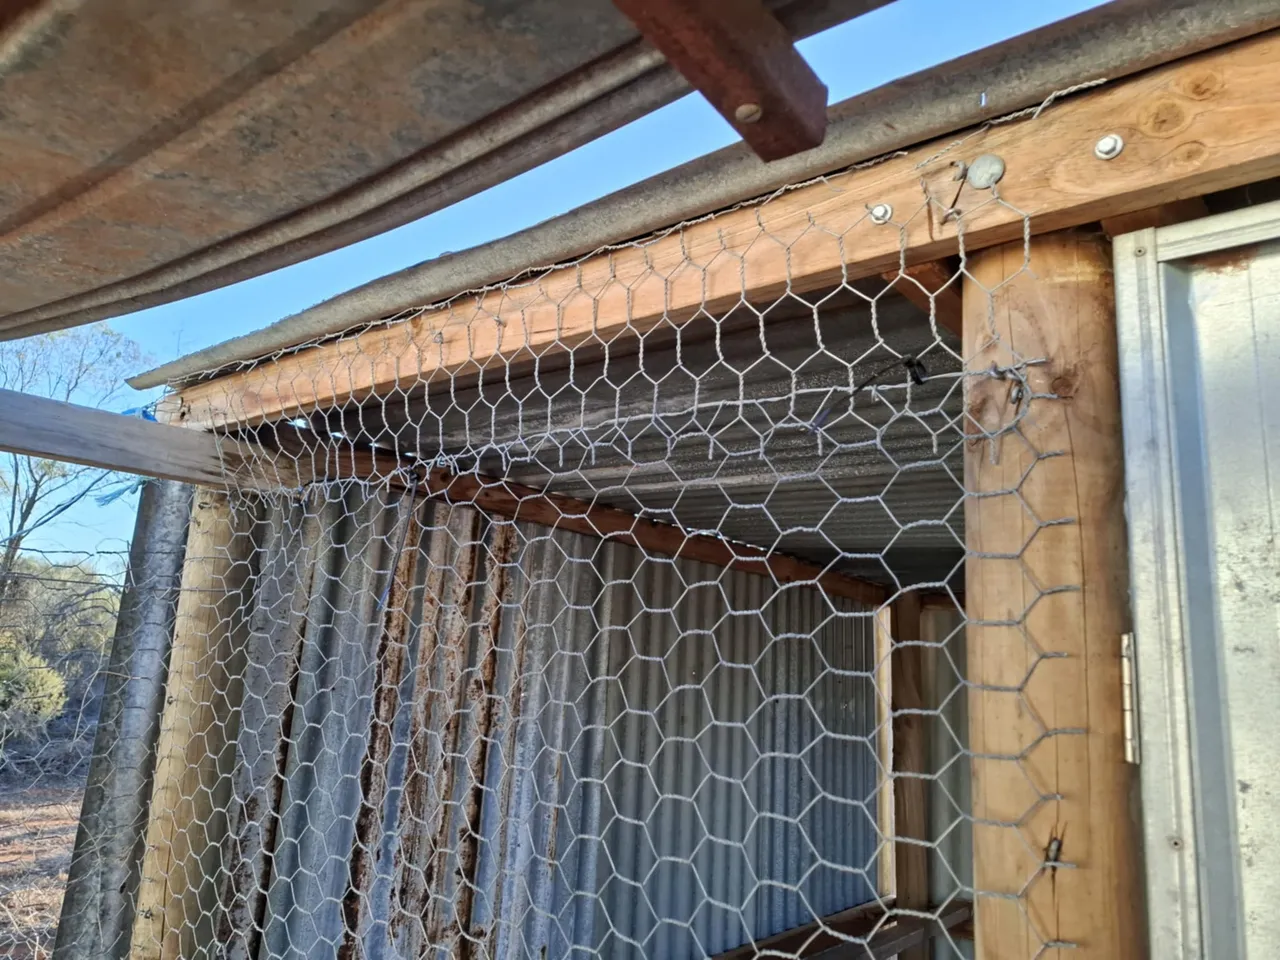
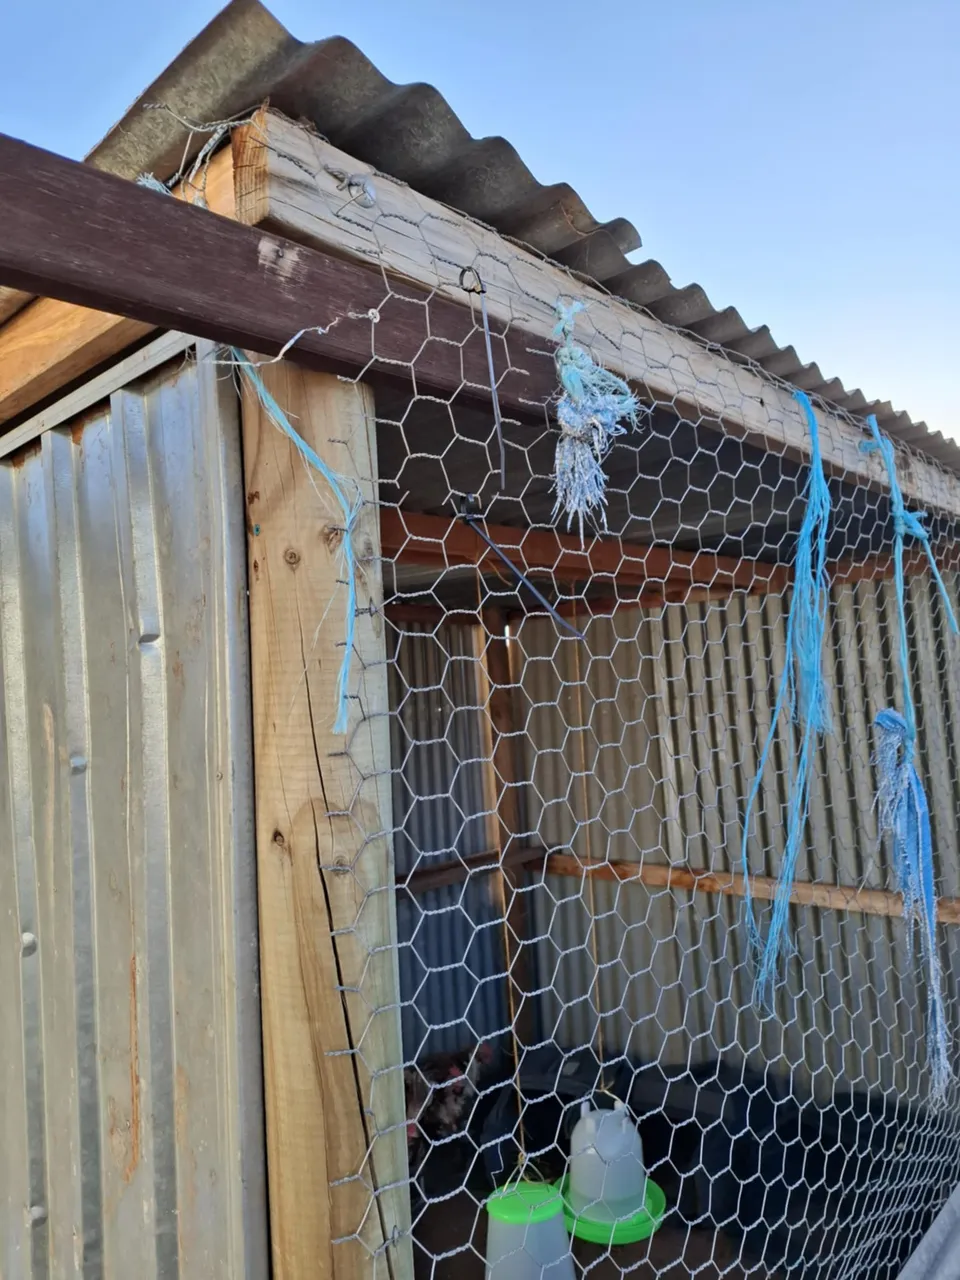
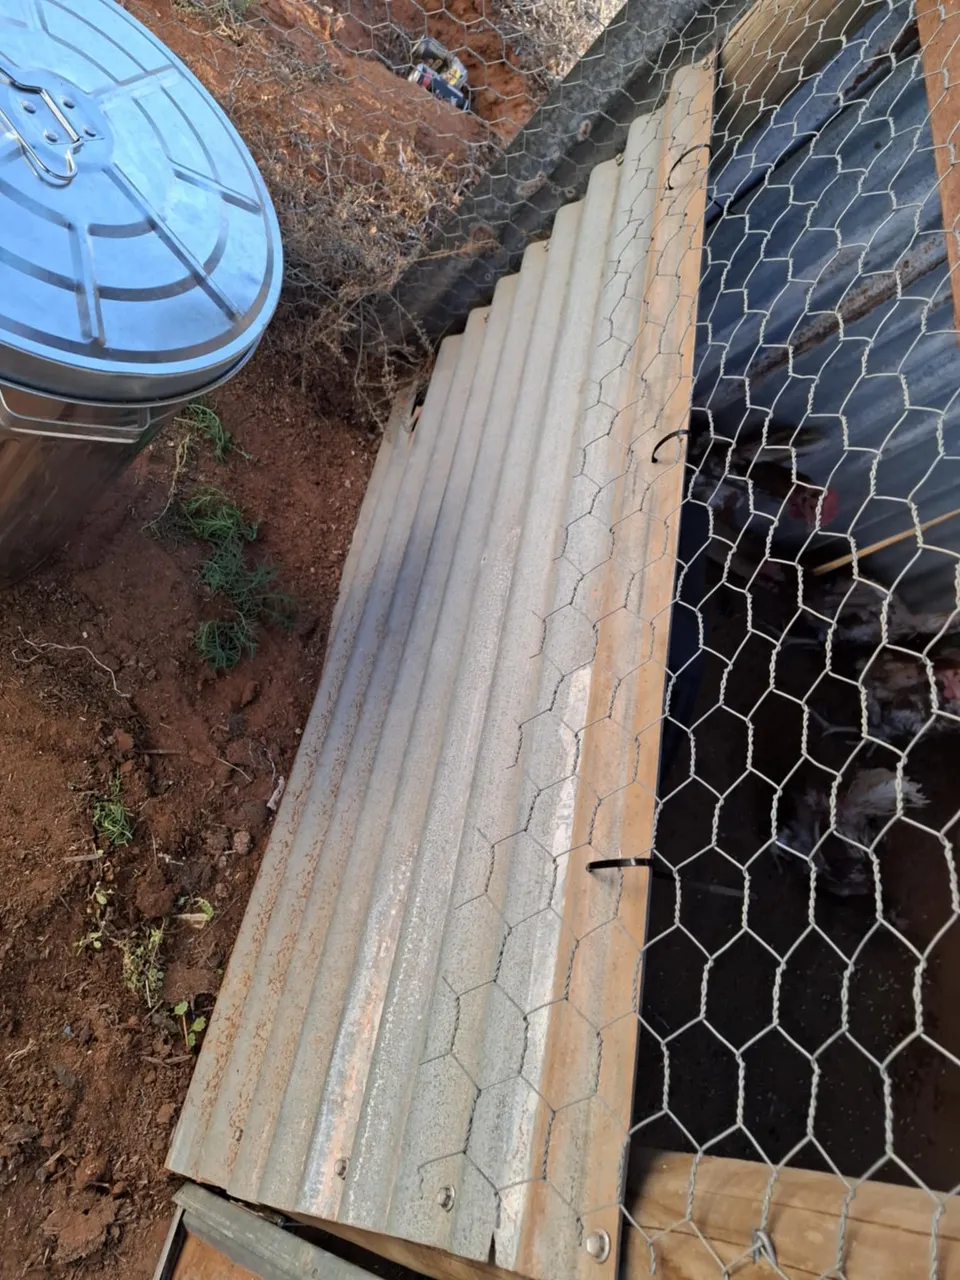
Using a combination of U-Nails, wire cuters and a few zip ties, I was able to complete the remaining tasks of affixing the chicken wire.
STEP 6 - Get The Chickens!
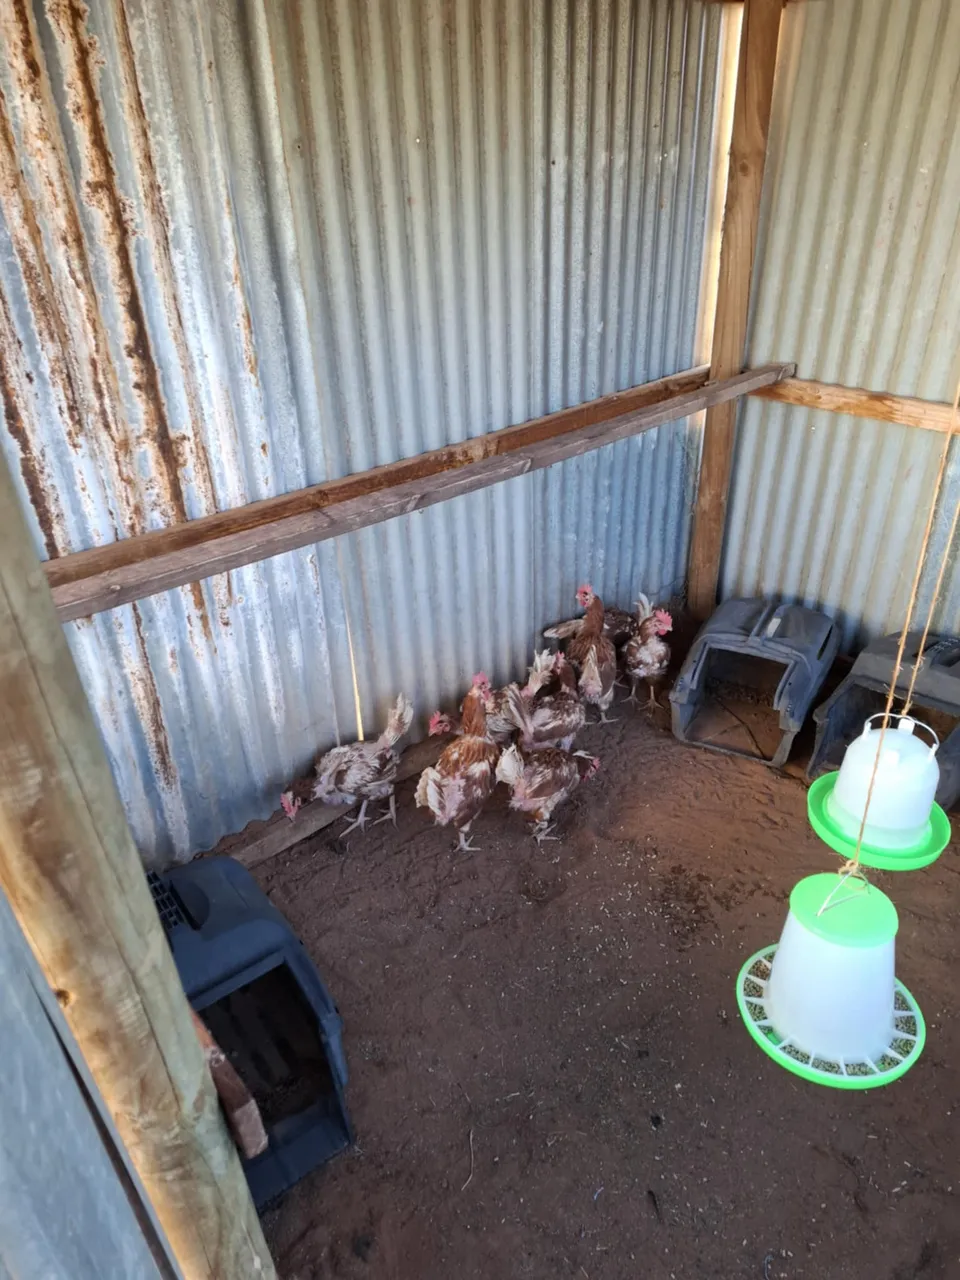
The final step was to re-furbish the interior and get some chickens. I used some old lawn mower catchers the previous owner had left behind. Then I purchased some feeders and chicken food.
I then found someone on marketplace who had saved some 15 month old hens from a barn farm. These girls were destined for the slaughter due the nature of overcrowding and competition for food and laying. These were some of the weaker ones identified by the production farm. But now they have a new lease on life and making us delicious eggs!
Final Thought's From BeardsNest Manor
Thank you for reading! I hope it gave you some inside to farmsteading and DIY. Stay tuned for Phase 2 updates at BeardsNest Manor! If you like this kind of content or have a question, feel free to follow me or ask a question! I am happy to pass on any advice, wisdom or knowledge or even just to have a chat!
I also have a youtube channel I am building that we will hopefully use in the future to document the happenings of the farm! Not much content in there yet, but there is a test ASMR short! Slow and steady!
https://www.youtube.com/channel/UCwRzJ1bYoYOHBSyhKY8bgpA