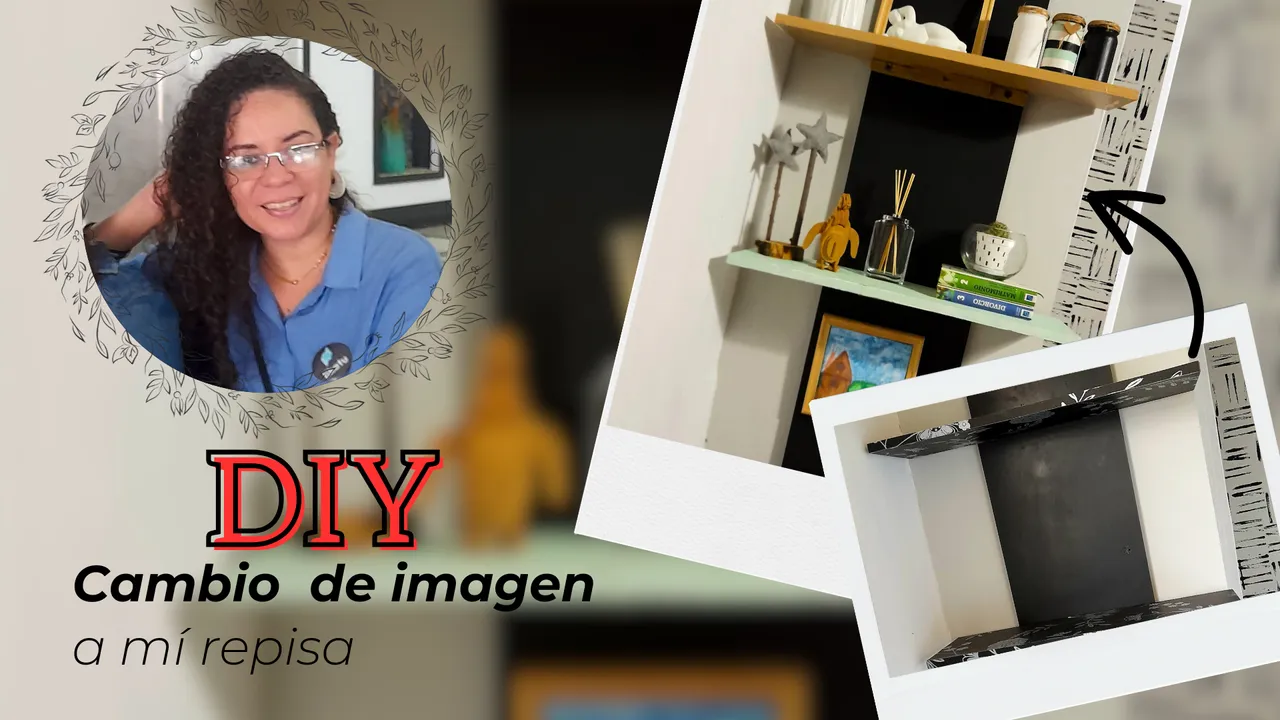

Hola hola gente creativa| Hello Hello creative friends
Como parte de los cambios que estoy haciendo en casa, decidí transformar una repisa que hice hace un tiempo ya, y que por cierto compartí con ustedes en la comunidad, y aunque seguía perfecta quise darle un pequeño cambio para adaptarla al nuevo estilo con el que estoy trabajando en casa y que todo se viese uniforme, así que por aquí les comparto qué hice para darle ese toque especial.
As part of the changes I'm making at home, I decided to transform a shelf that I made some time ago, and that by the way I shared with you in the community, and although it was still perfect I wanted to give it a little change to adapt it to the new style I'm working with at home and that everything looked uniform, so here I share with you what I did to give it that special touch.
Como les digo, esta repisa la hice hace un tiempo y combinaba perfecto con todo mi estilo, pero ahora con los últimos cambios, la sentía un poco fuera de lugar, pero por supuesto no quería prescindir de ella, así que decidí darle un toque especial modificando los peldaños, además de incorporar unas piezas de madera rústica como soporte de los mismos y definitivamente amé el resultado, se ve super lindo, así que quise contarles cómo lo hice.
As I say, I made this shelf some time ago and it combined perfectly with all my style, but now with the latest changes, I felt it a little out of place, but of course I didn't want to do without it, so I decided to give it a special touch by modifying the steps, plus incorporating some rustic wood pieces to support them and I definitely loved the result, it looks super cute, so I wanted to tell you how I did it.

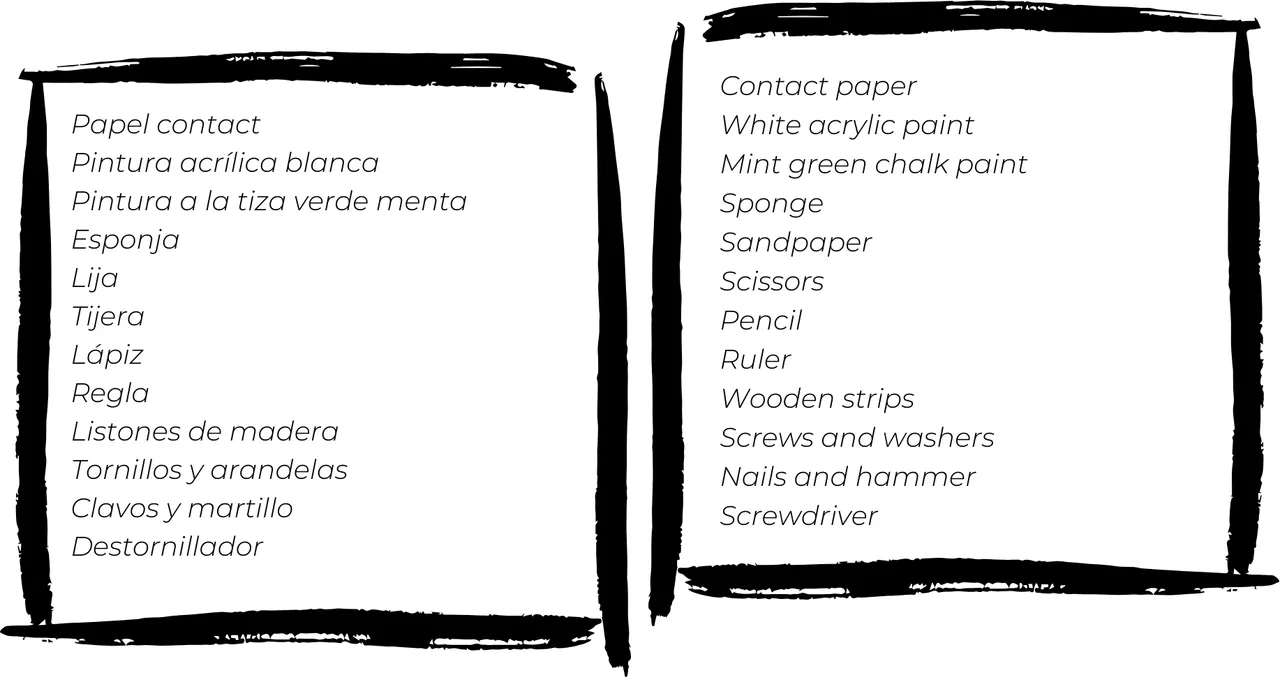
Paso a Paso
Lo primero que hice fue desmontar la repisa de la pared para poder quitar los dos peldaños que modificaría, y esto lo hice con la ayuda de un destornillador de estrías.
The first thing I did was to disassemble the shelf from the wall so I could remove the two steps that I would modify, and I did this with the help of a slotted screwdriver.

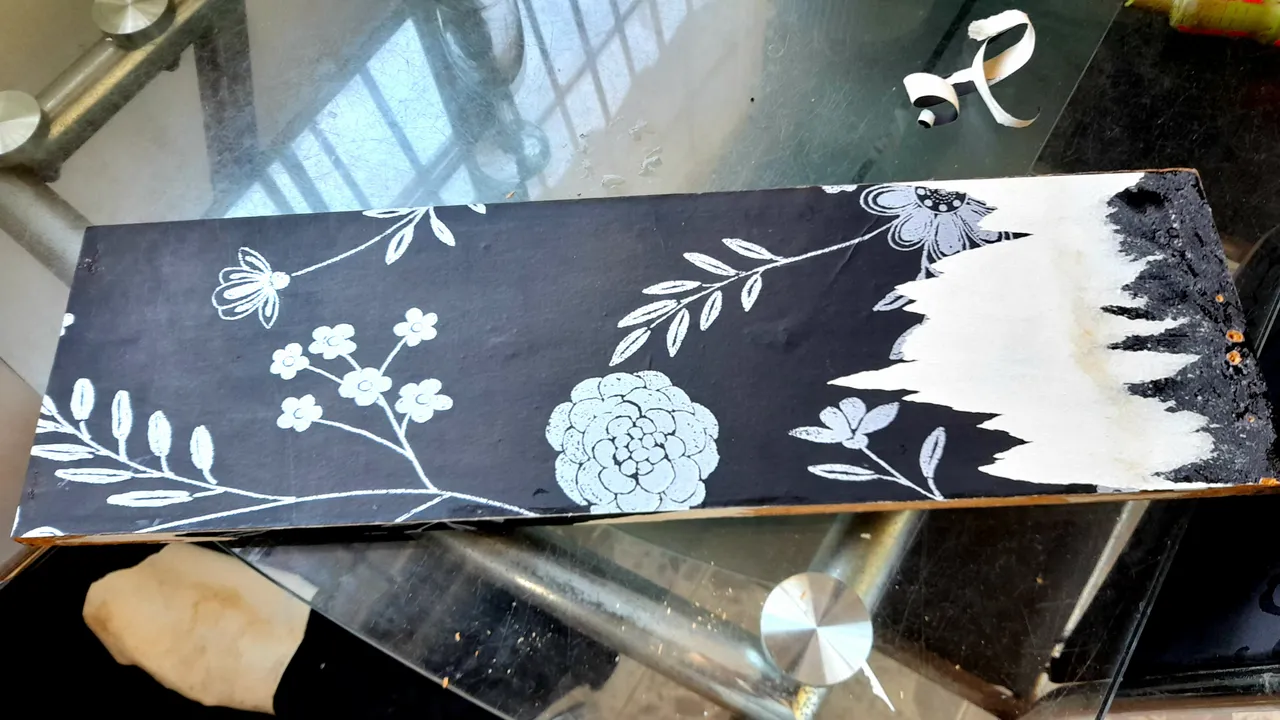
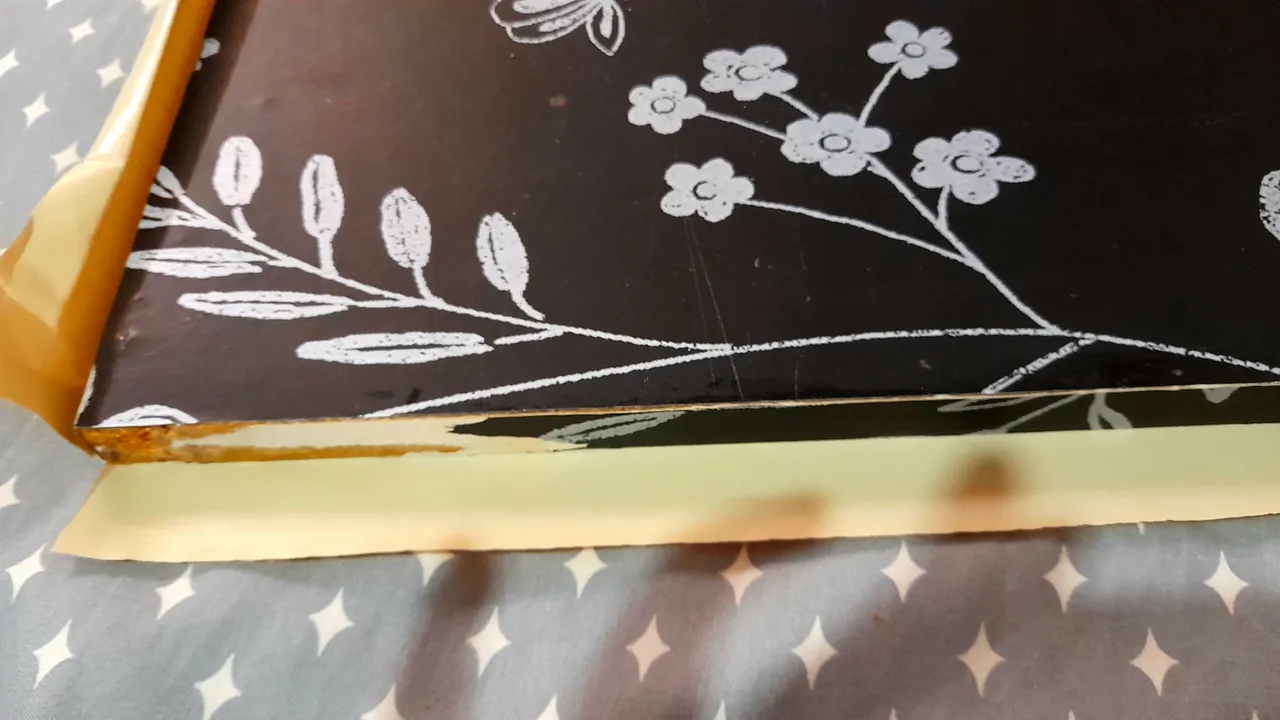
Mi idea era pintar uno de los peldaños, y el otro cubrirlo con el papel coctact que simula la madera para que así hiciera "match" con el librero que modifiqué hace poco y que forma parte del recibidor, así que comencé a trabajar con el peldaño que iría cubierto con el papel contact, y lo que hice fue tratar de retirar lo más que pude el papel tapiz que tenía, tomé las medidas en el papel contact y lo forré teniendo cuidado de no dejar burbujas.
My idea was to paint one of the steps, and the other one to cover it with the coctact paper that simulates wood so that it would "match " with the bookcase that I recently modified and that is part of the hall, so I started working with the step that would be covered with the contact paper, and what I did was to try to remove as much as I could the wallpaper I had, I took the measurements on the contact paper and lined it taking care not to leave bubbles.

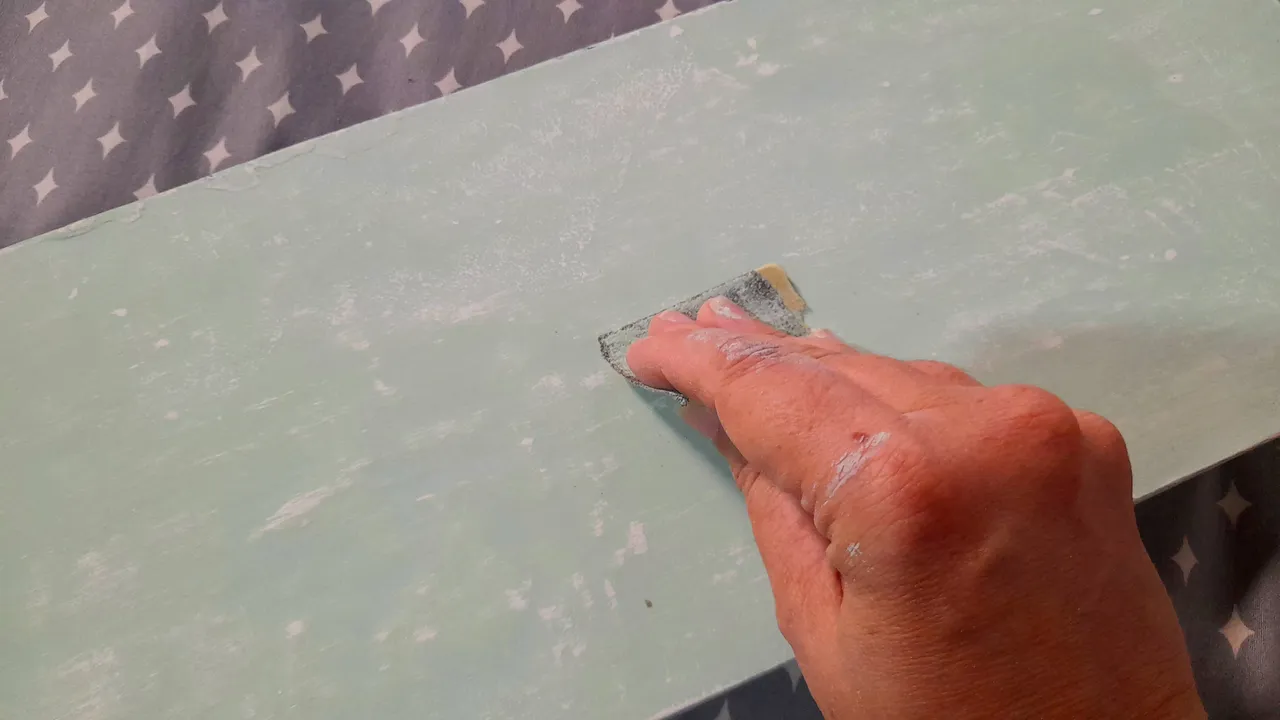
Listo el primer peldaño, el segundo lo pintaría de blanco, para luego hacer una especie de pátina en color menta, así que primero le di dos capas de pintura blanca y al secar lo lijé muy bien, asegurándome de dejar lisa la superficie antes de aplicar la siguiente capa de blanco, y lijar nuevamente una vez seca.
Ready the first step, the second one I would paint white, and then make a kind of patina in mint color, so first I gave it two coats of white paint and when it dried I sanded it very well, making sure to leave the surface smooth before applying the next coat of white, and sanding again once dry.
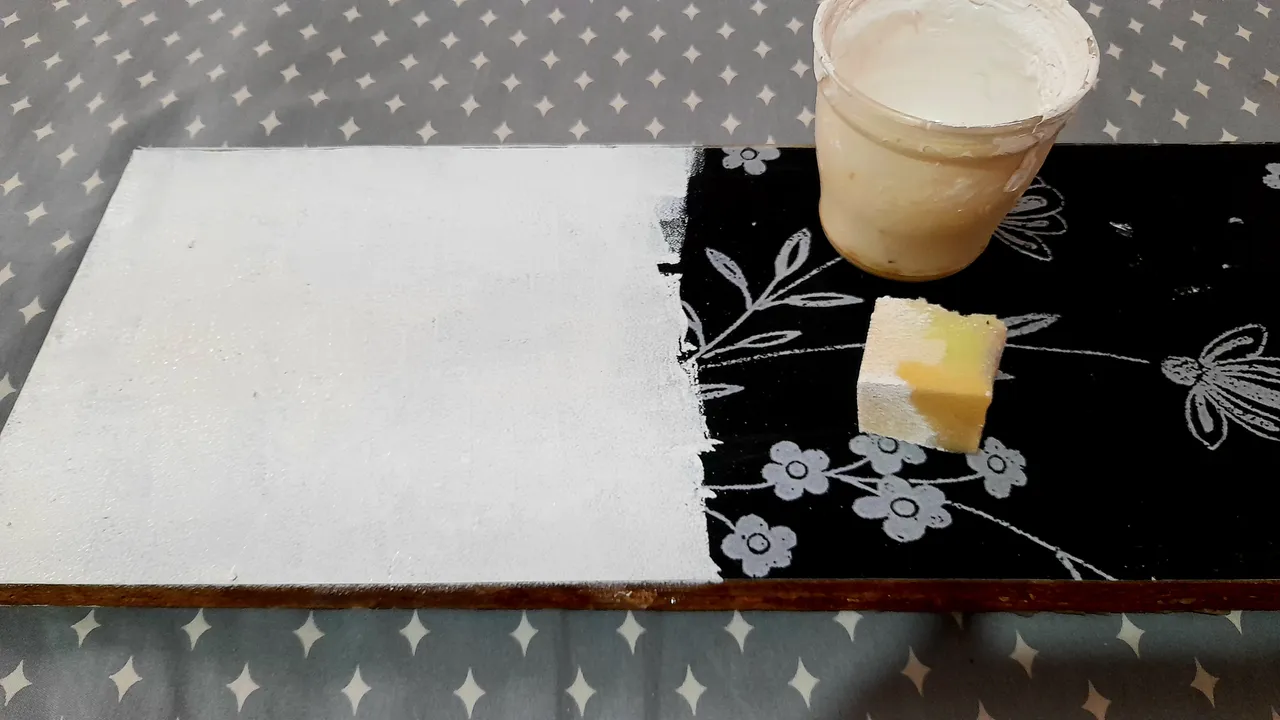
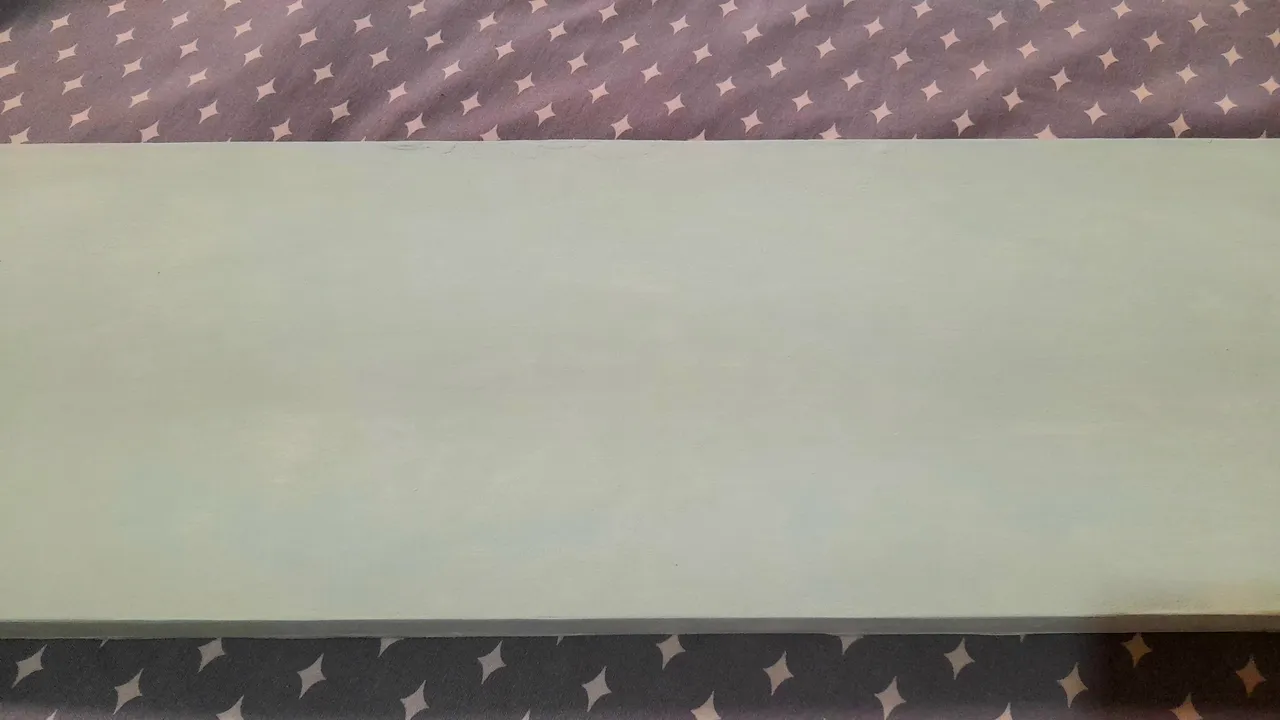
El siguiente paso fue aplicar la pintura verde menta, para lo que utilicé una esponja húmeda a la que luego apliqué la pintura a la tiza y deslice sobre el peldaño como si estuviese usando una brocha, tratando de cubrir la superficie lo más parejo posible.
Este paso lo repetí una vez más, dejé secar muy bien y pasé la lija para dejar al descubierto algunas zonas de l pintura blsnca y crear así un efecto envejecido, y listo este paso, uní nuevamente los peldaños a la repisa para después fijarla a la pared.
The next step was to apply the mint green paint, for which I used a wet sponge to which I then applied the chalk paint and glide over the step as if I were using a brush, trying to cover the surface as evenly as possible.
I repeated this step once more, let it dry very well and sanded it to expose some areas of the chalk paint to create an aged effect, and once this step was done, I attached the steps to the shelf again and then fixed it to the wall.

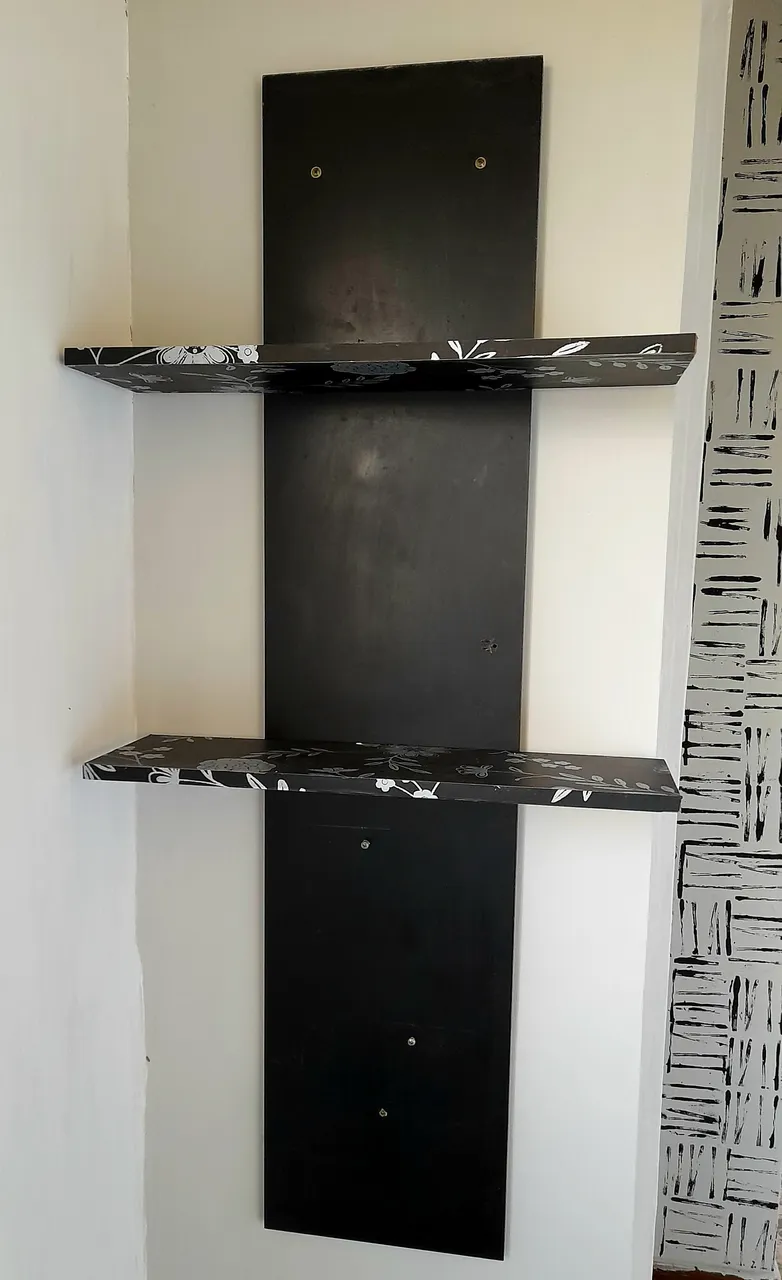
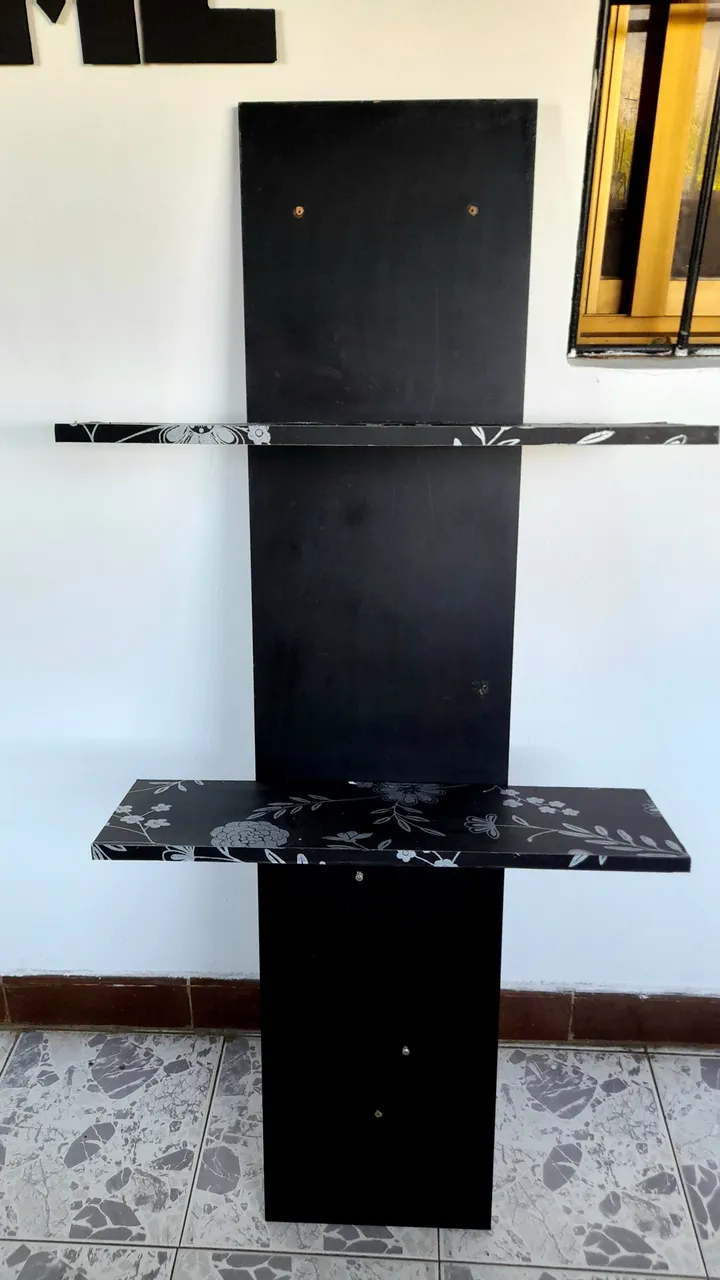
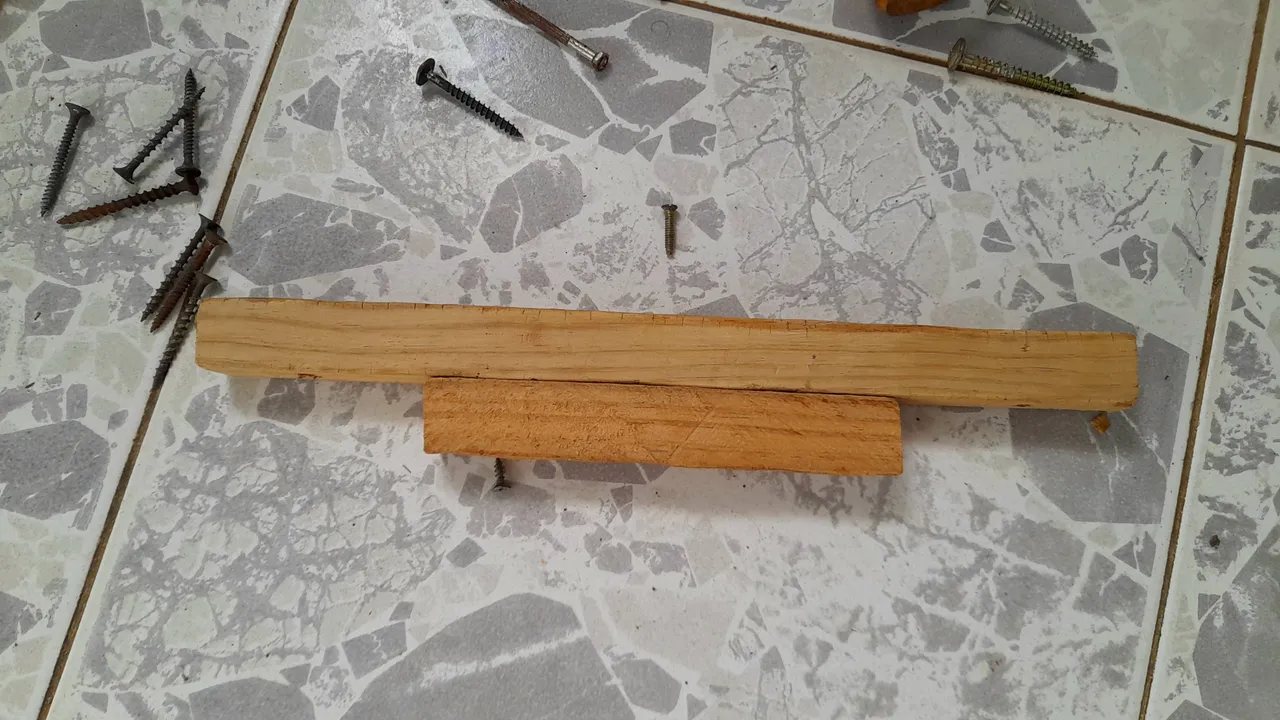
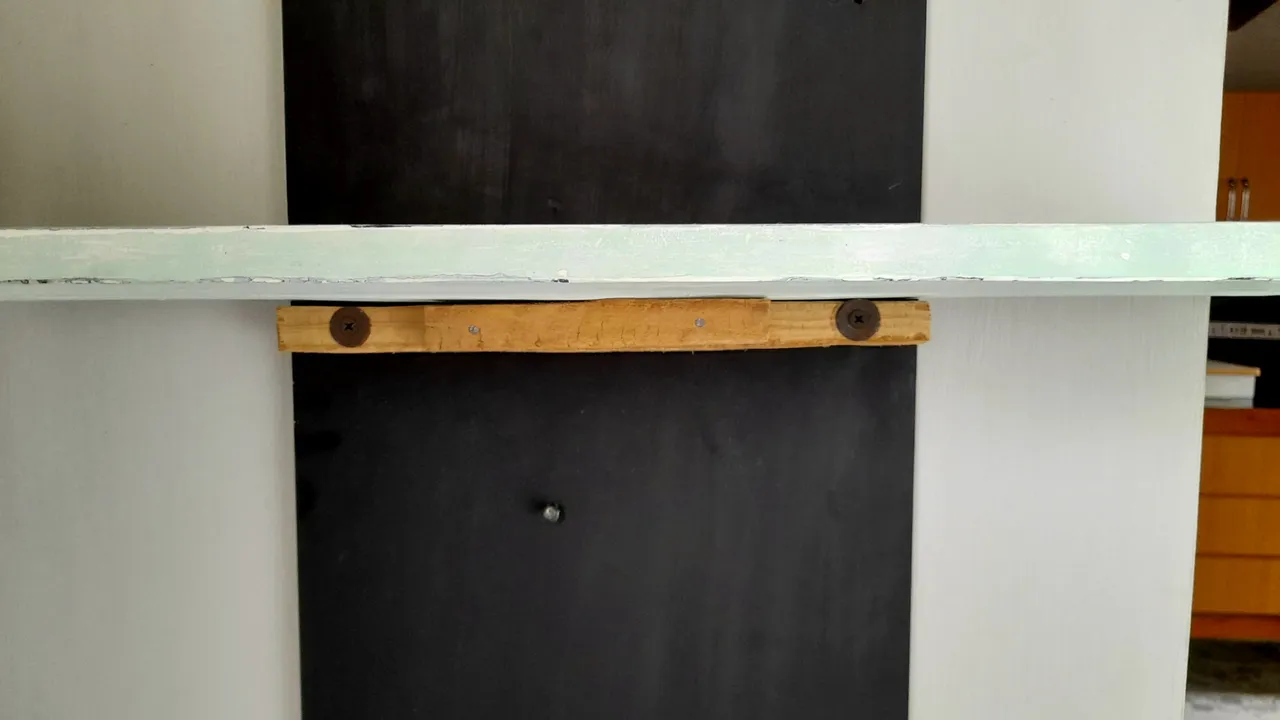
En este punto viene para mi la parte más importante, y que aporta más carácter, y fueron los soportes de madera que cortó mi esposo para mí y que sirvieron como una especie de pie de amigo para los peldaños, permitiendo que pudiesen soportar más peso.
Esto lo hizo cortando dos listones de madera del ancho de la base de la repisa, y dos más un poco más pequeños y unió con unos clavos el listón pequeño al grande, tal como lo ven en las imágenes y finalmente los fijó a la base justo debajo de los peldaños con unos tornillos con arandelas envejecidas para terminar de dar un toque antiguo a todo el trabajo. Y de esa manera quedó lista la repisa con su nueva apariencia.
At this point comes for me the most important part, and that brings more character, and were the wooden supports that my husband cut for me and that served as a kind of foot friend for the steps, allowing them to support more weight.
He did this by cutting two strips of wood the width of the base of the shelf, and two more a little smaller and joined with nails the small strip to the large one, as you can see in the pictures and finally attached them to the base just below the steps with screws with aged washers to finish giving an antique touch to the whole job. And that's how the shelf was ready with its new look.


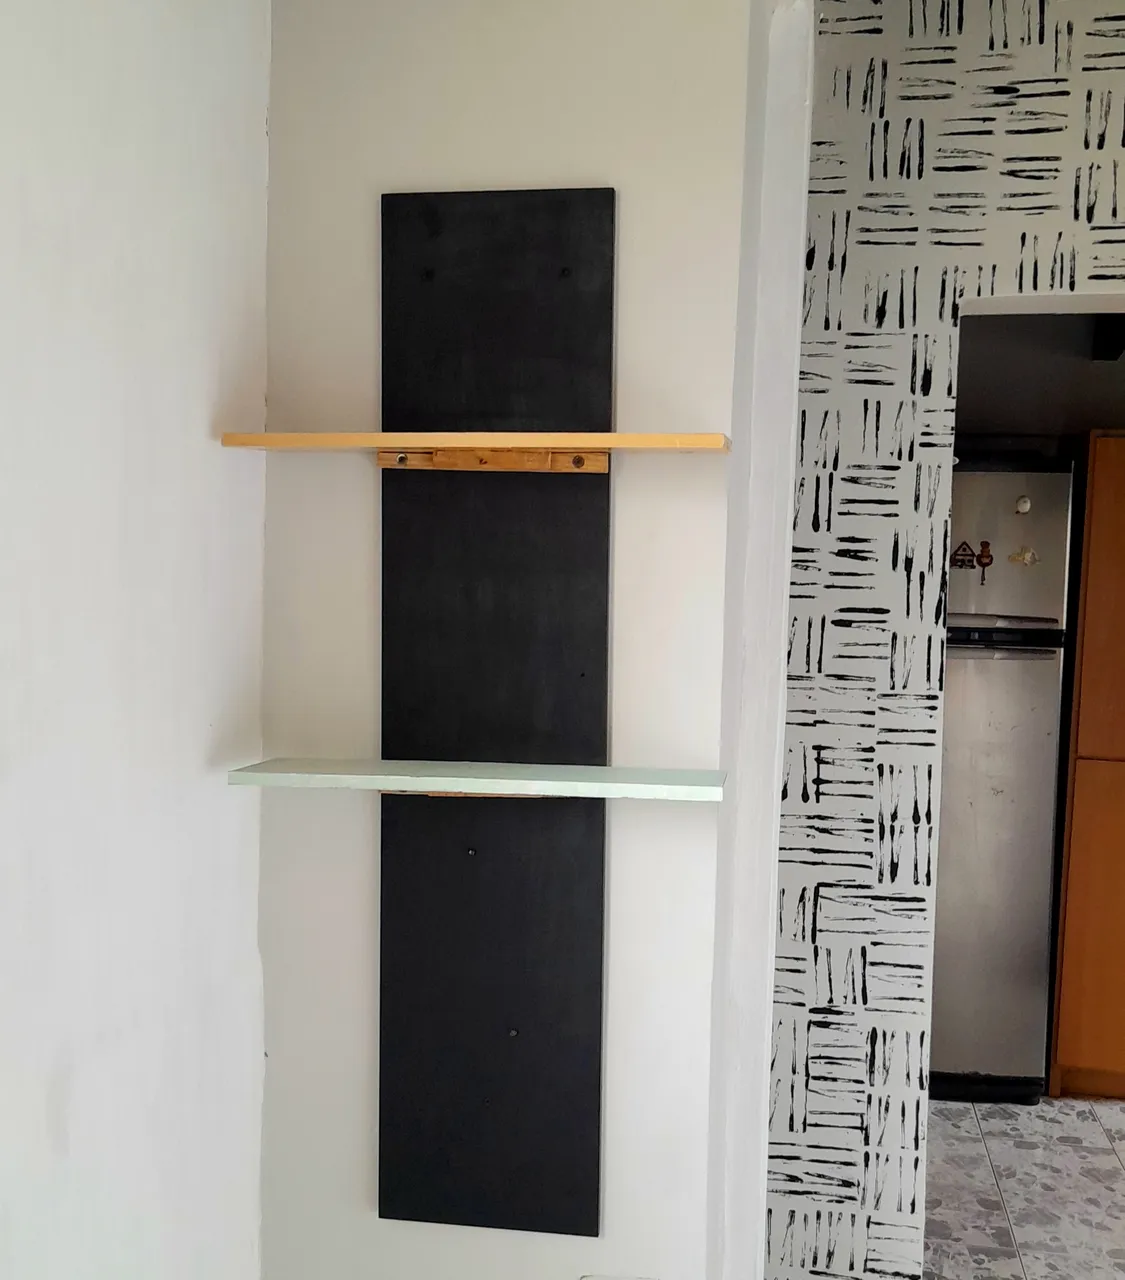
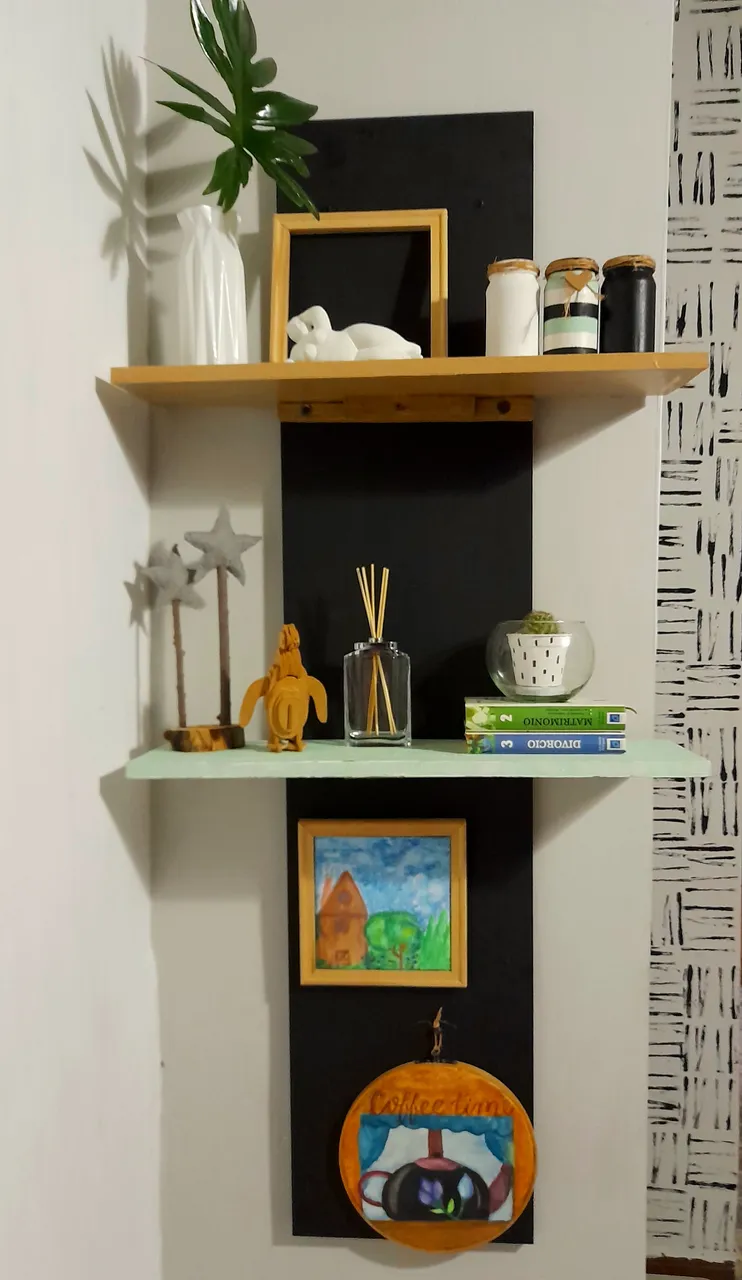
Este proyecto quizá sea un poco más elaborado que los anteriores que les he compartido, pero valió totalmente la pena porque quedó mucho más lindo de lo que to imaginaba, sobre todo después de colocar todo lo que va en ella, creando así otro rinconcito súper personalizado para mi hogar.
This project may be a little more elaborate than the previous ones I've shared with you, but it was totally worth it because it turned out much nicer than I imagined, especially after placing everything that goes in it, creating another super personalized corner for my home.
