With the initial decisions made and steps taken, as detailed in my last post, it was time to get our adventure into gear and start working!

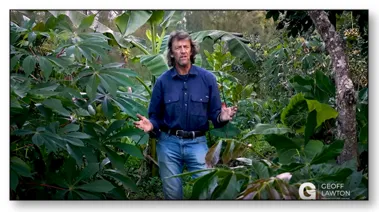
Lead image for @roleerob's "Back to Eden" gardening series, based on Deuteronomy 30:19
On this new journey along an adventurous new path in our lives, what was the first challenge to face?

Getting that large pile of wood chips, now partially blocking the access of one of our cars into our garage, fully processed and onto the soil. It certainly was not doing much good sitting there on the concrete! 😉

Photos: Where my last post ended!
Easy to write and say. It took me many days of activity to take care of it. Walk with me, dear reader, into the next phase of this exciting new chapter of our lives, and "through our eyes," see what we did and learned through the process.
But, first let's take a closer look at the reasons we selected wood chips as our number one choice for covering our soil.

Mulching with Wood Chips
Using mulch to completely cover the surface of the ground is a very basic component of permaculture gardening. But ... Mulch comes in all shapes and sizes and can include almost any dead plant matter. Why did we choose the wood chip approach of Paul Gautschi's "Back To Eden" gardening method?
Beyond the simple answer of the inspiration Paul provides anyone considering his vision for gardening, for us there were three primary reasons:
Water
In our part of the world, consisting of what is mostly high desert country in the Rocky Mountains of the western part of America, water is absolutely essential. Specifically, the need to irrigate with it. There is simply not enough annual rainfall to provide for the needs for all but the hardiest of plants. Most of which do not include anything being grown to eat!

One of the remarkable attributes of the wood chip approach that Paul is "evangelistic" about is their serving as a "reservoir" of sorts for moisture. They absorb and store it! While the surface of the chips may dry out a bit, between instances of receiving more water, underneath they preserve their stores of moisture and slowly release them out into the soil below!
In his case, he claims to never need to water. Okay, since he lives on the Olympic Peninsula of Washington state, this is understandable. But in drier areas? Watching other YouTube videos from folks living in areas more similar to our own, they do admit watering is still necessary, but at a greatly reduced level.
Wow, what a hassle and labor-saving attribute. Love it. Sign me up! Oh wait! There are two more primary reasons ... 😊
Weed Suppression
Would anyone argue with the statement one of the banes of gardening is the almost continuous battle against weeds? And the marvel and wonder that what you don't want seems to thrive and what you do want doesn't?
Paul has a segment in his "Back To Eden" film about weeds and it was just remarkable to watch.
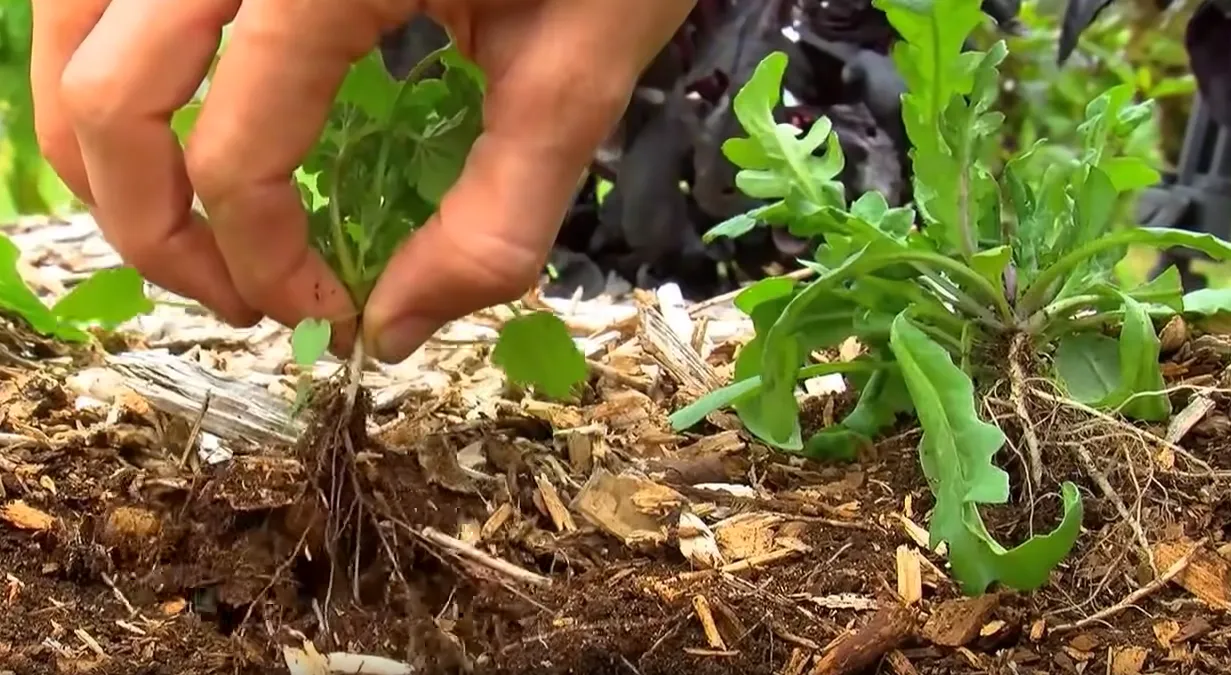
First, the layers of wood chips provide a barrier against weeds being able to germinate. But second, whatever weeds still manage to overcome that barrier can be easily pulled out by hand!
Wow, love it. Sign me up! Oh wait! There is still one more excellent reason, perhaps the best of all ... 😊
Time
A very appealing part of Paul's method is that the more time you put into it, the less work you have to do. The "magic" happens when year after year, the wood chip layers decompose through the constant process of all the microbes, worms, etc. breaking them down and returning the nutritional value of the dead plant material to the earth.
The result is the soil just gets richer and richer, in so many ways, as life returns in abundance!
There is no way to adequately illustrate this concept. But, it was a very compelling part his film to hear Paul describe it. After the +20 years he has been at what he is doing, it seems he is literally "living the dream!" A gardener's dream!
Not sure how close we can get to experiencing the same thing, but we are determined to find out!
Closing with all this incentive to move forward using wood chips, it never occurred to me to consider something that @riverflows referred to in her comment on my last post:
"In Australia though, these chips are mostly gums... we can't do woodchip gardening like Back to Eden unless its for natives. Straw, manure, paper etc is better for our food producing gardens."
Wow. I thought as long as the wood was dry and therefore easily chipped up, that would be all there was to it. As we have already humbly realized in many other aspects of this new adventure, there is a lot to learn ...
Move, Observe, Analyze, Adjust, Repeat ...
Starting into it, before I had done a thing, tackling the challenge of getting all of these wood chips properly chipped down to a finer size and distributed seemed like it should be no problem. Aren't most projects like that? Consistently underestimating the time and effort required, until you actually get moving on it? 😉
In this case, this all being new to me and with the excitement of what we were starting into, I really enjoyed the work and learning as I went. There was just a lot more to it than I had originally thought.
The basic 1-2-3 sequence of events, in what follows was:
- Cover the area with contractor's paper.
- Chip up the big wood chip pile in our driveway, into smaller chips.
- Spread them out on top of the contractor's paper.
Done. "Piece of cake!" 😊
Here are the "before" views, of the 3 areas we will now cover in some detail, both literally, as well as figuratively ...
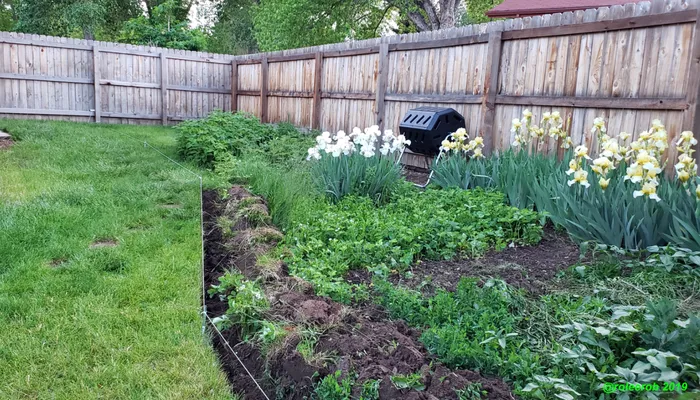
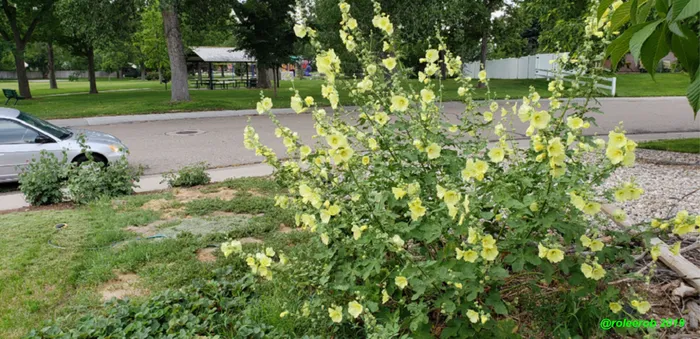
Photo 1: Area #1 in front of raspberries. Area #3 behind them.
Photo 2: Area #2 in front side yard. Between our strawberries and rose bushes.
Covering Area #1
To get "off and running shuffling," we selected the area, in our back yard, between our fence and our raspberry patch, as the first one to tackle.
While not clearly visible (gotta work on my "photo journalism" skills ...), in photo #1 above, we see a considerable amount of grass in Area #1. That was the first target, once I had finished getting the divider in place between our lawn and this new area to be dedicated to "Back to Eden" gardening.


Photos: Sequence of covering Area #1
I spent a lot of time on getting this first area covered, due to filtering every single 5-gallon bucket, before passing them back through our little Sun Joe.
From this, I learned a lesson covered in detail in the "Lessons Learned" section below. Stopping the filtering, except for "special" circumstances (still working on what those might be, but probably finer wood chip cover in our flower beds ...)!
Covering Area #2
With a little experience "under our belts," the covering of Area #2, shown in Photo 2 above, went much more quickly. For one thing, I was done with filtering every single 5-gallon bucket of material, once each batch of chipping was completed.
As part of that decision, I also knew that getting every over-sized bit of material out of our big wood chip pile was time prohibitive.


Photos: Sequence of covering Area #2
As shown a little bit above, we contented ourselves with getting as many of the "big pieces" manually separated out that we could reasonably manage. Then, we would chip them up and add them on top of the layer steadily being built on top of Area #2.
Covering Area #3
To complete this phase of our new venture, finishing the covering of Area #3 required considerably more work. As shown in Photo 1 above, we can see there is a lot of the old vegetation needing to be removed first. Specifically, a very old bed of irises and an old bed of strawberries. With a liberal sprinkling of weeds thrown in ...


Photos: Sequence of covering Area #3
As evidenced in the first picture and more clearly shown in the second, most of this vegetation was progressively dug out, chopped up with our lawn mower, then sprinkled back over the soil over which it had just been removed.
The irises were dug out and the tops only chopped up with our lawn mower. The stem tubers were dried out and chipped up with our Sun Joe (see more on that below).
The chopped up vegetation, spread over the ground, was covered with our contractor's paper. Which was then covered over with 4 - 6 inches (10 to 15 cm) of wood chips.
With all of these areas covered, we felt a real sense of accomplishment, as the transformation from beginning to the end was considerable!
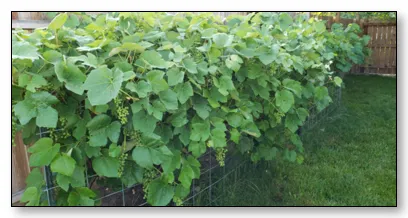
Once we had completed this effort, we still had a bit of time left in the season. With this time and a now expanding view of what "could be," we also got all around the base of the canes in our raspberry patch and the trunks of our two old grapevines covered in wood chip mulch.
We liked the idea we were getting them all covered up and "tucked in" before the onset of winter.
Supplemental Sources of Wood Chips
It wasn't long into working on the pile of wood chips seen above (from chipping the 9 trees referred to in my last post) that I knew this simply wasn't going to cover it. Quite literally!
Even with the relatively small amount of space we had committed to getting started on, with the objective of covering it to a depth of ± 6 inches (15 cm), we just didn't have enough. Hmmm. What to do?
We came up with several supplemental sources of "wood" chips:
Additional Trees in our Yard
This was the simplest. Even though we had already cut 9 down and chipped them up, we still had several more. Most notably, our big Blue spruce and Ponderosa pine trees. There were a lot of dead branches to both prune off the trees, as well as gather off of the ground underneath them.

Photo: Blue spruce and Ponderosa pine branches, bark, and pine cones
While the branches and bark of each seemed to produce more or less the same result, we noticed that the Ponderosa pine cones chipped considerably better than those of the Blue spruce.
Why? Don't claim to know, although it was our first indication that not all trees are "created equal" when it comes to their wood chip and mulching properties.
Other "Woody" Plants
Okay, still in our own yard, we "stretched" on this one, as we decided there would be no problem with chipping up the stem tubers of the irises we were taking out, trimmings off of our rose bushes and raspberry canes, our grape and ?...? (never have figured out what it is, but we are trying to put an end to it ...) vines in the back yard, our hen and chicks when dried, our corn cobs when dried, etc. 😊


Photo 1: Iris stem tubers drying on center right, in prep for chipping.
Photo 2: Bits and pieces of our vines chipped up into mulch.
Covered in more detail in the Philosophical Postcscript section of this post, it was amazing to see that chipping up the iris stem tubers and the hen and chicks did not end their remarkably resilient lives!
Nope! There is sufficient life in the fleshy portions of even small fragments of these plants that they can put down roots and send up new growth through the wood chips into which they are mixed! 😧
Park Across the Street, "Out and About" ...
Stating the obvious, there are plenty of sources of woody materials all around most of us. We just have to be looking for it. For most of us, these materials are free for the taking, as they are considered a nuisance that someone is going to have to rake up, pick up, etc.
For starters, we literally just need to go across the street to our town park, for example, and pick up sticks which fall to the ground from the big trees there.
My wife has been good at just seeing dead branches laying about and picking them up and putting them in the trunk of our car. We pile them up until a sufficient quantity has been accumulated to justify getting our little Sun Joe out for "another round" of chipping!
The Great Outdoors!
There is little this Steemian enjoys more than a day trip up into the high country. The air is always cool and clean. We'll typically seek out clear-running mountain streams to sit by and enjoy the blessed solitude.
So ... How tough could it be to simply throw a little bit of dead wood, pine cones, etc. into the back of the truck while we're at it?


Photos: Wood Chip Source from the High Country!
Not too tough! There is the small matter of the expense of driving the truck, etc. And the even smaller matter of whether we can legally gather dead wood from our own National Forests.
Meh, not too worried about it!
The truth is, almost any dead plant matter is a source of mulch. In one way or another. In my next post, I will be writing more about that. And with it covering more of what we have done in the area of both hot and cold composting.
Lessons Learned
As a lifelong committed "continuous learner," I truly enjoy learning new stuff. As a "contrarian," I have never wanted the old adage "you can't teach an old dog new tricks" to apply to me! 😉

With each of these posts on our new adventure, I will be putting what I have learned into this section. I trust in investing the time to write it, dear reader, if you ever choose to travel a similar path, that you may find something of value and so save yourself from making mistakes similar to ours.
"Choke feeding" the Sun Joe
In settling on 3 passes through the Sun Joe as optimum, I learned that the results were improved by keeping the hopper above the blades "choked" on the 2nd and 3rd passes, i.e. pretty full. In so doing, the chips seem to be pressed together in going through the blades, thereby producing a consistently finer "finished product." Which was our objective ...
While you can also attempt this a bit on the 1st pass, given all of the large variations in size, etc., of the materials being fed into the Sun Joe, it is not practical to be concerned with this too much. Instead, just get through the 1st pass as best you can and focus on using this technique on the 2nd and 3rd passes.
Sun Joe's Paddle vs. a Good Stick!
Helping get the various materials you put into this little chipper through the blades is an essential part of its operation. For example, pine cones are roundish in form and, therefore, do not readily pass through the blades easily. They just "spin" on top of them.
The paddle which comes with your Sun Joe is designed to help with this. While better than nothing, we found a good stick works far better. Of course, over time the blades will keep catching the tip of it and chopping it off, making it shorter and shorter. Slowly you'll get to the place where you just let it pass through. Then get another one!
- Note: As with most things in life, a little patience goes a long way, when operating the Sun Joe. Specifically, while the initial thought might be whatever material is currently "hung up" above the blades isn't going to ever go through, often times it actually will, if you just hold back a bit ...
Feeding Sequence into the Sun Joe
Tied to the tip above, we found that a long stick, when fed into the Sun Joe, would pull a lot of material bound up above the blades through them! So ... Depending on what we had available, we would alternate feeding smaller items into the hopper, i.e. those shorter than the depth of the hopper, with larger items which were longer.
Once we got the "feel" of this, it saved time and effort in getting the 1st pass completed.
Screening Wood Chips
As likely would be the case for most of you, I started into this project working on it based on my experience in a long career - educated as an engineer and finishing it as a Business Systems Analyst. In other words, absolutely nothing to do with farming / gardening. 😊
So ... Starting into working through the pile of wood chips seen above, I would run my 5-gallon bucket worth of bigger material through the Sun Joe. Then, I would stop and screen out the - ½ inch (1.3 cm), before running the + ½ material through the Sun Joe again. Beyond my aching back, I decided (with a generous amount of help from my wife!) this really was overkill. The result of over analyzing ... 😉
I ended up running each 5-gallon batch of material through the Sun Joe 3 times. This number of passes consistently reduced everything well below - 1 inch (2.6 cm), while there was still always a small amount that was + ½ inch. I was very satisfied with what we ended up with.
Layers of Contractor Paper
Being a bit of a Grinch at times, I decided for no particular reason, that 1 layer of the paper under the wood chips should be enough.
Well, given the results of how easily some of the grass I covered up still came up through it, I won't make that mistake again. I will lay down at least a double layer and likely a triple layer.
There is no question many of you will have your own wisdom and experience to add to what you have read about in this post. As always, I'd love to receive any feedback you may be inspired to provide!
Materials List
The phrase "time and materials" has long been a standard reference at the beginning of undertaking any project. From my father, I learned his oft-quoted reinforcement that, to do a job well, you needed to have the right tools.

With this, he also taught me that we would almost certainly not have been the first person to run up against whatever challenge was in front of us. Requiring some new tool ... We just had to put in the effort (this was BG! Before "Google It!" 😉) to find it.
So ... As a part of these posts going forward, dear reader, I will always provide you a listing of what I have found to be of value. Will it be the "right" tool? Is there a better one? I will always welcome input on these questions in the comments! 😊
Sun Joe CJ603E 1.7 Inch Cutting Diameter Electric Silent Wood Chipper/Shredder
There was no doubt in our minds, launching into our "Back to Eden" gardening venture, that we needed some method of creating our own wood chips. As you read above, we have a lot of materials to process.
But which wood chipper to choose? Well, there are a number of options which we investigated, but ultimately settled on this one.

The key to our selection from the number of "micro" chippers available, were the common features of size for storage, power to do the job, and electricity being the source of the power. Of all the "micro" chipper options containing this "package" of features, this one seemed the best to us.
If you have a bigger property, more trees or material to put through it, etc., you would likely want something bigger and more powerful. If so, as with this class of chipper, you will find many options.
So far, with many hours of use in Season 1, we are very happy with this little chipper.
- Price (here): $168.65 USD + shipping
- Here is a YouTube video with a demo, if you would like to check it out!
- Oh, and the "Silent" in the description!? 😧 Compared to what? 😏 You will most definitely want hearing protection, when operating this!
Tierra Garden GP104 2-in-1 Galvanized Woven Wire Garden Sieve
All we learned in watching a number of YouTube videos and reading associated websites, was that we wanted our wood chips to be smaller in size than what any "industrial grade" wood chipper would typically produce, e.g. the wood chip pile in our driveway!

So, we would need to potentially screen out all that was passing through whatever size was desired and then chip the rest with our little Sun Joe. We found this sieve to be just the right size for our little lot and the amount of material we'd likely be putting through it.
It comes with both a ½-inch (1.3 cm) and a ¼-inch (0.6 cm) screen. They are easily and readily interchangeable, as needed. Perfect! 👍
- Price (here): $16.43 USD + shipping
Contractor's Paper - 36 in. x 100 ft. Roll
Prior to putting your wood chips down, it is a good practice to first put down a layer of paper. To suppress any weeds, grasses, etc. from coming up through your layer of wood chips.
All research indicated just a good thick sheet of basic brown paper was the best. Nothing special, no colors, glossy finishes, etc. Just thick basic brown fiber paper.

This example is what we bought, at a well known DIY supply store here in America, but I am sure there are very many very similar products available wherever you may be.
- Price (here): $18.97 USD + shipping
Philosophical Postscript
Wrapping up this post, dear reader, I would like to briefly touch on some of my philosophical reflections, 🤔 while working in the peace and quiet of my own garden. Based on how unexpectedly refreshing and inspiring I have found this time to be ... 😉
Strength of Life
As I referred to briefly above, it was amazing to see that chipping up the iris stem tubers and the hen and chicks did not end their remarkably resilient lives!
Nope! There is sufficient life in the fleshy portions of even small fragments of these plants that they can still put down roots and send up new growth through the wood chips into which they are mixed! 😧
What power there is in life! Can we even begin to imagine the processes behind a plant getting established in the most hostile of places, such as on the face of a rock? And not only surviving, but ultimately working its roots down into the cracks with sufficient force to break it up? Incredible ...

How does man, in his uhhh ... "wisdom" think properly about such marvelous observations?
What is the source of this life force?
This indomitable will to live?
This
indomitable will to live?Does man have this within him? These thoughts brought to mind the stories I have read of survival that almost defy belief:
- The story of the mountain man, in the early days of the American West, Hugh Glass, who was attacked by a grizzly bear and left for dead (after he had killed the bear with his knife!). Unable to walk, he still managed to make it over 200 miles to a fort. Driven by his determination to hunt down the senior member of his party who had abandoned him ("Band of Brothers" code - No man left behind!). Which, of course, he did ...
- The story of Sir Ernest Henry Shackleton and his ill-fated attempt to cross Antarctica in 1914. His ship became trapped, then crushed by the ice. To survive, after packing up what they could in their life boats, he led his entire crew across some open ocean to safety on one island. Then, with hope of survival dimming, he left with the 2 strongest men and rowed a boat across 830 miles (1,330 km) of the open south Atlantic ocean to get to another island. The location of which contained the southernmost place where he could get help. Not one of his crew was lost ...
Meanwhile ... 😉 Back in the peace and quiet of my own garden, these reflections brought me back to what I wrote about in my Observations: Gratitude and the Simple Things post and an old saying:
"... it could be better. And it could be worse!"
So, with this renewed "no excuses" view of life, I can be thankful, no matter how challenging any given day might seem, at least (so far! 😉) I haven't been passed through a "wood chipper" in life!
We always have so much for which to be thankful and not take for granted!!
🙏 🌄 😊 🙏
Closing
In one way or another, we have all experienced (hopefully!) the satisfaction of persevering through whatever challenges we've faced, in reaching a desired objective. It was intensely satisfying to us, with the 3 areas of our little lot devoted to this new venture in our lives, to have them covered up before the onset of winter.
In so doing, we now have great anticipation for the beginning of Season 2. Where we can begin planting, tending, and harvesting some of our own food. Along the way, learning about what can be reaped after even ± 6 months of having the "good earth" properly tucked away under a protective layer. From what we have found in our research, we will not be disappointed.
Spring has long been our favorite season. While looking out the window at snow on the ground, we are looking forward to this annual time of renewal and return of life more than we have in a very long time.
I’d love to hear any feedback you may be inspired to provide.
Until "next time," all the best to you for a better tomorrow, as we all work together to build up our Steem Communities and add increasing value to our Steem blockchain! 👍 😊
Respectfully,
Steemian @roleerob
Posted using SteemPeak and “immutably enshrined in the blockchain” on Thursday, 13 February 2020!
P.S. Having now successfully met my original objective in posting to our Steem blockchain, ~ one per week, it will be a while before I post again. Too much going on "out there" screaming for attention ... Before clicking on "Publish" again, I want to give my regards / pay my respect to two sources of inspiration for me to begin writing a bit again, after stopping for almost 3 months:
- Inspired by winning my first (and only) @curie award in Sept 2018, I wrote my True Story: Encouragement on our Steem Blockchain post, in which I wrote the following:
"You just never know where one click on an upvote, mention in a post or reply, entry into a community's latest inspired effort to help others (all of the above!) will lead!"
I am reminded of that again in the "reach out" I received recently with the comments of @minismallholding on my Permaculture post listed below. Thank you! 😊 👍 - What an awesome word - "inspired!" In my Legacy post, I wrote about "Footprints on the sands of time" and am exceedingly grateful for people like Paul Gautschi, when I think of what these words mean to me. What a remarkable legacy he has built, in inspiring so many others with what he has uncovered and "evangelistically" shared of the Truth.
I hope, before my "number of days" draw to a close, to meet him. And thank him for persevering through whatever challenges he has faced in "bringing to life" what he was inspired to do.


Interested to read more of my related posts?
| Lead Image | Title, Link, & Summary |
|---|---|
 |
Observations: Gratitude and the Simple Things
Summary: Reflections on a quiet, peaceful morning about what is truly important and being grateful for what we so often take for granted. |
 |
R2R Reflections: For Such a Time as This ...
Summary: While on my road trip, what I probably thought about more than anything else was our time. While these reflections were focused on my own personal history, I also thought a lot about the time in human history into which I was born. |
 |
R2R Reflections: "Golden Years" and our Legacy ...
Summary: While on my road trip, my primary focus was on the "next chapter" of our lives. Our legacy and the "footprints in the sands of time" we would leave behind. |
 |
Reflections: Permaculture, Food Forests, and "Back to Eden!"
Summary: The response to this question - "What is a "food forest?" The story behind all the surprising and life-changing inspiration it has provided to me and my beloved. |
 |
"Back to Eden" Gardening: Journey Begins with Step One ..."
Summary: The adventure begins with the first step - making initial decisions and clearing the inevitable first hurdles. |


SteemPeak: An awesome interface for our Steem blockchain.
Check it out!