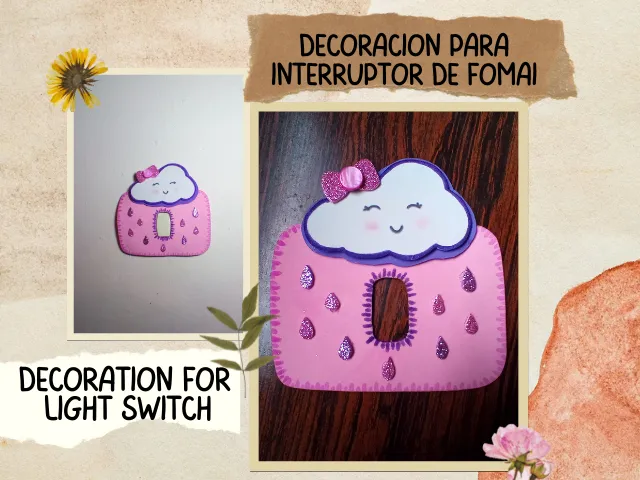
☔️ Buenos días amantes de la creatividad, Espero que hayan tenido un excelente fin de semana.☔️
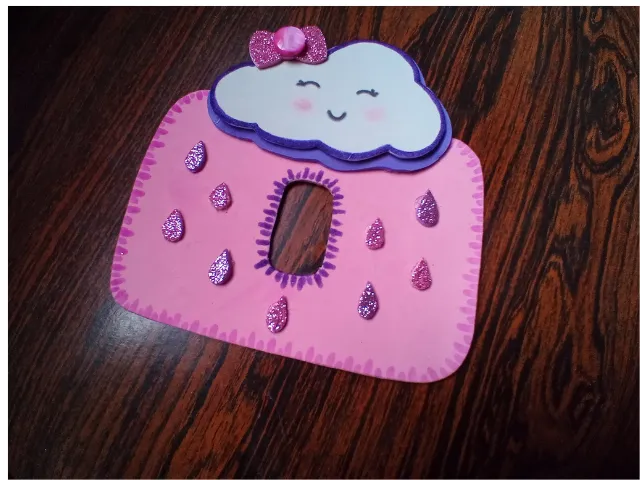
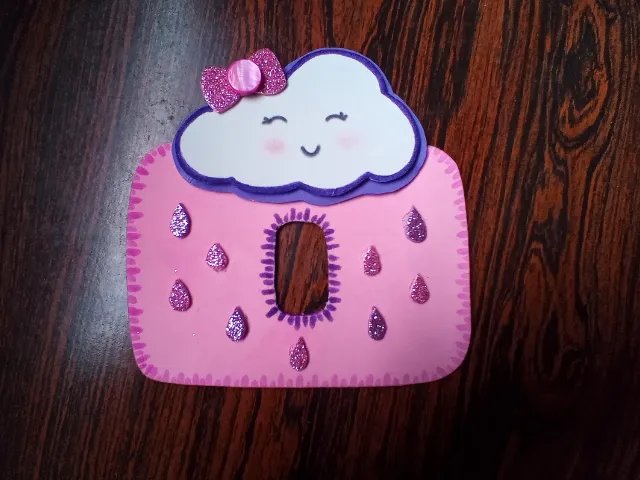
Hoy les traigo una linda decoración para tu interruptor de luz, esta vez la hice pensando en una habitación de niña, pero puedes colocarla en la habitación de tu elección y también hacerlo con la temática de tu preferencia. En mi opinión la decoración le da un aspecto bonito a este aburrido interruptor, si los decoramos le dan un toque bonito a nuestra habitación.
☔️ Good morning lovers of creativity, I hope you have had an excellent weekend. ☔️ Today I bring you a nice decoration for your light switch, this time I made it thinking of a girl's room, but you can place it in the room of your choice and also do it with the theme of your choice. In my opinion, the decoration gives a nice appearance to this boring switch, if we decorate them they give a nice touch to our room.
If you want to see how I made this beautiful decoration, then I will leave you the step by step.
♥️ESPERO QUE TE GUSTE,
¡Empecemos!
♥️I HOPE YOU LIKE IT,
Let's start!

🌧 MATERIALES | 🌧 MATERIALS
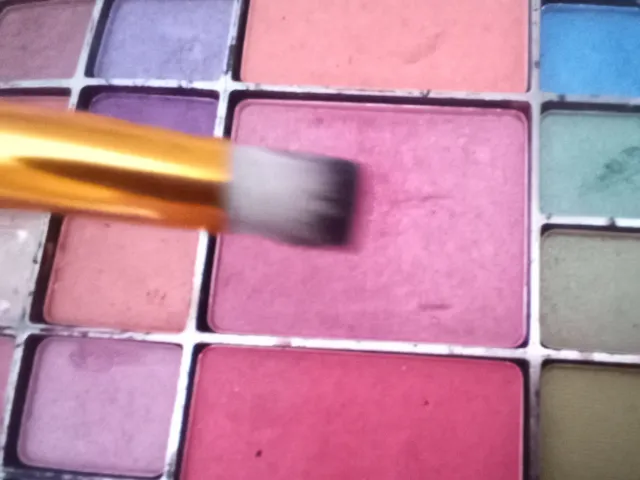
- Foami rosa claro.
- Foami blanco.
- Foami morado.
- Foami escarchado morado y rosa.
- Marcador rosa.
- Marcador negro.
- Marcador morado.
- Rubor.
- Silicon caliente.
- Exacto o Cutter.
- Imagen de referencia.
- Lapiz.
- Tijera.
- Regla.
- Light pink foamy.
- White foamy.
- Purple foamy.
- Purple and pink frosty foamy.
- Pink marker.
- Black marker.
- Purple marker
- Blush.
- Hot silicon.
- Exact or cutter.
- Reference image.
- Pencil.
- Scissor.
- Rule.
☔️ PROCEDIMIENTO | ☔️ PROCESS
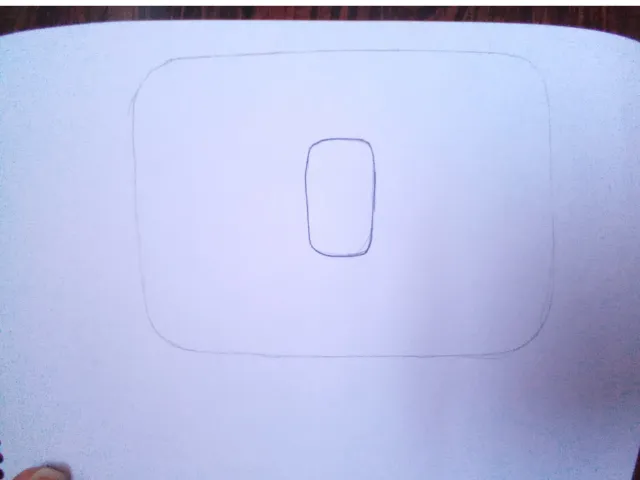
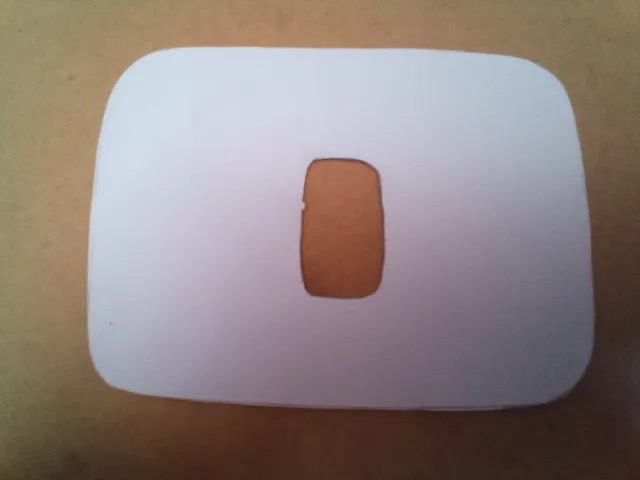
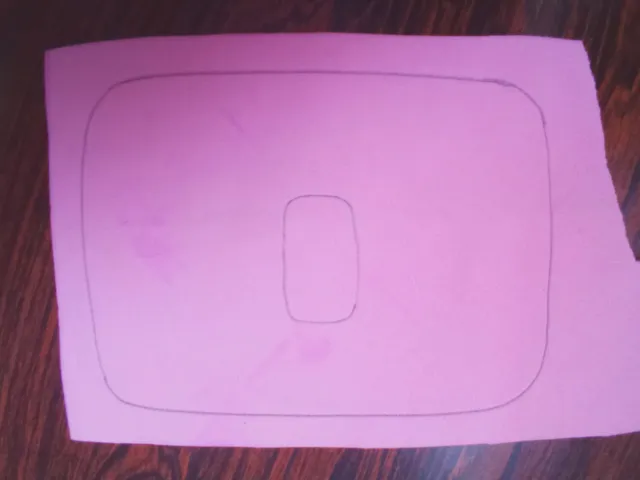
- PASO 1:
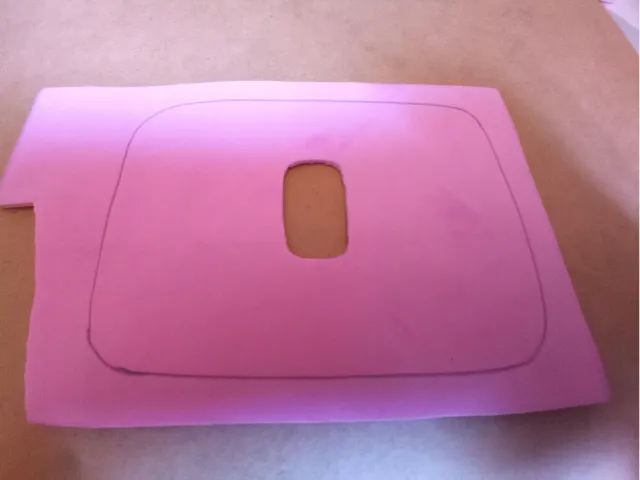
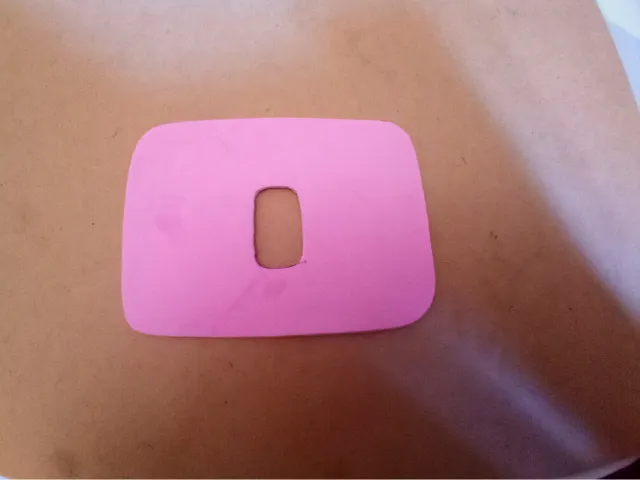
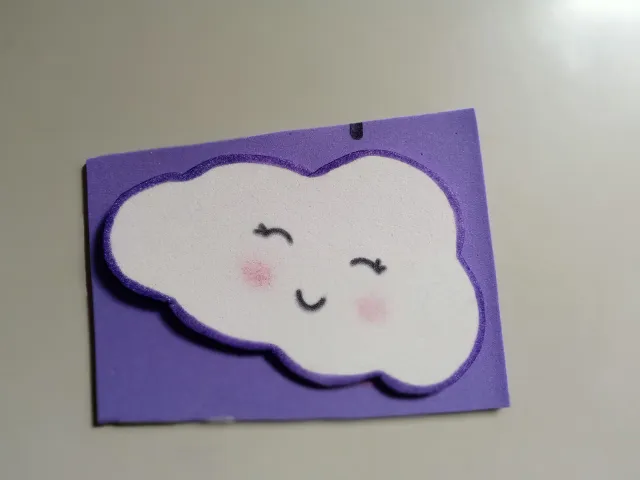
Lo primero con lo que debemos empezar es con el patrón de nuestro interruptor, para ello debes usar lápiz, papel y una regla para tomar las medidas del botón, una vez que esté listo, lo cortamos con un cúter o exacto y probamos si encaja correctamente en el botón, si es así, sigue tomando las medidas de ancho y largo de nuestro interruptor, corta con la tijera y vuelve a comprobar si las medidas son correctas. Luego calcamos el patrón al foami rosa claro y repetimos el procedimiento: cortamos donde va el botón con el exacto y el resto de la base con la tijera.
- STEP 1:
The first thing we must start with is the pattern of our switch, for this you must use a pencil, paper and a ruler to take the measurements of the button, once it is ready, we cut it with a cutter or exact and try it fits correctly in the button, if so, continue taking the width and length measurements of our switch, cut with the scissors and double check if the measurements are correct. Then we trace the pattern to the light pink foami and repeat the procedure: we cut where the button goes with the exact one and the rest of the base with the scissors.
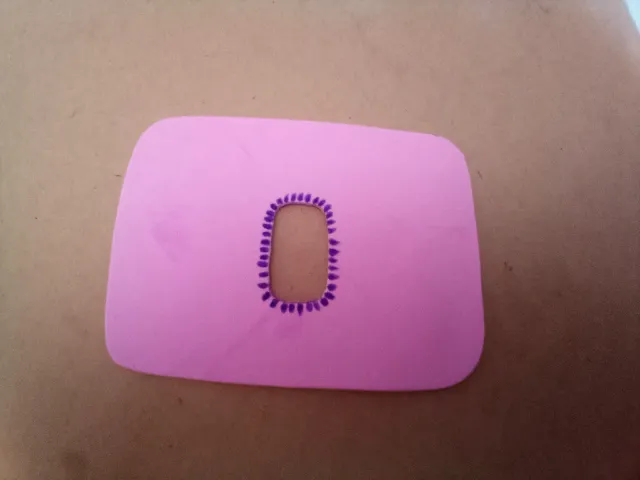
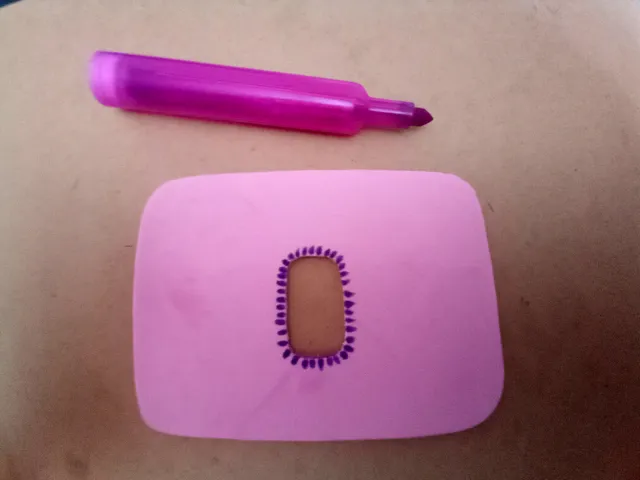
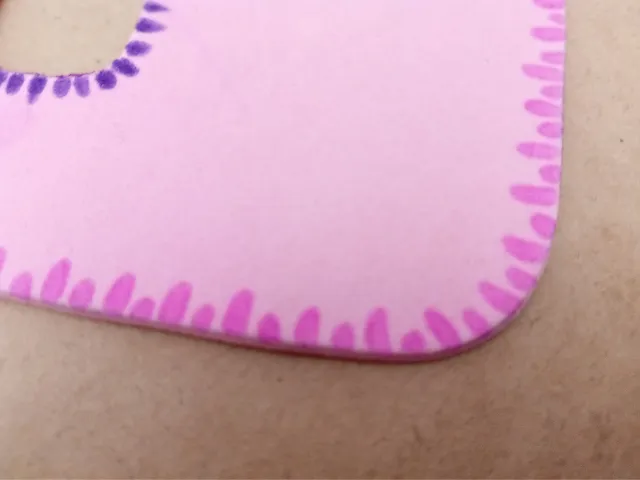
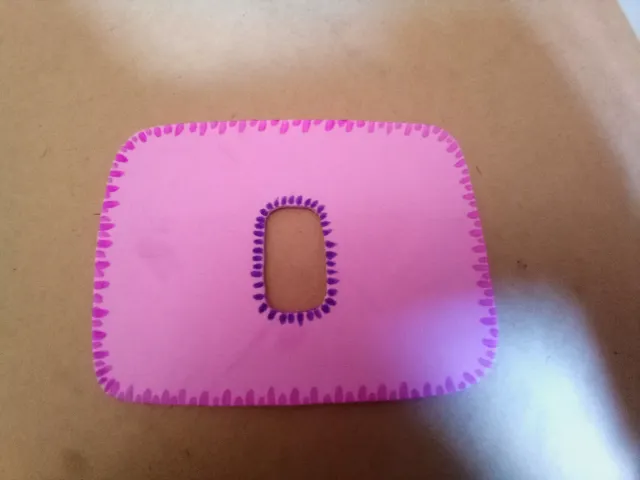
- PASO 2:
Con el marcador morado empezamos a hacer unas líneas alrededor de la zona donde va el botón del interruptor, seria: una línea larga, una línea corta, una larga y una corta. Repetimos el proceso de la misma forma con el marcador rosa, en todo el contorno de la base.
- STEP 2:
With the purple marker we begin to make some lines around the area where the switch button goes, it would be: a long line, a short line, a long and a short and we repeat the process in the same way with the pink marker, all around from the base.

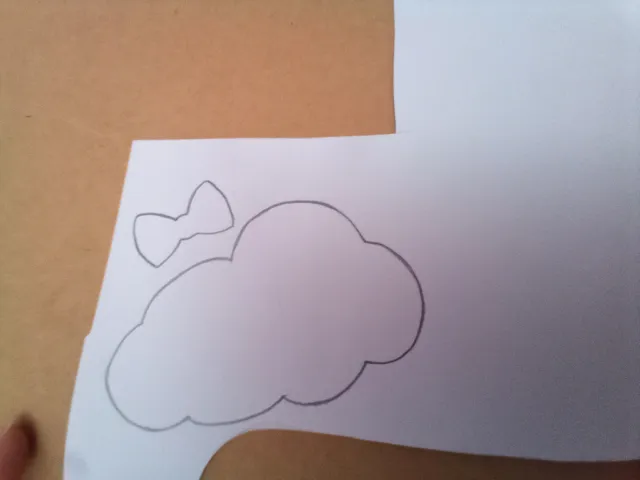
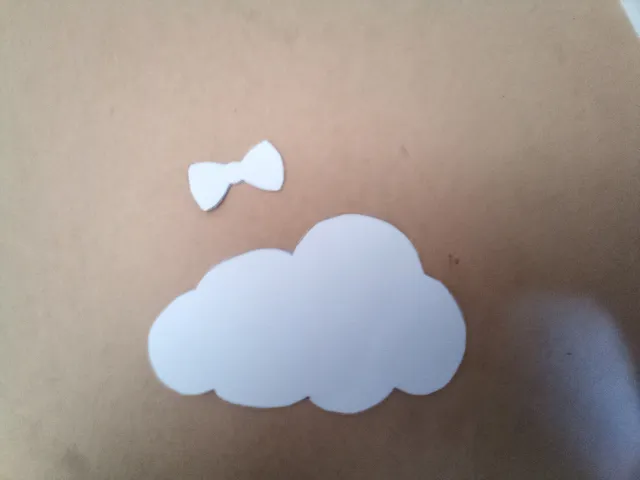
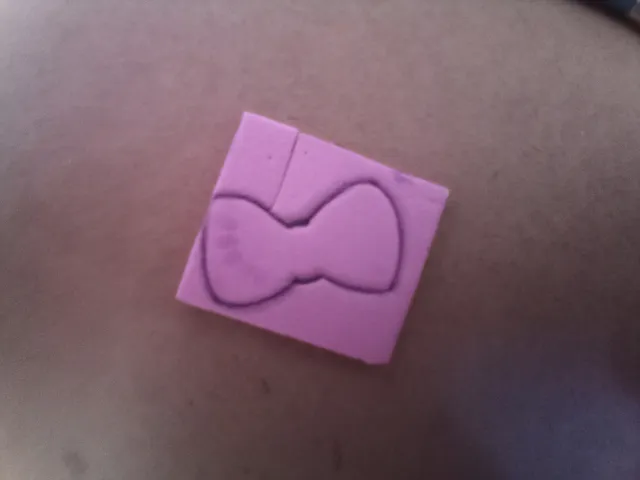
- PASO 3:
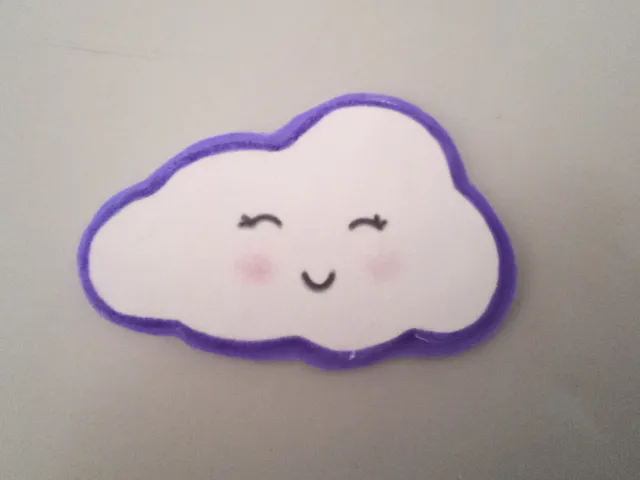
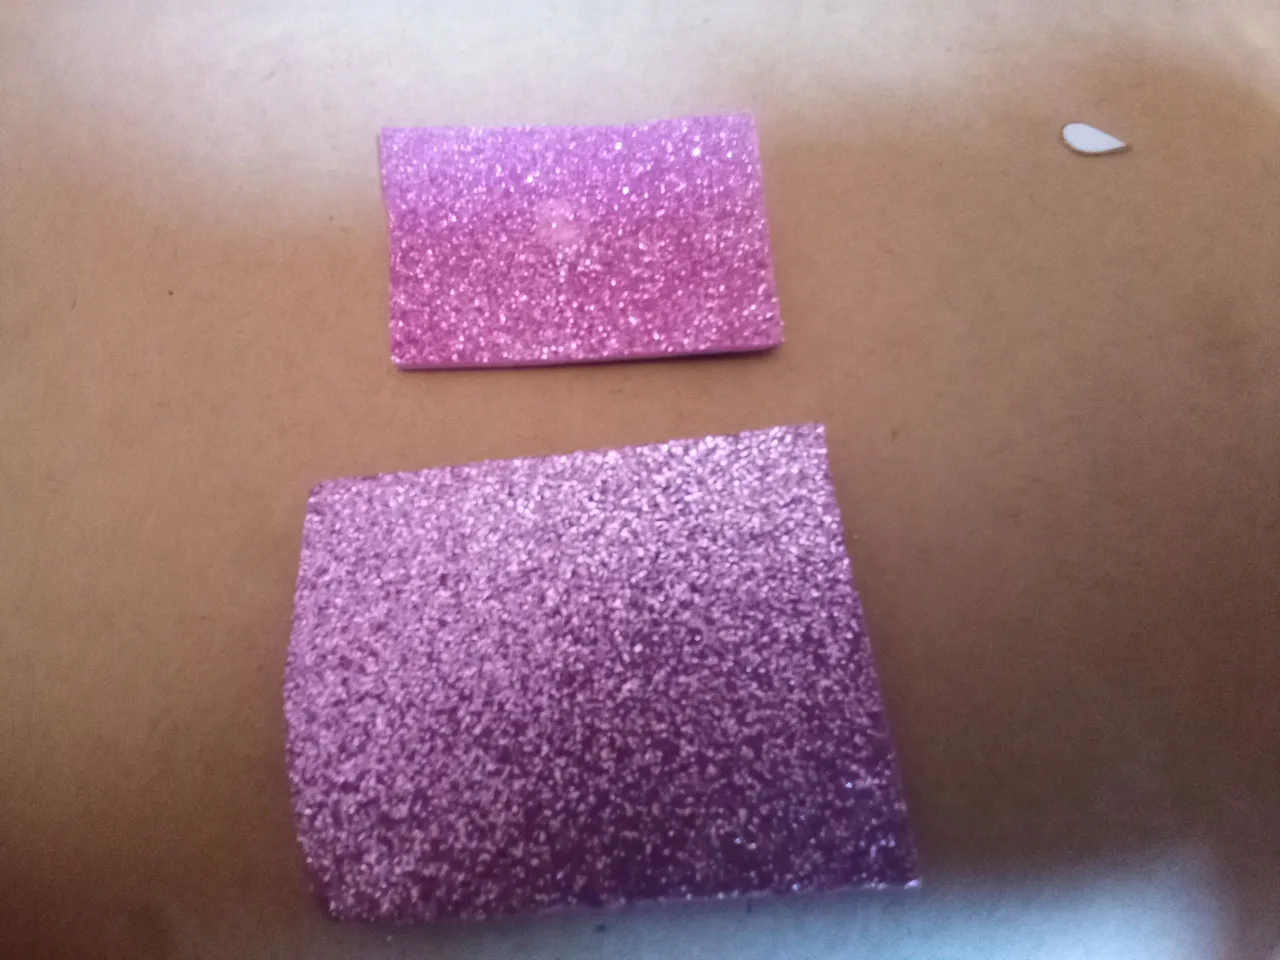
Luego buscamos una imagen de referencia, en mi caso quise hacer una nube con un lazo y una carita (al final del post dejo el enlace de la imagen de referencia) puedes hacer o buscar la imagen que te guste. Cuando encontremos la imagen de referencia que nos gusta, hacemos un patrón, luego lo pasamos al foami, la nube en el foami blanco y el lazo en el foami rosa escarchado, cortamos y continuamos.
- STEP 3:
Then we look for a reference image, I wanted to make a cloud with a bow and a face (at the end of the post I leave you the link of the reference image) you can make or search for the image you like. When we find the reference image that we like, we make a pattern, then we pass it to the foami, the cloud in the white foami and the bow in the frosty pink foami, we cut and continue.


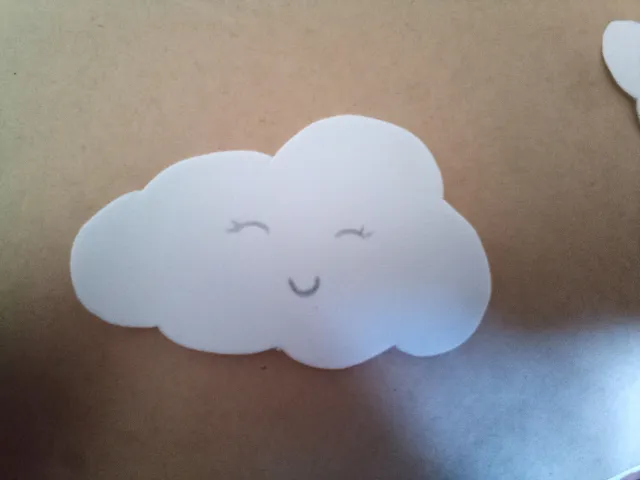
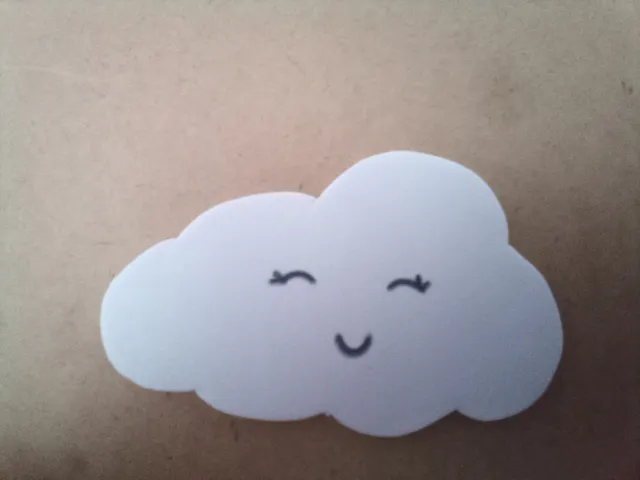
- PASO 4:
Toma la nube, dibuja los ojos y la boca con ayuda de un lápiz, cuando veamos que está como queremos, la resaltamos con el marcador negro. Luego con el rubor tomamos un poco con el dedo o brocha y lo ponemos debajo de los ojos. Seguimos, pasamos el marcador morado por el contorno de la nube.
- STEP 4:
Take the cloud and draw the eyes and the mouth with the help of a pencil, when we see that it is as we want, we highlight it with the black marker. Then with the blush we take a little with our finger or brush and put it under the eyes. We continue, pass the purple marker around the outline of the cloud.

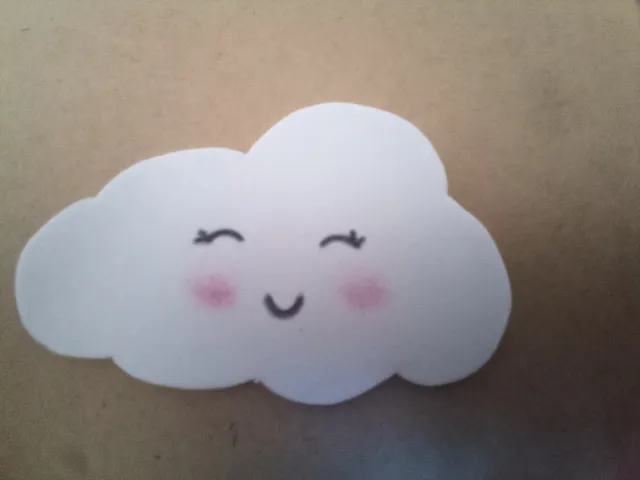

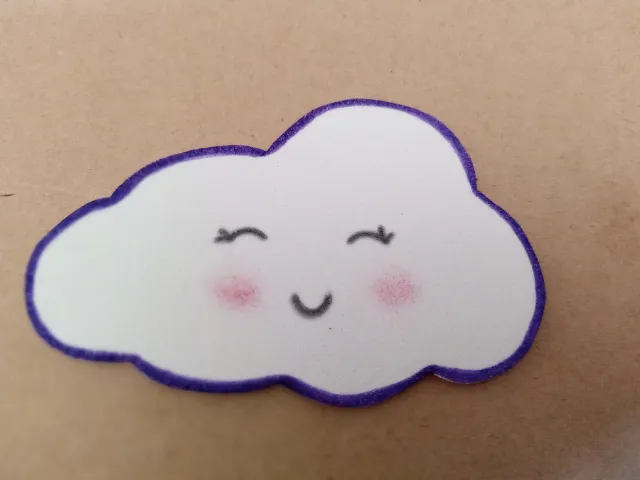
- PASO 5:
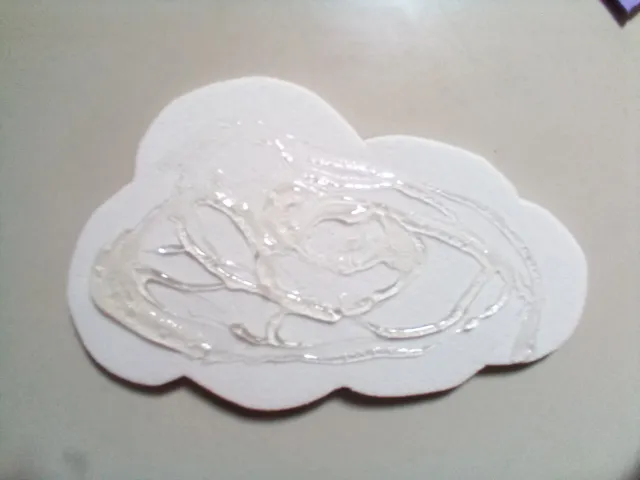
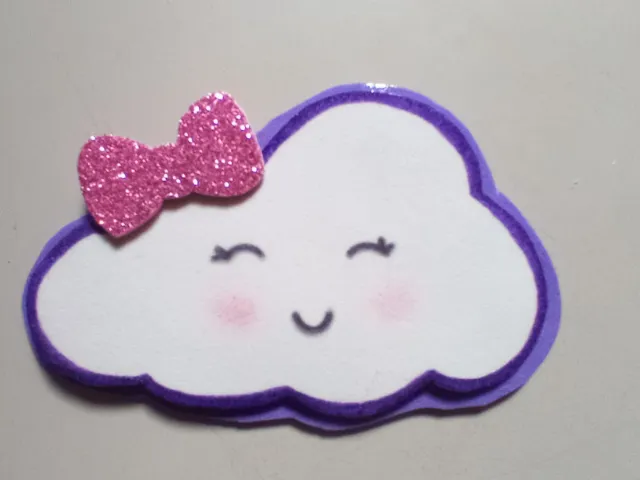
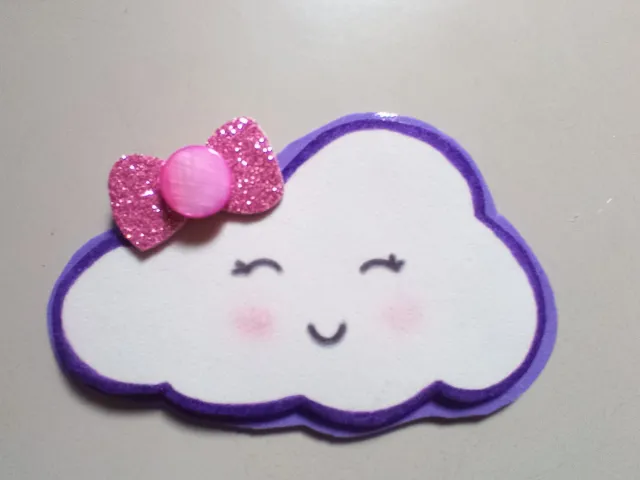
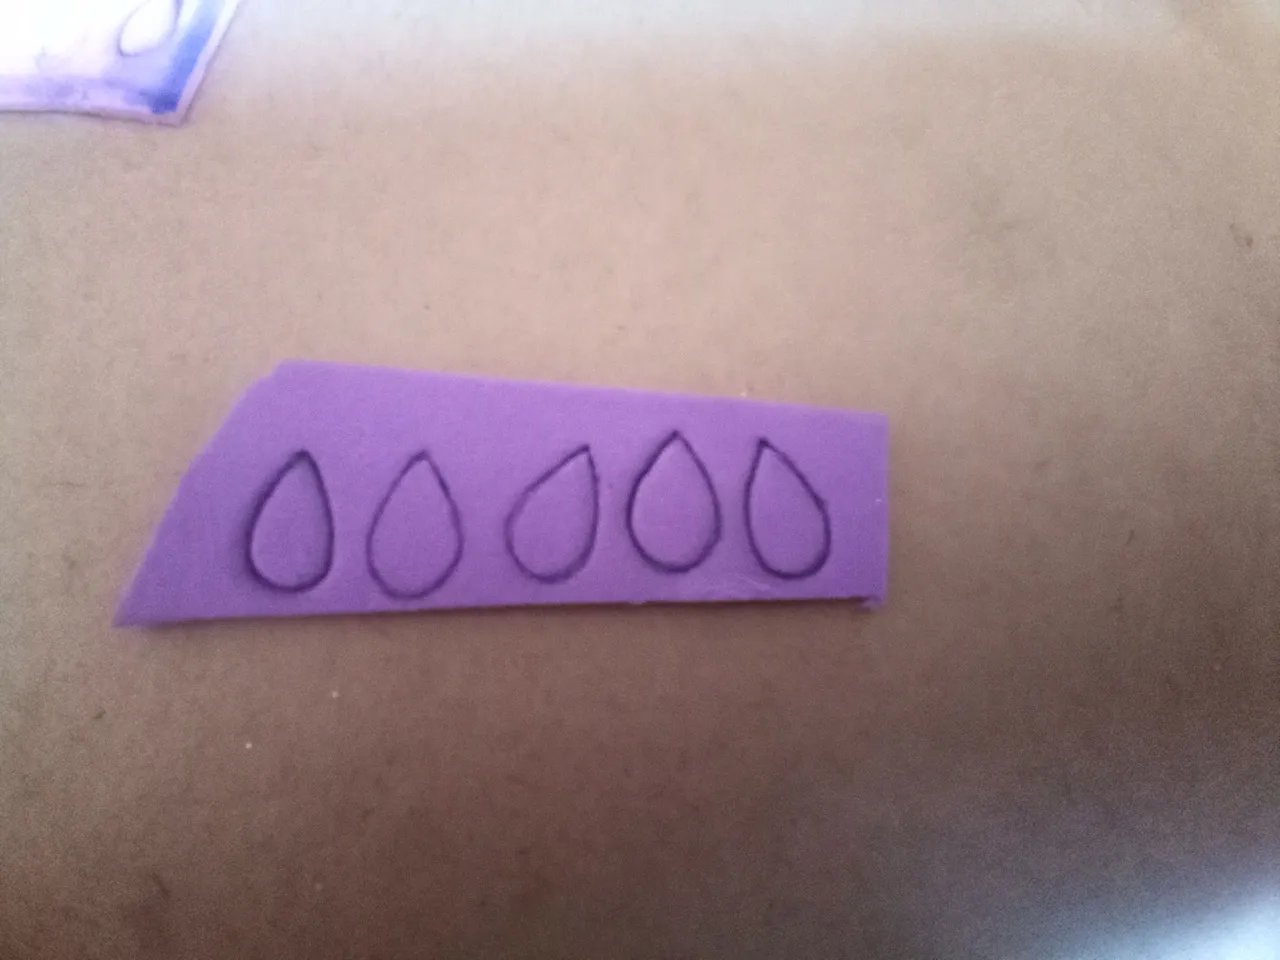
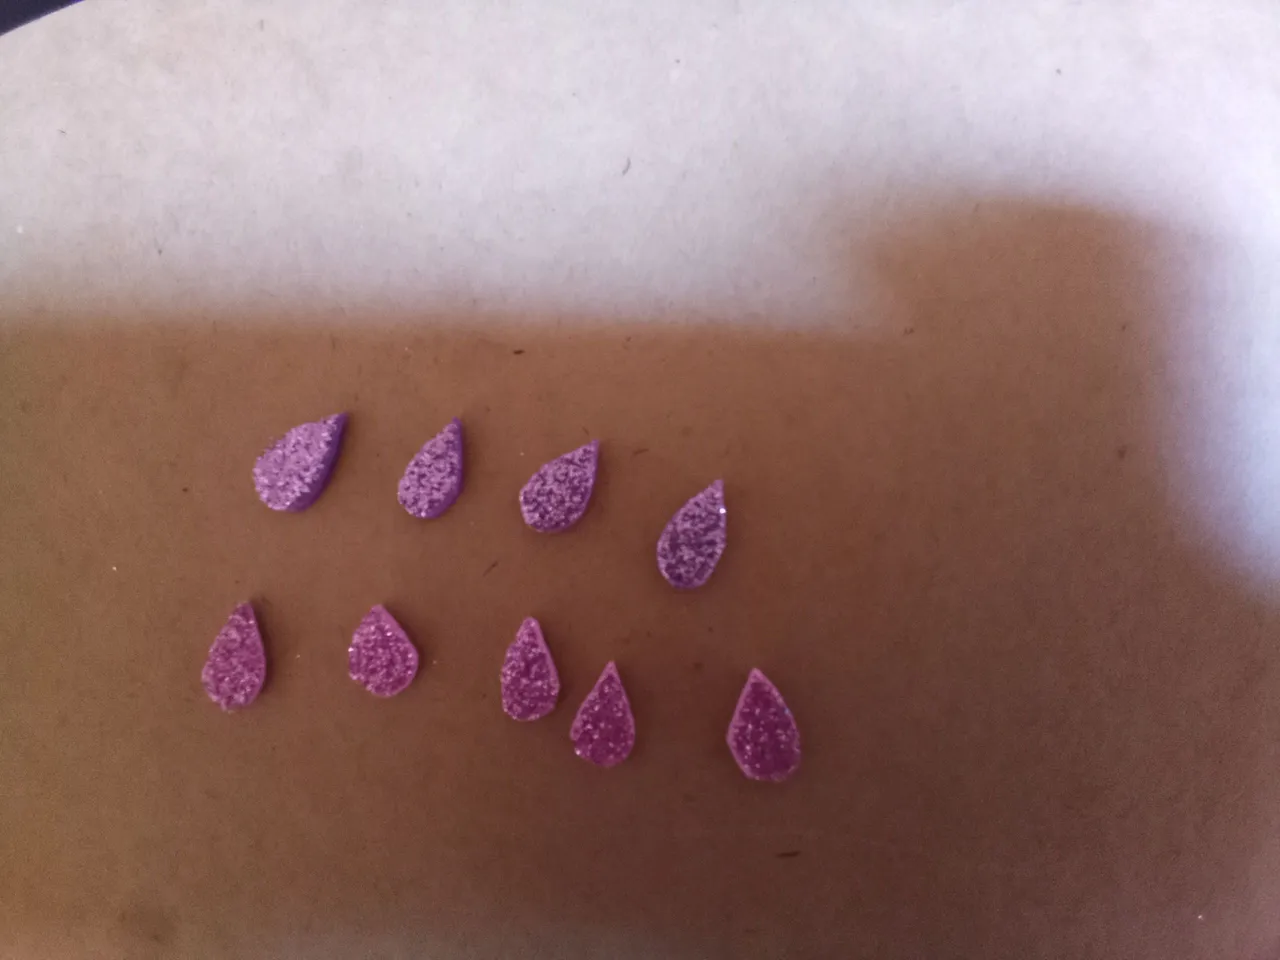
Pegue la nube con silicón caliente en el foami morado y corte un borde sobresaliente, aproximadamente 2 mm. Luego, pega el lazo en la esquina superior izquierda y le coloque una perla para darle un bonito toque. ahora podemos pegar la nube a la base del foami. Por último, haz un patrón en forma de gota para simular las gotas de lluvia o haz las gotas con el lápiz directamente sobre el foami morado escarchado y rosa escarchado, recorta y pega una a una a la base en el orden deseado.
- STEP 5:
Hot glue the cloud to the purple foam and cut off a 2mm overhanging edge. Then glue the bow in the top left corner and a pearl for a nice touch. now we can glue the cloud to the base of the foami. Finally, make a drop-shaped pattern to simulate raindrops or make the drops with the pencil directly on the frosty purple and frosty pink foami, cut out and glue one by one to the base in the desired order.
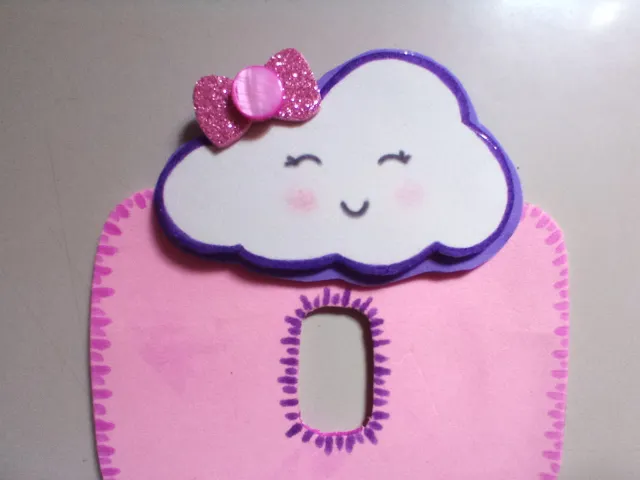
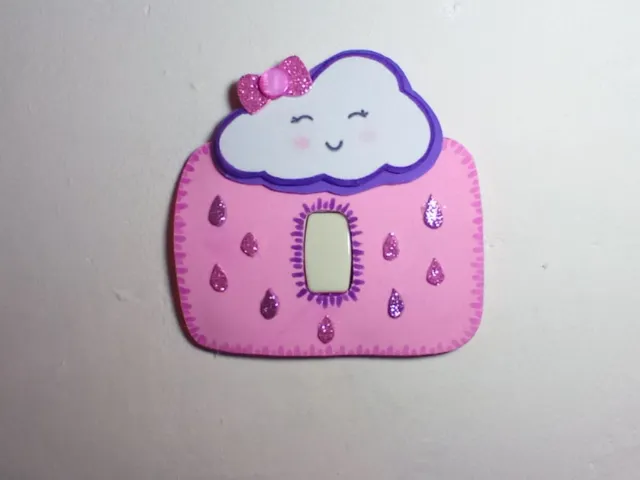
☔️¡Y listo!☔️ Ahora puedes pegar la decoración de foami en tu interruptor, puedes hacerlo con la temática que más te guste para darle un toque lindo a tu habitación. Espero que te animes a hacerlo.
☔️¡And ready!☔️ Now you can paste the foam decoration on your switch, you can do it with the theme that you like the most to give your room a cute touch. I hope you are encouraged to do so.
- Imagen de referencia: ->FUENTE<-.
- Reference Image: ->SOURCE<-.


Todas las fotografías son de mi propiedad.
Separador y Fotos editadas en Canva
All photographs are my property.
Photos edited in Canva