Greetings to all my fellow DIYHub! I hope you enjoyed Halloween night watching movies and caught at least one little ghost. ✌🏼
Popcorn, chocolate and a scary movie sound like a good plan 👻✨ until it's time for ghosts and scares. 😱
I spent October 31 doing what I love and there were no paranormal activity sightings, but a few hours later everything changed....
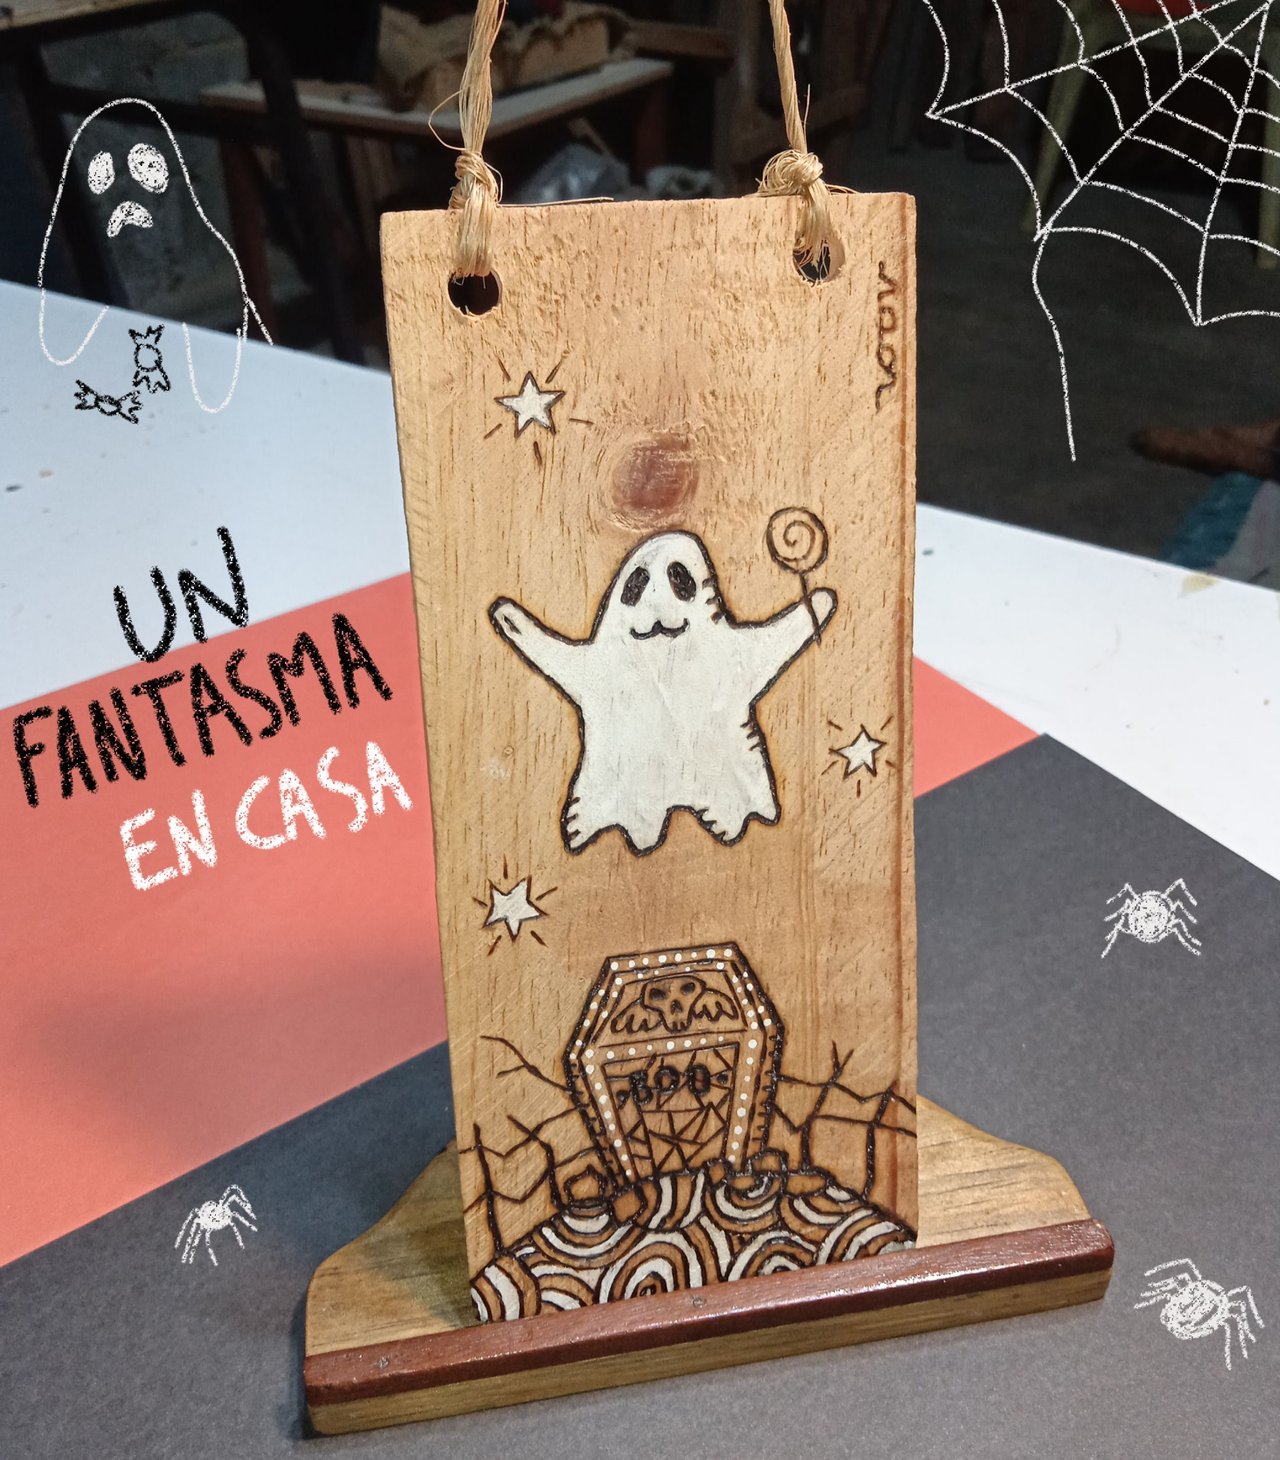
I set to work that day to create this pyrography tablet and at the stroke of 12pm I caught a gluttonous ghost as I was finishing my creation. He would eat a popsicle and say to me, I want to eat a chocolate too and if you don't want to, then I'll eat two! 😱
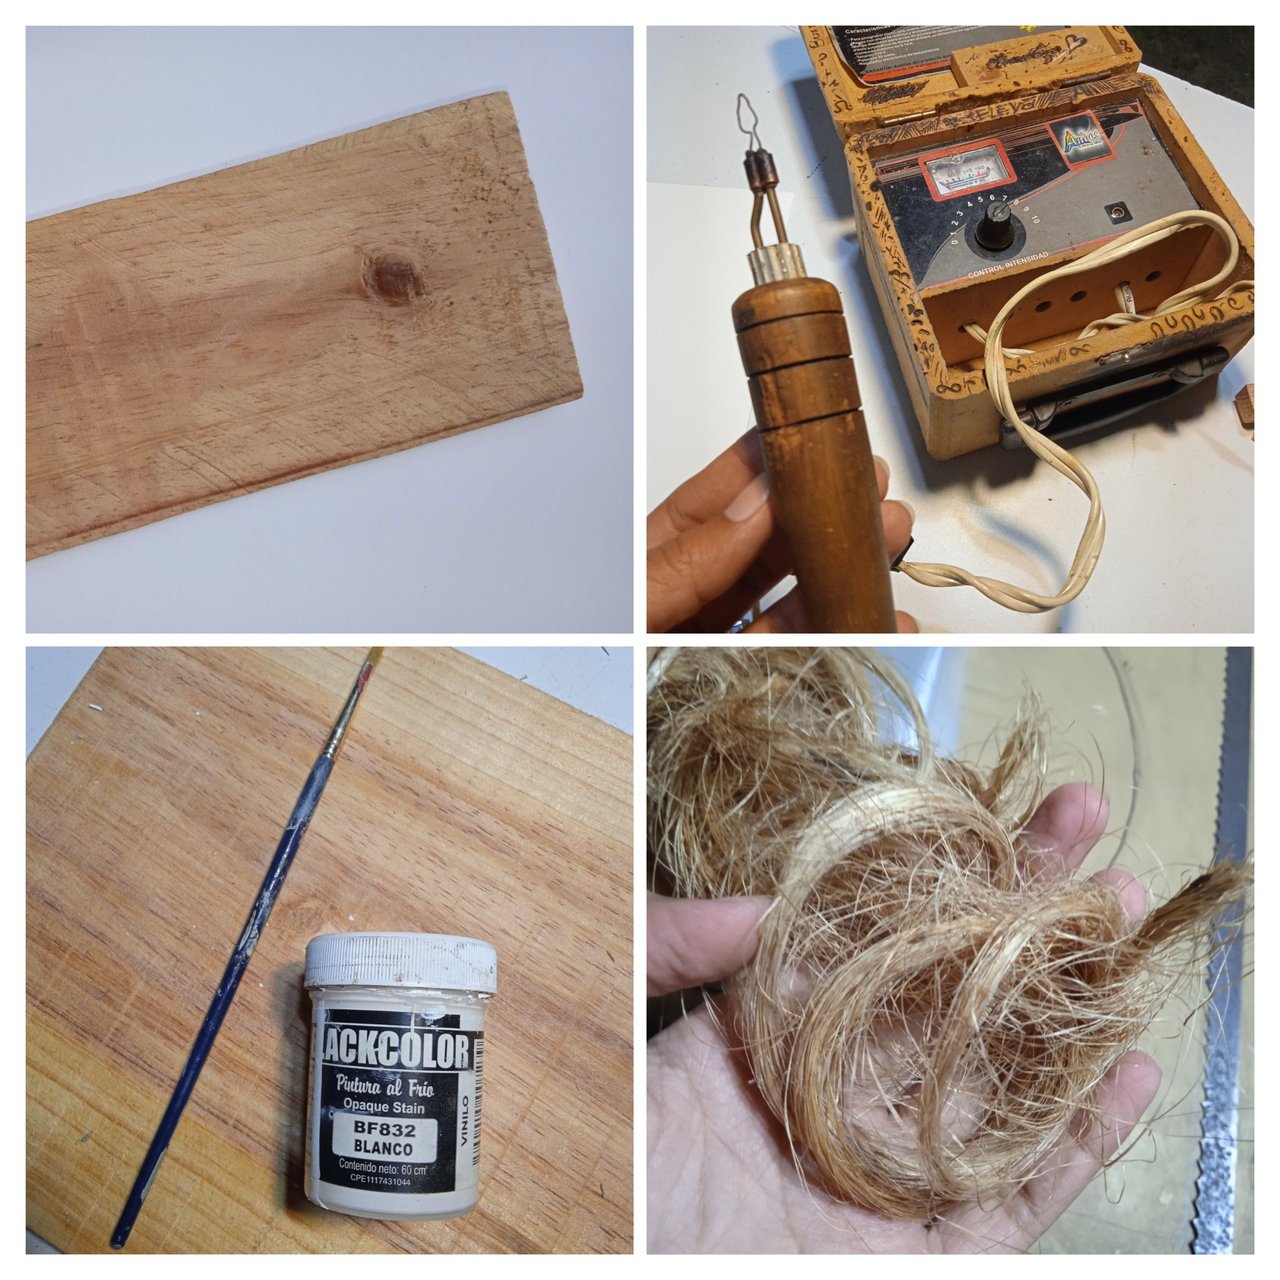
Well, I tell you about the process; in my husband's workshop there are always wood cutouts of many sizes, I chose one suitable for what I had in mind and I got to work making use of a pyrograph, this one is many years old, but I haven't used it that much, who has more experience is my husband.
Materials:
- Wooden board (19.5cm x 8cm).
- Paintbrush.
- White paint.
- Pyrograph.
- String.

Step 1:
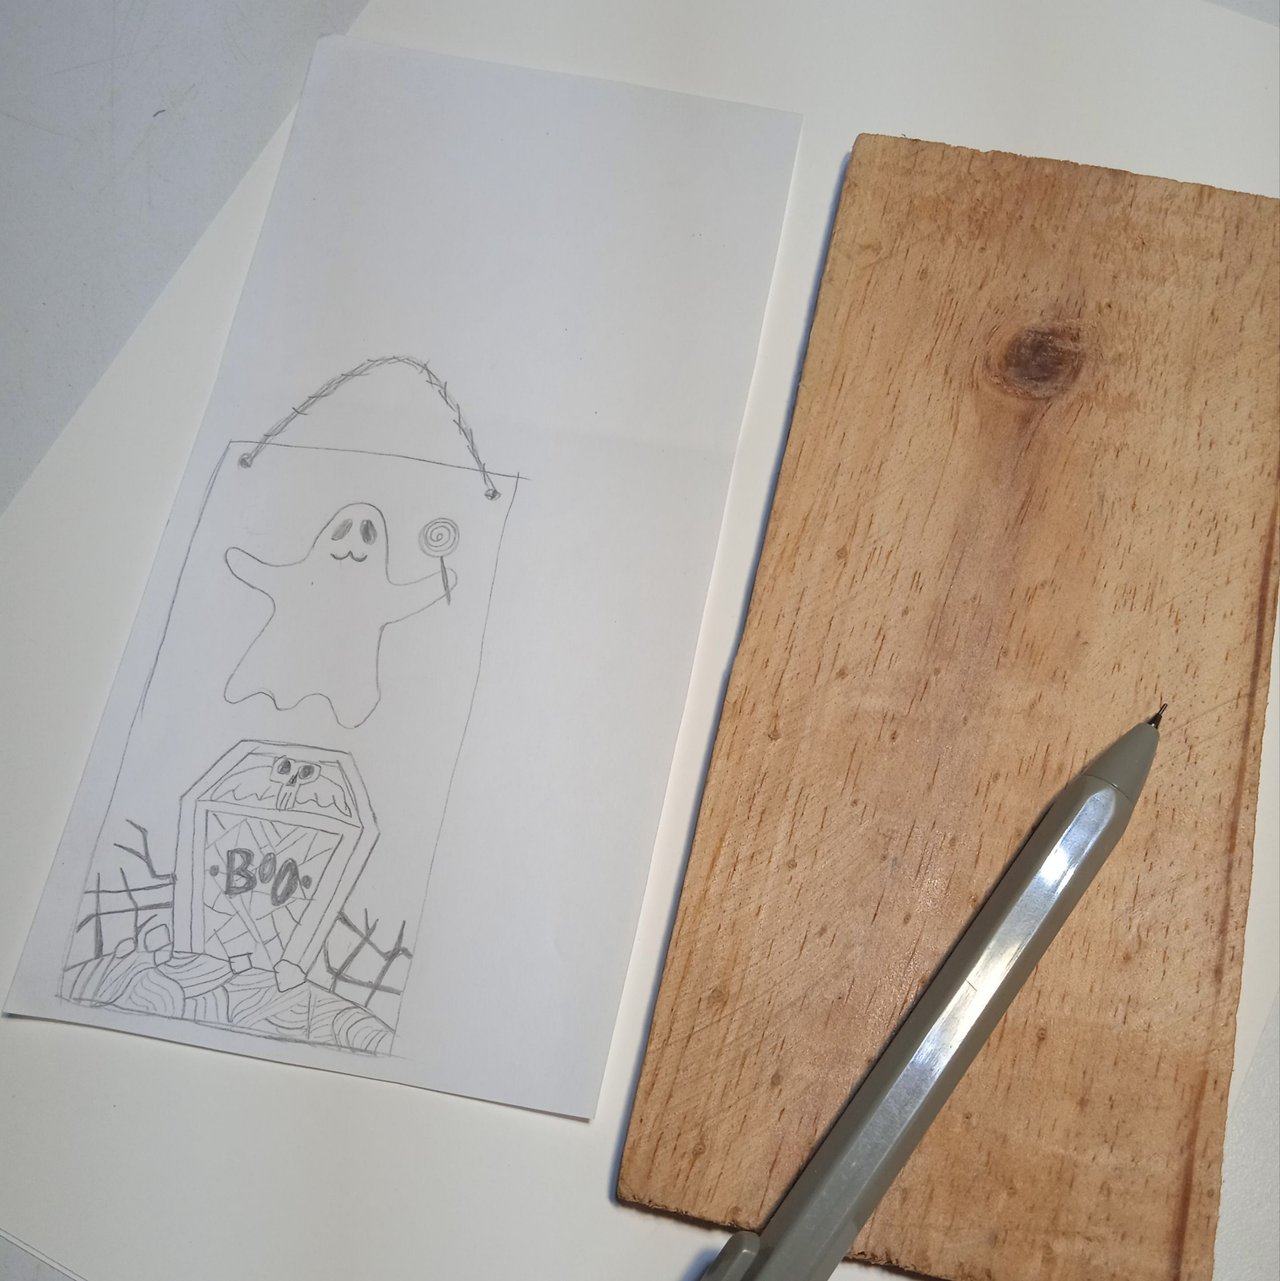
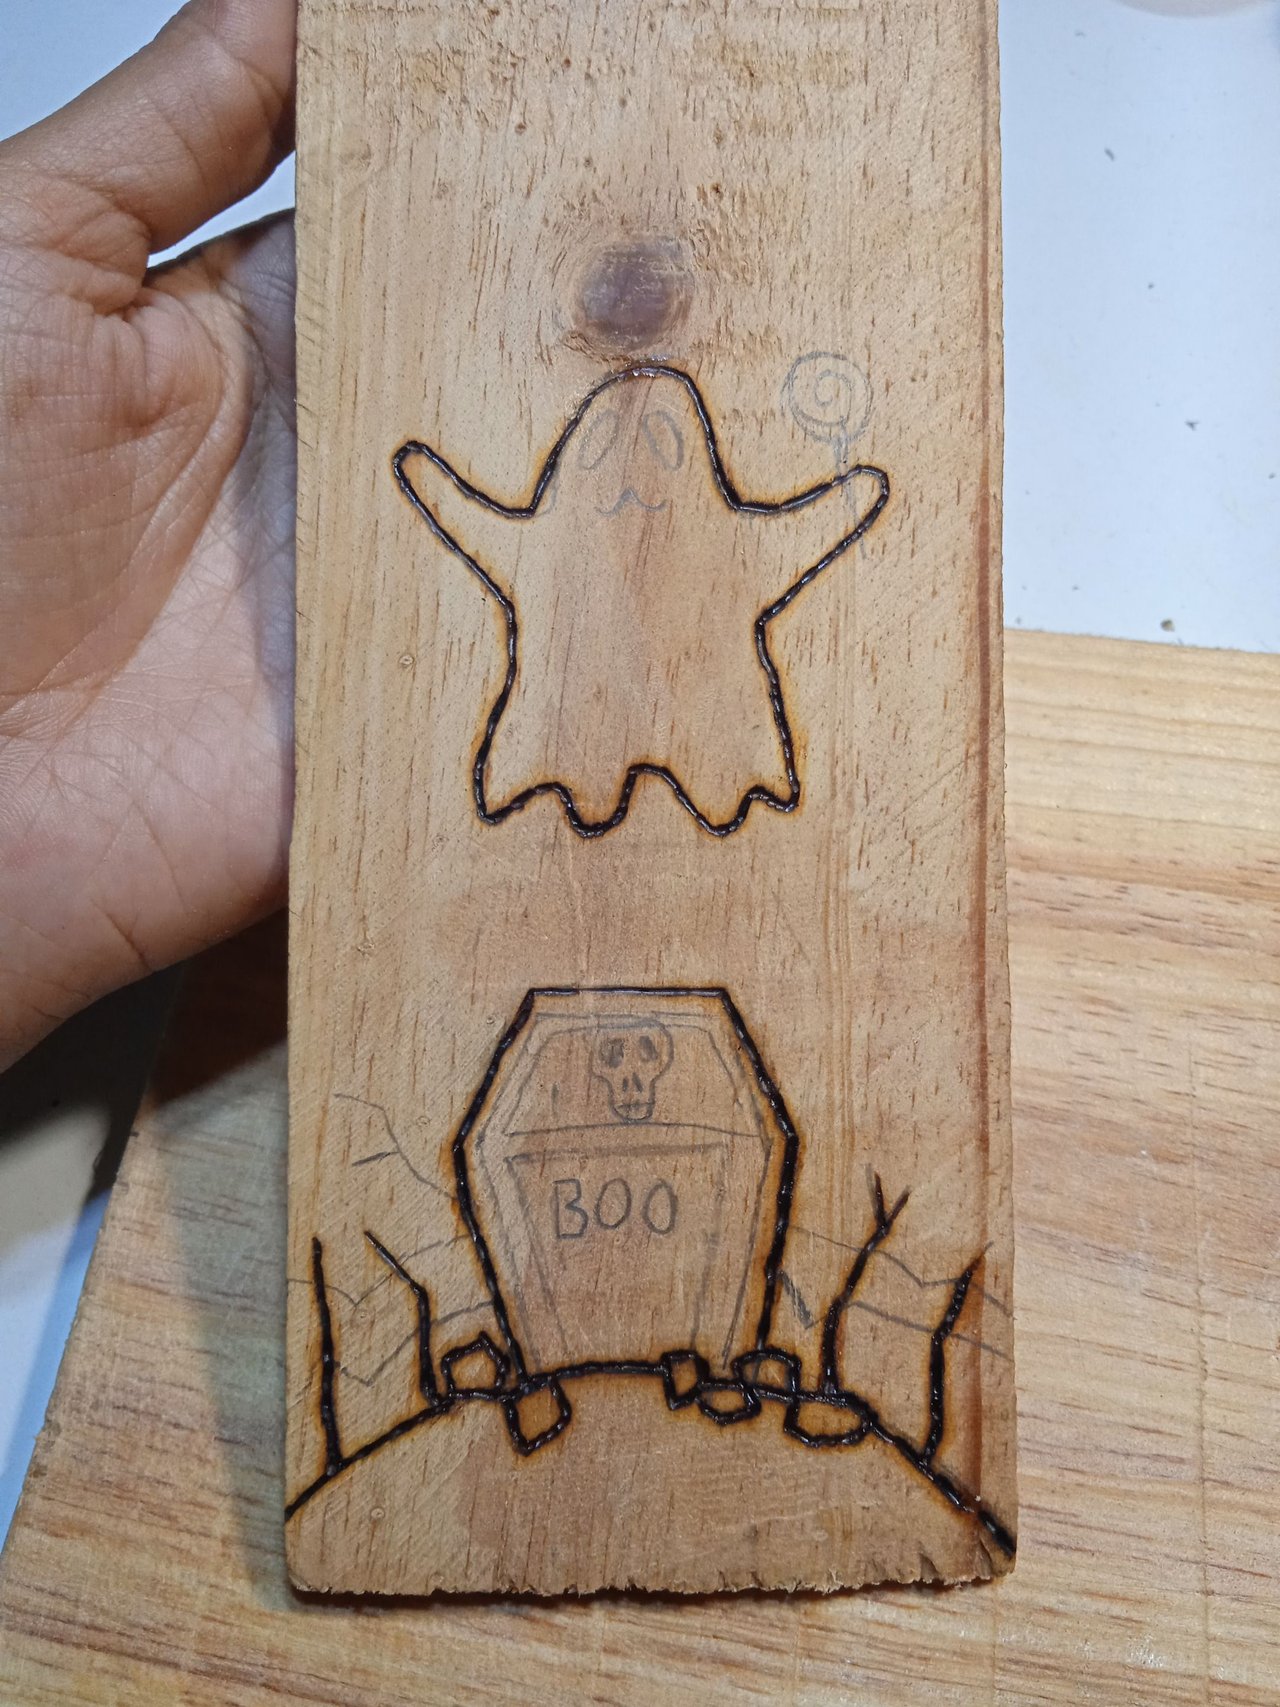
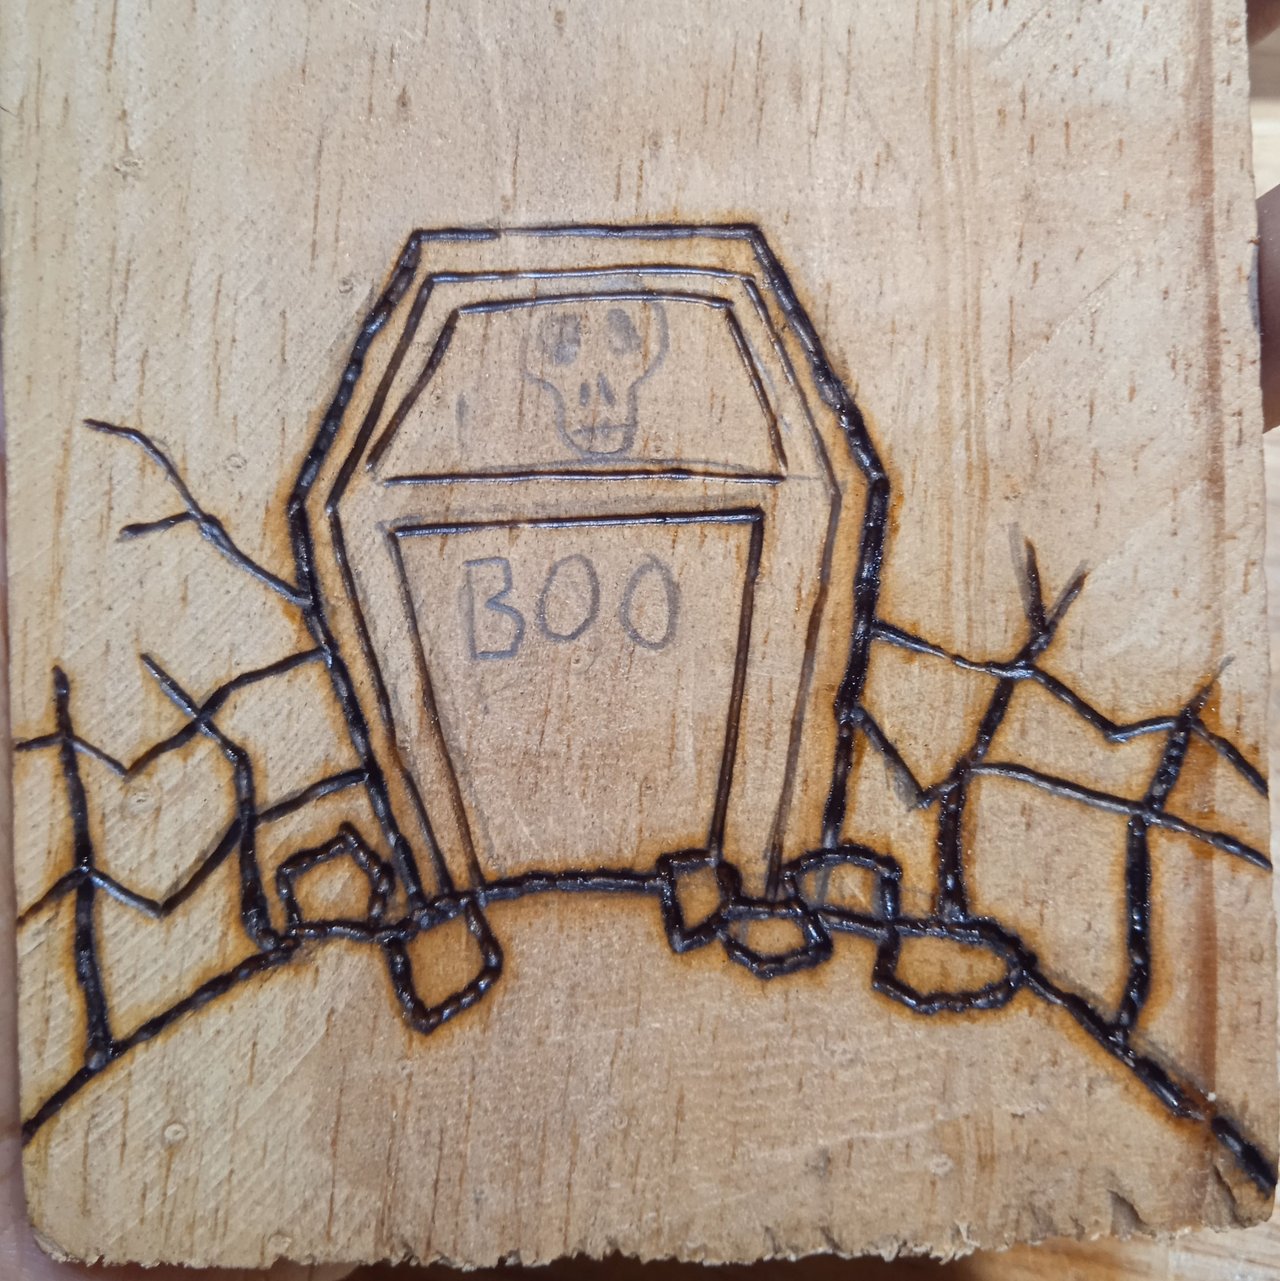
I made this sketch alluding to Jack Skellington's grave from the movie "Jack's Strange World", ideal for Halloween and Christmas viewing.
I then redrew the design on the board with a graphite pencil.
Step 2:
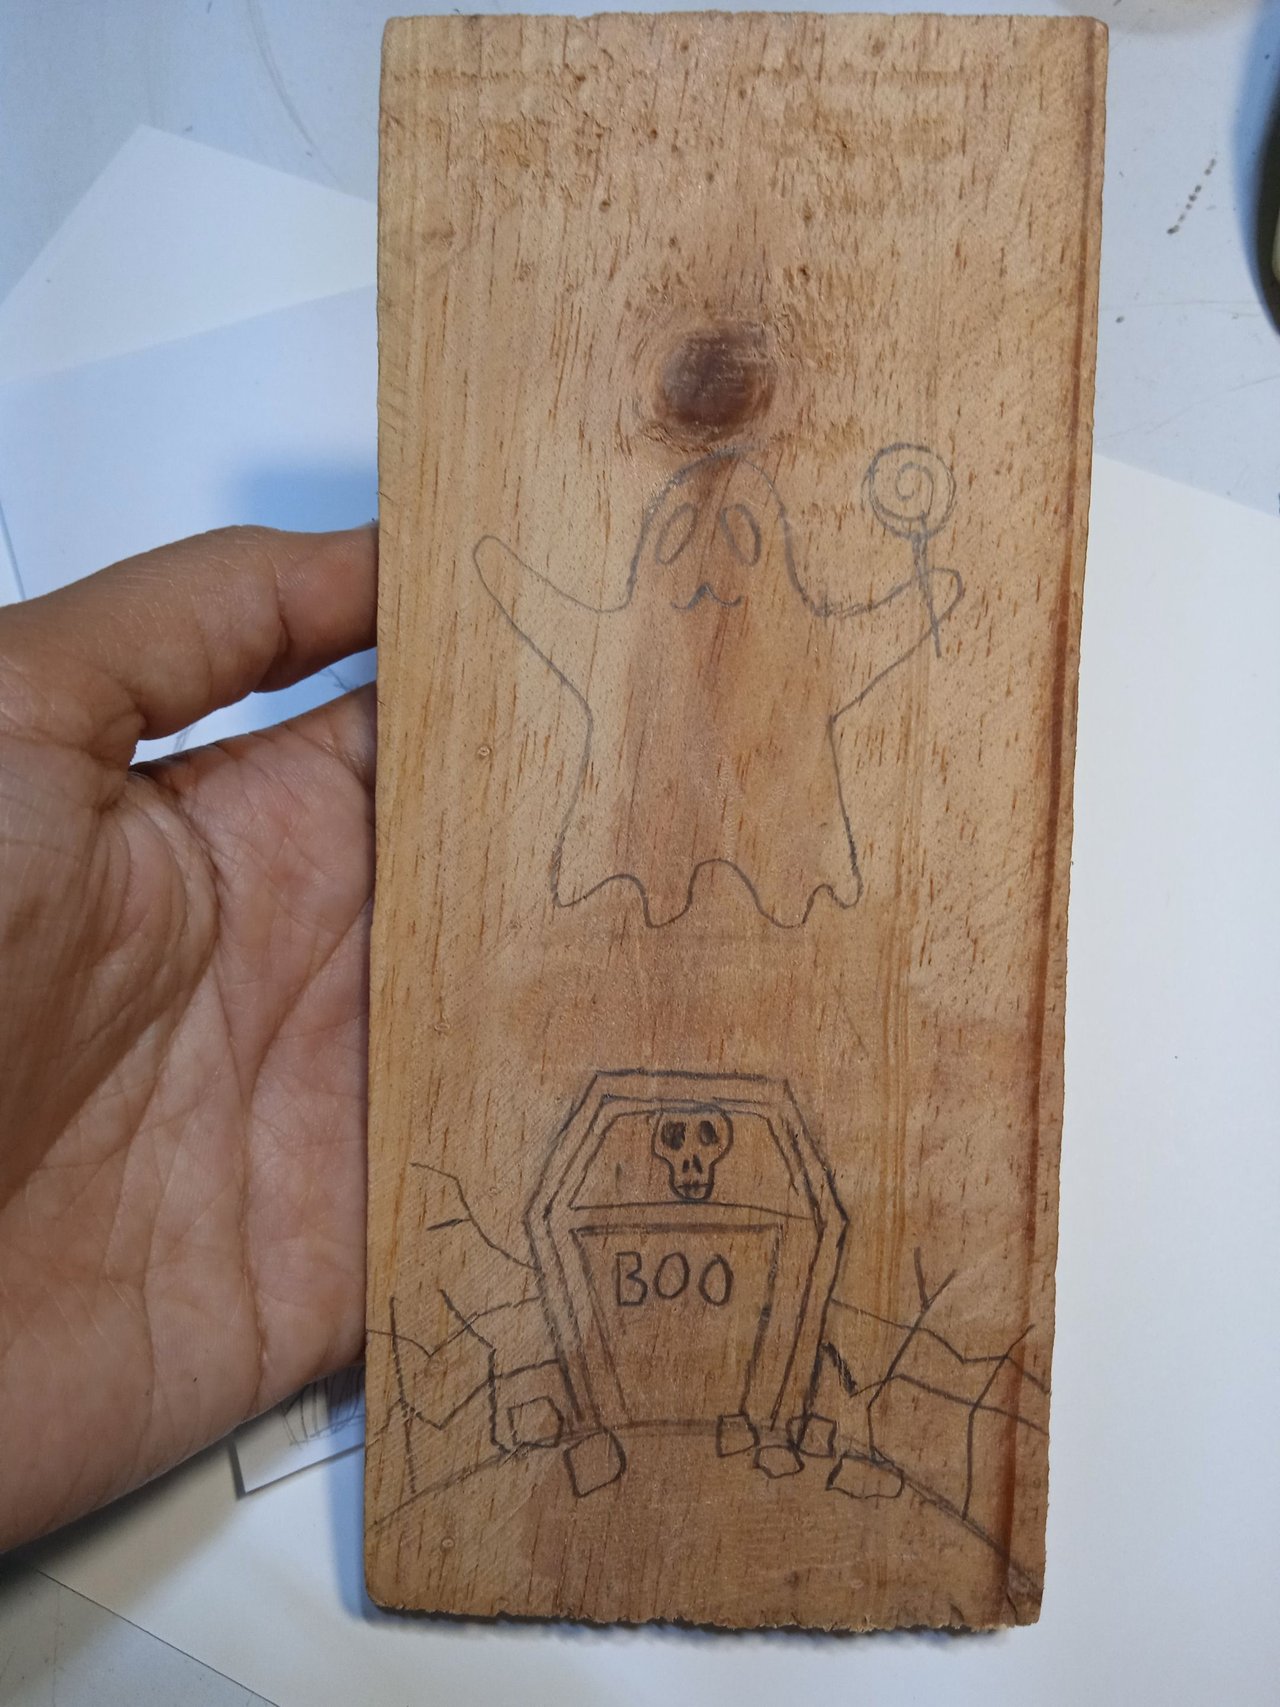
First I'm going to do the outlines of the tomb and the ghost, then move forward with the fill, that is, all the details of the ground.
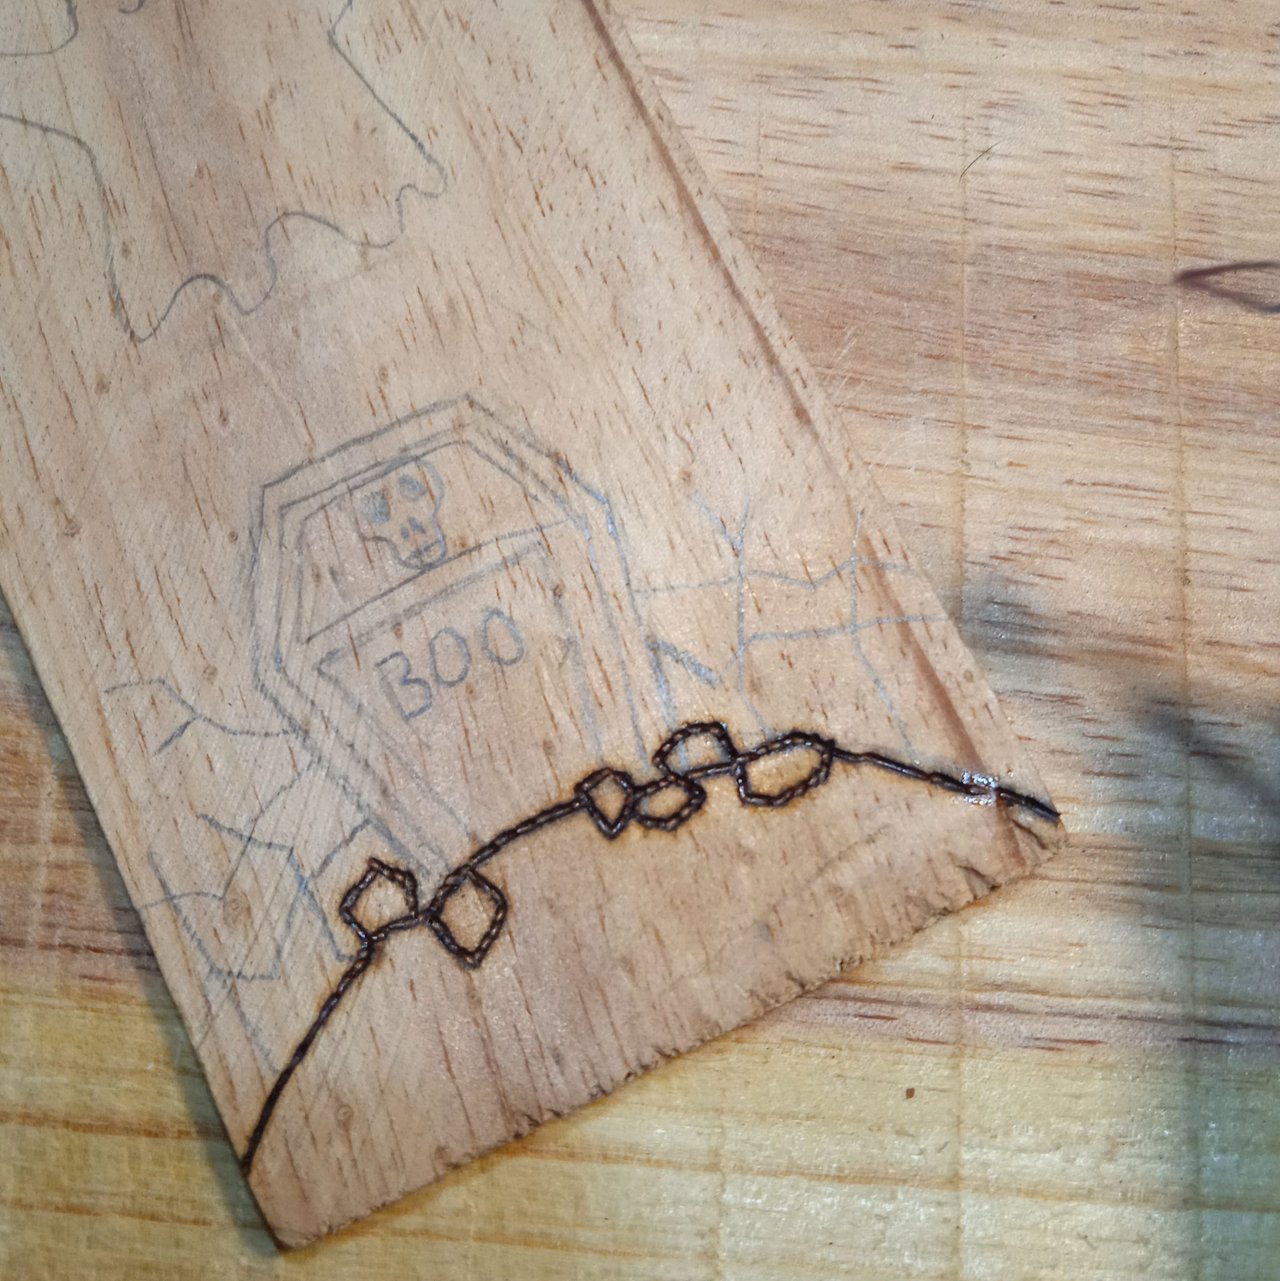
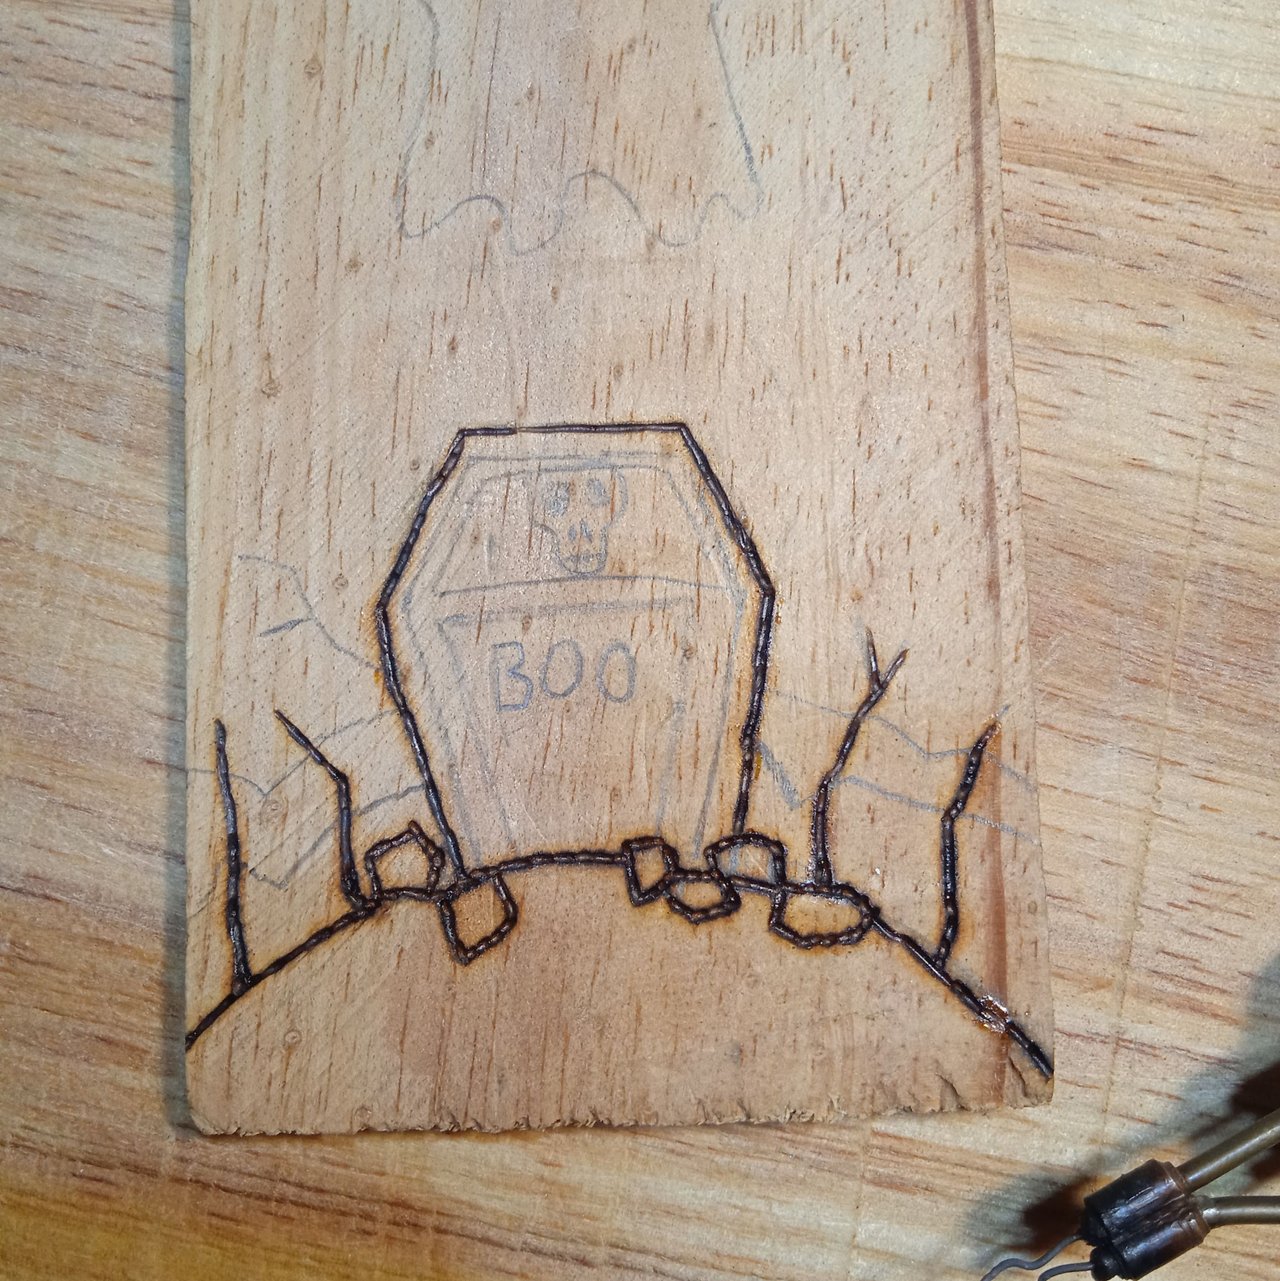
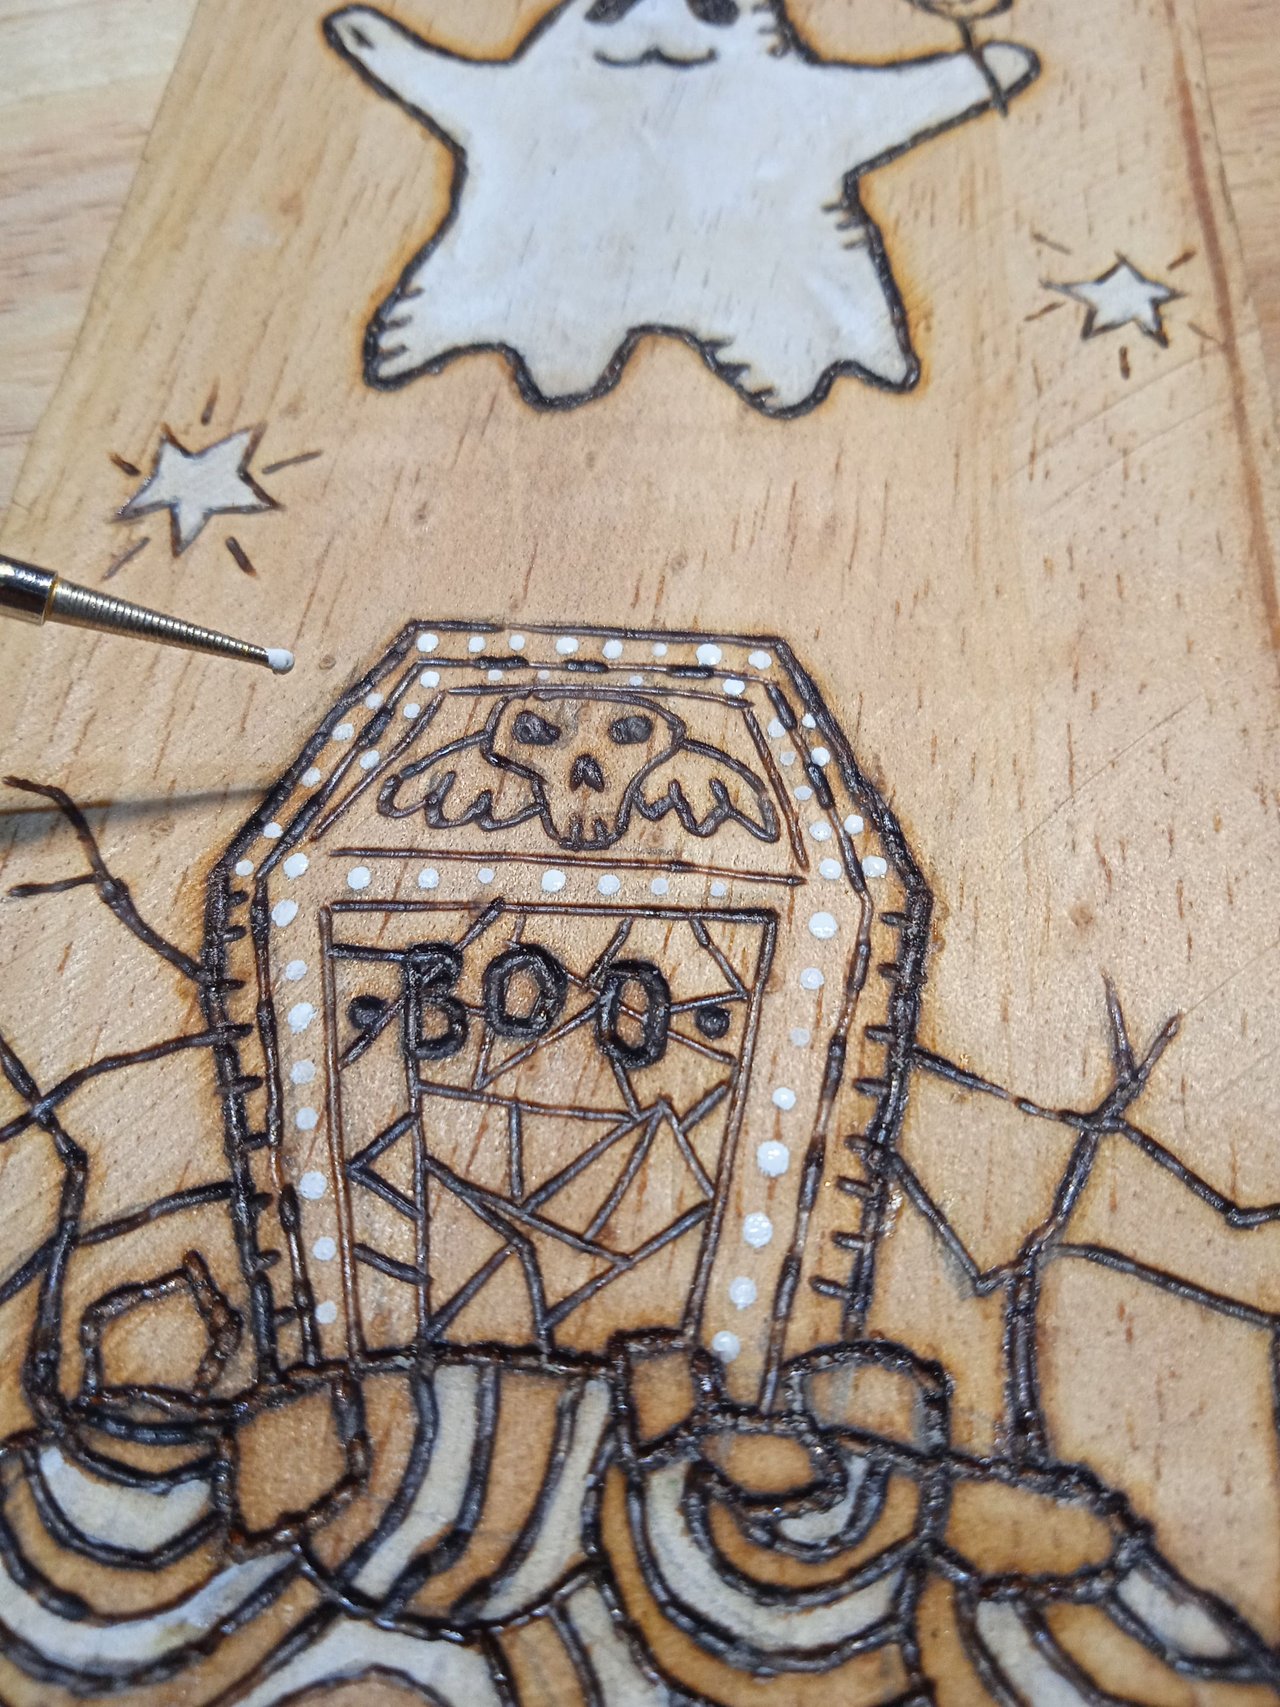
Step 3:
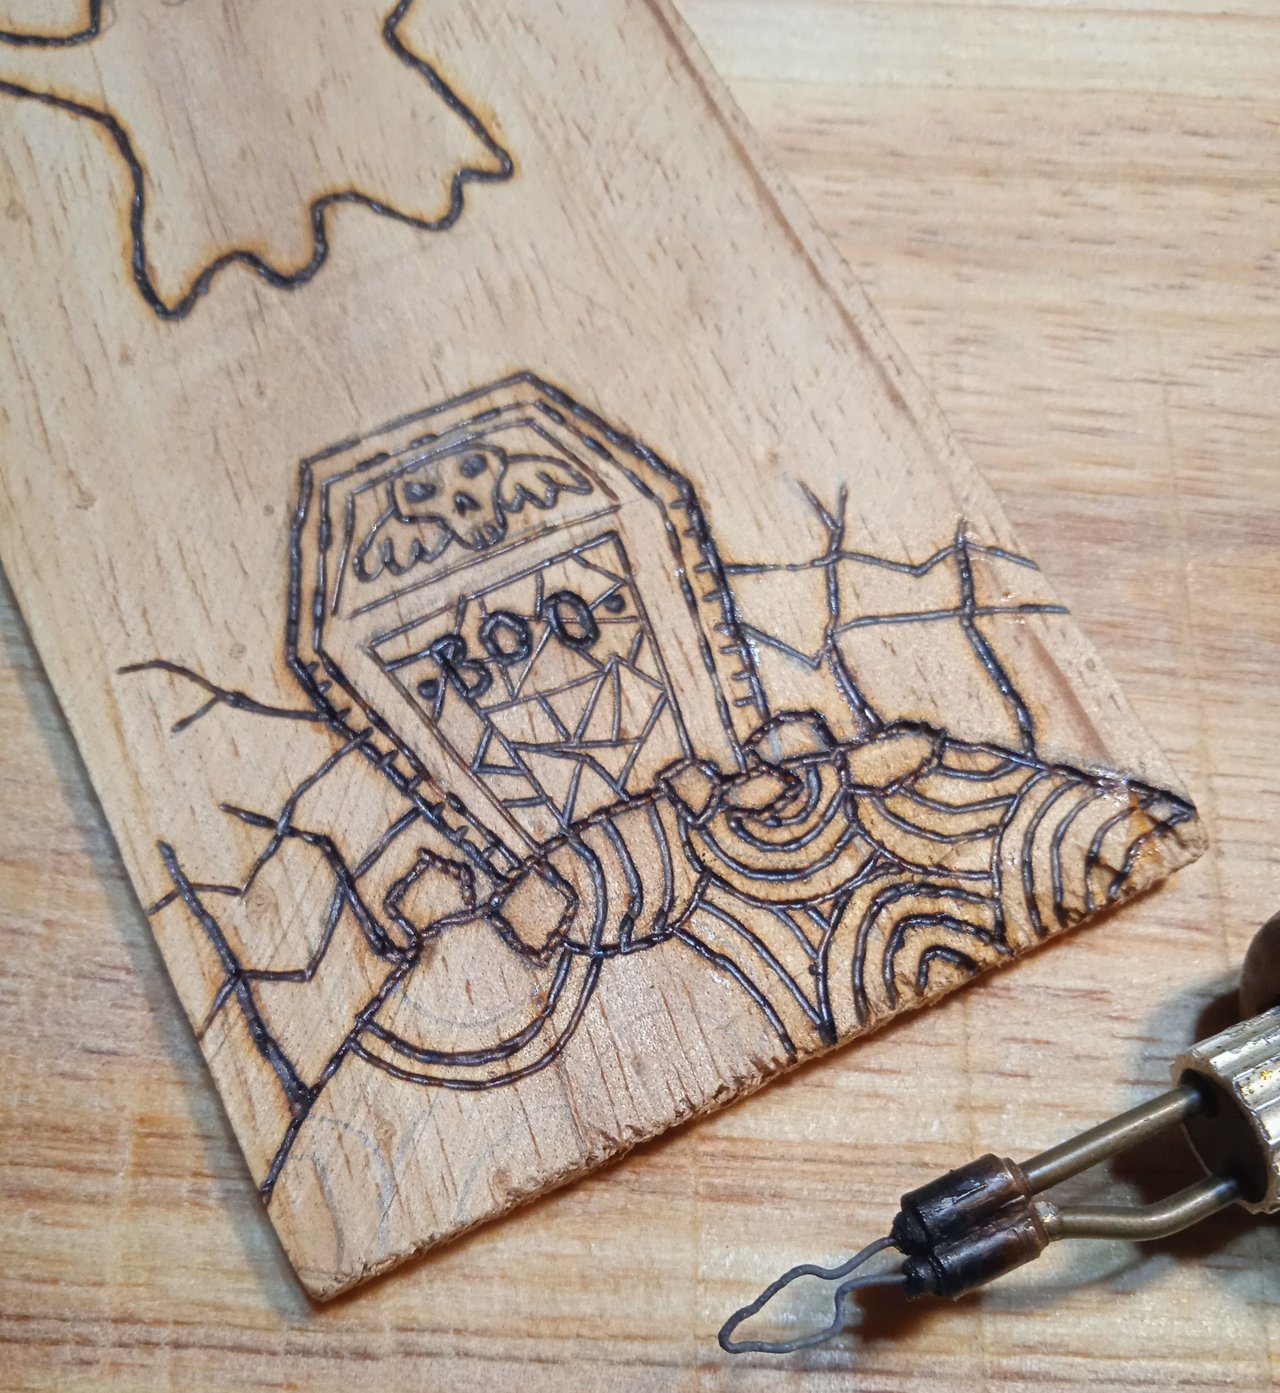
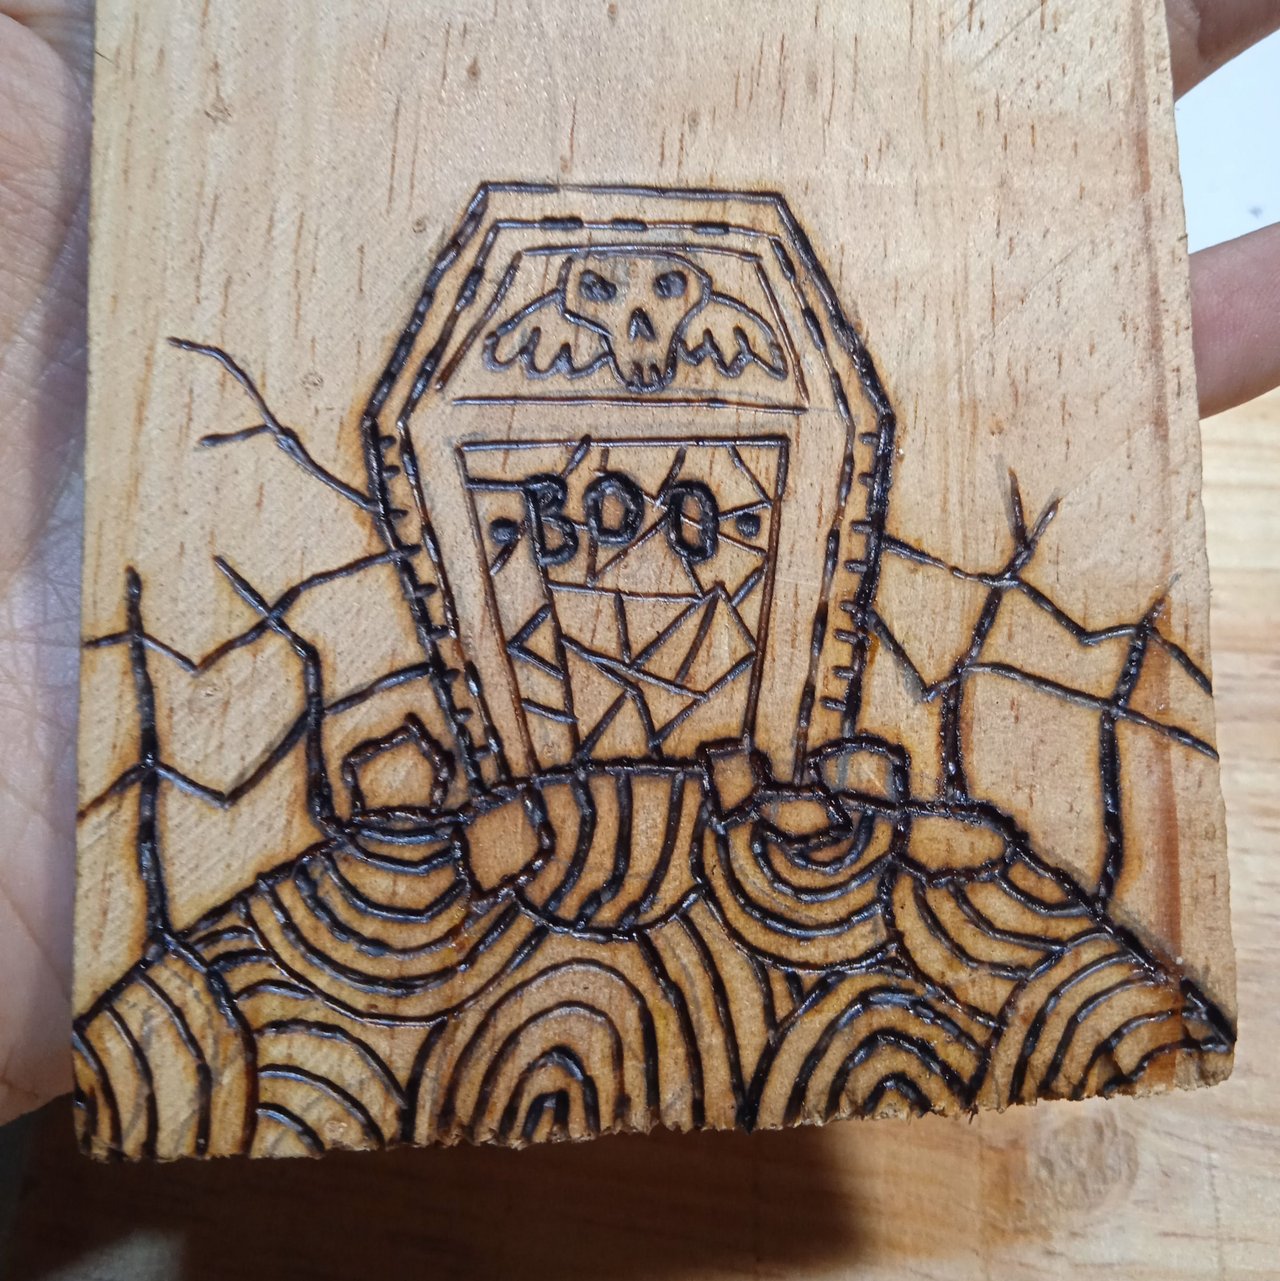
I make a few details on the tomb, so that the lines don't look so deep: I lower the intensity of the current, so it heats the pyrograph tip less and allows me to make thinner lines.
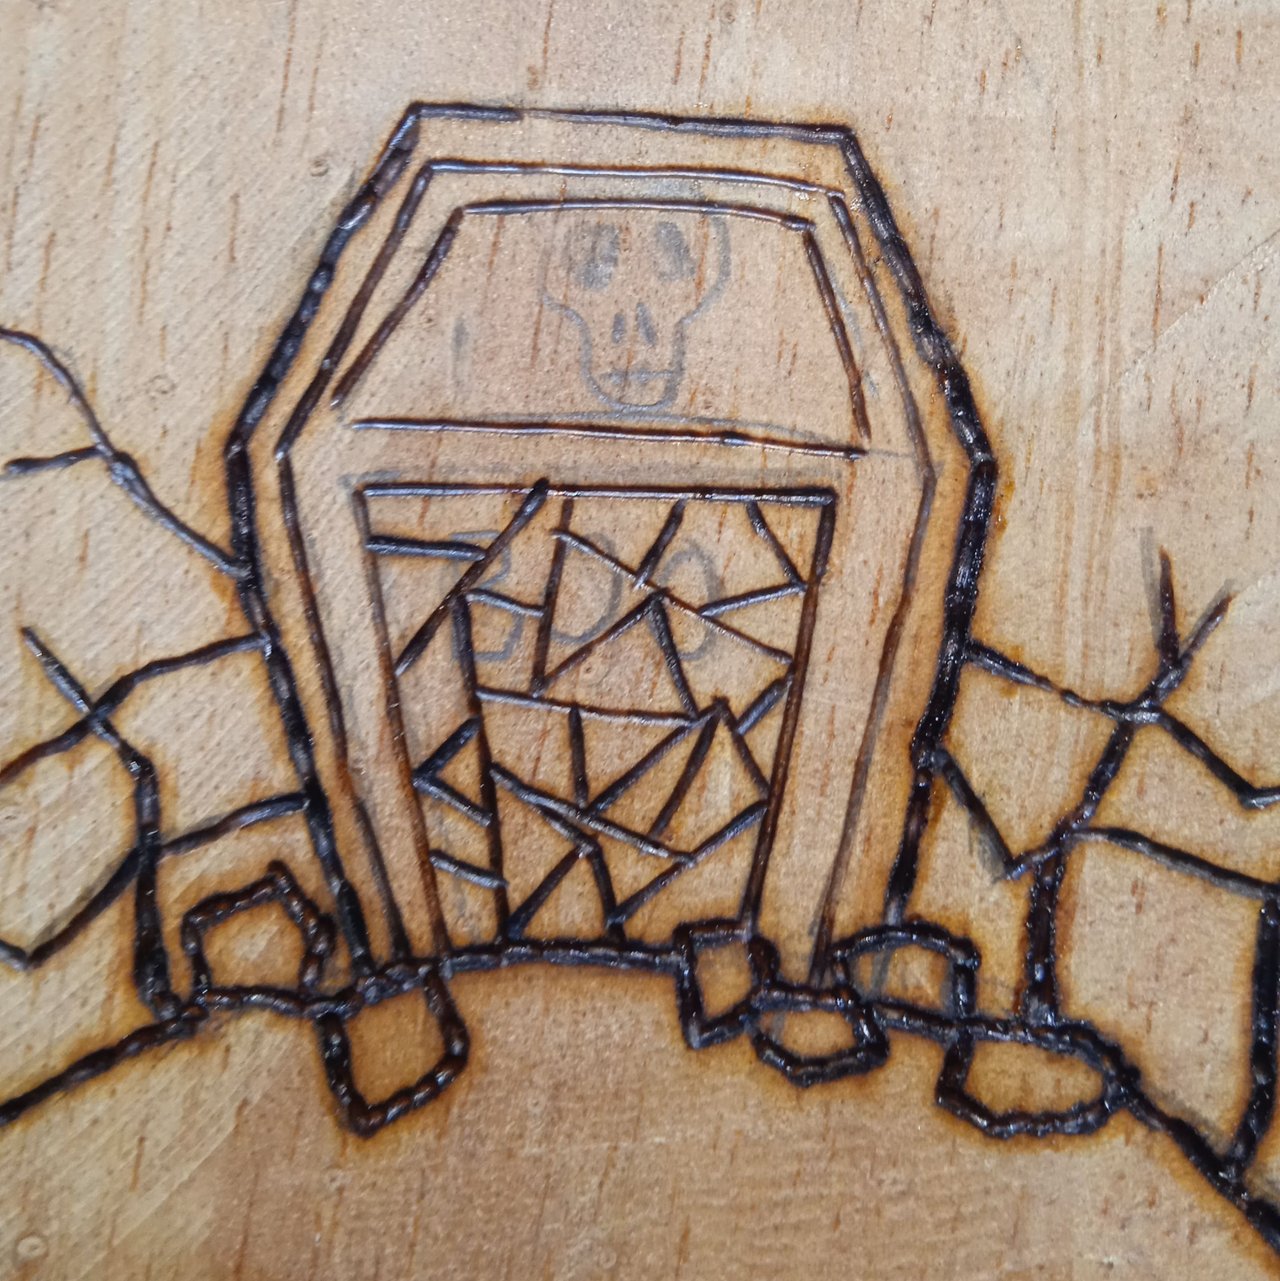
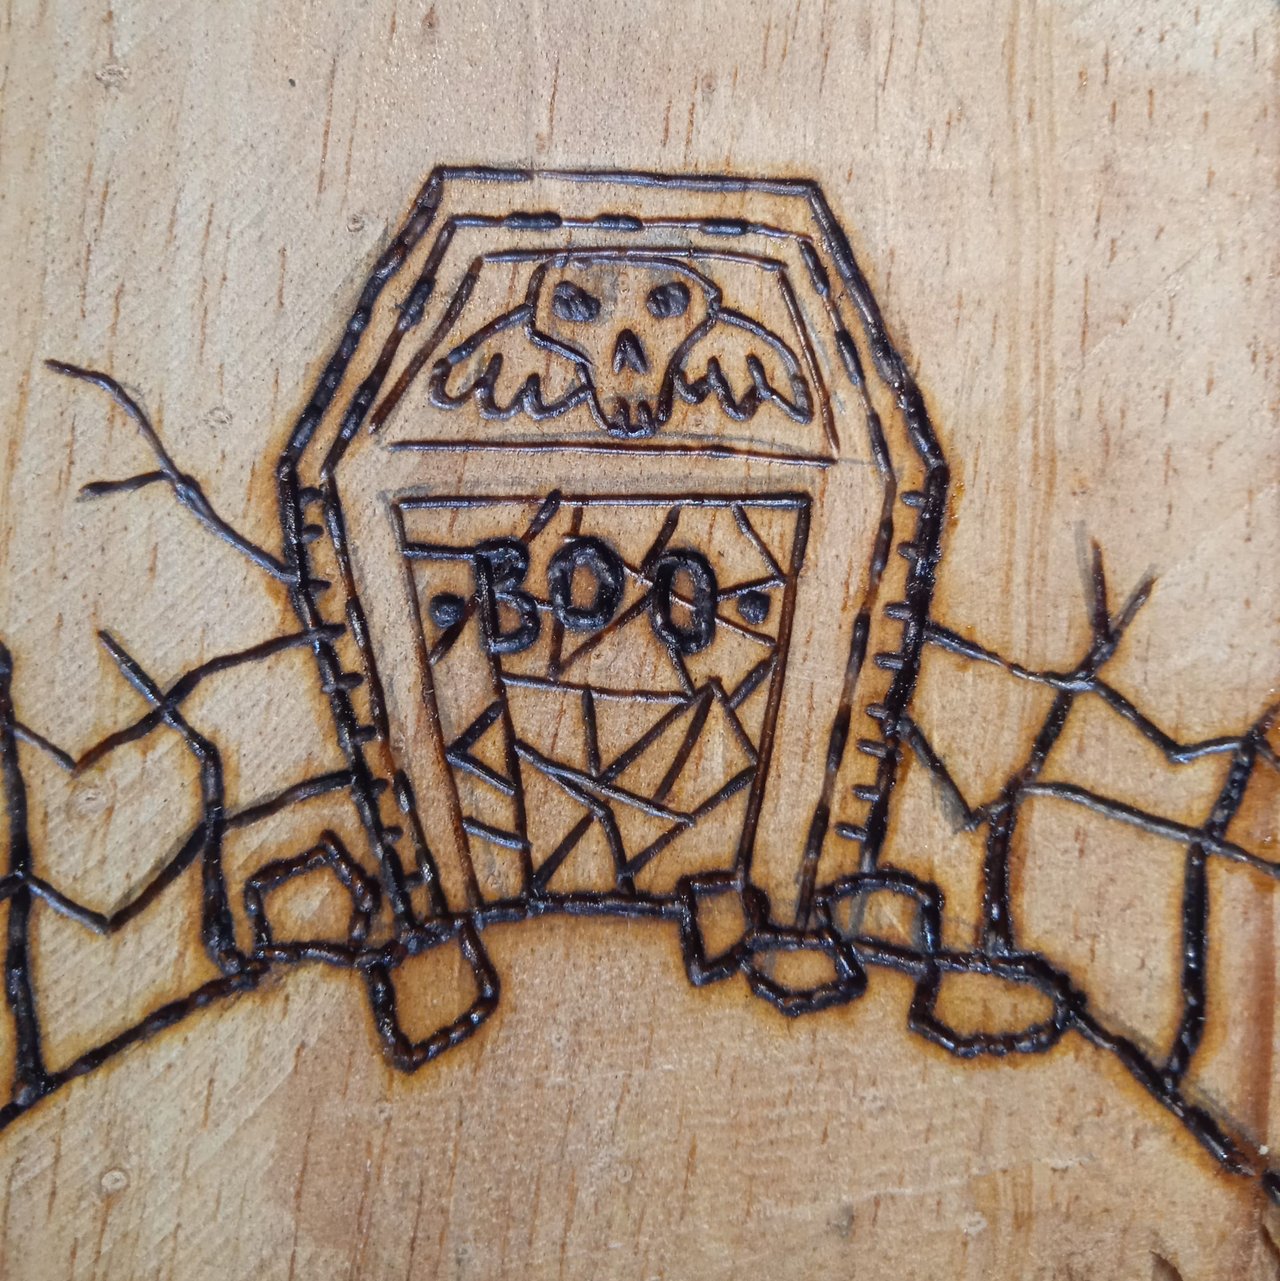
I also make these waves in the ground and I must tell you that they are not so easy to make. 😅 Some I do them slowly and it shows in the way the wood is burned, others I do them in one stroke and they look less shaky.
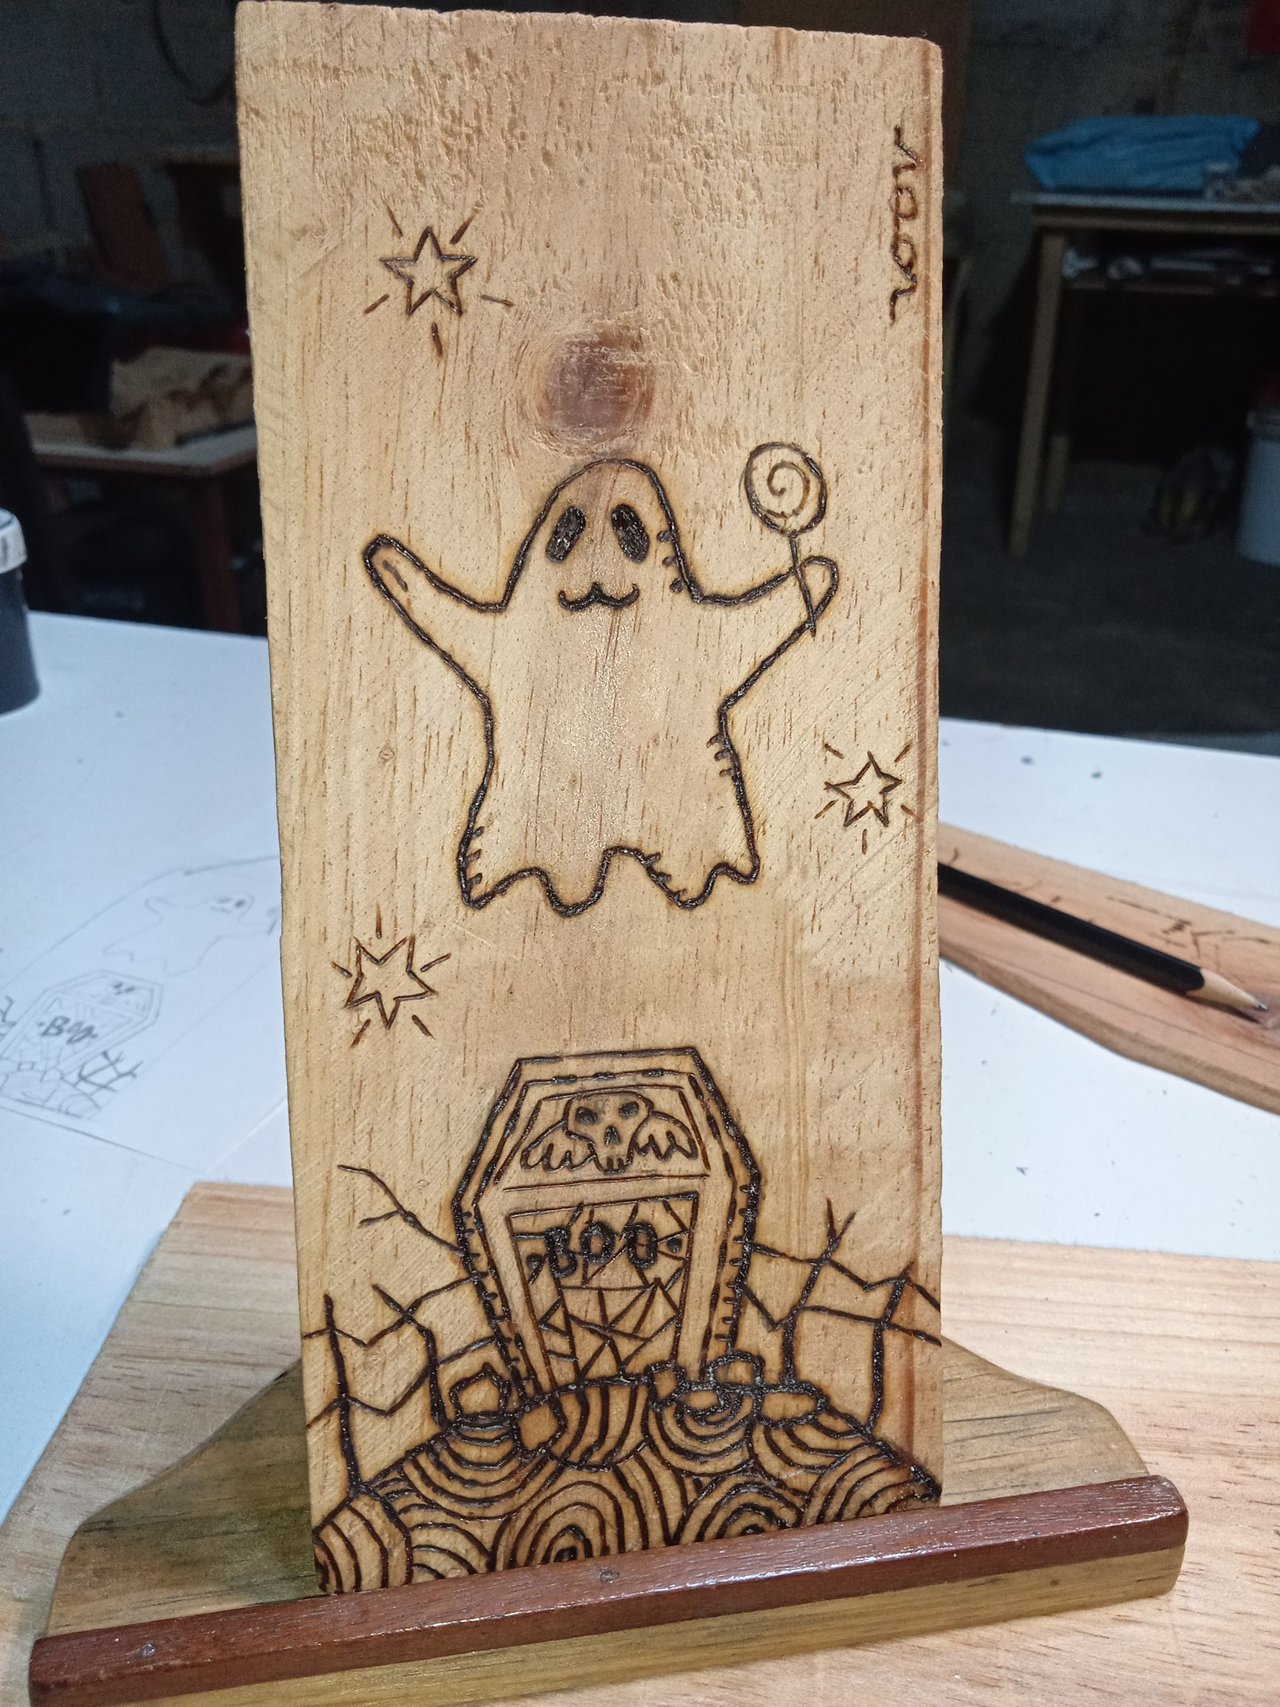
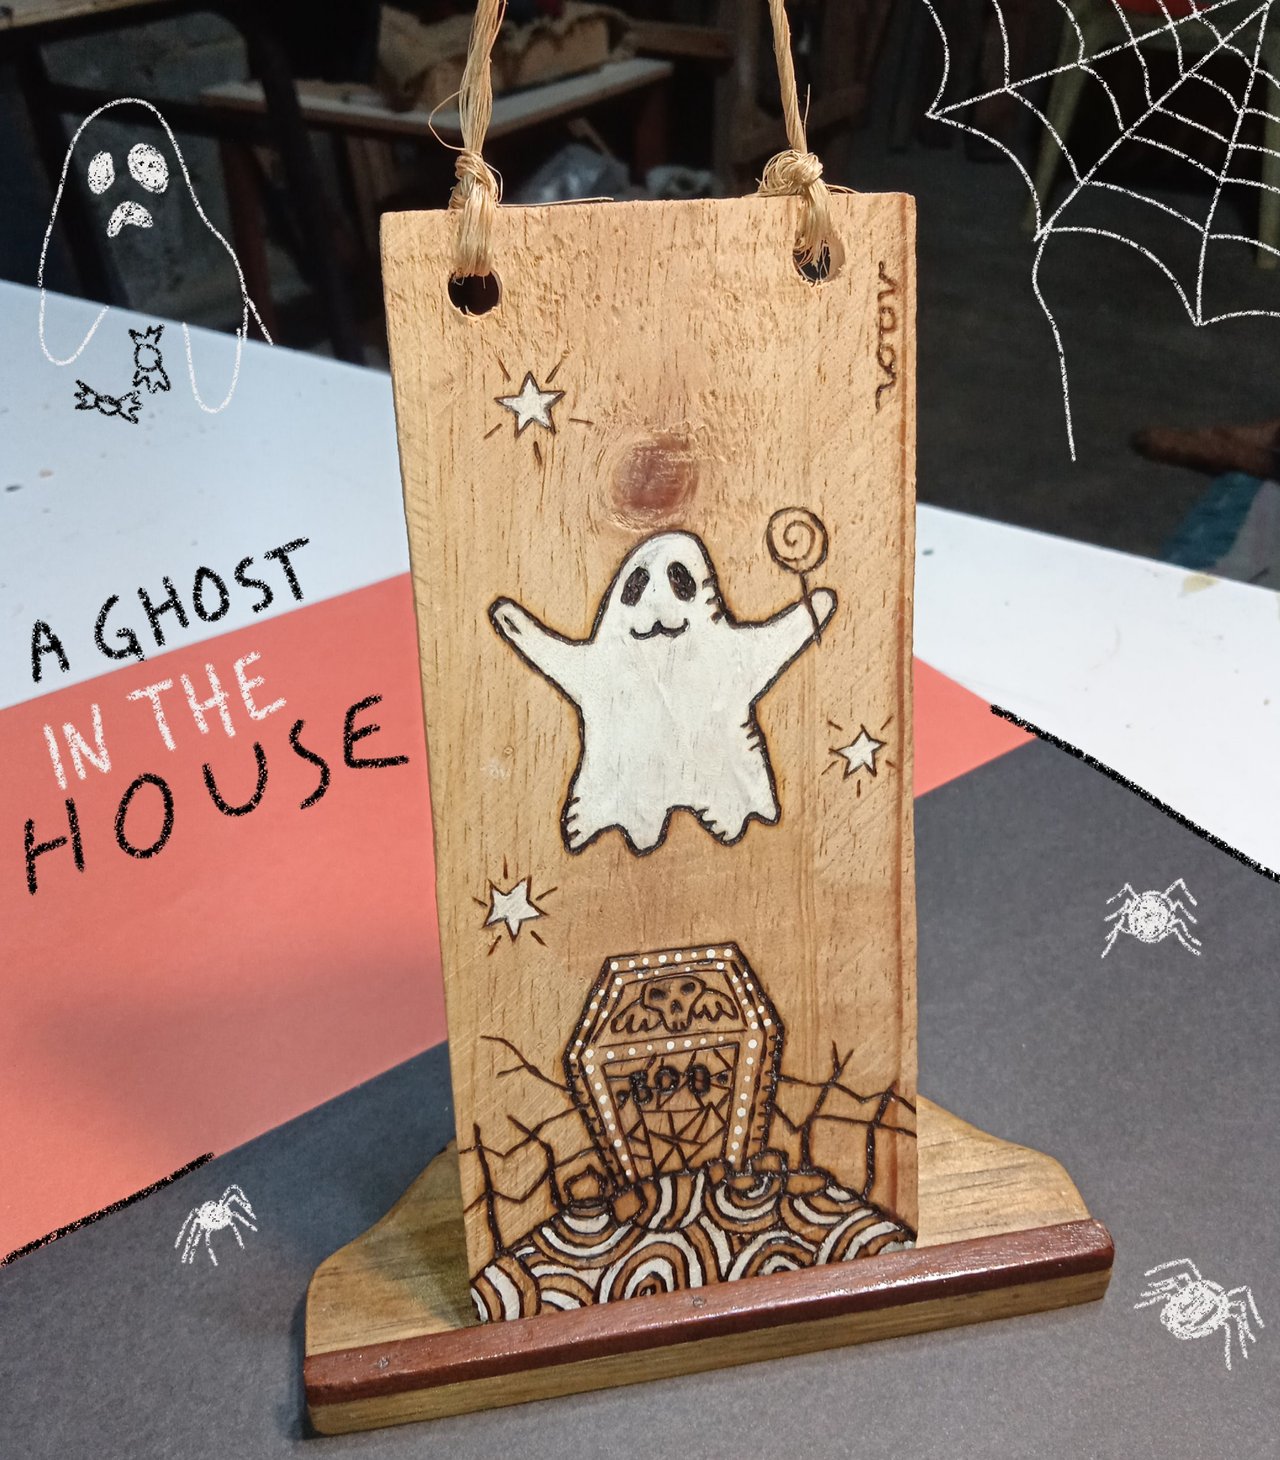
I review some stars that light up the night and our mysterious ghost with a sweet lollipop.
Step 4:
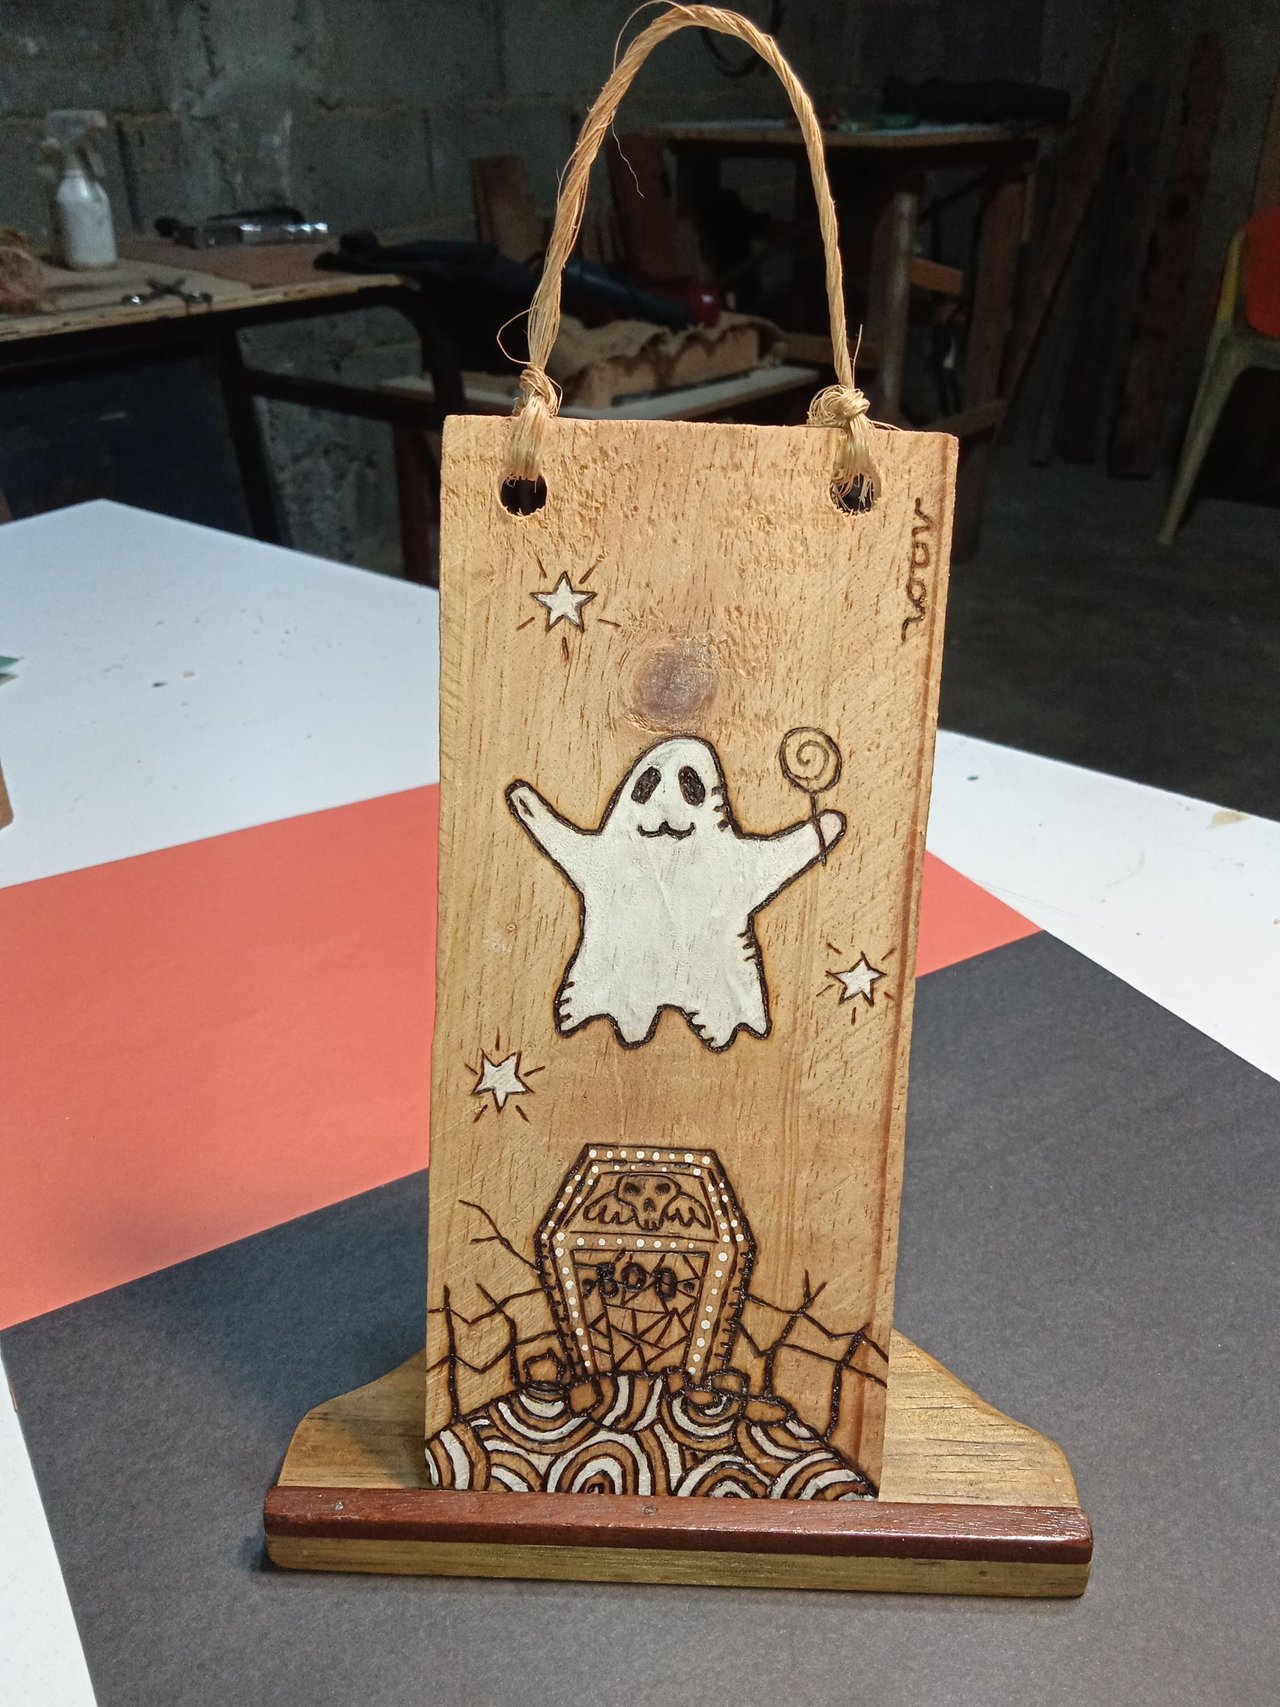
With white paint I paint the stars and other details, I like the background natural like this to make it look more rustic and homey. 🤭👻
And with the help of a drill the holes are made where I will pass the rope to hang it on the wall. Surely at night the gluttonous ghost will go for a walk around the house, but I don't think he will find sweets, for this time he will only find vegetables. 🤭
A ghost in the house 👻
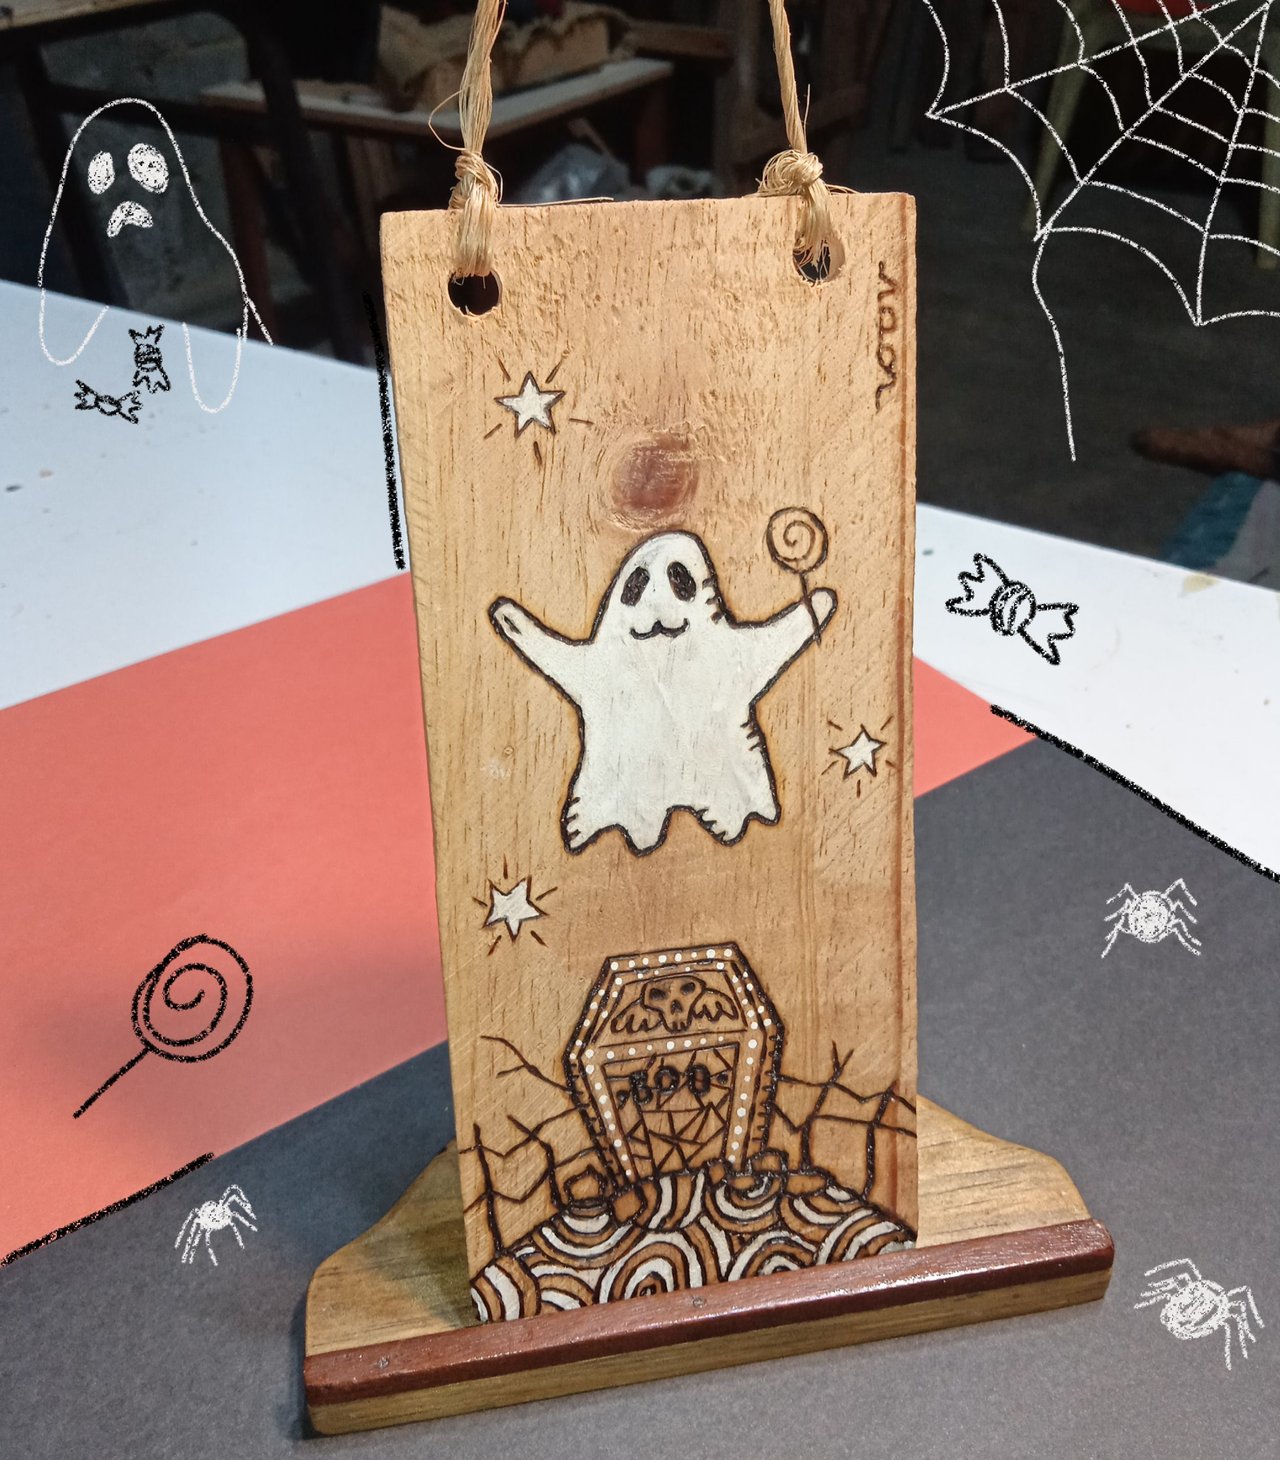
This is my entry for the DIYHub October Contest: Halloween Special 🎃 I hope you like it, as you can see making decorations for the house is easy and can be done with almost any material, you just have to get to work.
See you in another post, keep creating! 🐝✌🏼
Credits:
- Photo edited in IbisPaint X.
- Translated at DeepL.
¡Saludos a todos mis compañeros de DIYHub! Espero que disfrutaran la noche de Halloween viendo películas y atraparan por lo menos un fantasmita. ✌🏼
Palomitas de maíz, chocolate y una película de terror, suenan como un buen plan 👻✨ hasta que llega la hora de los fantasmas y los sustos. 😱
Yo pasé el 31 de octubre haciendo lo que me gusta y no hubo avistamiento de actividad paranormal, pero unas horas más tarde todo cambió...
Ese día me puse manos a la obra para crear esta tablilla pirograbada y al llegar las 12 de la noche atrapé a un fantasma glotón mientras finalizaba mi creación. Él se comía una paleta y me decía: ¡también quiero comer un chocolate y si tú no quieres, entonces me como dos! 😱
Bueno, les cuento sobre el proceso; en el taller mi esposo siempre hay recortes de madera de muchos tamaños, escogí uno adecuado para lo que tenía en mente y me puse a trabajar haciendo uso de un pirografo, este tiene muchos años, pero yo no lo he usado tanto, quien tiene más experiencia es mi esposo.
Materiales:
- Tabla de madera (19.5cm x 8cm).
- Pincel.
- Pintura blanca.
- Pirografo.
- Cuerda.
Paso 1:
Hice este boceto alusivo a la tumba de Jack Skellington de la película "El extraño mundo de Jack", ideal para ver en Halloween y Navidad.
Después volví a dibujar el diseño en la tabla con un lápiz de grafito.
Paso 2:
Primero voy a hacer los contornos de la tumba y el fantasma, para luego avanzar con el relleno, es decir, todos los detalles del suelo.
Paso 3:
Hago unos pocos detalles en la tumba, para que no se vean tan profundas las líneas: bajo la intensidad de la corriente, así calienta menos la punta del pirografo y me permite hacer líneas más delgadas.
También hago estas ondas en la tierra y debo decirles que no son tan fáciles de hacer. 😅 Unas las hago pausadamente y se nota en la manera como es quemada la madera, otras las hago en un solo trazo y se ven menos temblorosas.
Repaso unas estrellas que alumbran la noche y a nuestro misterioso fantasma con una dulce paleta.
Paso 4:
Con la pintura blanca pinto las estrellas y otros detalles, el fondo me gusta así natural para que se vea más rústico y hogareño. 🤭👻
Y con ayuda de un taladro se hacen los orificios por donde pasaré la cuerda para colgarlo en la pared. Seguramente en la noche saldrá a pasear el fantasma glotón por la casa, pero no creo que encuentre dulces, por esta vez solo encontrará vegetales. 🤭
Un fantasma en casa 👻
Esta es mi participación para el DIYHub October Contest: Halloween Special 🎃 Espero que les guste, como pueden ver hacer decoraciones para la casa es fácil y se pueden hacer con casi cualquier material, solo hay que poner manos a la obra.
¡Nos vemos en otro post, a seguir creando! 🐝✌🏼
Créditos:
- Foto editada en IbisPaint X.
- Traducido en DeepL.