Project Overview
Many people are aware of the infamous railgun, yet very few have ever built one or know how they work. In this blog I will showcase the 4kJ railgun that I constructed for fun. If you are not interested in the physics, skip the Method of Operation section.
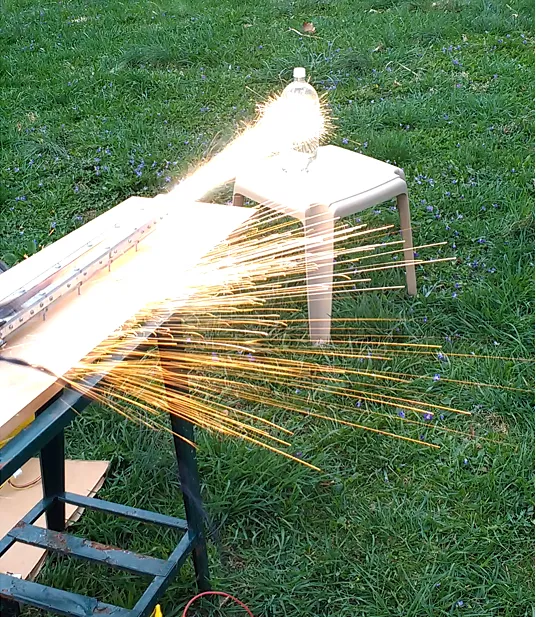
Figure 1. Initial test firing of the railgun at 30 FPS
Method of operation
A railgun works thanks to a few electric and magnetic effects. First off, it is important to understand that whenever an electric current flows through a wire, a magnetic field is created around the wire. This field is circular and forms concentric rings around the wire. The field strength is dependent on the current flowing through the wire as well as how far away you are from the wire. This effect is known as Ampère's circuital law and is the main driving force in most electromagnetic devices. In fact, you can very easily demonstrate this effect by wrapping a coil of wire around a nail and powering it via a small battery(electromagnet)! This effect plays a key role in generating the force needed to propel a projectile.
The second important part to having a functioning railgun is the fact that magnetic field lines cannot cross each other. Although magnetic fields are actually vector fields and are much more complex than simple lines, we can model them as potential lines for our case. Think about what happens when you try and push the "North" sides of two different magnets together. You can feel the repulsion created by the magnetic field lines being pushed closer and closer together. Since they can not cross each other, they are pushed into a smaller and smaller area, effectively creating what is akin to a compressed spring. When you let go of the magnets, they then quickly push themselves apart. It is this force that propels the projectile in a railgun.
So now you may be wondering how do these two things factor into each other? Are there magnets in railguns? Well to answer these questions, we will take a look at how simple railguns are designed. For the most basic railgun, all that is required for operation is conducting rails, a conducting projectile, and a hell of a lot of power. The two conducting rails, which can be seen in Figure 2 below, are separated and are placed parallel to each other.
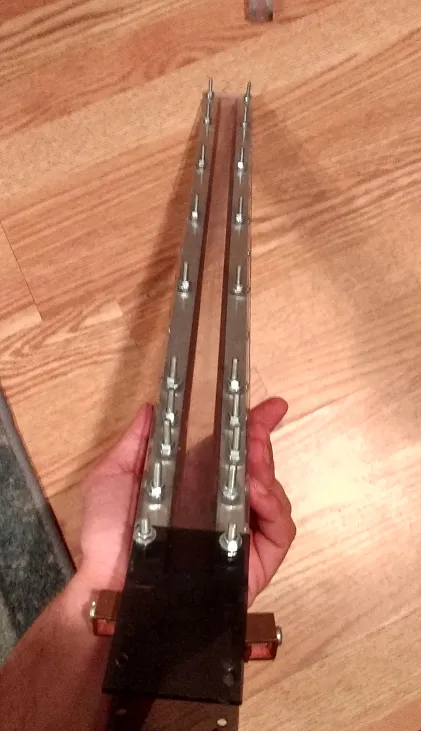
Figure 2. Copper rails with an Aluminum housing and polycarbonate structure.
Placing the rails parallel to each other will allow current to flow up one side and then back down the other when a projectile passes through the center. The projectile in the center is truly key to how the gun operates. Without the projectile passing through the center, there is no current flow and therefore, no magnetic field. However, when a projectile is injected between the rails, it acts as an electrical short, allowing vast amounts of current to flow through it. This large current flows up the rail and generates a strong magnetic field around the rails. This field is fairly uniform all the way up until the current hits the projectile then bam! The electric current makes a sudden right turn and flows through the projectile. All of the sudden you have a 90 degree change in the magnetic field, such that it is actually pushing against the field created by the wire. It is this pushing force created by the magnetic fields that force the projectile down the barrel until it leaves the conductive rails. This is the basic method of how a general railgun works.
My design
My prototype follows the basic form of a railgun fairly well. I did add a layer of mild steel within the Aluminum housing to augment the magnetic field between the rails. I am not sure how well this actually worked, and I will need to perform more analysis to determine the effects.
The power supply for this beast is a 450 V 4kJ capacitor bank that I purchased the components for on Ebay. This is a very large amount of electrical energy, at very dangerous voltages. To put it in perspective, a 30-06 Rifle round has a muzzle energy of 4.035kJ. The electrical discharge energy is on par with a high caliber rile! Unfortunately, this does not mean our projectile energy will be this large. In fact, it is much much smaller due to the inefficiencies of the railgun. The straight electrical discharge is quite impressive however. Figure 3 shows the capacitor banks as well as some of the arc damage from when I discharge the capacitors for storage.
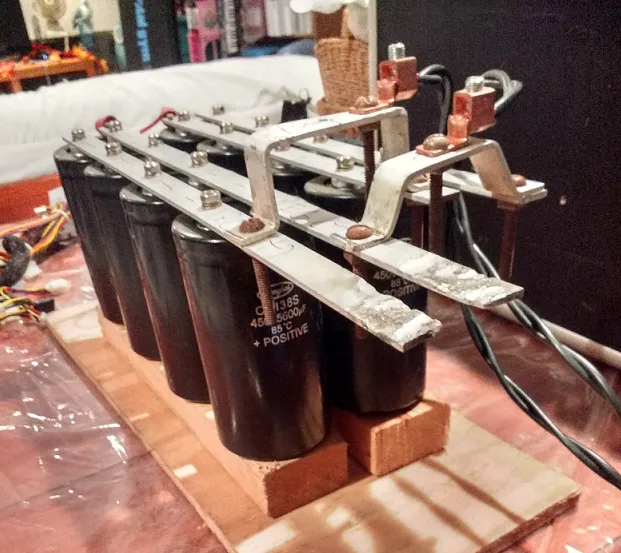
Figure 3. 450 Volt 44800 microFarad capacitor bank (440V operating).
The reason why I use capacitors is that they dump their stored electrical energy very fast. This allows for very high discharge currents and strong fields, which yields faster muzzle velocities. These capacitors are hooked up to either side of the railgun, and when the projectile enters the rails, it completes the circuit and gets pushed forward.
The projectile is injected at an initial velocity via a compressed air channel. The reason for doing this is that if you just place a static projectile between the rails, it will basically just short and explode with little forward motion. This damages the rails and isn't very interesting. By giving it a small initial velocity, the projectile has no chance of getting welded to the rails which would cause it to come to a grinding halt. I used a pilot actuated solenoid to dump a 500mL reservoir of 90psi air to give the projectile its initial kick. This solenoid was essentially the trigger for the system and is what I used to control the firing.
This covers the majority of my railgun project. This was only from my first round of testing and I have made revisions since then. When I get the time to do another test firing, I will document it and then write another article about the results.
Test Firings

Figure 4. Railgun in slow motion. Framerate was 120fps. The actual .gif was slowed down a bit to better visualize the firing.
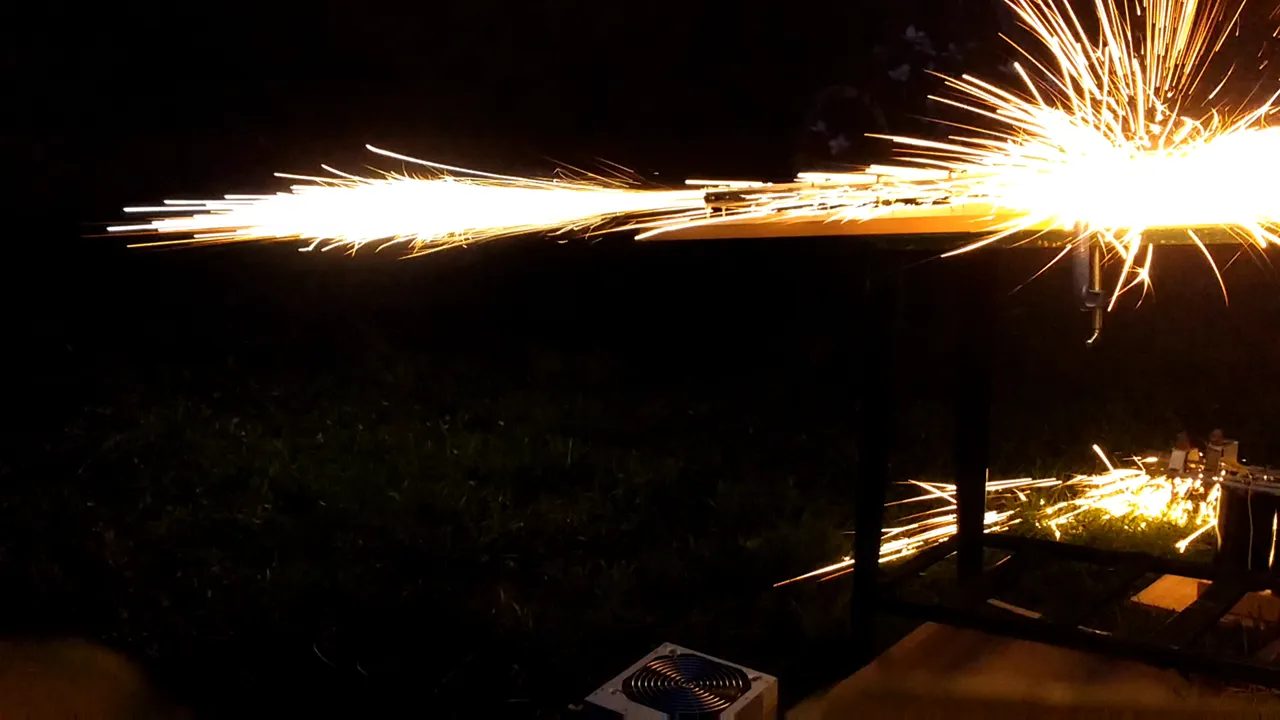
Figure 5. Railgun being fired in low light conditions. Was recorded at 60 fps.

Figure 6. Projectile entered one side of a full 2 liter bottle and was captured within.
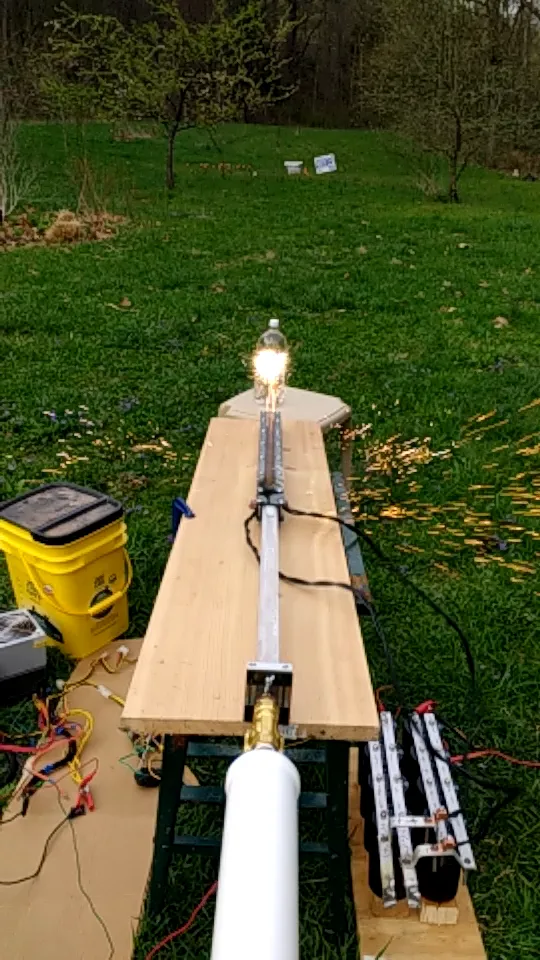
Figure 7. Capture of the slow motion impact. Plasma and molten metal ball is obscuring the actual impact.
I hope you guys enjoyed this read and are now informed about what a railgun is and how it works! If you have any questions or ways I can improve my articles, drop me a comment below!
SOURCES:
Bullet kinetic energies: https://qph.ec.quoracdn.net/main-qimg-adbdc1ef2c4f25b953d75f88db58a574-c