Today I will be talking about my first furnace run, what the results were, and changes I will be making to my next run. I apologize for the lack of good images from during the actual run. I was constantly running around to prepare the next ore load and monitor the furnace which left little time for me to take pictures. I am going to see if one of my friends will be a cameraman for me next time so I can get better quality and quantities of images to document the process more indepth.

Figure 1. Furnace operating at full power.
Prior to performing my first smelt attempt, I watched numerous videos and tried to gather as much information as I could on smelting techniques and how to do it. Very little information about how to know when the furnace was properly heated was available which made the most critical part of the smelt pure guesswork. The reason the temperature is critical is because it controls the amount of carbon in the iron as well as whether or not the iron melts (these two are also related). The trick to operating a bloomery is that the furnace never actually melts the iron. Instead, it essentially melts out the impurities in the ore leaving behind relatively low carbon iron which can be used to make tools and weapons. If the iron ends up melting, it will absorb much more carbon from the charcoal and form a very high carbon cast iron which is unforgeable. The heat of the furnace is controlled by many different factors, but the most critical one is air blast. Too much air and the furnace runs too hot and cast iron is produced. Too little and you get very small iron fragments or no iron at all!
After doing analysis on the two runs that I performed, I am fairly certain that I had way too much air input which melted the iron and left we with a silicon/iron alloy that was very high in carbon. In addition to too much air, I think the tuyere, the tube through which air is forced into the furnace, was not at a steep enough angle which caused the slag bowl/cast iron that formed on the bottom to cool prematurely.
For my next run, I will be decreasing the amount of air fed to the furnace and will also be angling the tuyere more towards the bottom of the furnace.
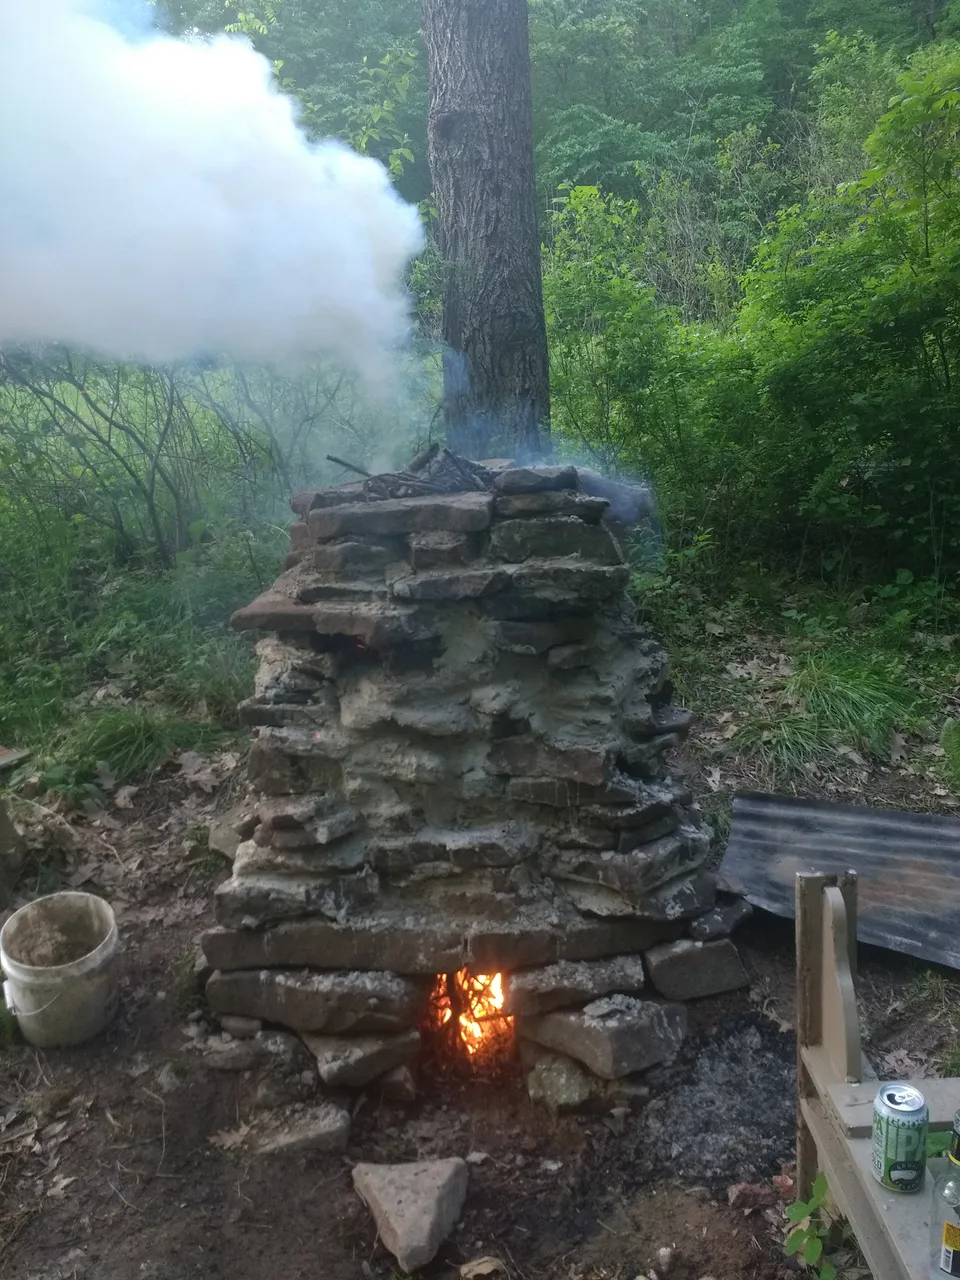
Figure 2. Drying the furnace out prior to the first run.
Once the furnace was completed, a natural draft fire was built inside of it to help dry out the insides and to season the rocks (Figure 2). Since it is primarily comprised of sandstone, this step is extremely important to prevent rocks from exploding and to minimize cracking. When this particular sandstone explodes, it is very violent and can injure you substantially. I have been cut up by hot exploding rock shards before and it is not fun!
The low heat (relatively speaking) of the draft fire allows moisture to be driven out slowly which mitigates the buildup of pressure that leads to explosions. Once this was complete, the furnace was ready for operation.
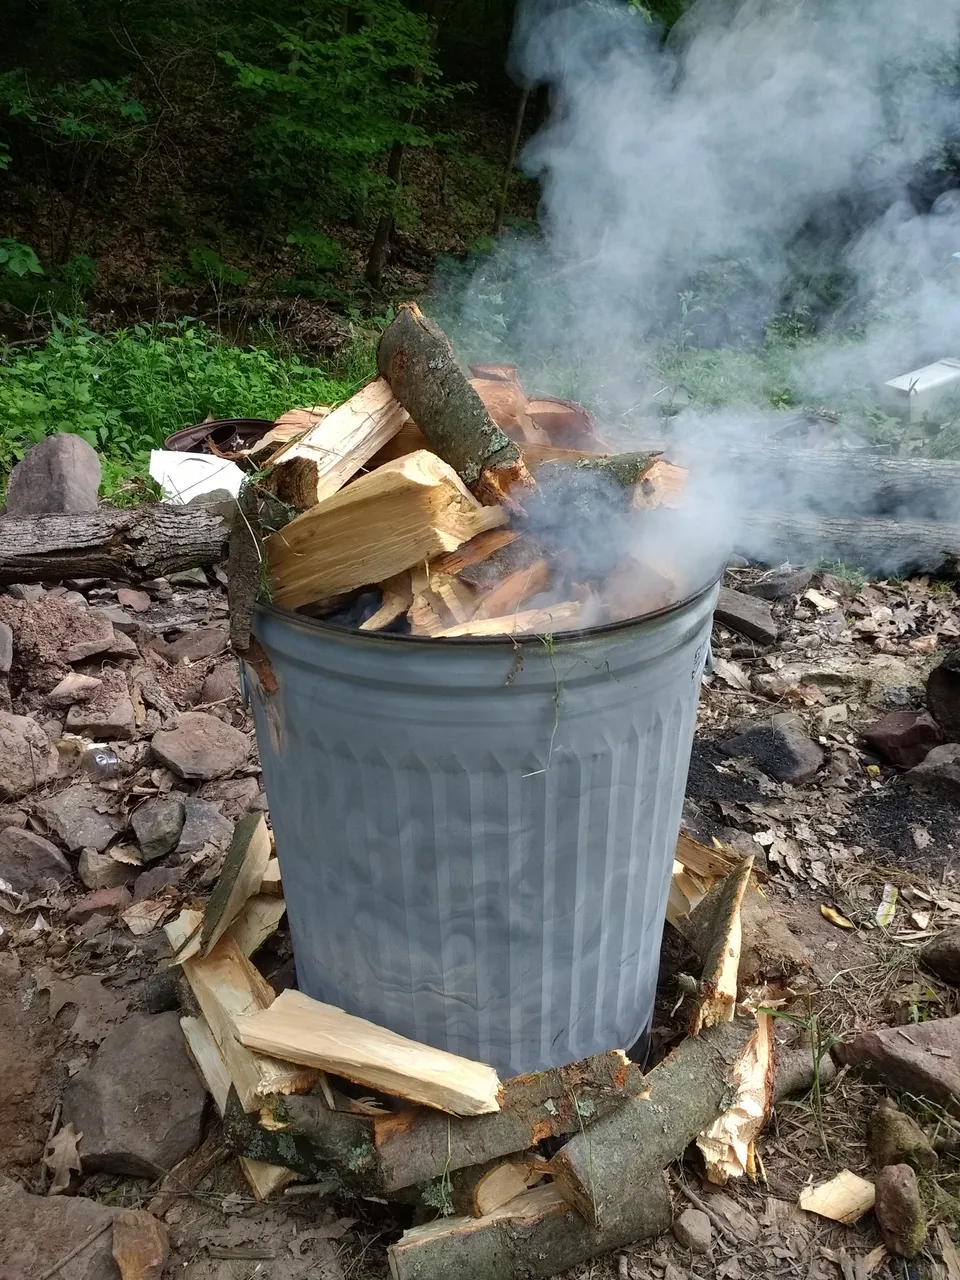
Figure 3. Making charcoal for use in the furnace.
Although the furnace was intended to be used with only wood, it was apparent early on that this would be too difficult to operate because there was no good way of measuring out how much wood needed to be used when ore was loaded. However, the furnace was still preheated using wood which made good use of the wood burning design!
Charcoal is the go-to fuel for iron smelting because it is free of impurities and burns very hot. Thankfully, it is extremely easy to make. My method of making charcoal is quite simple.
First, I cover the bottom of a metal trash can in wood. This is simply to protect the bottom of the can from damage since it will be more prone to rusting.
Second, I start a small fire on a piece of sheet metal outside the trashcan. Once this fire has mostly burned to coals, I simply dump it inside the trashcan.
Third, I keep adding wood until I fill the can just above the top. I repeat this process every time the fire burns its way to the top of the can and until the can is full of charcoal. Once it is full, I simply put the lid on and wait for it to cool down.
This process makes a large amount of smoke and is essentially just a large campfire that has its coals collected in a trash can. This process works very well and I can make a full can with little effort in about 6 hours. The two smelts that I have performed so far each used about 2 cans of charcoal each. In future smelts, I will be using at least 3, possibly 4. I think part of the reason that my smelts were unsuccessful was that I did not run them long enough because I ran out of charcoal!
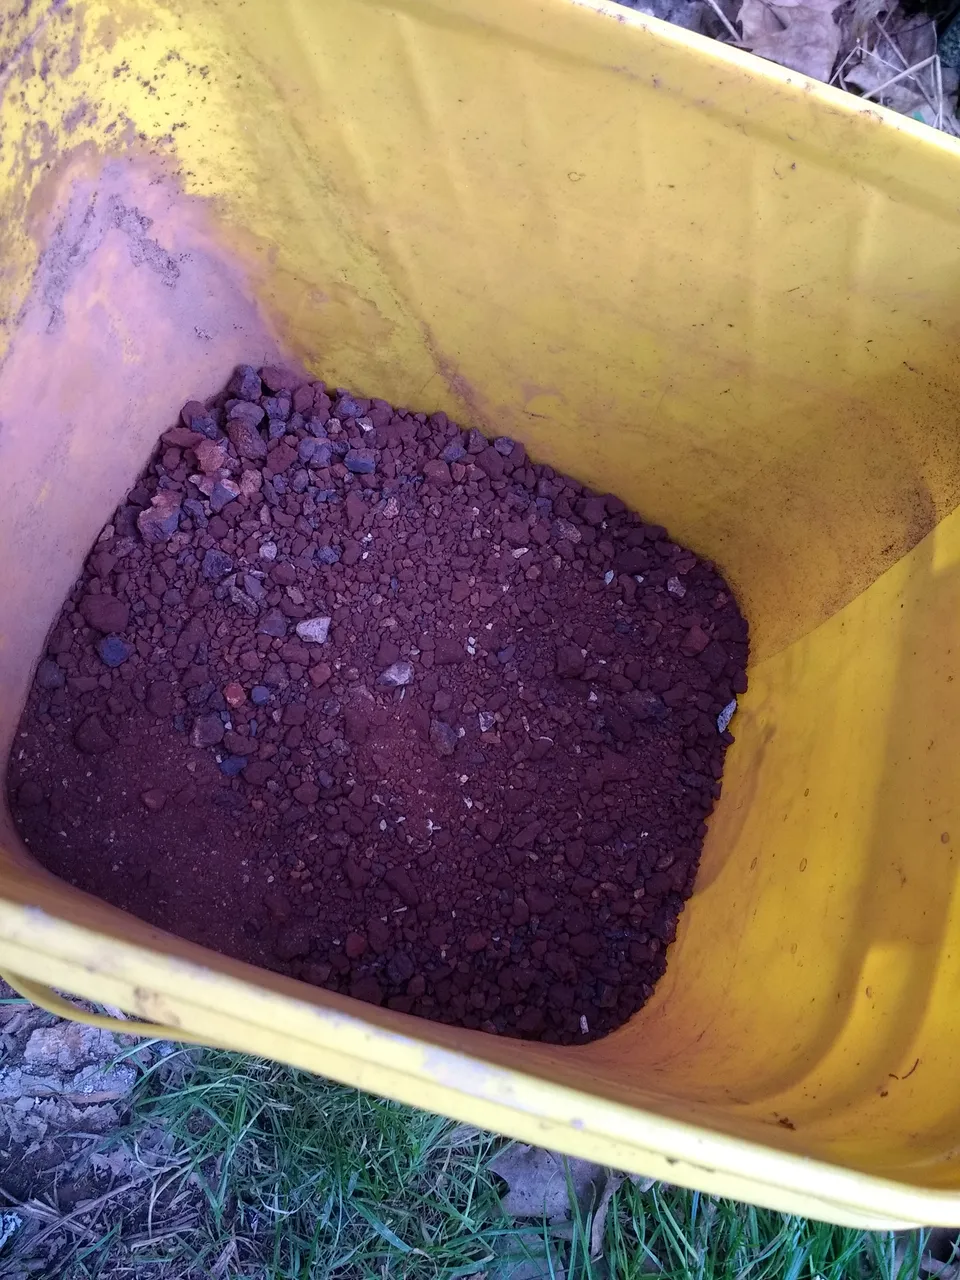
Figure 4. Crushed ore in a bucket.
In addition to making charcoal, the ore that had been previously roasted needed to be crushed to increase its surface area which allows for smoother smelting (Figure 4). There is not too much to say here other than I smacked a lot of rusty rocks with a hammer.
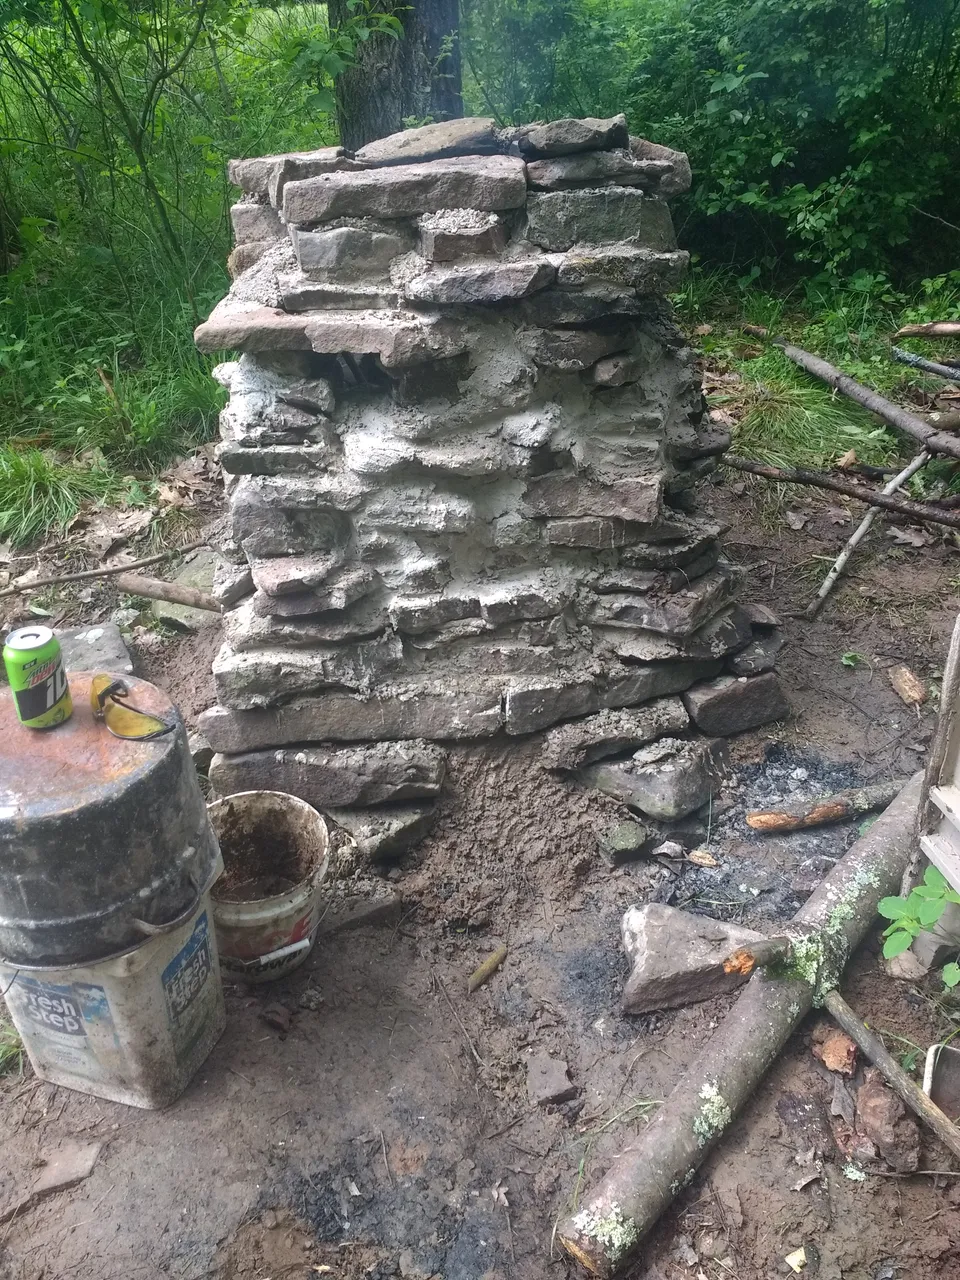
Figure 5. Sealing the access holes in the furnace.
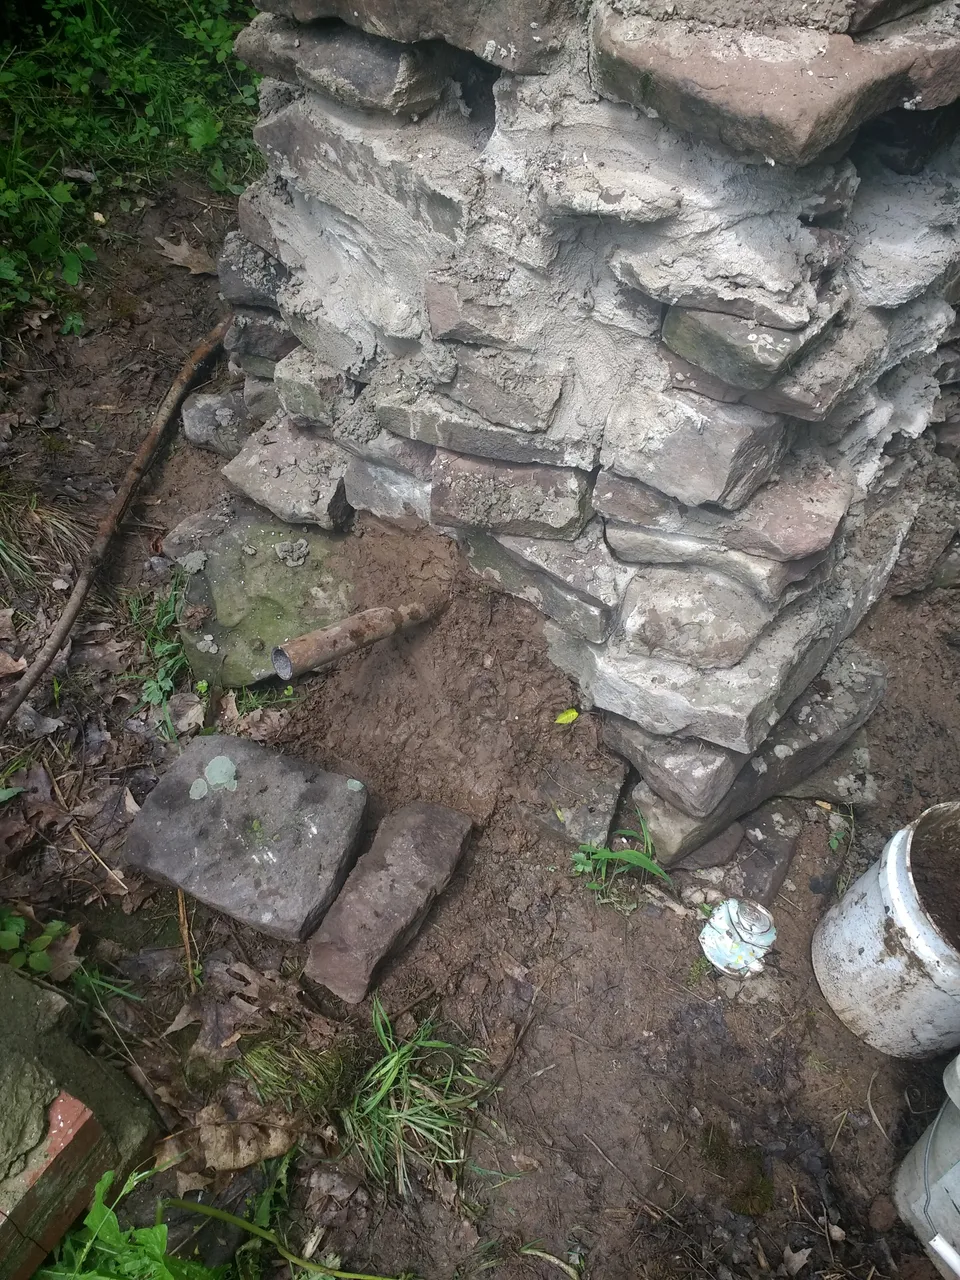
Figure 6. Side access hole with tuyere sticking out.
The actual smelting process was started by lighting a small fire inside of the furnace. Once this fire was creating a strong draft, large amounts of kindling was added to preheat the furnace. Kindling sized wood worked the best because it reduced to coals rapidly and burned very hot. Once the furnace was filled to the top with wood, the bottom access hole and side access hole were sealed off with rocks and mud (Figure 5). The side access hole had the tuyere in it which provided a small draft to keep the fire burning hot during the preheat (Figure 6).
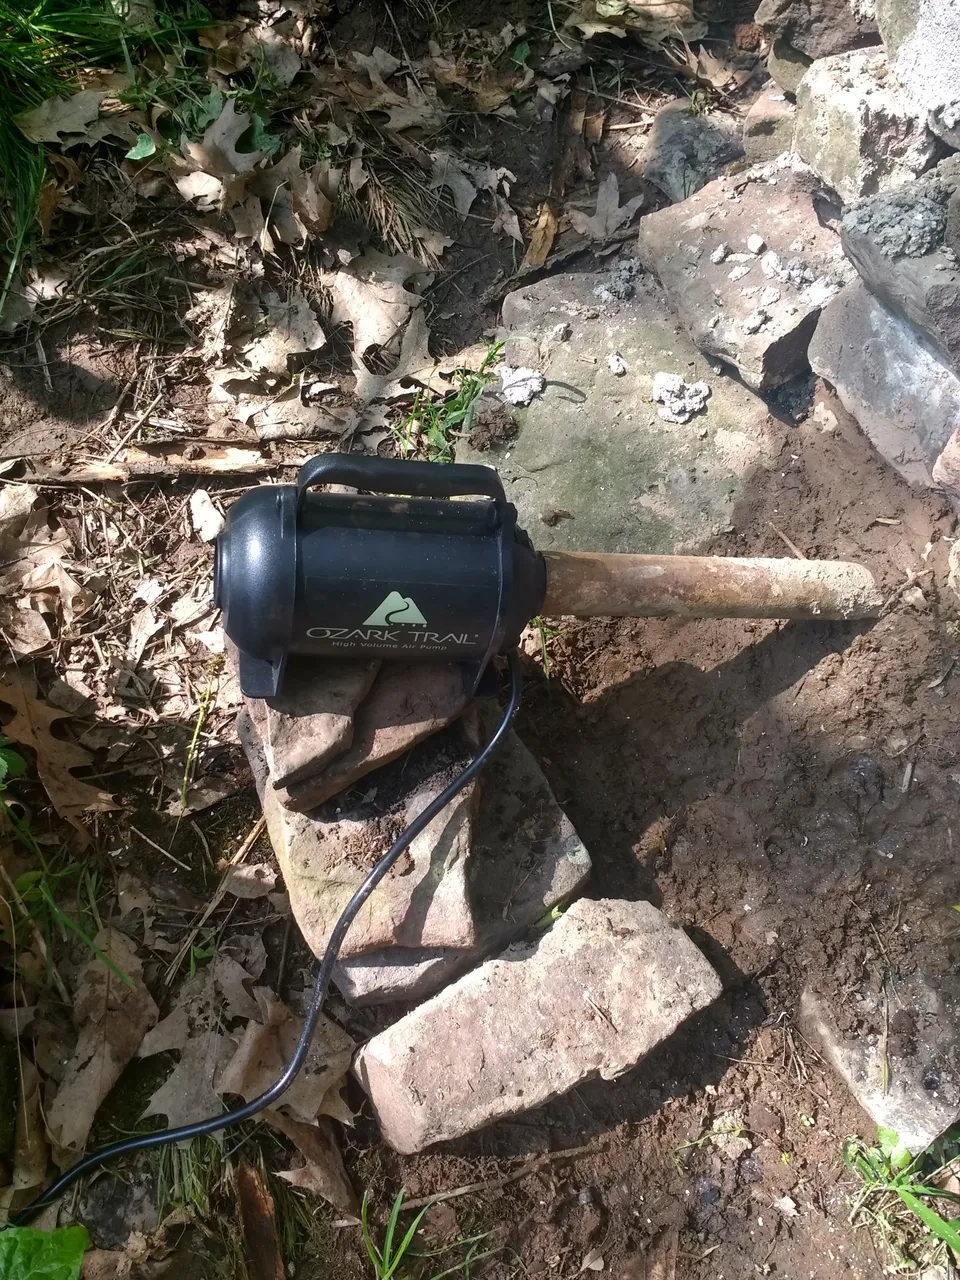
Figure 7. Modern "bellows" aligned to blast air through the tuyere into the furnace.
For my bellows, I choose to use a high volume air inflation unit that I found laying around in my garage. This air unit is nice because it does all the hard work that would normally go into manning a set of bellows. The downside to it is there is very little air control and it is basically all or nothing. As mentioned previously, it outputs too much air and will need to be toned down to maintain a proper furnace temperature. These were simply aligned with the tuyere and turned on to provide air once the furnace was adequately full of coals and wood.
The following series of figures show various parts of the furnace during operation.
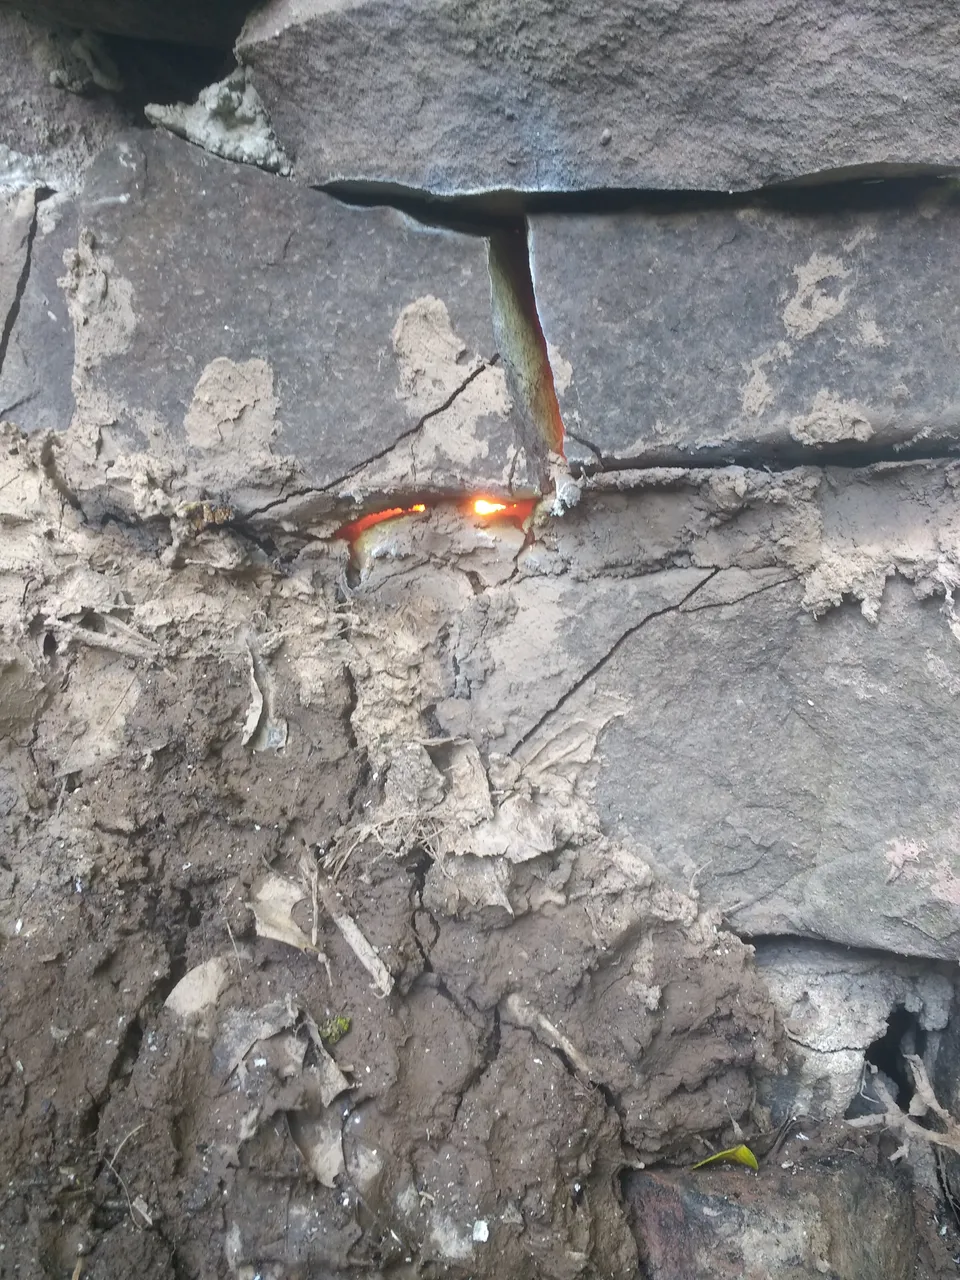
Figure 8. View inside the furnace through a few broken rocks.
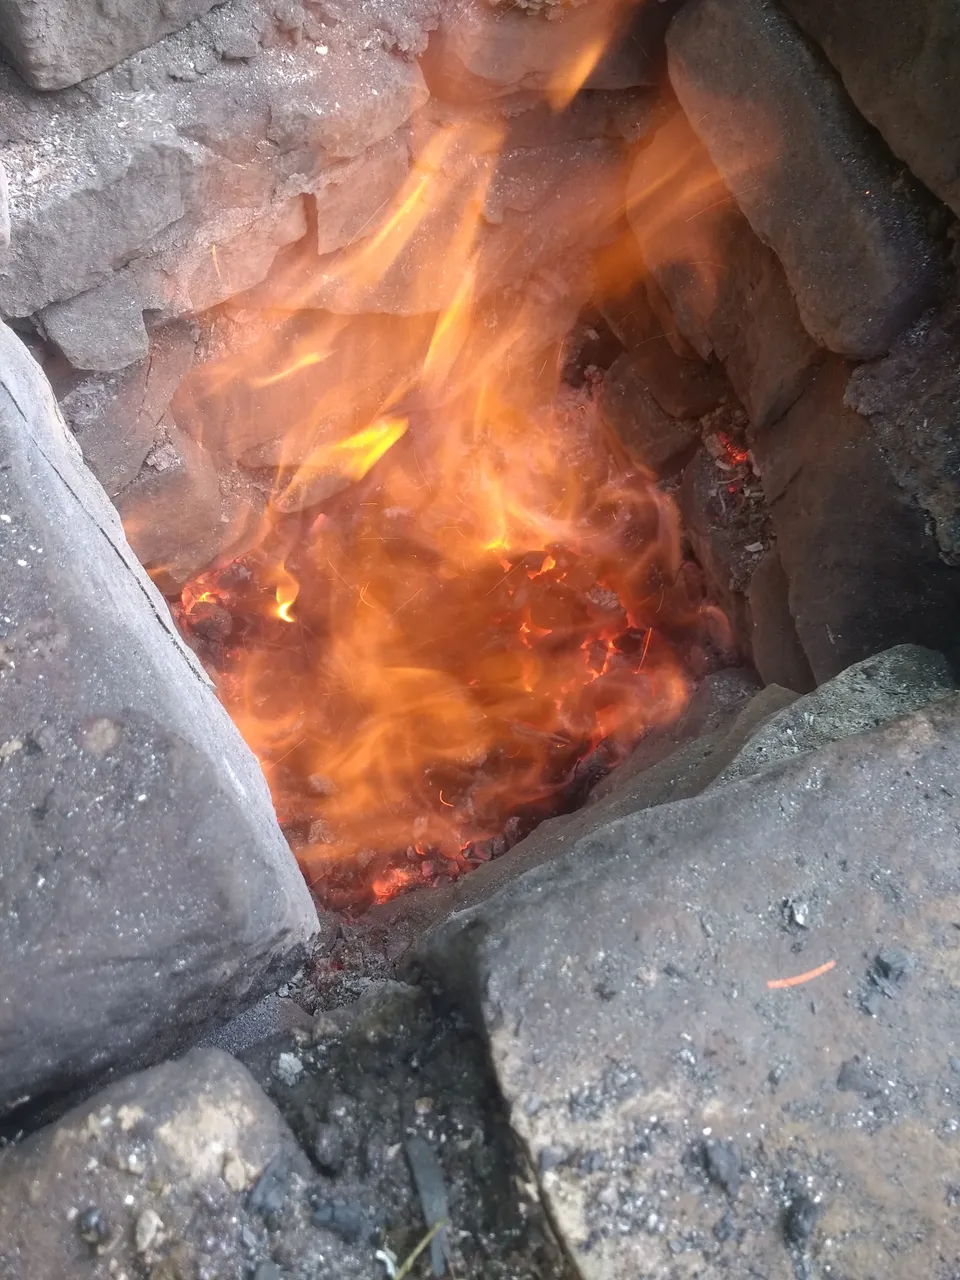
Figure 9. Top down view looking inside the furnace near the end of the smelting process.
After allowing the furnace to run for a few hours (and after running out of charcoal), I began to remove the main access point to the furnace to remove the smelted products. If a successful bloom has formed, the next step is to take it out while still white hot and carefully pound it together to consolidate all of the smelted iron particles. Without this step, the bloom will crumble and not much usable iron will be obtained.
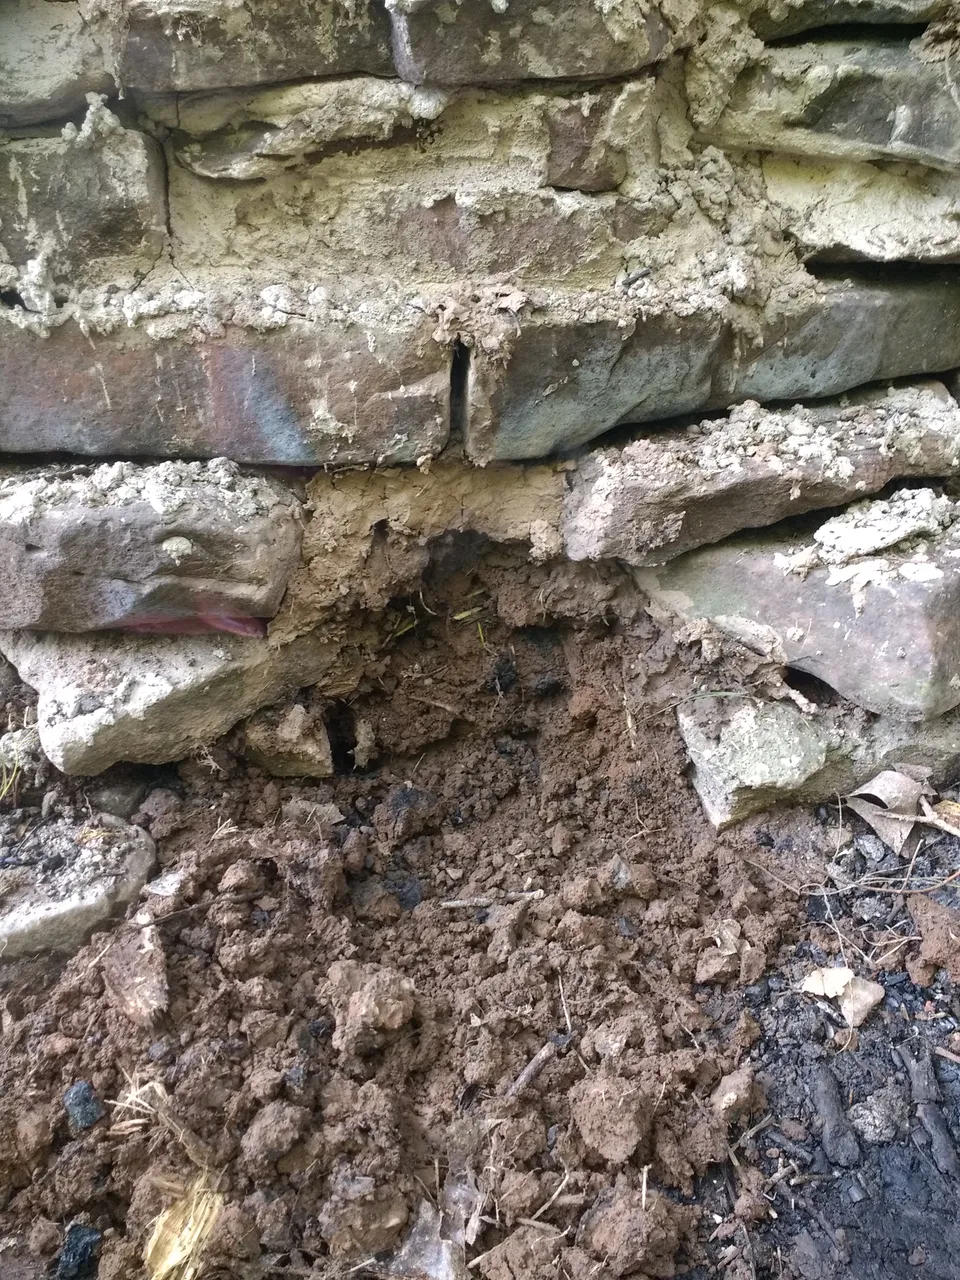
Figure 10. Removing the earthen doorway to remove the smelted end product from inside the furnace.
Removing the door unleashed a torrent of white hot coals and revealed a large chunk of slag with very small amounts of iron laced within. This end product was stuck to the walls of the furnace on all sides and had to be hammered out with a steel rod and lots of effort.

Figure 11. Inside of the furnace after removing the earthen door.
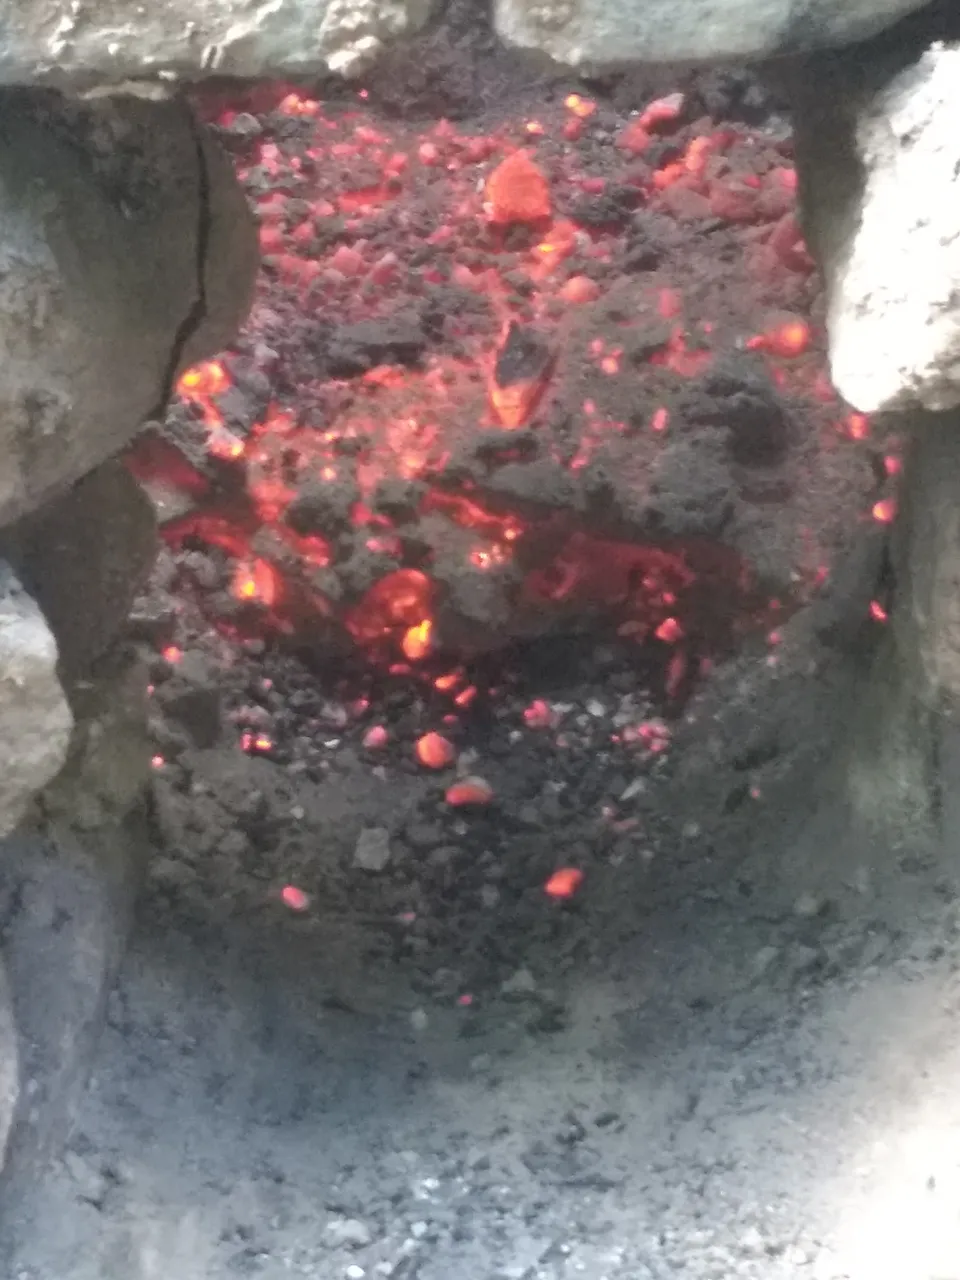
Figure 12. Slag bowl stuck to the inside of the furnace.
Unfortunately, the result of this smelt was a very nice looking slag bowl, very small amounts of iron, and what appears to be some metallic looking alloy (possibly ferrosilicon with a very high silicon content). This material crumbled broke similar to glass but also had a metallic luster and grains, something that glass and slag typically does not have.
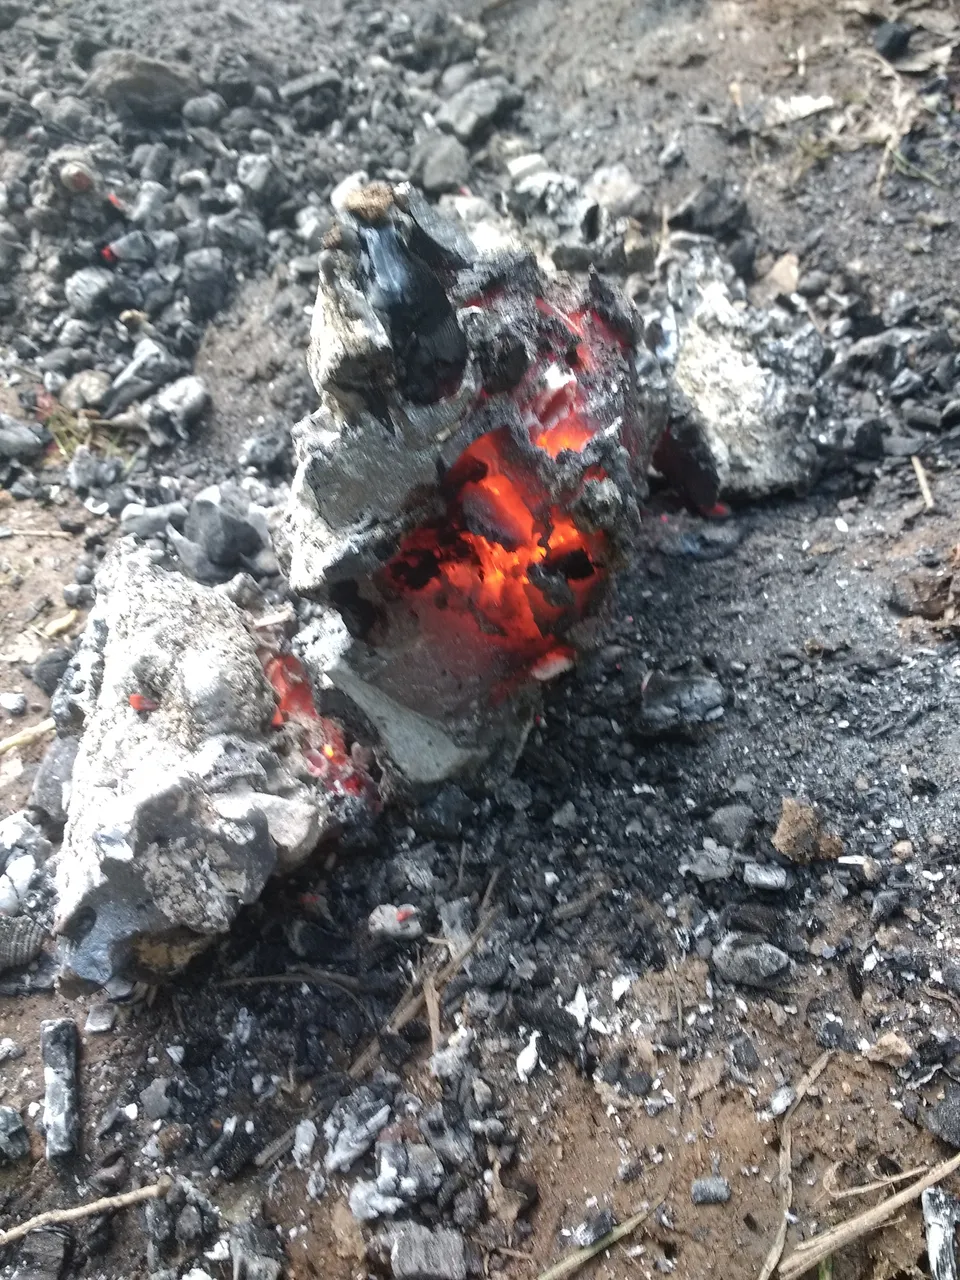
Figure 13. Chunk of smelt product shortly after being removed from the furnace.
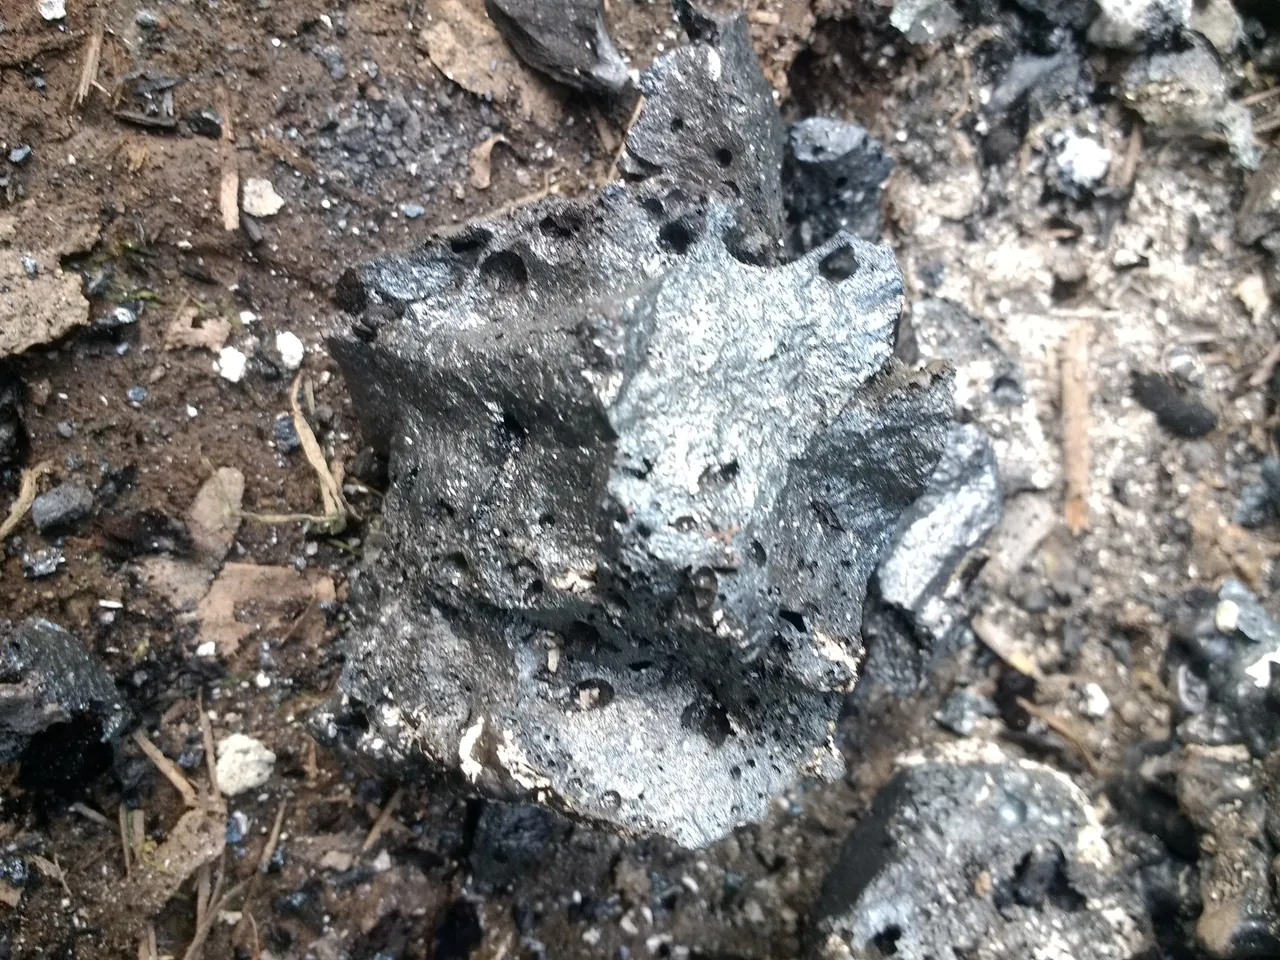
Figure 14. Metallic looking smelt byproduct.
The result of this smelt was not the iron bloom that I was hoping for, but it did yield insight on the process and some thing that went right and wrong. For starters, the rate of charging the furnace with charcoal and ore was fairly good although the amount of ore and flux in each charge needed to be increased. One of the biggest reasons for this result was that the airflow was too high and that the furnace was burning too hot. What I think happened was that iron was forming from the ore but was melting into pig iron. This pig iron would flow down through the charcoal and along the walls and react with the silicon rich rocks and either form and iron silicon alloy or iron silica compounds. This would then collect in the slag bowl at the bottom. Another error that I made, primarily in design, was that the tuyere was placed too high on the side of the furnace which meant that the slag bowl formed and cooled too high in the furnace. This was part of the reason why it was so difficult to remove from the furnace and I also think that the slag bowl was too cold to properly combine the iron particles into a more solid mass the way it typically does in a bloomery.
I am already restoring parts of the furnace because the extreme heat severely melted the inside rocks (the homemade refractory was okay still) and a very large crack formed on the one side of the furnace. For my next smelt, I will be moving the location of the tuyere from the side access port to the lower port so that the slag bowl forms much lower. In addition, I will be sealing up the side access port because it is more trouble than it's worth. I will also be adjusting the amount of airflow into the furnace as well as increase the amount of ore and flux that I add in each charge.
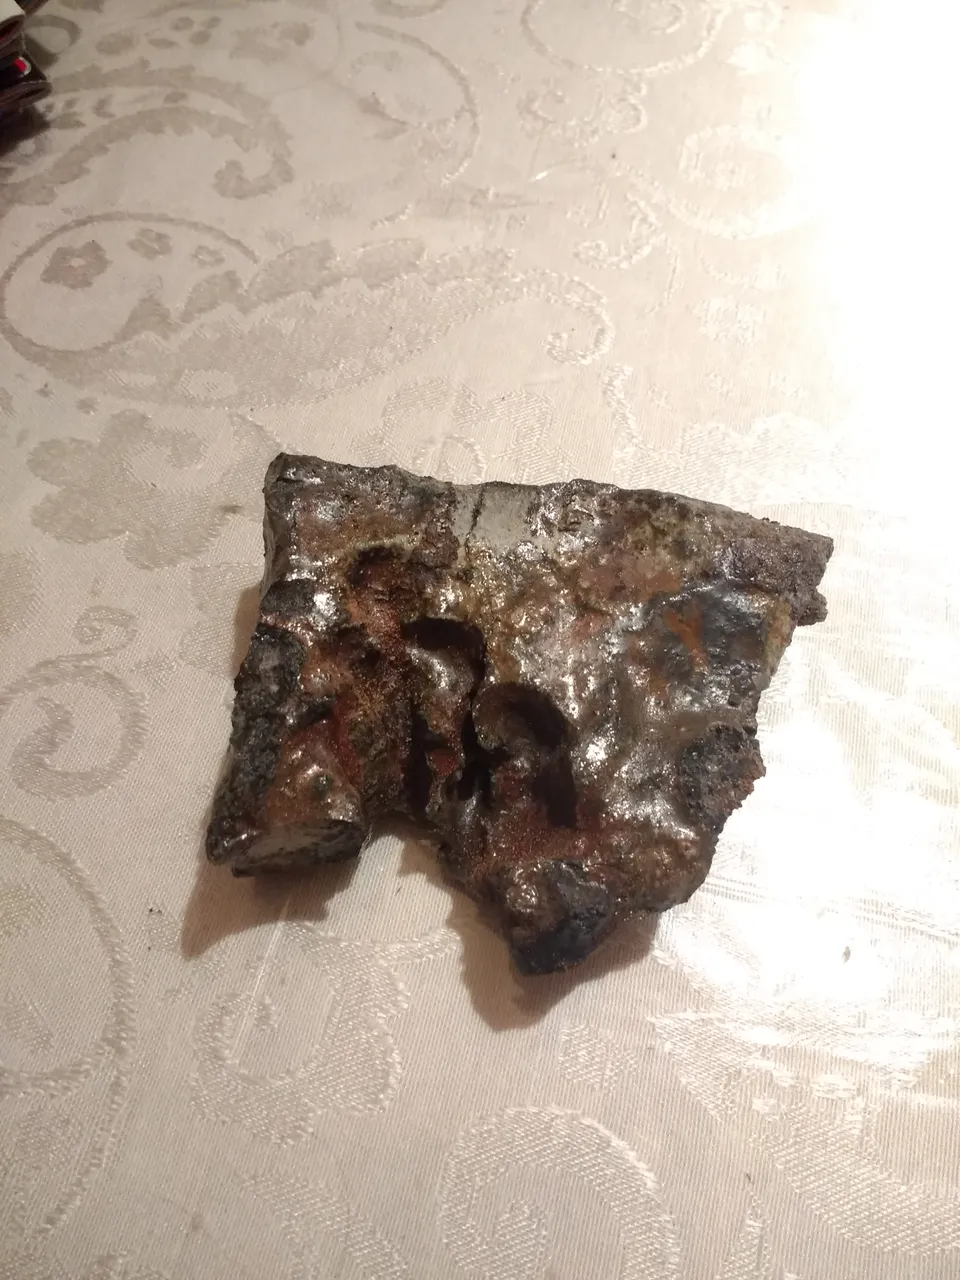
Figure 15. Rock from the inside of the furnace with melt pool erosion on it.