Hello everyone, today I bring you a practical and very functional drinking session for your pet and you take the trouble of giving your pets water at all times with this little invention, the water lasts a whole day. I explain step by step so that arm one I hope to explain myself well. Go ahead and make your own. I hope you like it.
- Materiales para la elaboración del Bebedero:
• Un tobo vacío
• Un pote vacío con su tapa
• Cinta métrica
• Un exacto
• Marcador
• Pistola de silicón
• Permatex para evitar fugas
• Un tornillo con tuerca y dos arandelas planas
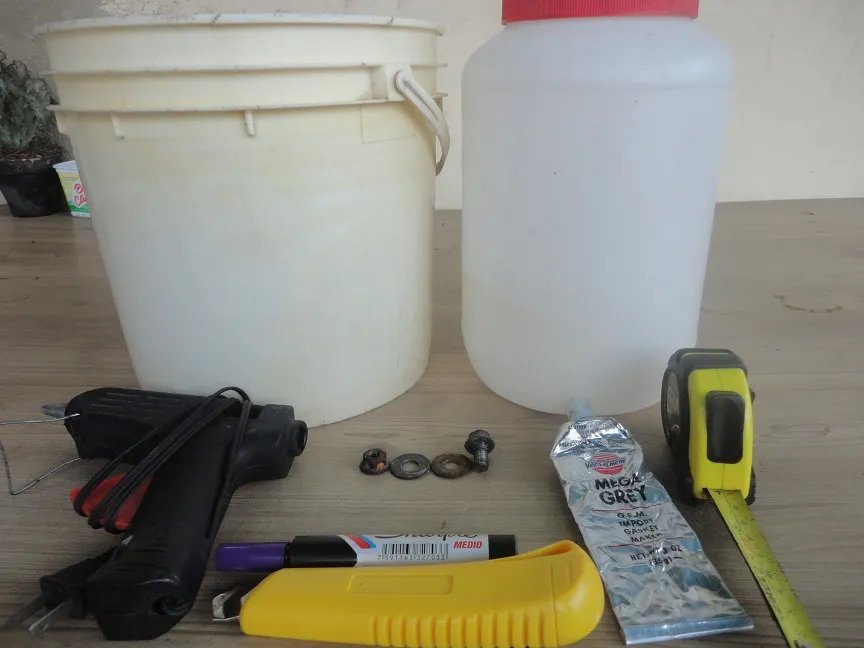
An empty slide
• An empty pot with its lid
•Measuring tape
• An exact
•Marker
•Silicone gun
• Permatex to prevent leaks
• One bolt with nut and two flat washers

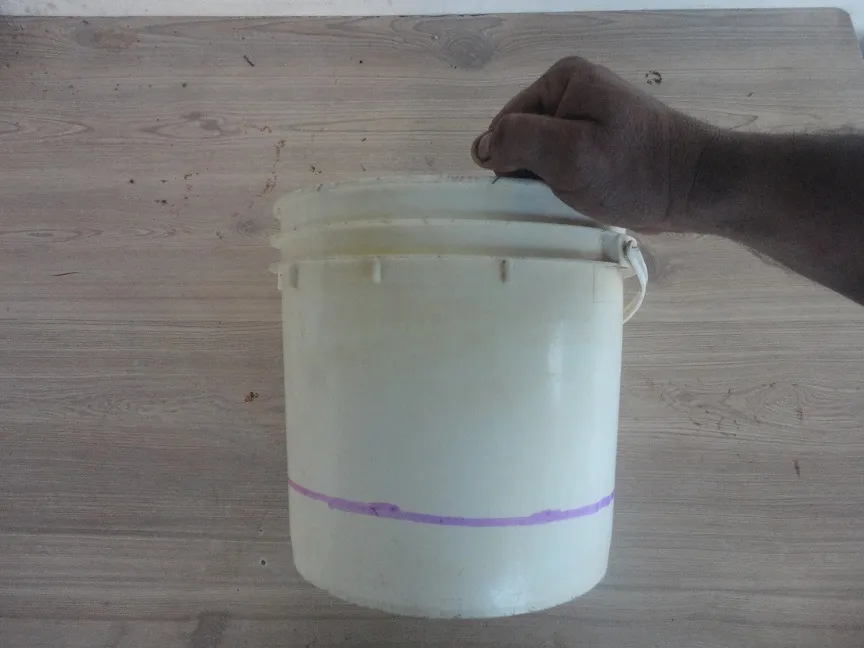
Primer paso a seguir utilizamos la cinta métrica para medir 2 pulgadas en el fondo del tobo mientras más marcas hagas más fácil puedes trazar la circunferencia.
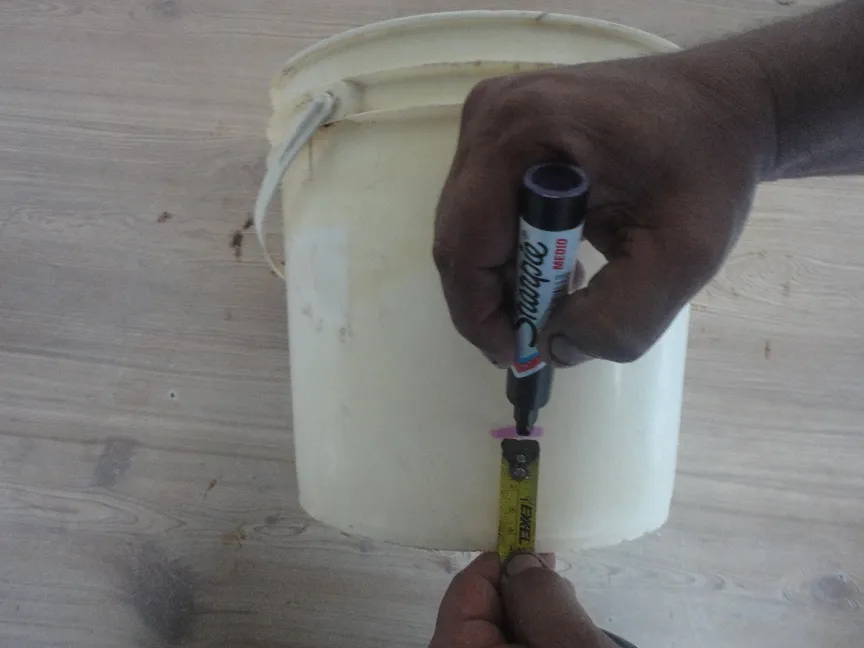
First step to follow we use the tape measure to measure 2 inches at the bottom of the slide, the more marks you make, the easier you can draw the circumference.
Después de marcar el tobo en todo el contorno, comenzamos a picar con el exacto siguiendo la marca con mucho cuidado hasta picarlo todo como lo ven en la imágenes.
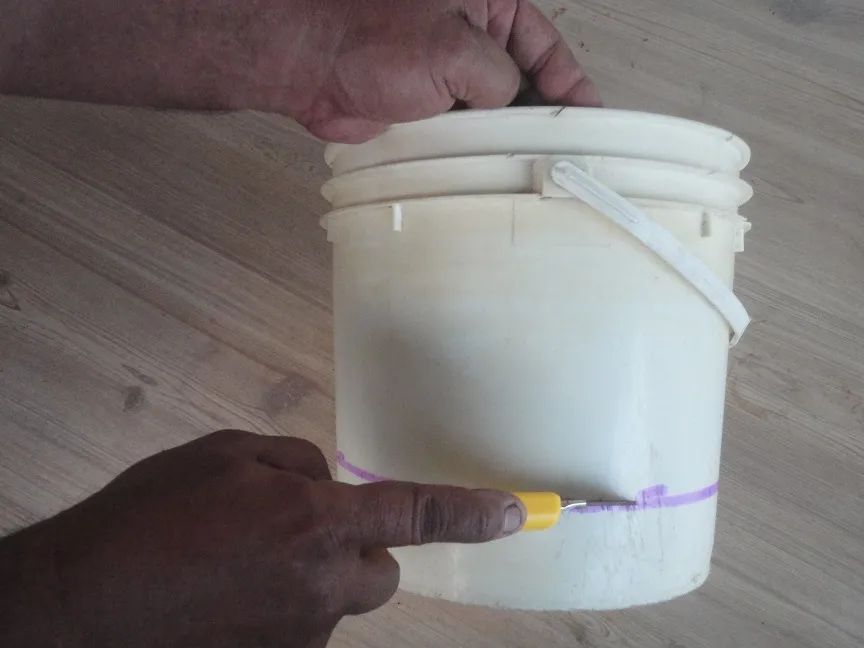
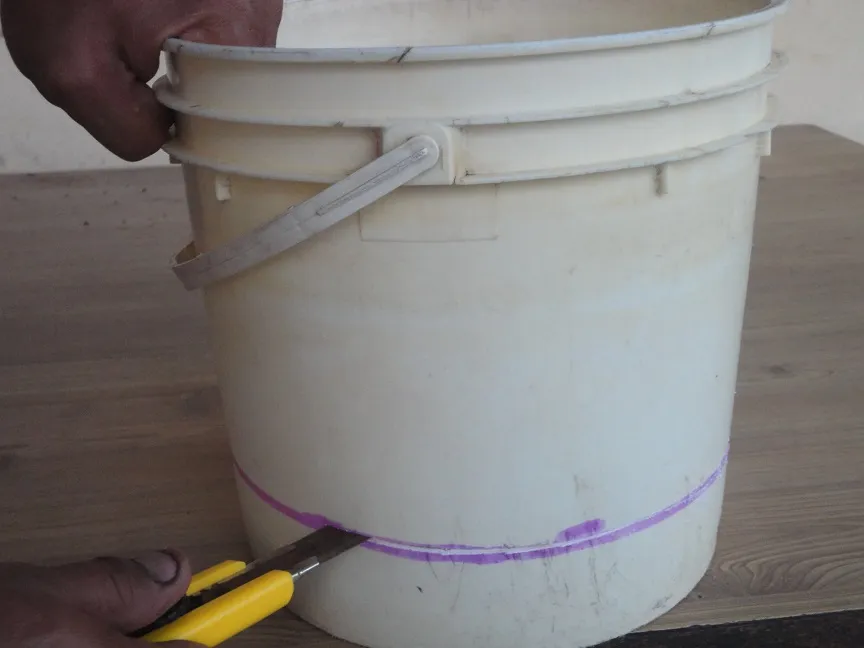
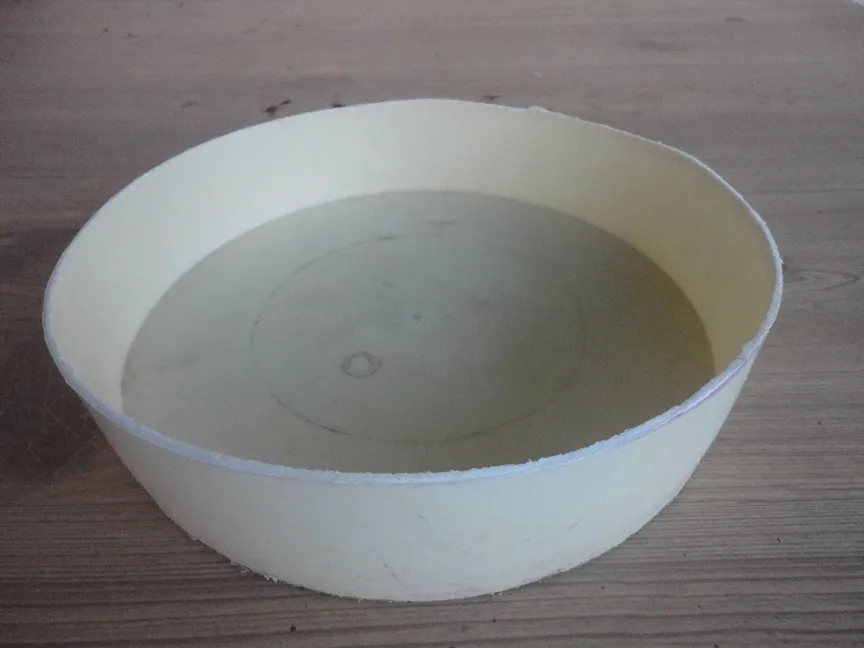
After marking the chute around the contour, we begin to chop with the exact one, following the mark very carefully until it chops everything as seen in the images.
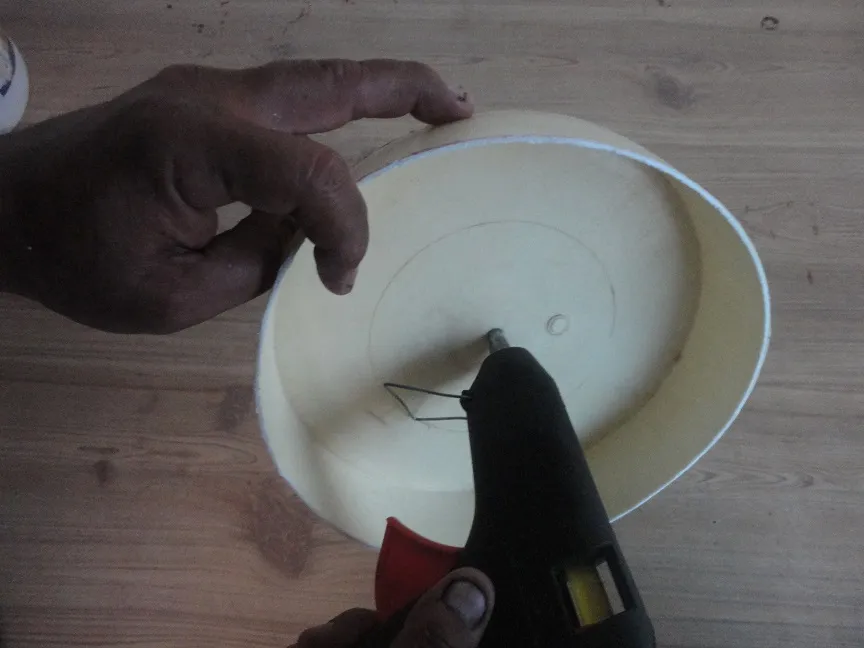
Siguiente paso con la pistola de silicón con la punta bien caliente abrimos unos pequeños agujeros en la tapa del pote y en el fondo del tobo como lo ven en estas fotos.
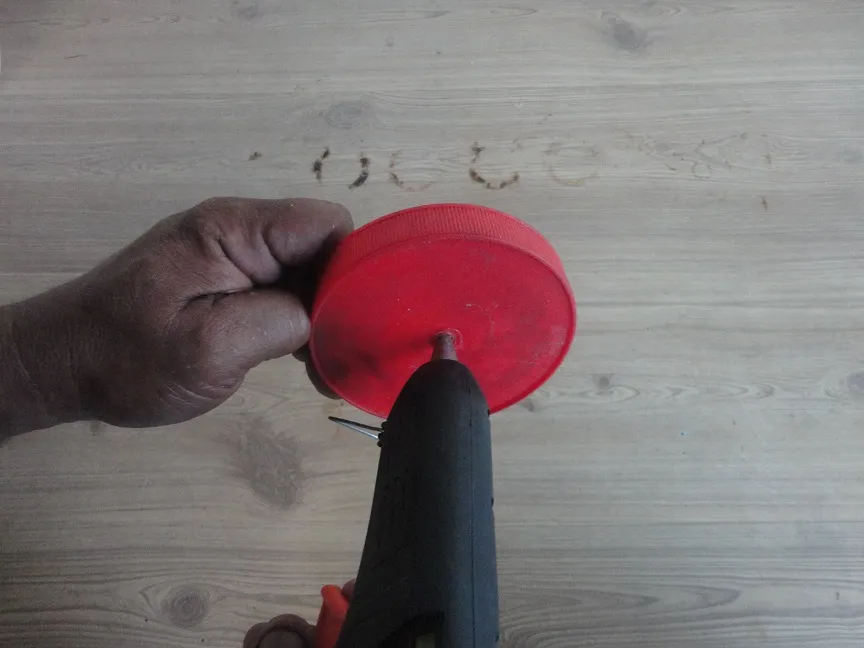
Next step with the silicone gun with the very hot tip, we open some small holes in the lid of the pot and in the bottom of the chute as seen in these photos.
Listos los dos agujeros
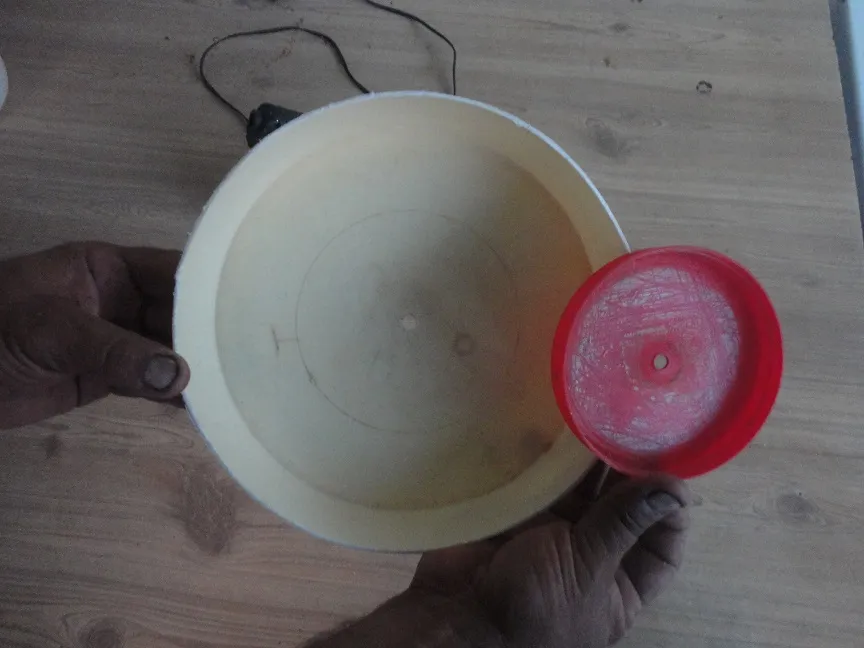
Ready both holes
Agarramos el tornillo con tuerca y las dos arandelas
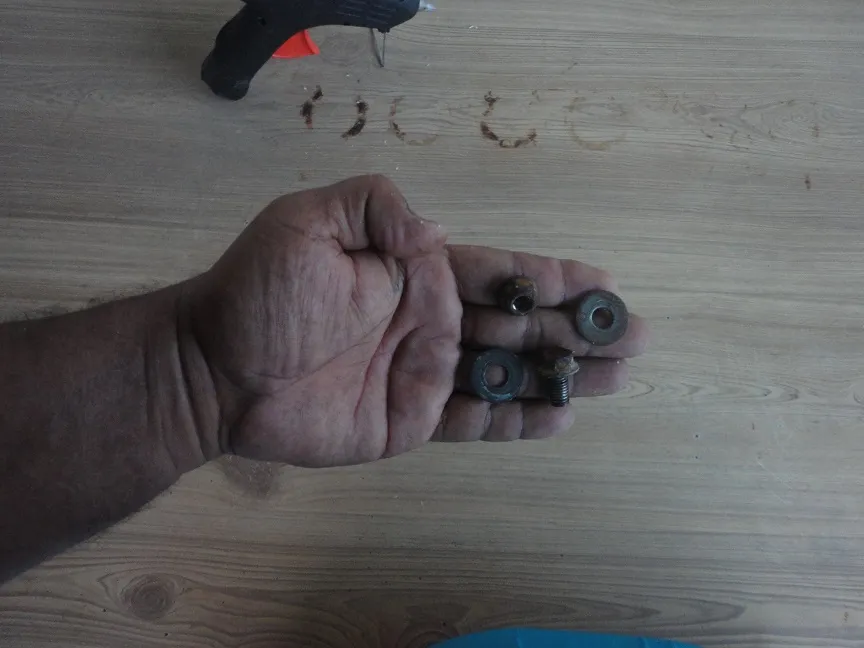
We grab the screw with nut and the two washers
Utilizamos el permatex en la orilla de fondo del tobo para atornillar la tapa del fondo del luego de esto atornillamos bien para que no haiga fugas de liquido
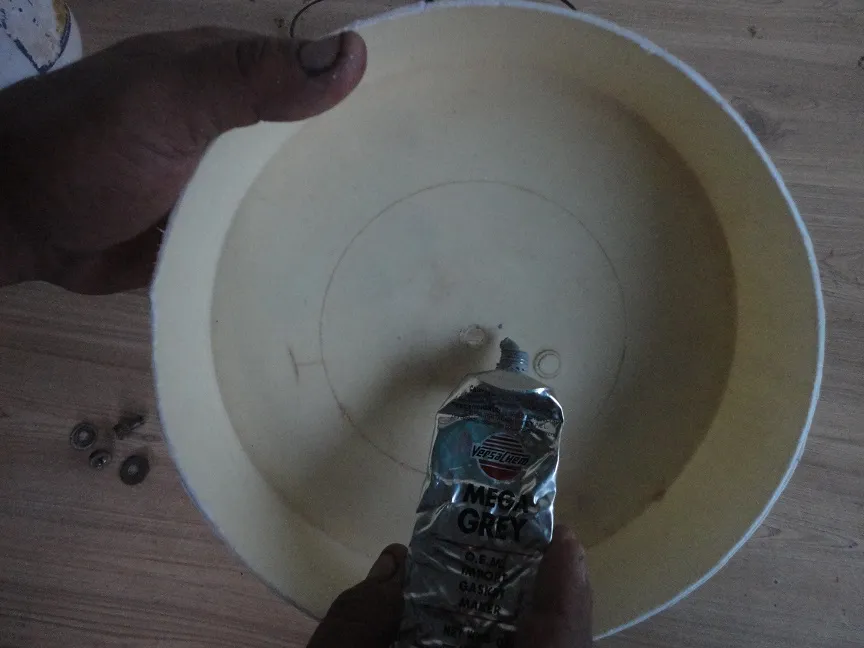
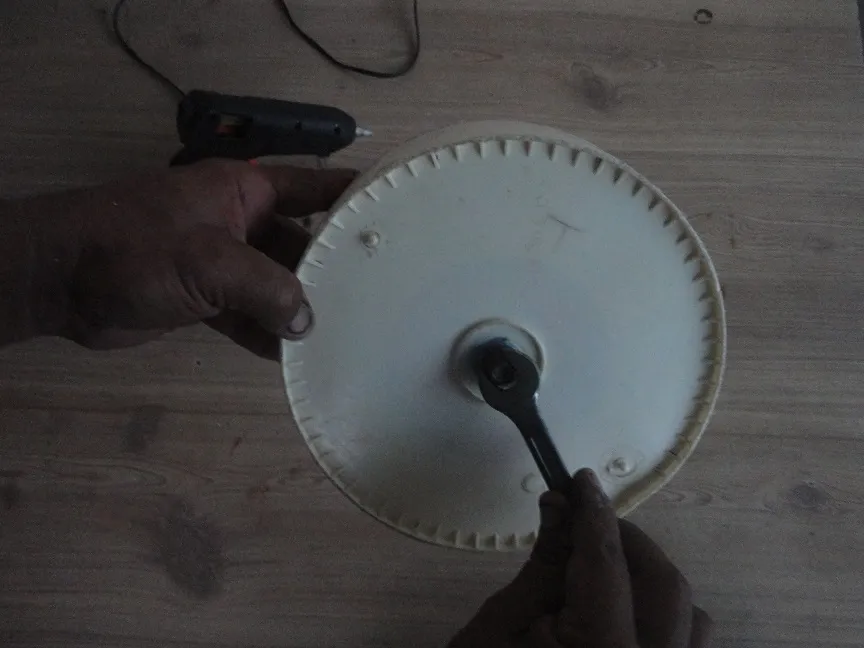
We use the permatex on the bottom edge of the slide to screw the bottom cover of the slide, after that we screw it tight so that there is no liquid leakage
Lista la tapa fijada y bien atornillada del tobo
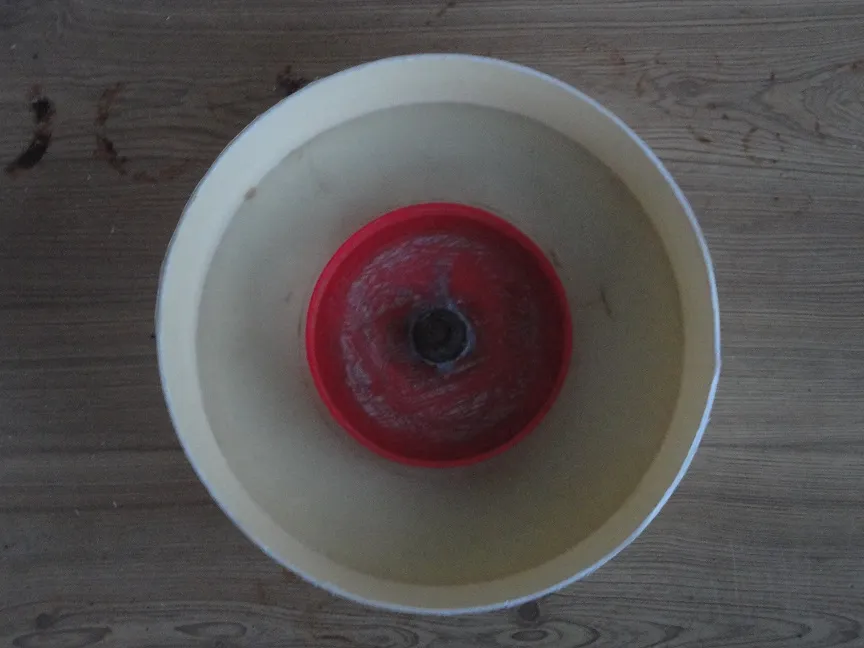
Ready the cap fixed and well screwed on the chute
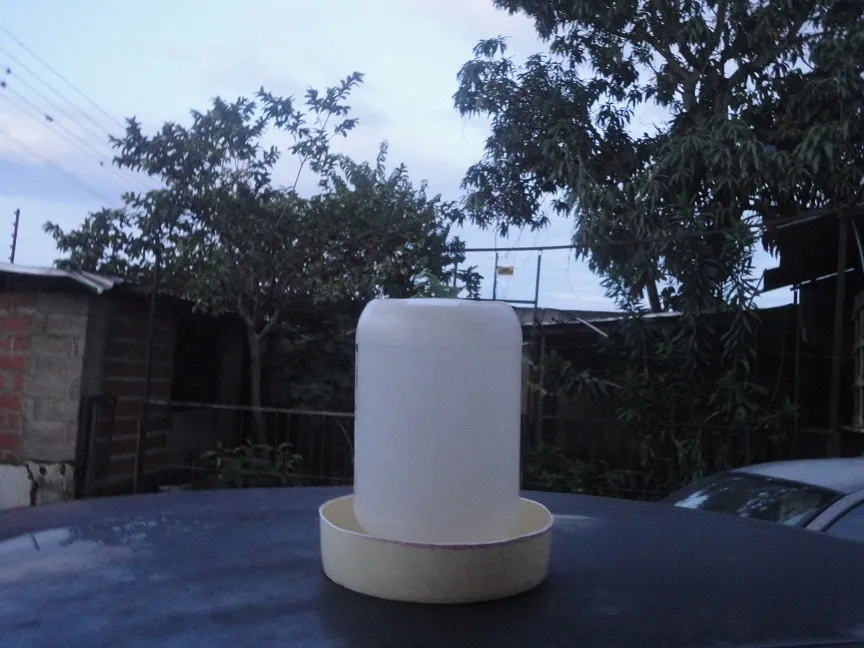
Ultimo paso muy importante quiero que se fijen en unos pequeños agujero específicamente 4 en cada esquina del pote blanco es exactamente la medida del nivel del agua .Una vez listos se llena el pote con agua se enrosca en su tapa y le das vuelta y listo tu bebedero de materiales de reciclaje está listo y cumple muy bien su función.
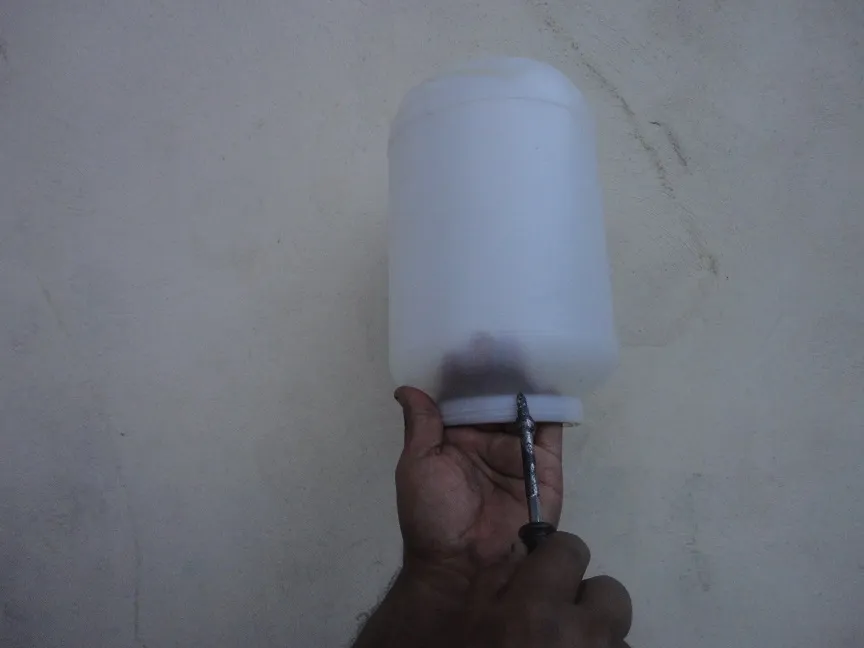
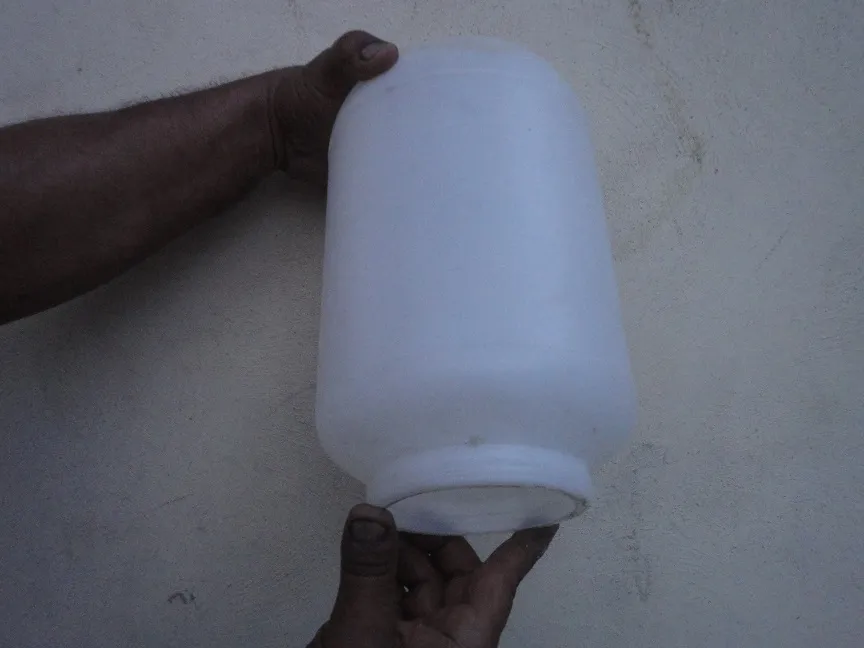
Last very important step I want you to look at some small holes specifically 4 in each corner of the white pot is exactly the measure of the water level. Once ready, fill the pot with water, screw it on its lid and turn it over and that's it. drinking fountain for recycling materials is ready and does its job very well.
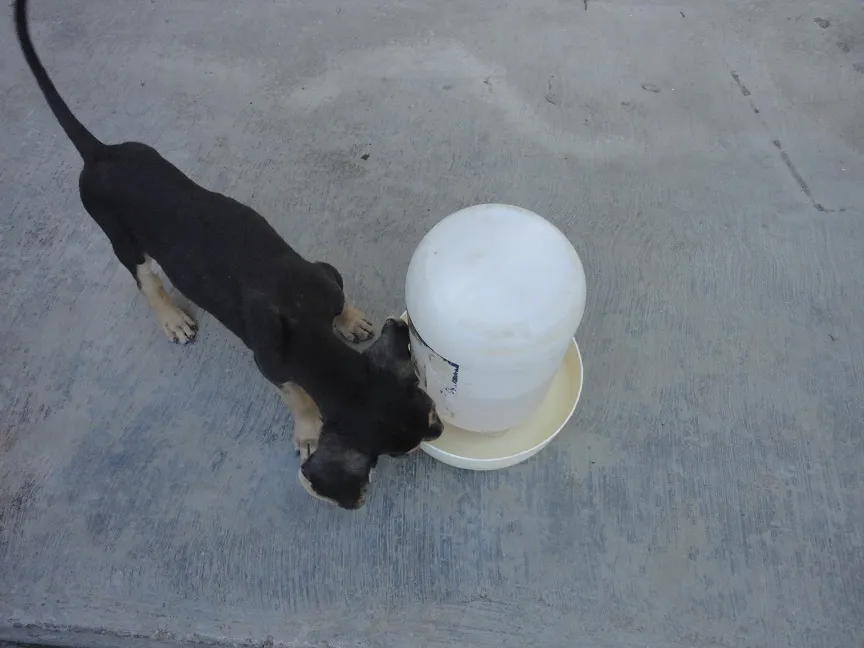
Es fácil de hacer hagámolos en familia como pueden ver ya mis mascotas lo probaron.
It's easy to do, let's make them as a family, as you can see, my pets have already tried it.

En nuestro tiempo libre nos gusta realizar manualidades de todo tipo, tanto para nuestros hijos como también para facilitar las situaciones que se nos presentan en nuestros día a día. Todas las compartiremos con ustedes a través de este blog.
In our free time we like to do crafts of all kinds, both for our children and also to facilitate the situations that arise in our day to day. We will all share them with you through this blog.
Pronto estaremos presentando nuestros nuevos proyectos, hasta la próxima...
Soon we will be presenting our new projects, until next time ...
***** Nota: Las imágenes presentadas se realizaron con una Camara Sony Cyber Shot , no están editadas ni se hizo uso de filtros para su presentación en este post. *****
***** Note: The images presented were made with a Sony Cyber Shot Camera, they are not edited or filters were used for presentation in this post. *****