Good day everyone,
Today I will be running through building my Ubuntu server VM using Windows Hyper V as part of laying the groundwork for using the Steemit Python Library and the future automation tasks I would like to complete for my account such as automatically claiming rewards, following my followers etc. It will also afford me the flexibility to weight my votes which as far as I know is unachievable in the Steemit web front end.
I probably could have installed using Anaconda on Windows but I've read Linux is preferred so chose to go with that.
I have already installed the prerequisite features and restarted my computer. Keep in mind not all CPUs support virtualization and must be enabled via the firmware.
To add the role after virtualization is enabled:
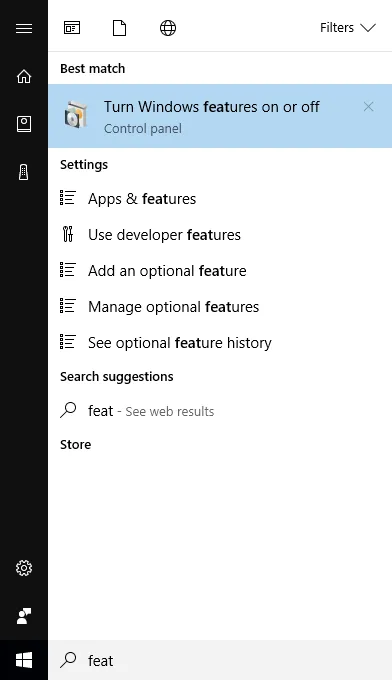
- Hit the windows key and start typing "Features". You will notice that "Turn Windows Feature On or Off" appears. Select that. Alternatively, you may hit windows+R and then type "OptionalFeatures.exe" in the run bar.
- You want to make sure the features under Hyper-V are checked. Note: If it is not enabled in the firmware, you will see a message.
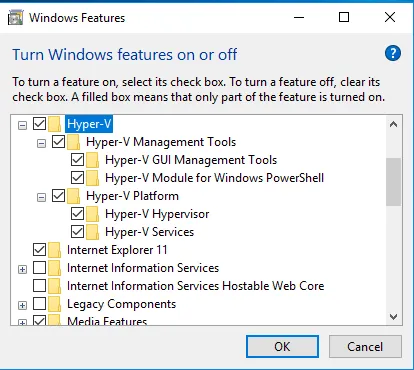
The features are as follows:
Hyper V-Management Tools, Hyper-V GUI Management Tools, Hyper-Module for Windows PowerShell, Hyper-V Hypervisor, Hyper-V Services
After installation, your computer will prompt for restart. Afterwards, you will be able to open Hyper-V and install Ubuntu. How exciting!
The Ubuntu Desktop 64-bit image may be found on the following site. It's 1.4 GB so make sure you have enough space!
http://releases.ubuntu.com/16.04/
**Here are the steps for building the Ubuntu virtual machine in Hyper-V. **
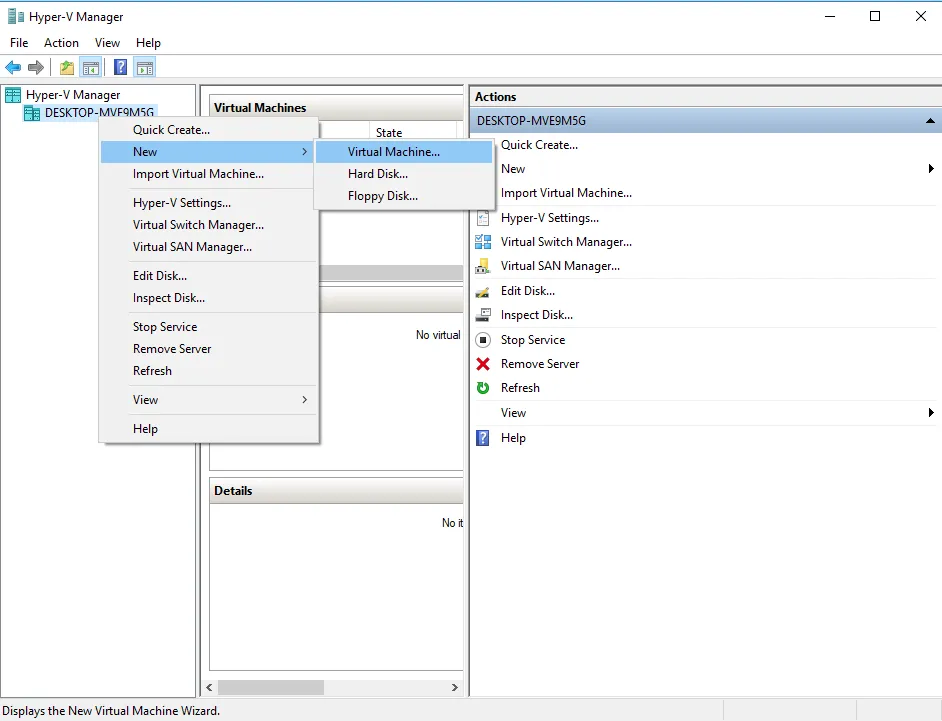
Open Hyper-V Manager by either hitting Windows and typing "Hyper-V" (Hyper-V manager should autopopulate) or hitting windows+R and then typing virtmgmt.msc in the run dialog.
Next you will want to right-click and then select "New", then "Virtual Machine" which will start the Wizard.

Whoops! Wrong Wizard!
Right Wizard
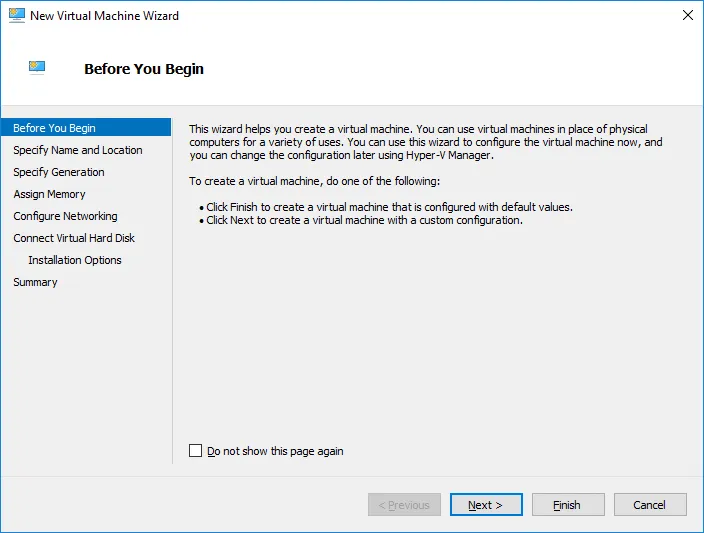
Here are the sub-instructions for the setting our parameters in the Wizard.
a. Click "Next"
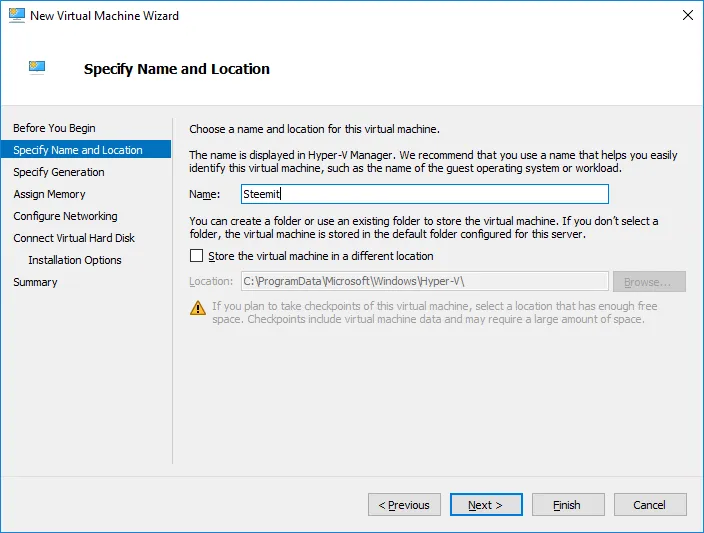
b. Type a Name for your virtual machine. I went with "Steemit". If you want the VM stored on separate disk, change from the default location. For my purposes, keeping the default.
c. To err on the side of caution, I am selecting "Generation 1" as I do not require the features afforded by Generation 2; although, I do believe it would likely work since our image is 64-bit. If you want to live on the wild side, feel free to go for Gen 2 but just be advised I am not certain if the OS is supported in that mode. Please, you may also need to be aware of this secureboot caveat if you plan to go Gen 2. Again, for simplicity sake, I am opting for Gen 1.


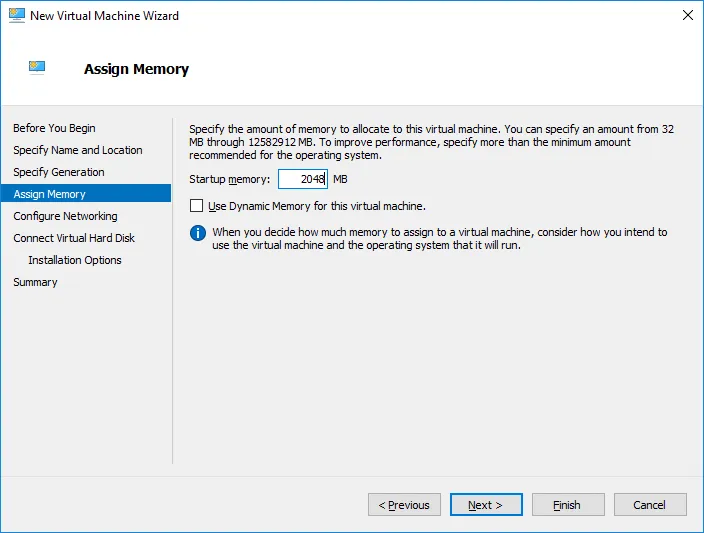
d. Allocate RAM to the VM. You should be able to get be with 2 GB. Type in either "2048" or whatever your little heart desires I suppose. You may uncheck "Use Dynamic Memory".
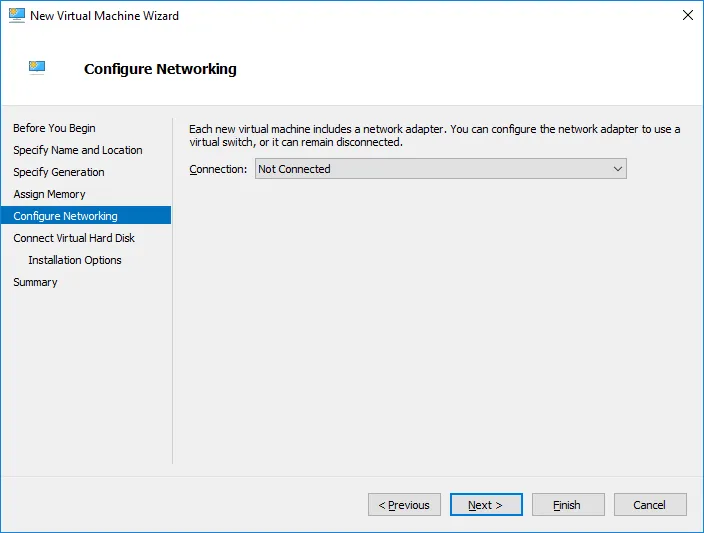
e. For the time being, we will leave the virtual NIC "Not Connected" and come back to it later.
f. Now, is the time to set the size of your virtual hard drive. I'm going with 20 GB and sticking with the default storage location.
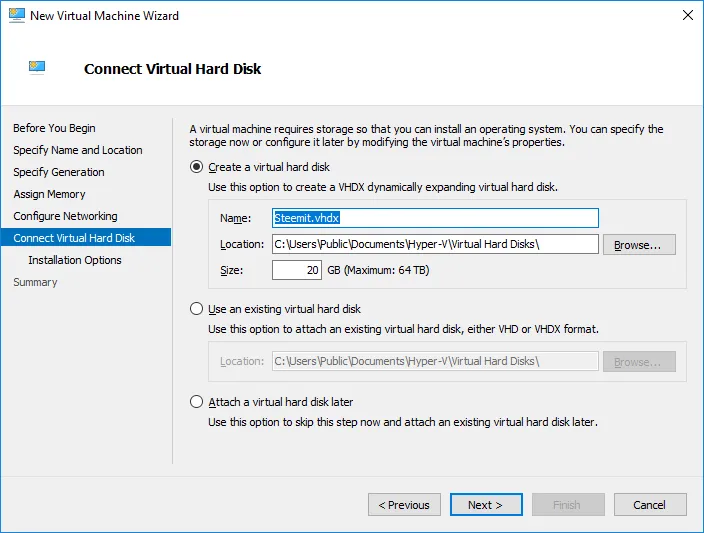
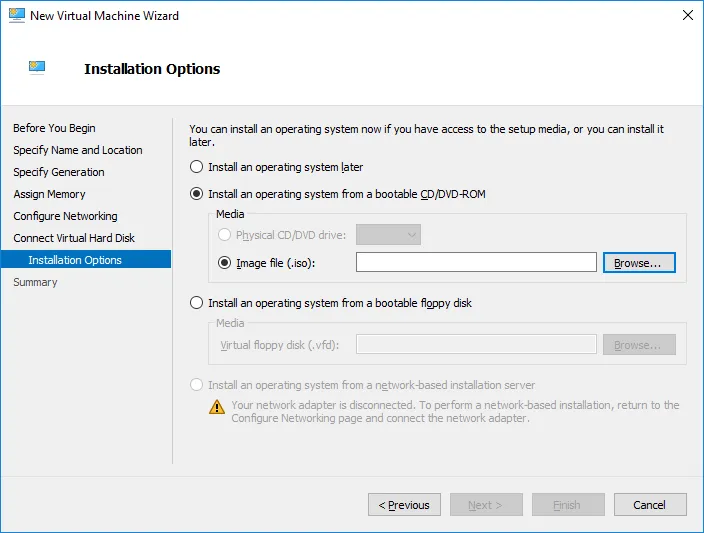
g. Now, Browse to the Ubuntu Desktop ISO you downloaded earlier and click "Next".
h. We've finally reached the end of the yellow brick road. Click Finish and the Wizard is done.
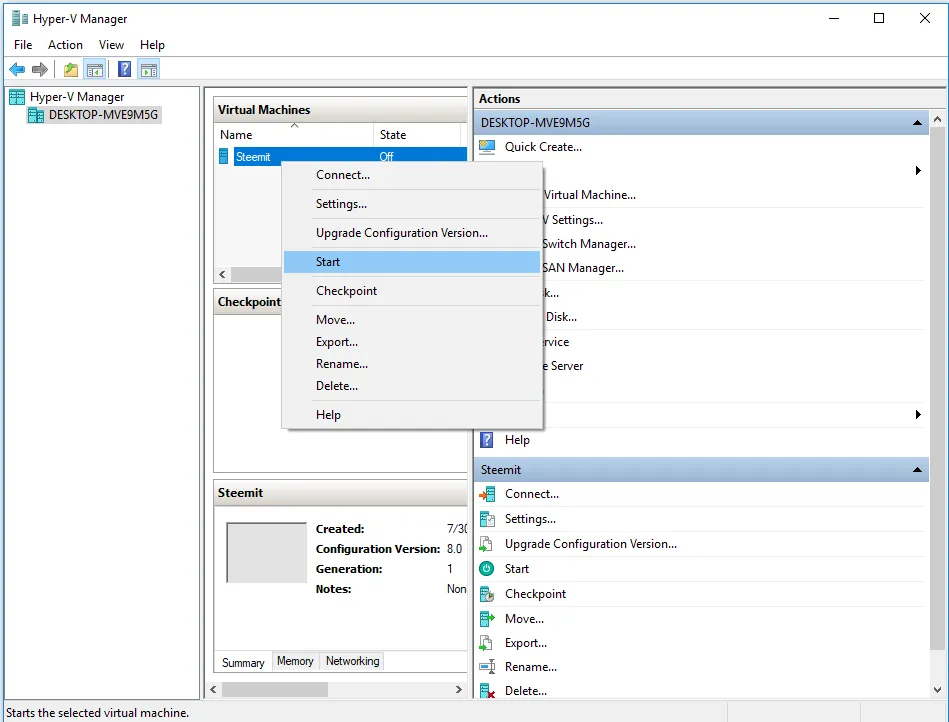
Now, let's start that bad boy up! What'd ya say?
From Hyper-V go ahead and right-click then "Start".
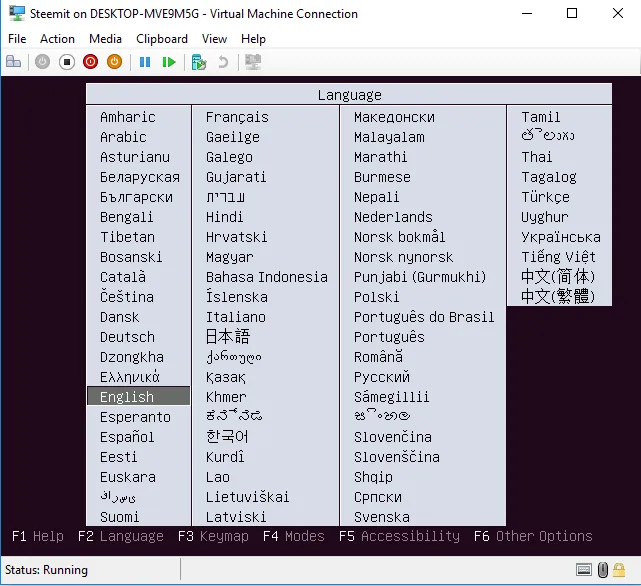
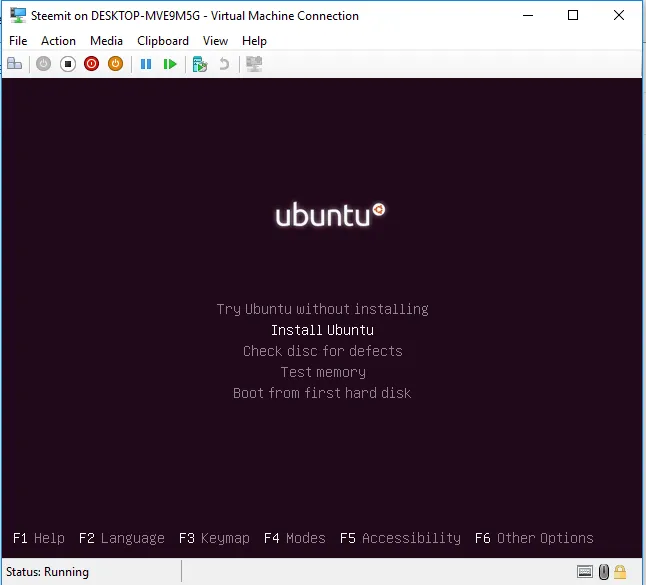
Next, right-click and hit "Connect". If you're like me, you're going to select "English" but my guest to choose whatever language you desire just know I might not be able to help you if you get stuck and you're VM is set to Spanish. Well. Muy poquito. (I'm half Hispanic but don't speak it but can read a little. I digress)
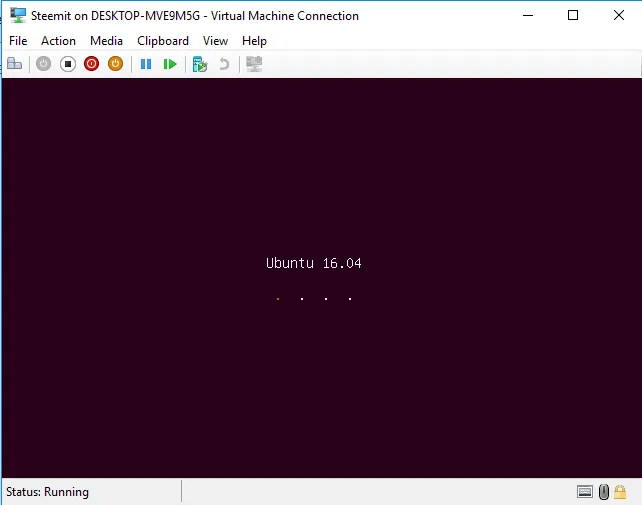
Hit Enter after choosing your desired language. Next step is to select "Install Ubuntu".
Ok, and, if you didn't get enough last time, we have another language screen.
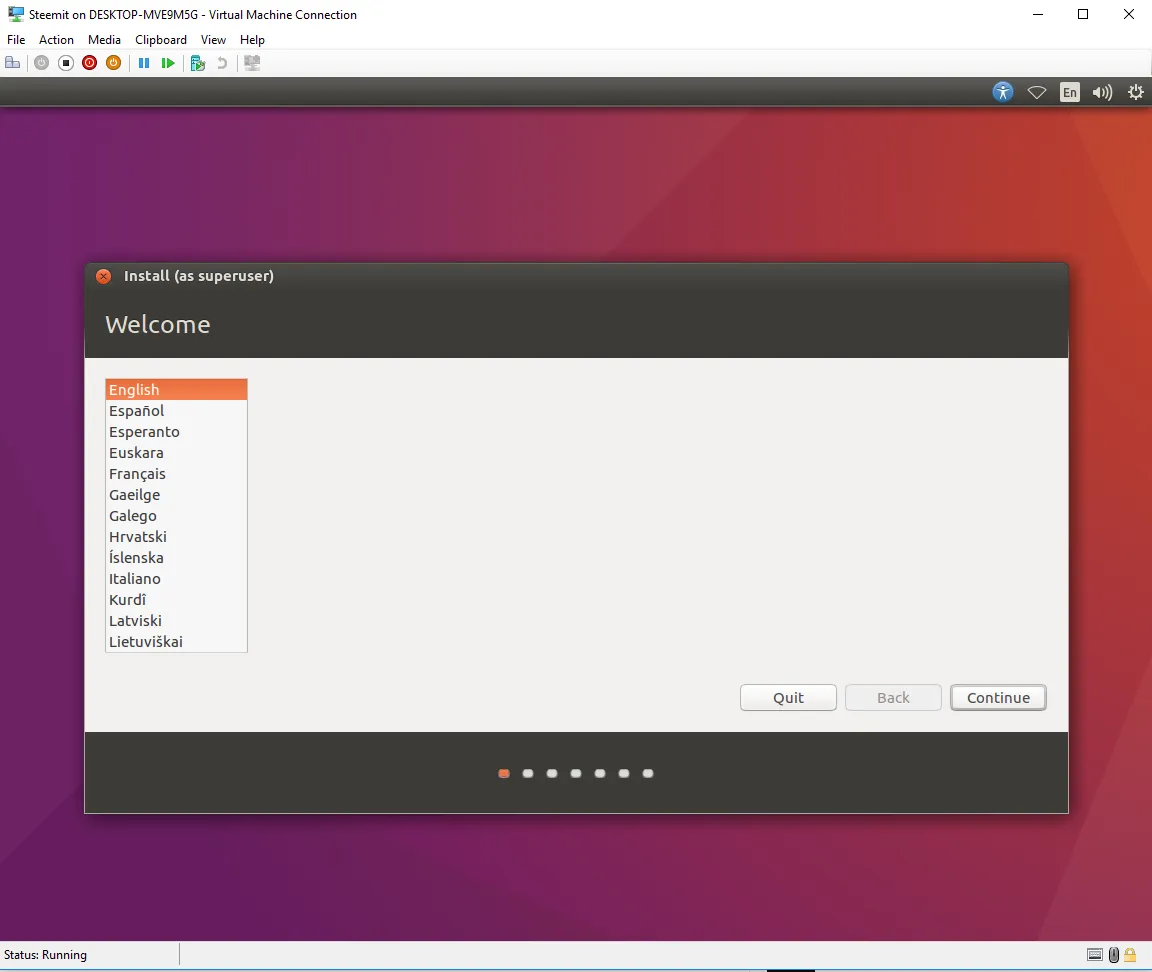
Select your language and hit "Continue".
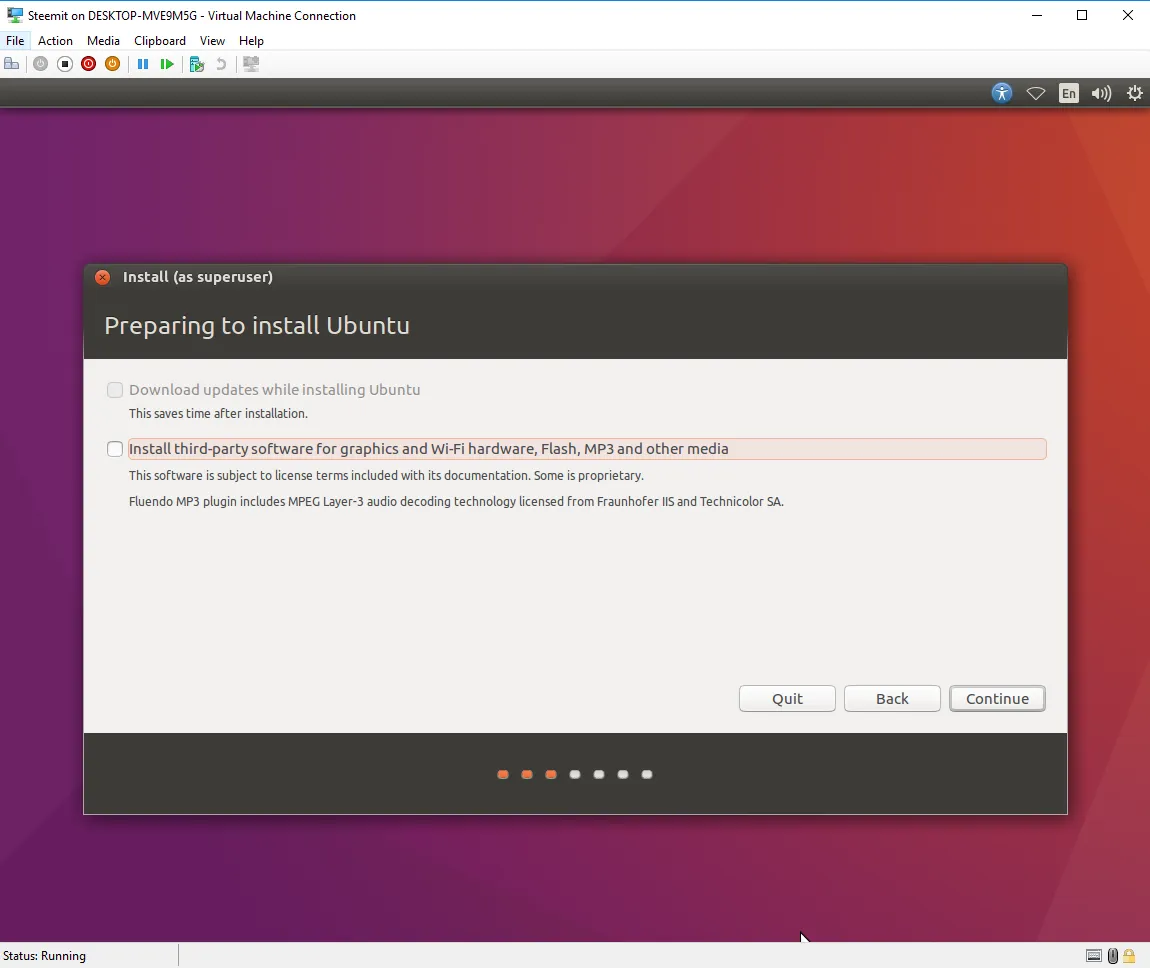
Now, if you want, opt for the third party features if you want. They should not be needed.
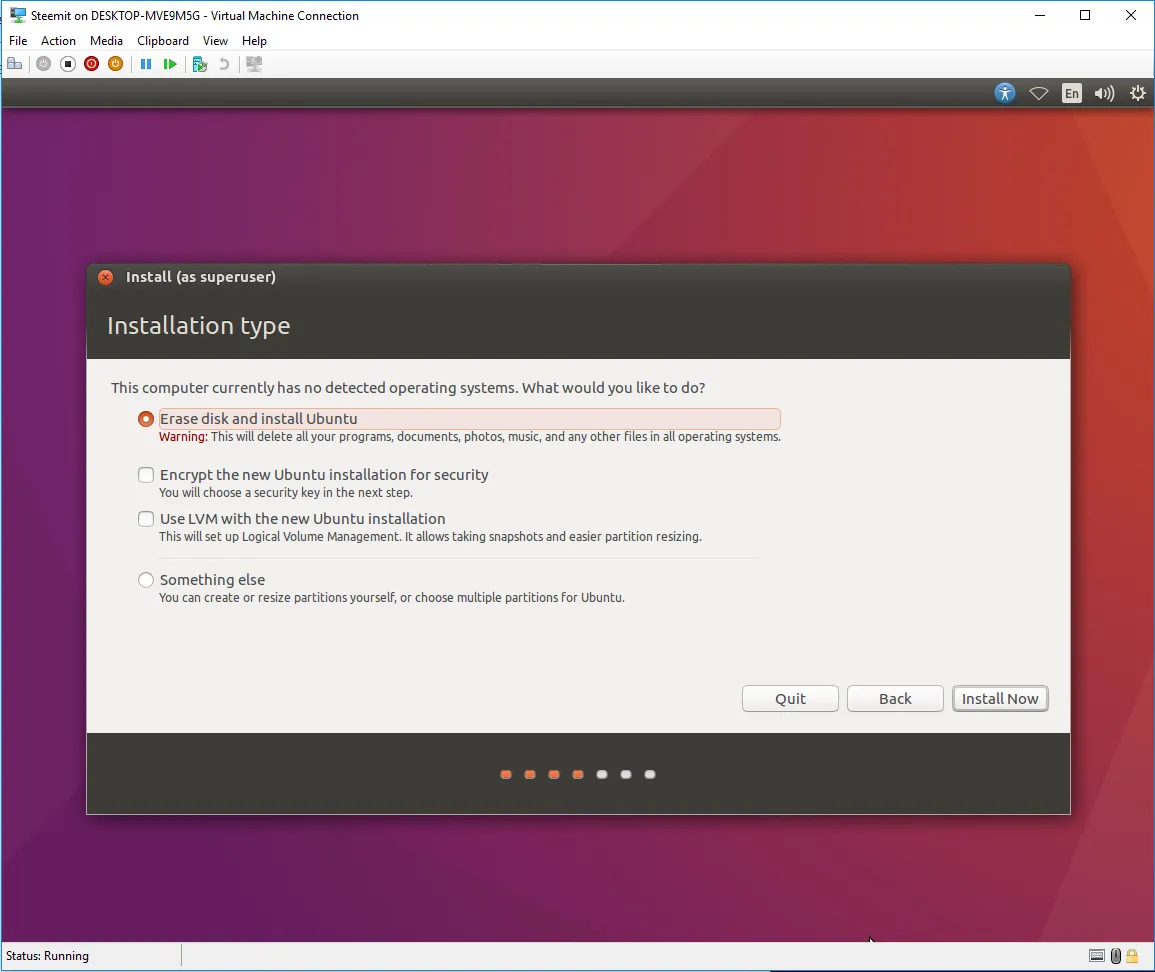
Next, go ahead and select the option to erase the disk and Install Ubuntu. Select "Install Now". Let's get this ball rolling.
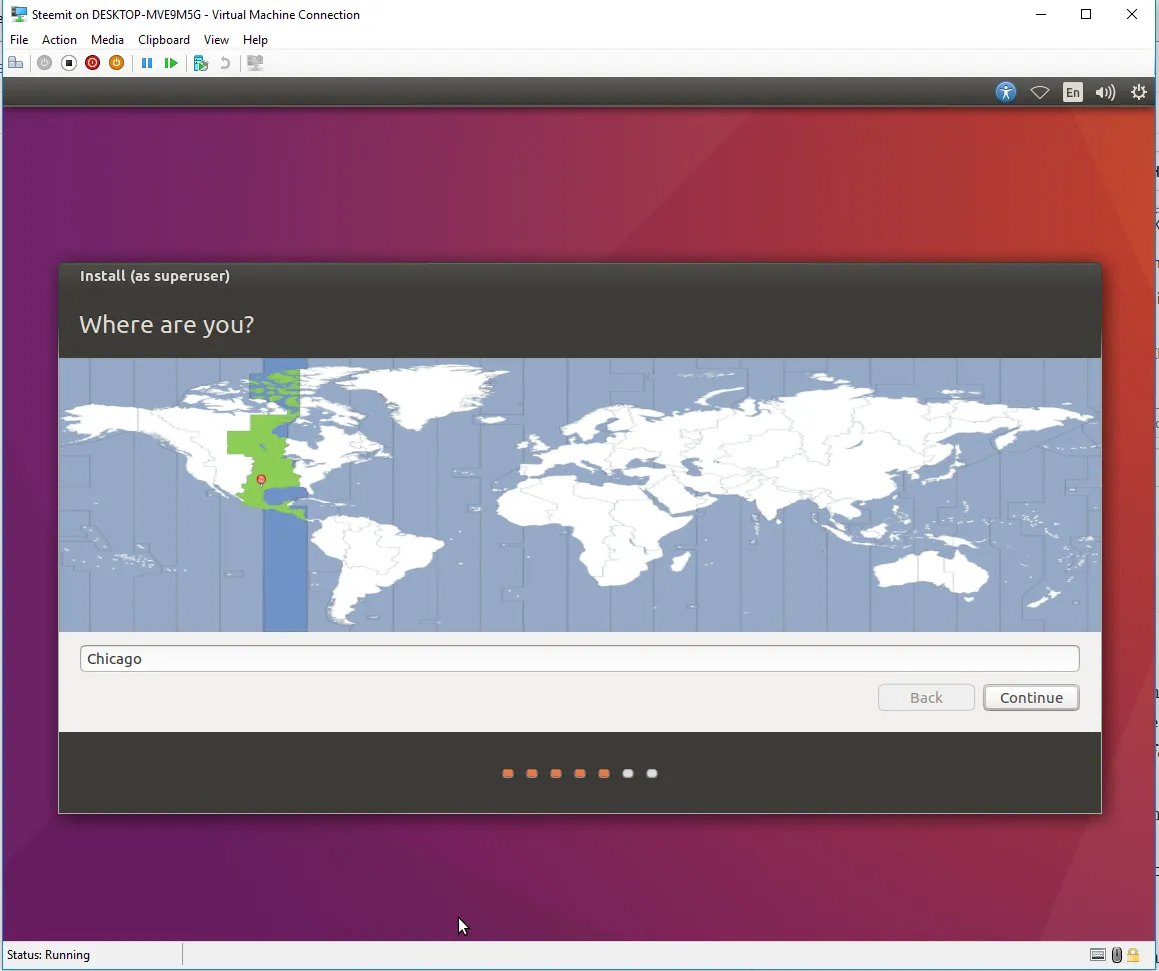
Select your timezone and location.
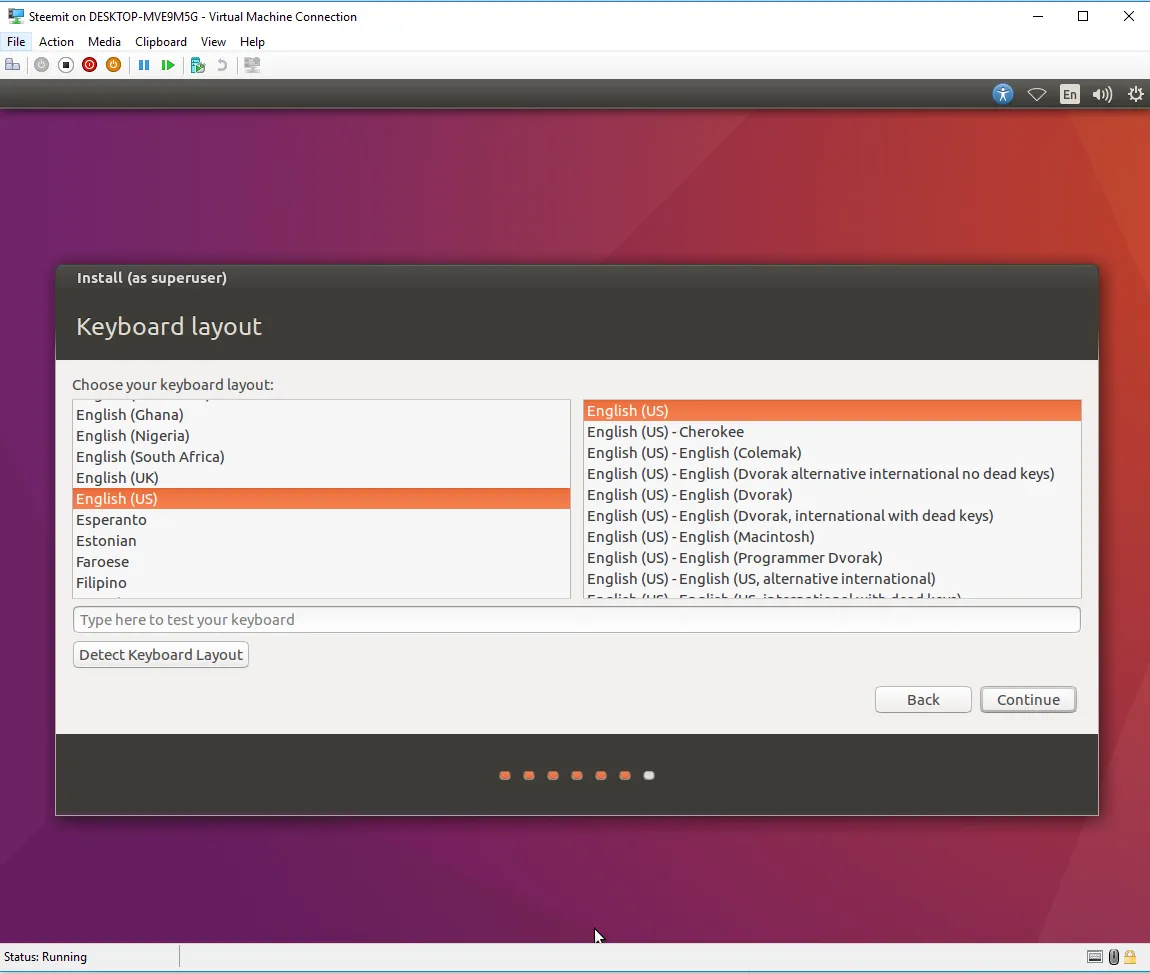
Select your appropriate Keyboard Layout.
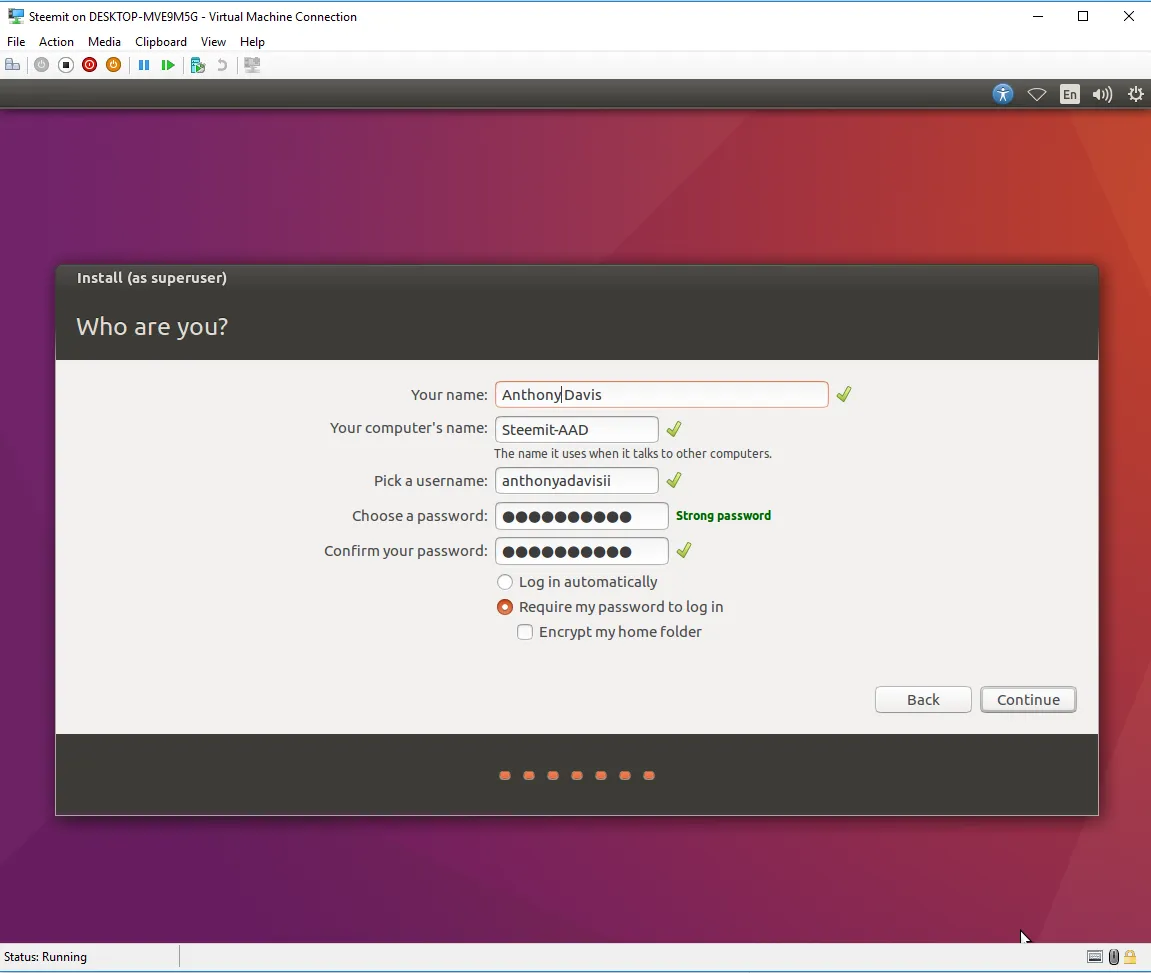
Next, set your account info. Make sure to use a strong password and I would advise backing it up to a password manager or something of the sort.
Ok, now we let it do it's thing and install the OS. I think that is a good stopping point and I gots to go. So, check back soon. I'll see you next time on Part 2!