Would you like to know how to create an RSS feed for your blog on Steemit because this might be useful for you if you want to share updates to your Facebook and Twitter accounts automatically.

Unfortunately Steemit does not have a built-in RSS feed that you can use and there is no plugin available like for WordPress.
I have been looking for a way to make an RSS feed for my posts on Steemit and that is not easy. A lot of free services that were helping with that just disappeared and there are just a few websites that can help with RSS feed creation now.
How to Create an RSS Feed for your Steemit Blog!
I knew about the service I am going to share with you, which is free with certain limitations, but as I wanted to get less limitations still for free, I looked and looked, tested a few things without success.
There are other solutions that I found very complicated and that are time wasters, so I'm going to stick with FetchRSS that you can access here: http://fetchrss.com.
This is the easiest way I found to create an RSS feed from a website that doesn't have one. You can create feeds from Facebook, YouTube, SoundCloud and all kinds of websites.
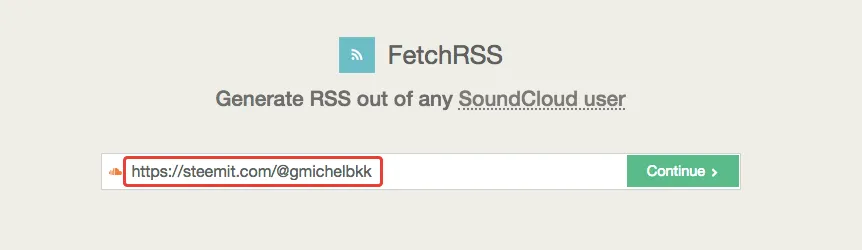
First, enter your Steemit URL and click "Continue."
You will see this feed builder showing up.
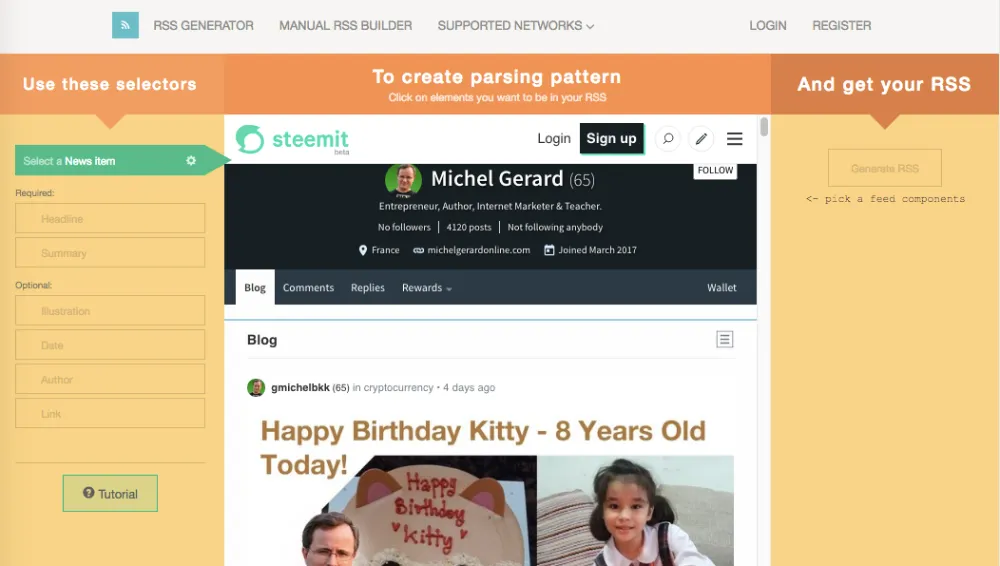
This looks easy, but I struggled a bit to get it right, so I'm going to detail each step here.
You first have to define a "News Item."
I used a keyboard shortcut "CMD -" in Mac and "CTRL -" on Windows to make the posts show up smaller as a list instead of in full as it is now.
When it was in full, I just couldn't select the news item.
When you are on the "Select a News Item" tab, which is in green, move your mouse around and try to select the first block like I did.
Click when you have it and it will highlight all the others in blue.
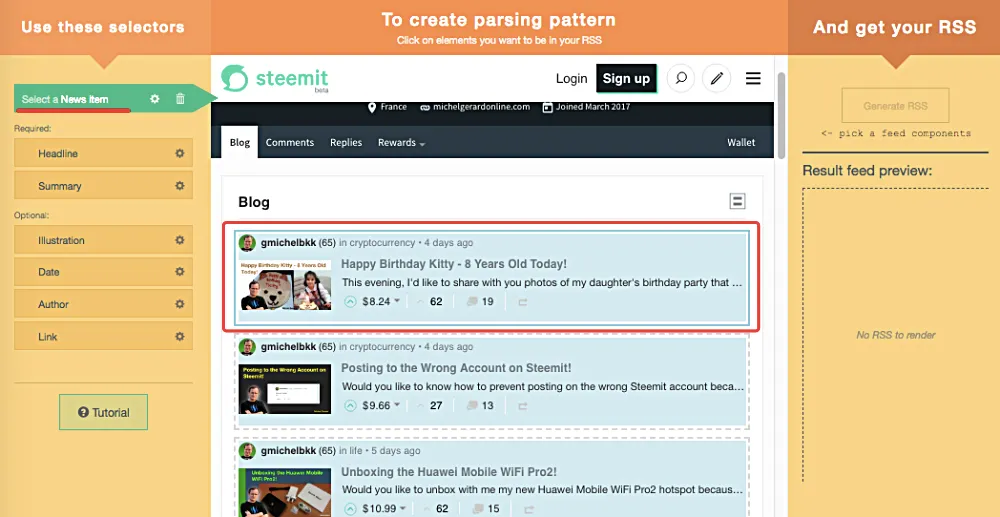
The next step is to click on the second tab "Select a Headline."
This is a required step.
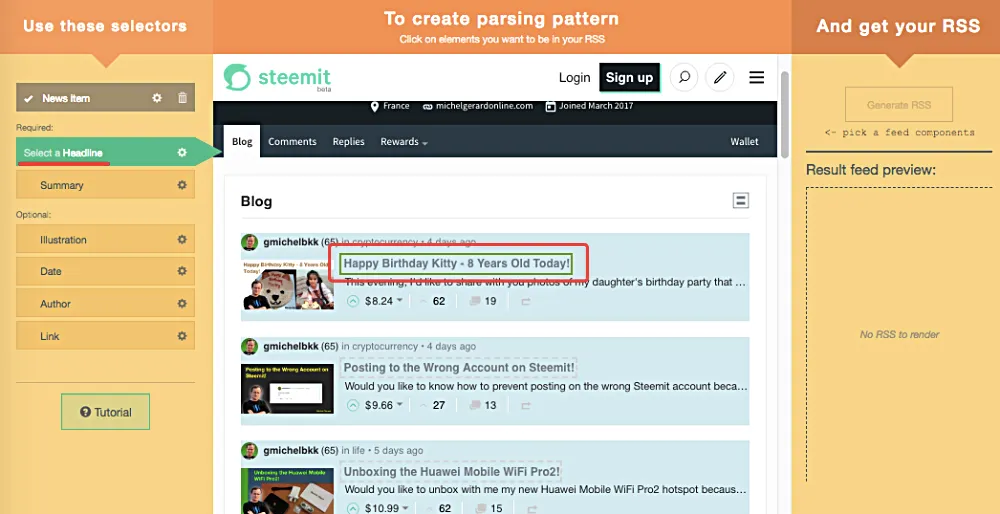
Move your mouse around and select the title of the post. After you click on it, it will be highlighted in green and you will see a preview at the right.
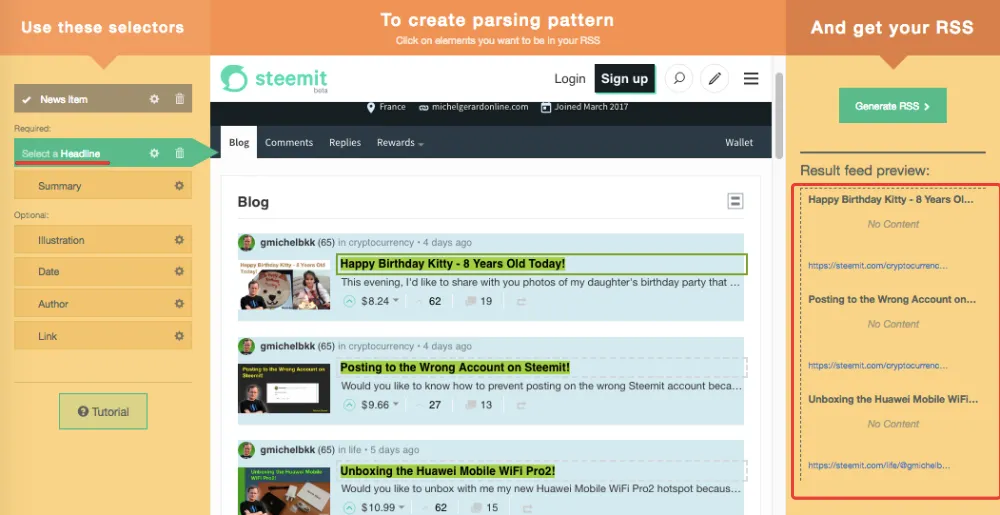
The next step is "Summary" and it is also required.
Select the Summary with your mouse, click and it will show in red.
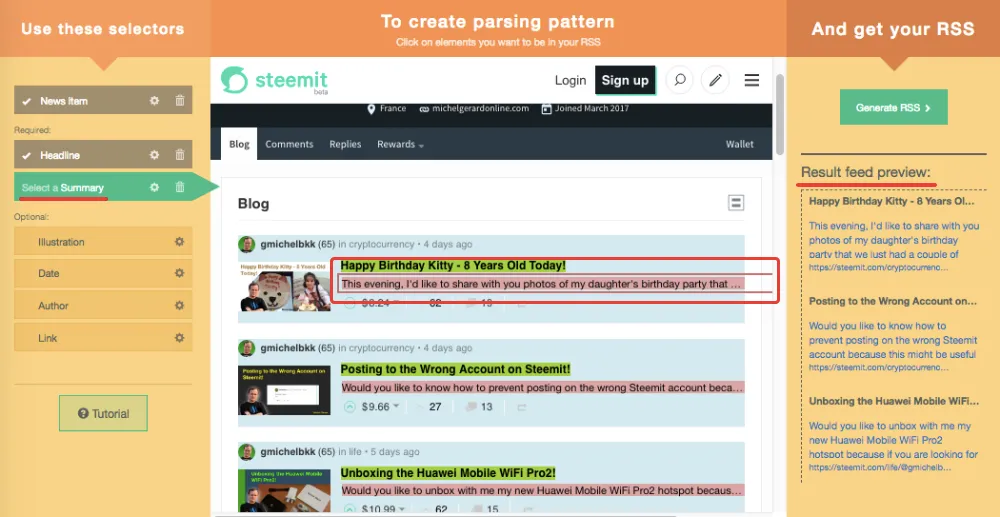
At the right, you can see the preview of what your feed looks like.
The other tabs are optional, but it's good to have them in the feed.
You want to have your thumbnail in the feed, so on the "Illustration" tab select the image.
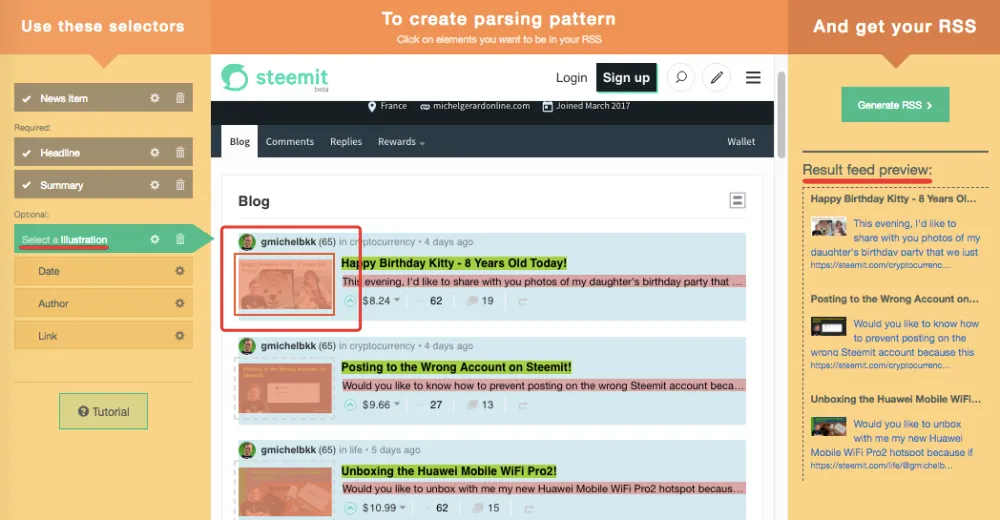
The preview is starting to look good.
Then, you have the "Date" tab where you can select the date.
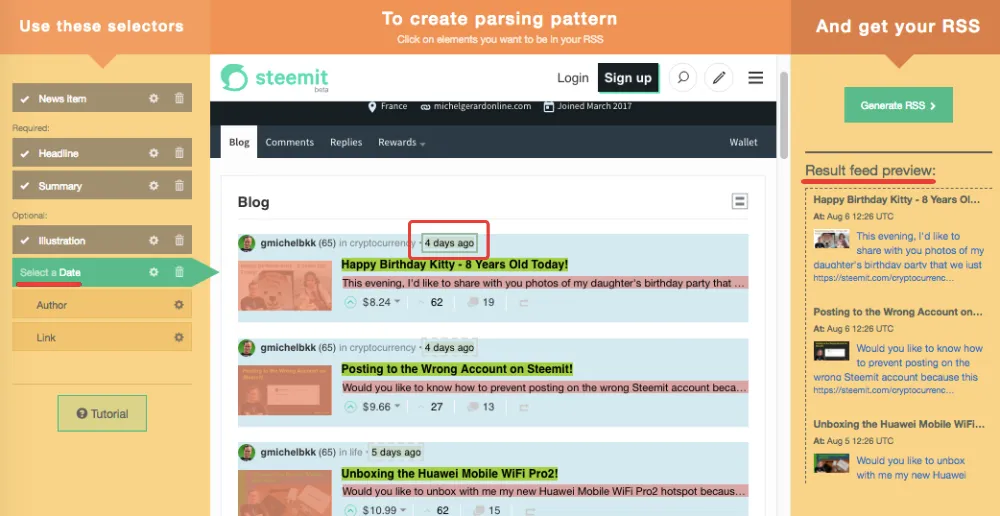
Finally, we can select the "Author."

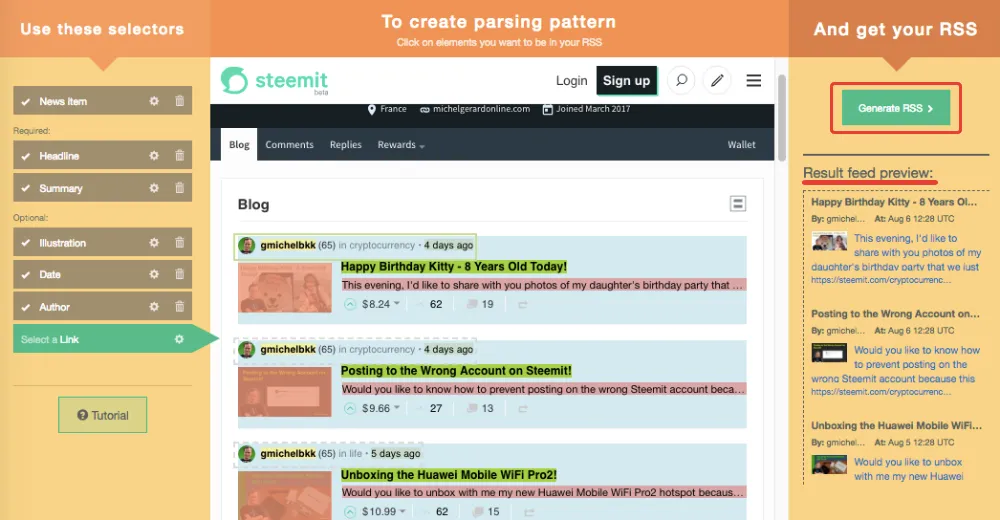
There is no link showing up, so it's not necessary to go through this tab.
Click on "Generate RSS" at the top right.
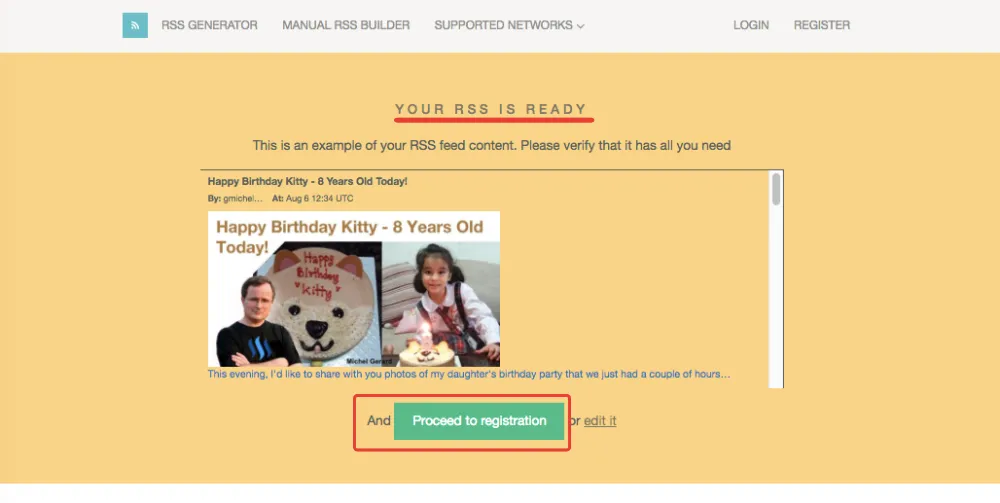
Your RSS feed is now ready.
You will see an example of the RSS feed content, and then you can click the "Proceed to registration" button.
You will see the different plans available.
You can start with the free plan, the limitation being that the feed update rate is 24 hours, there are ads, and the feed is deleted if it is not being requested for 7 days.
So make sure that you access the feed at least once a week or you will have to redo this all over again.
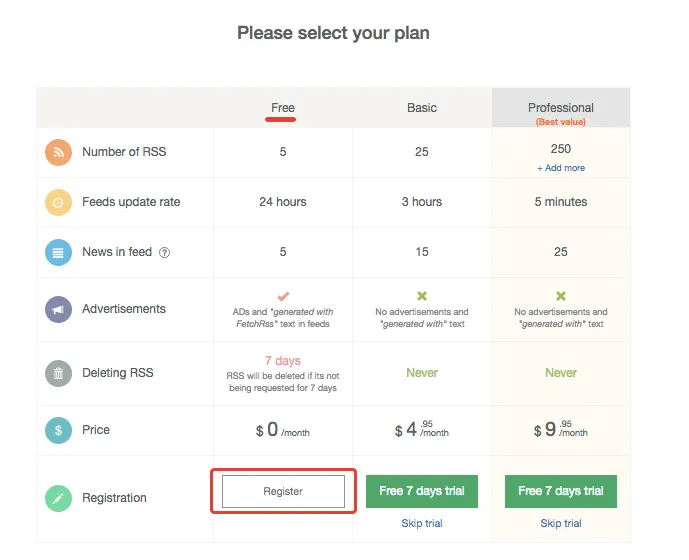
If you prefer, you can choose a monthly paid plan and the feed will never be deleted.
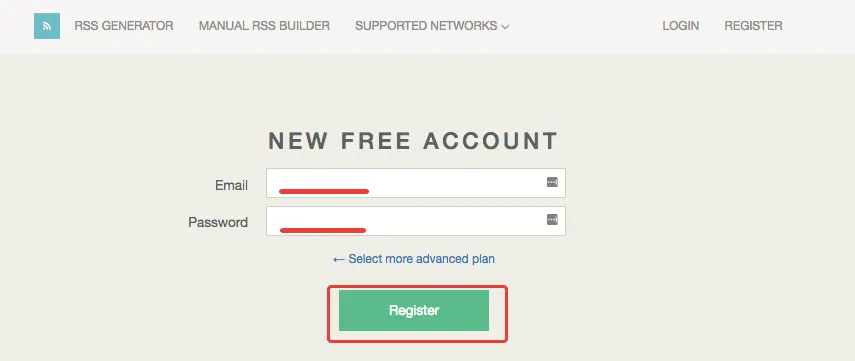
Click the "Register" button.
This will direct you to the "Registration" page.
After you have confirmed your email address and logged in, then you will see your RSS feed.
Go to "My Feeds" and then click on "Config."

Change the title and you can also edit the description if you wish to.
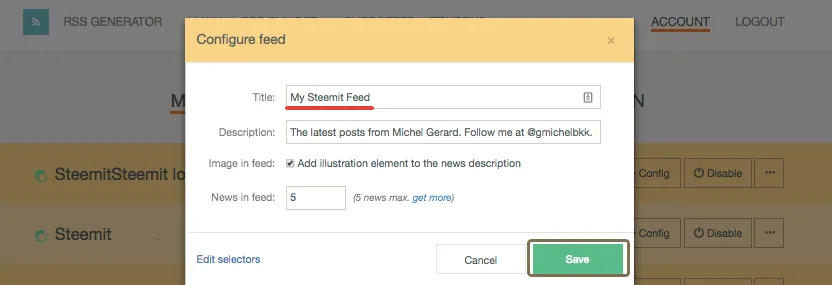
Notice than on the free plan, you can have 5 news maximum in the RSS feed
Click "Save."
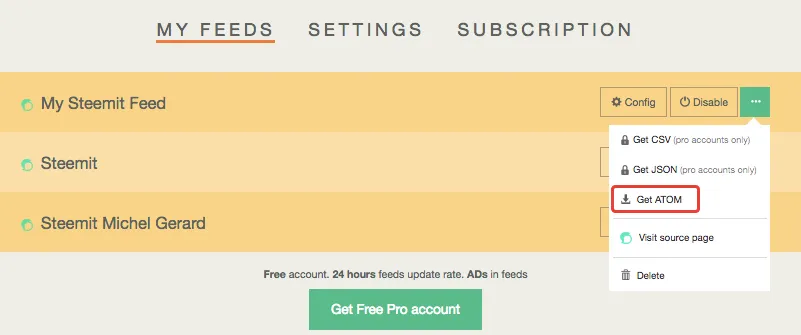
As you can see, I have 3 feeds there out of the 5 in the Free plan.
Click on the menu at the right, and then click on "Get ATOM," which is the only format we have in the Free plan.
This will open your feed.
This is what mine looks like.
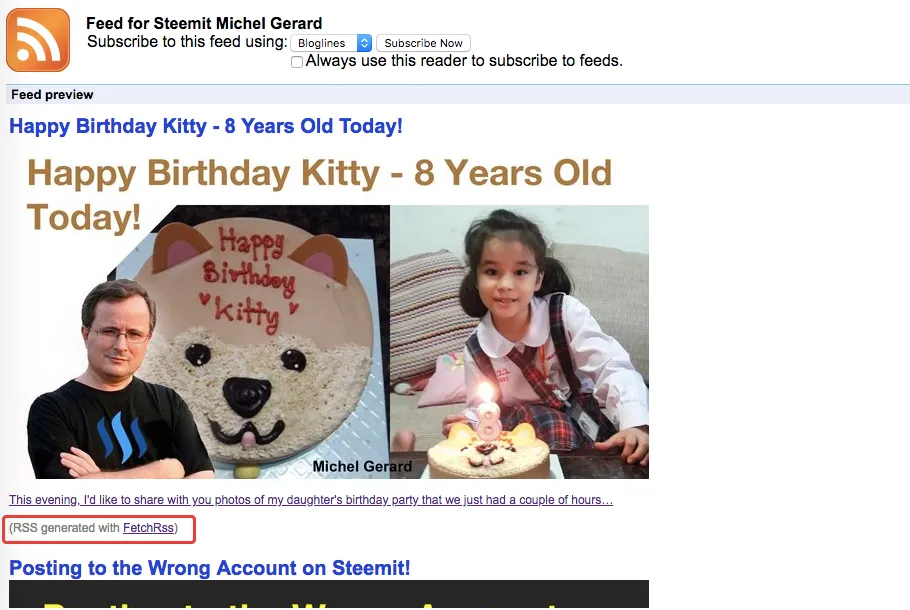
Notice the little ad that you get with the Free plan.
You can then use this RSS feed as you want. You can show it on your WordPress blog or use a service like IFTTT and Zapier to publish updates on your Facebook and Twitter.
Would you upvote this post and follow me for more because this will encourage me to write more posts like this one?
I have categorized my posts on Steemit for easy access:
Steemit tools | Steemit strategies | Steem economics | Steem on WordPress | Blogging on Steemit | Steemit posts I curated | Cryptocurrency | Cryptocurrency trading | Mac computer tutorials | WordPress & online marketing | Self-development & motivation | Travel in Thailand | Travel in Japan | Travel in France | Life in Thailand | Fitness challenge | Fruit-veggie juices & smoothies | Education | My answers on Quora | Fundition tutorials & projects | Miscellaneous writing
You may prefer to go to my Steemit Posts Directory.
The most important votes you can make on Steem are for Witnesses. The top 20 witnesses can influence the addition or removal of features in future Steem hard forks. Read my post: What is a Steem Witness, How to Vote and Why?
Michel Gerard