
Introduction
Hello steemians,
Recently, a fellow steemian @ced000 used the kinetic theory of gases to explain steem price behavior.That was so inspiring.
Today, I'll do something not too similar but equally out of the norm. Rather than using the regular photoshop or coreldraw to design a 3D logo, I will be showing us how to design the steem logo using an engineering 3D modeling software called Solidworks. Version: Solidworks 2014

Designing the logo is in four stages:
- Drafting
- 3D modeling
- Assembly
- Animation
This will be fun. Only requirement needed to participate is the solidworks software installed on your computer and a basic knowledge of solidworks. Units are measured using MMGS(Millimeter,Grams, Seconds). Let's begin!
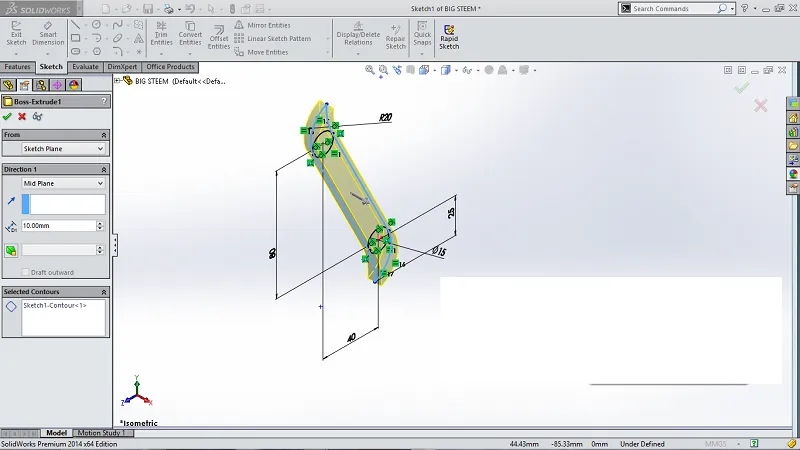
Drafting
In this first stage, we dimension each of the components of the logo and draft a 2D sketch of the diagram.
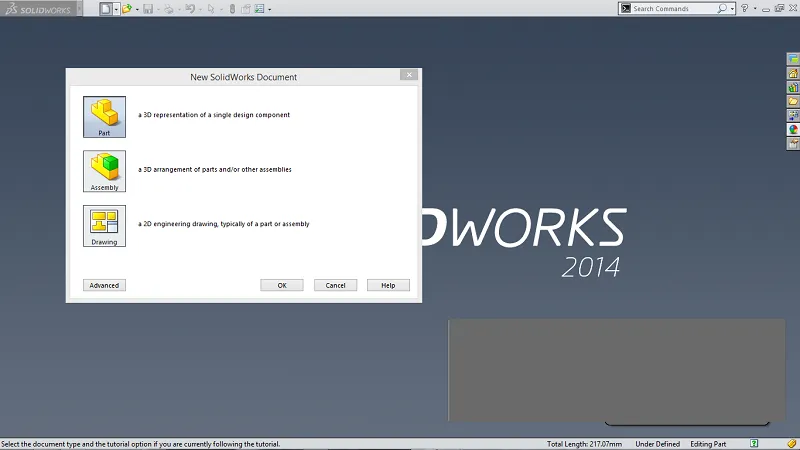
- Open solidworks
- Start an new solidworks part document.
- Sketch the diagram below on the right plane
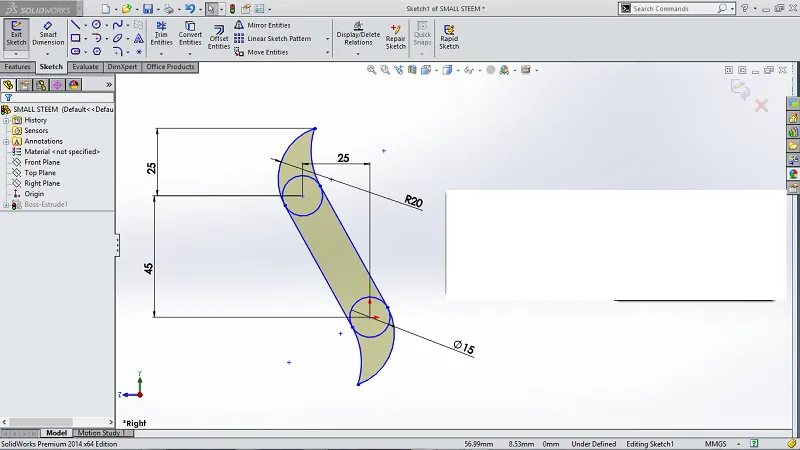
- Save it as
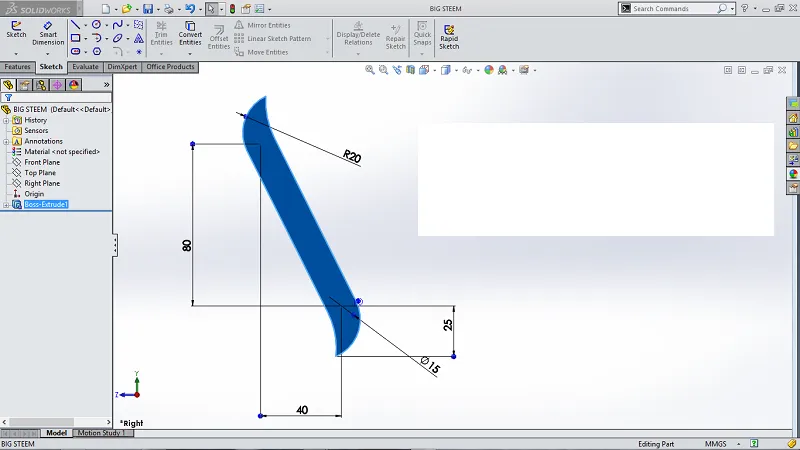
small steem.sldprt - Open another part document and save it as
Big steem.sldprt - Sketch the diagram below on the right plane.
- Exit all sketches.
- Save!
3D Modeling
We will be using the Extrude boss command to convert the sketches to 3D.
- Convert the view orientation to isometric.

- In the Features menu under the toolbar, select the Extrude boss command.
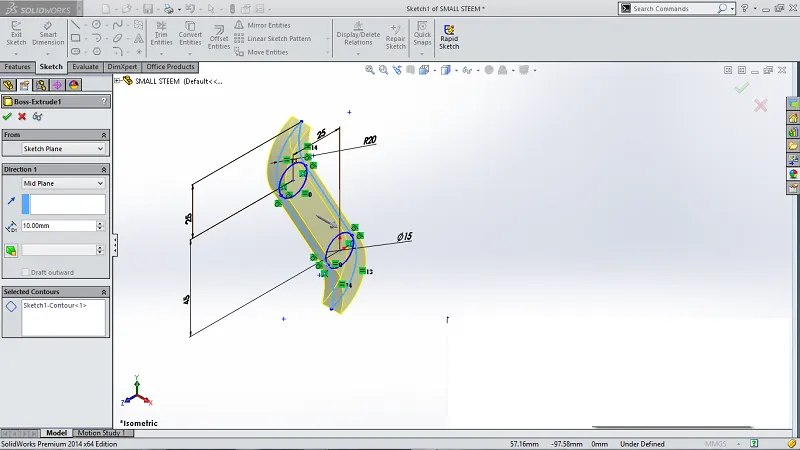
- Change the direction from blind to mid-plane.
- Change the width of the extrusion to 10mm
- Repeat the same steps above for the second part
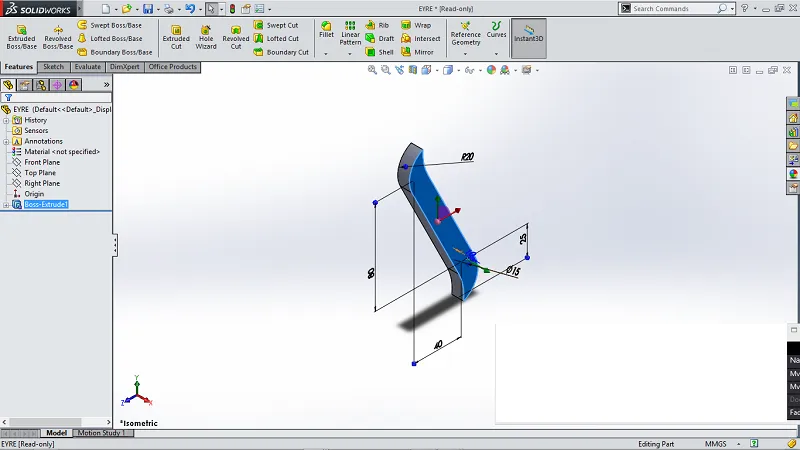
- Save!
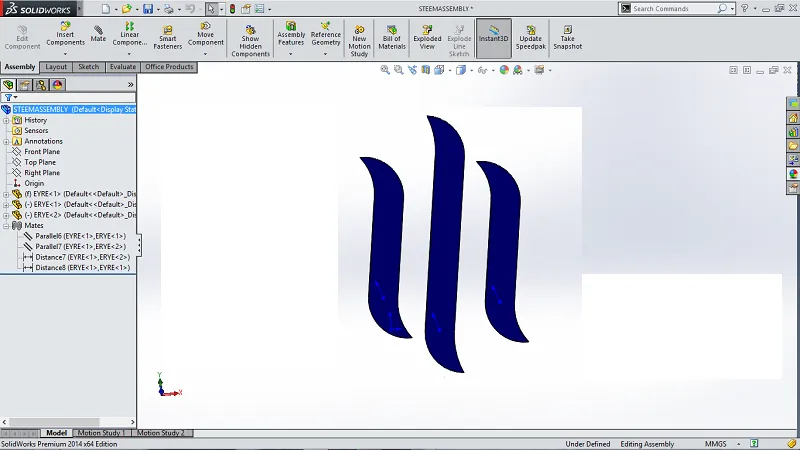
Assembly
In the Assembly stage, we are going to join the two components to form the steem logo.
- Using the Insert component command in the assembly toolbar, insert the two parts,
small steemandbig steem. - While holding the ctrl key on the keyboard, select and drag the
small steempart, this should duplicate the small steem part, let's call it small steem 2. - Using the Mate command, set the following:
- Select the front face of the
Big steemand the front face of thesmall steempart. Select the Parallel mate command and click OK to accept. - Without exiting the Mate Select the left side of the
small steemand the right side of thebig steem, select the distance mate and set a distance of 30mm. Click OK to accept. - Repeat the procedures above for
smallsteem2
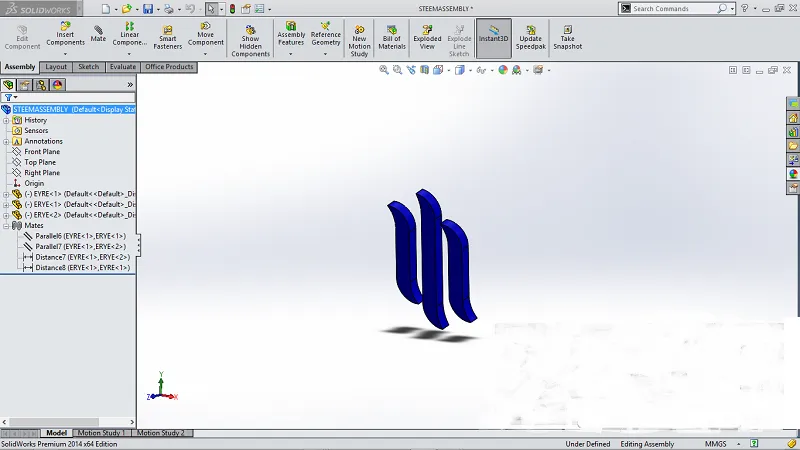
- Select the front face of the
- To change the appearance of the assembly, click the multi colored ball in the quick toolbar menu above the graphics area. Select the color or appearance you want it the assembly to take.
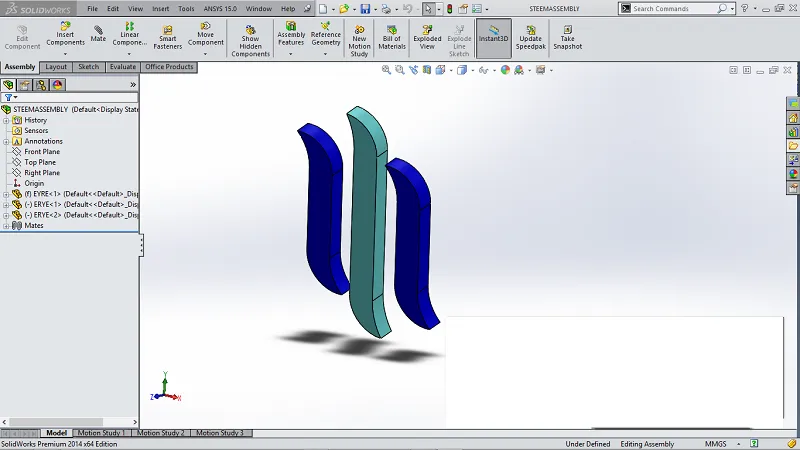
- Do not forget to save your work. You could save it as
steem assembly.sldasm
Animation.
In this section, we would be adding a motion study to the assembly.
- In the Assembly menu, click New motion study.
- Click on Add animation and select your desired animation. Choose your desired settings and save.
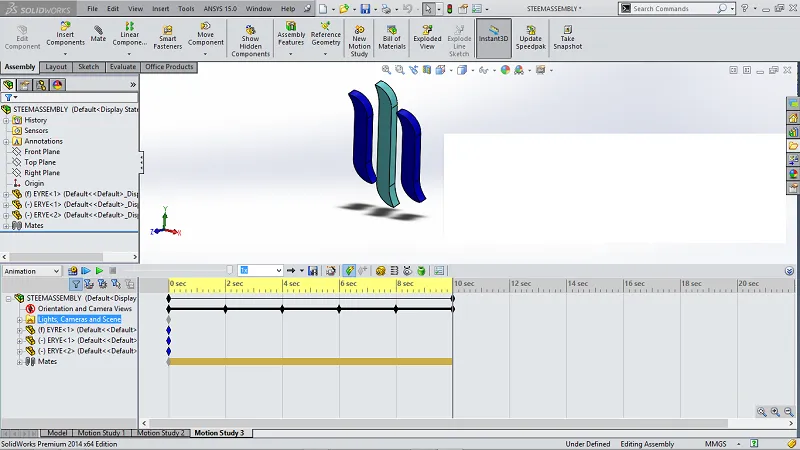
3.Run the animation.
Avi to Gif
- You can convert the animation video which is in saved as a
.avifile togifusing openavitogif - Do not ever forget to save!.
Image source
All images used in this presentation are original works.
Solidworks is very easy to use, if you can dimension it, you can sketch it
Hopefully I'll create an animation of the steemit logo sometime soon.