Hola compañeros de hive, en el día de hoy quiero hablarles sobre la importancia de usar FOR en nuestros códigos.🤖
La increíble utilidad bucle FOR
En el emocionante universo de la electrónica, cada línea de código cuenta una historia de innovación. Hoy, te sumergirás en el fascinante mundo del for en Arduino, una herramienta imprescindible para simplificar y potenciar tus proyectos. 🌟🔧
¿Qué es el for? Es tu mejor aliado para repetir acciones con elegancia y precisión. 🔄💻
Imagina este escenario: Quieres controlar una matriz de LEDs 🌈 para crear un espectáculo de luces hipnotizante. Con un simple for, puedes hacer que cada LED parpadee en secuencia. 🎆
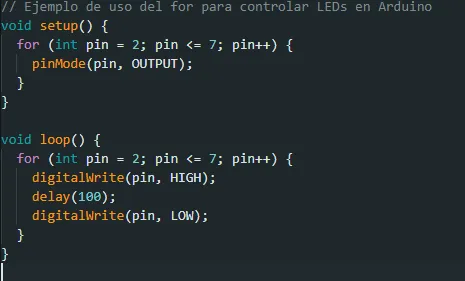
// Ejemplo de uso del for para controlar LEDs en Arduino
void setup() {
for (int pin = 2; pin <= 7; pin++) {
pinMode(pin, OUTPUT);
}
}
void loop() {
for (int pin = 2; pin <= 7; pin++) {
digitalWrite(pin, HIGH);
delay(100);
digitalWrite(pin, LOW);
}
}
¡El for es tu herramienta para transformar ideas en realidad! Desde controlar actuadores hasta procesar datos, Arduino y el for son una combinación imbatible para cualquier proyecto electrónico. 💪🔌
¿Estás listo para desatar tu creatividad con el for en Arduino? ¡El límite es tu imaginación! 🌟🚀 Cualquier duda que tengas , podes dejármelo en los comentarios o si tenes algun tema que te gustaría que hable!!! un saludo compañero de hive💪
-.....................................................................
Hello hive colleagues, today I want to talk to you about the importance of using FOR in our codes.🤖
The incredible usefulness of FOR
In the exciting universe of electronics, every line of code tells a story of innovation. Today, you will immerse yourself in the fascinating world of the Arduino for, an essential tool to simplify and enhance your projects. 🌟🔧
What is the for? It is your best ally to repeat actions with elegance and precision. 🔄💻
Imagine this scenario: You want to control an array of LEDs 🌈 to create a mesmerizing light show. With a simple for, you can make each LED flash in sequence. 🎆
// Example of using for to control LEDs on Arduino
void setup() {
for (int pin = 2; pin <= 7; pin++) {
pinMode(pin, OUTPUT);
}
}
void loop() {
for (int pin = 2; pin <= 7; pin++) {
digitalWrite(pin, HIGH);
delay(100);
digitalWrite(pin, LOW);
}
}
The for is your tool to transform ideas into reality! From controlling actuators to processing data, Arduino and the for are an unbeatable combination for any electronic project. 💪🔌
Are you ready to unleash your creativity with the for on Arduino? The limit is your imagination! 🌟🚀 Any questions you have, you can leave them in the comments or if you have any topic you would like me to talk about!!! Greetings hive mate💪