¡Hola, Mundo!
¿Queréis acompañarme en el proceso de un sencillo trabajo de scrap? Mi pequeña amiga cumplía tres años y además de un divertido juego de mesa quería tener un detalle con ella, hecho por mí, por supuesto. A ella le encantan los gatos, y aunque su color preferido es el azul, no me pude resistir a esta colección de papeles en tonos rosas y grises, que coordiné con blanco y negro.
Hi, World!
Would you like to join me in the process of a simple scrapbooking project? My little friend was turning three years old and besides a fun board game I wanted to have a detail with her, made by me, of course. She loves cats, and although her favourite colour is blue, I couldn't resist this collection of pink and grey paper, which I coordinated with black and white.
Procedimiento:
Procedure:
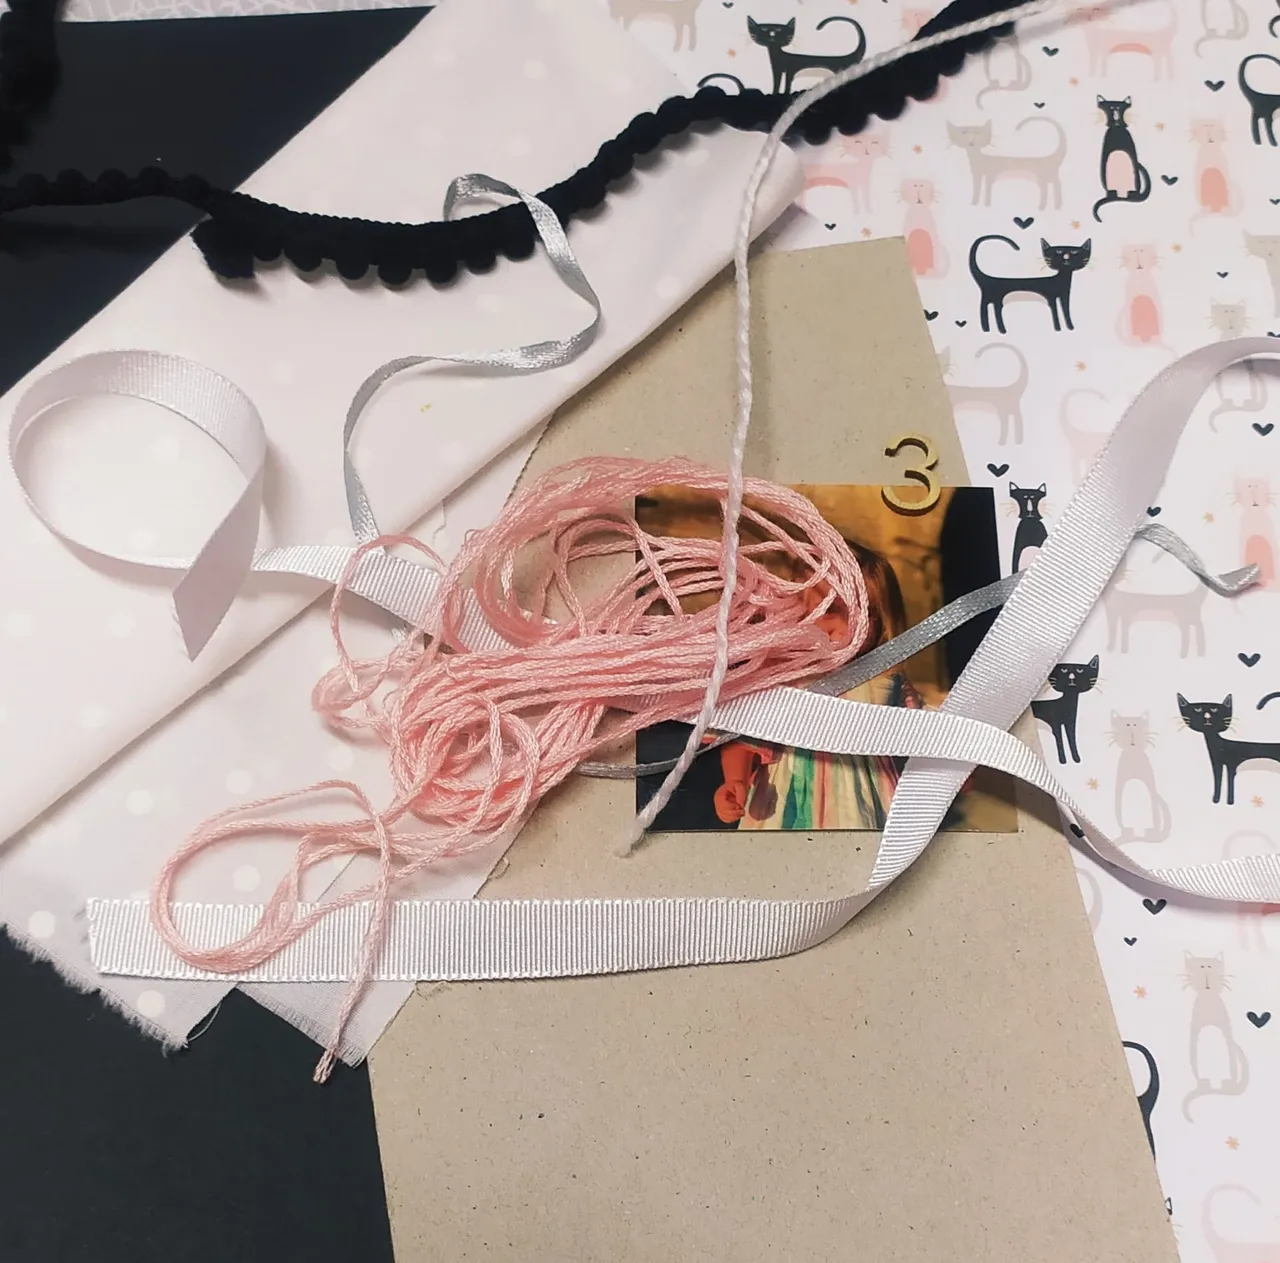
1.- Lo primero que hice fue sacar una copia de la foto que iba a usar, y a partir de ella, preparé todos los materiales, para ver bien el efecto que hacían los colores y las texturas. Luego siempre surge algún cambio, como los madroños negros que veis en la foto, que al final no usé. O los "eyelets" (ojales) y la cinta de algodón que decidí añadir después.
1.- The first thing I did was to make a copy of the photo I was going to use, and from it, I prepared all the materials, to see the effect of the colours and textures. Then there are always some changes, like the black "madroños" (strawberry fruits) you can see in the photo, which I didn't use in the end. Or the eyelets and the cotton ribbon that I decided to add later.

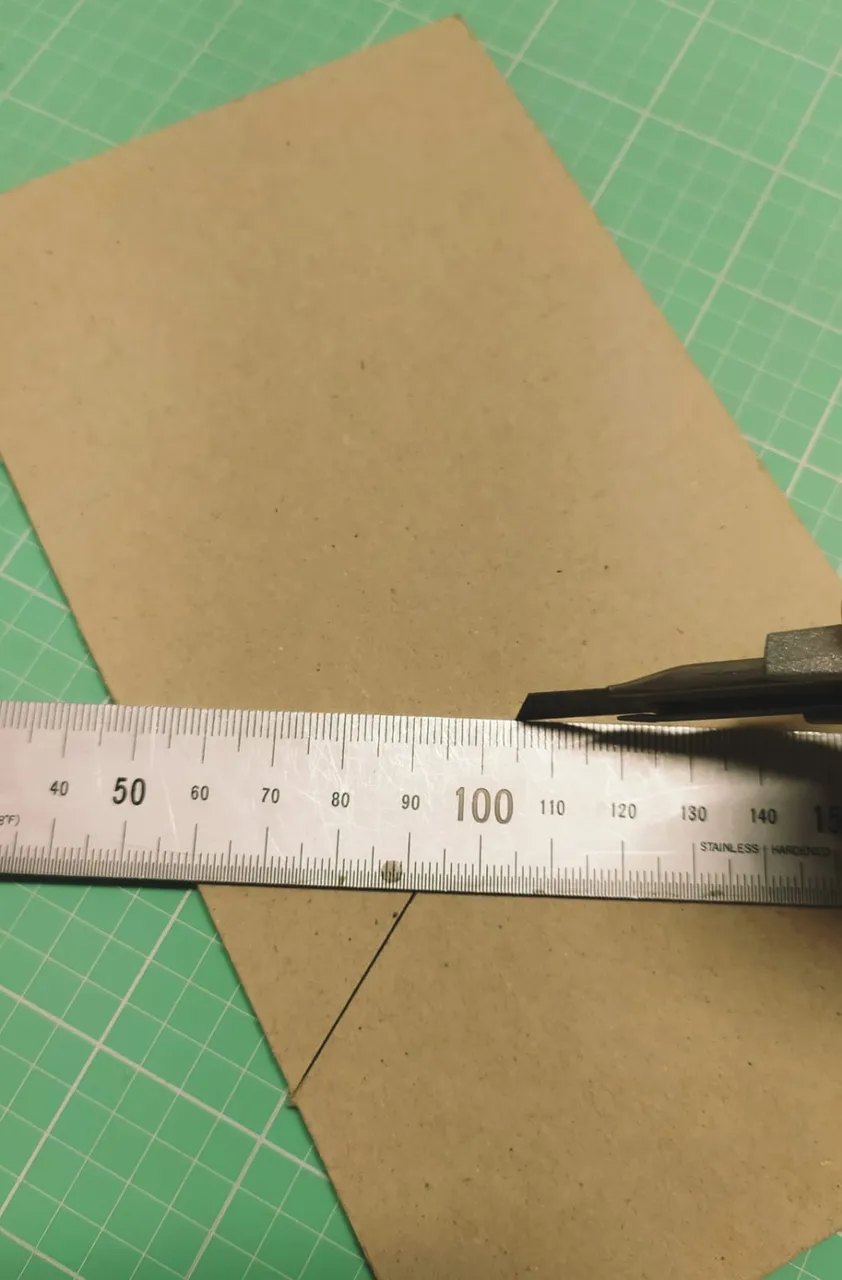
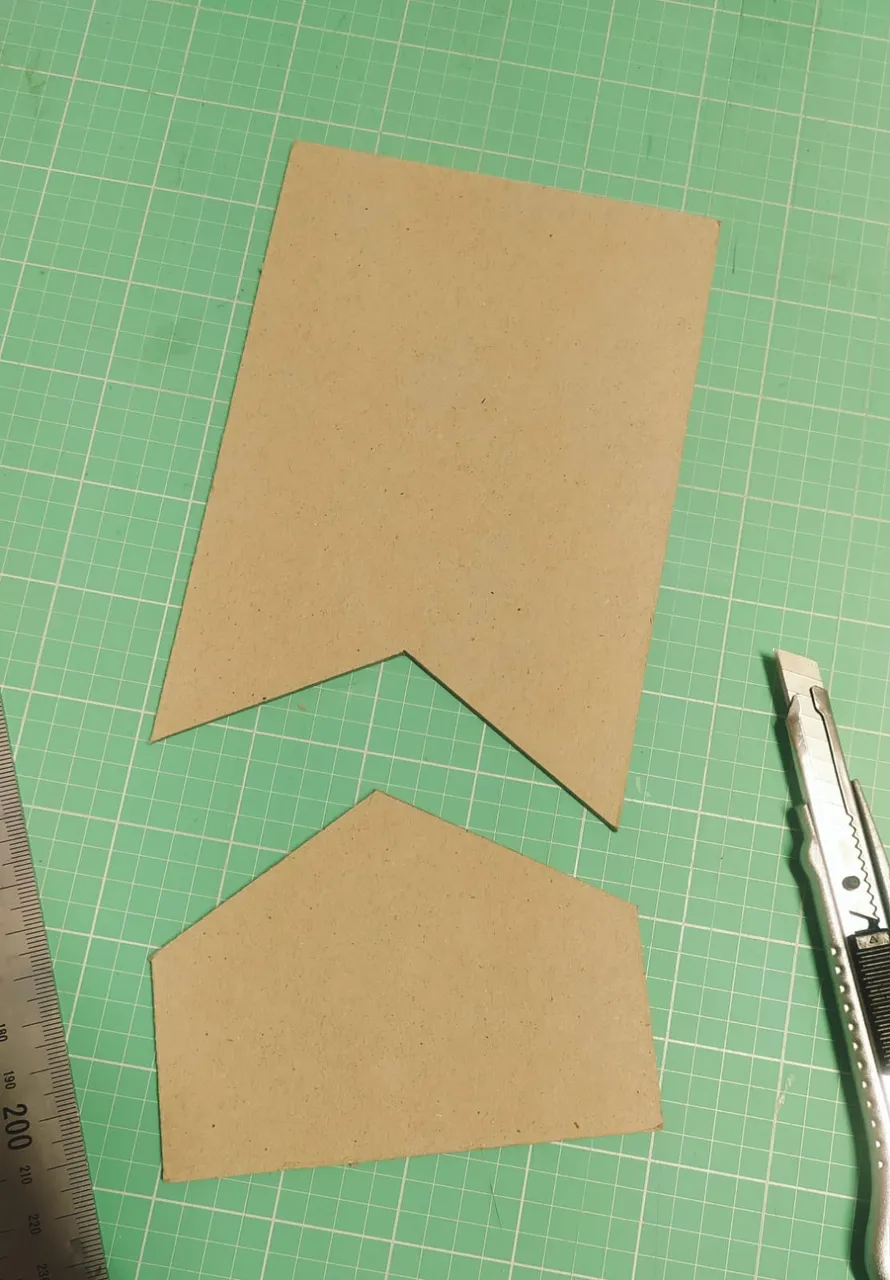
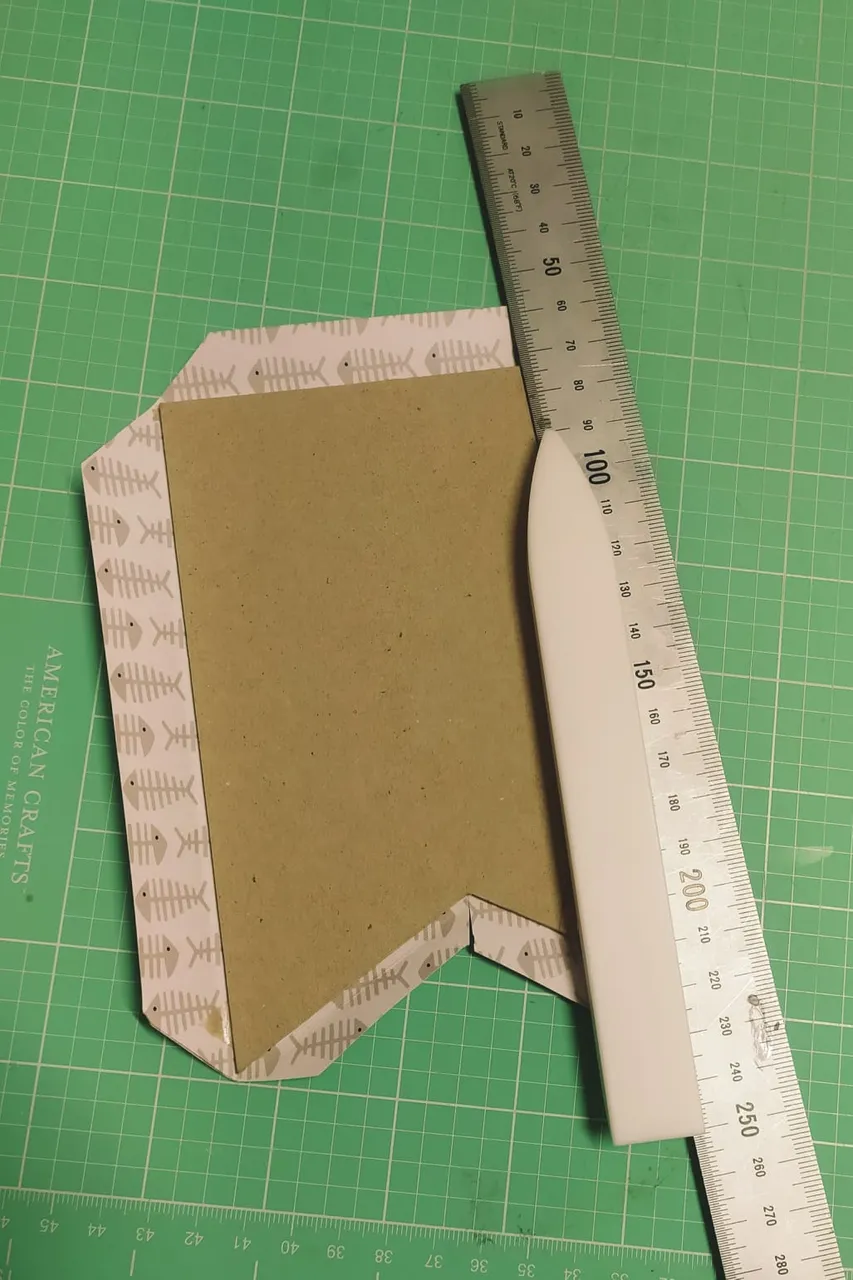
2.- Marcamos las dimensiones elegidas para nuestro banderín en el "chipboard" (que es una lámina de cartón prensado para encuadernación y cartonaje, que además de rígido y resistente, se puede cortar fácilmente con un cúter), y lo cortamos con el cúter y la ayuda de una regla metálica (en una de plástico se podría clavar la cuchilla y romperse una u otra y, lo peor, provocar un accidente y tener que salir corriendo a urgencias).
2.- We mark the dimensions chosen for our pennant on the chipboard (which is a sheet of pressed cardboard for bookbinding and cardboard, which is rigid and resistant, and can be easily cut with a cutter), and we cut it with the cutter and the help of a metal ruler (in a plastic one, the blade could get stuck and break one or the other and, worse, cause an accident and have to rush to the emergency room).
3.-Encolamos el papel elegido y le hacemos los cortes pertinentes en las esquinas, para plegar los bordes y encolarlos por detrás. Nos ayudamos de una plegadora (yo estoy usando una de teflón, que no marca ni mancha el papel) y una pequeña paletina para aplicar la cola blanca (previamente diluida en un poco de agua, para extenderla mejor).
3.- We glue the chosen paper and make the relevant cuts in the corners, to fold the edges and glue them on the back. We use a folding machine (I'm using a Teflon one, which doesn't mark or stain the paper) and a small palette knife to apply the white glue (previously diluted in a little water, to spread it better).
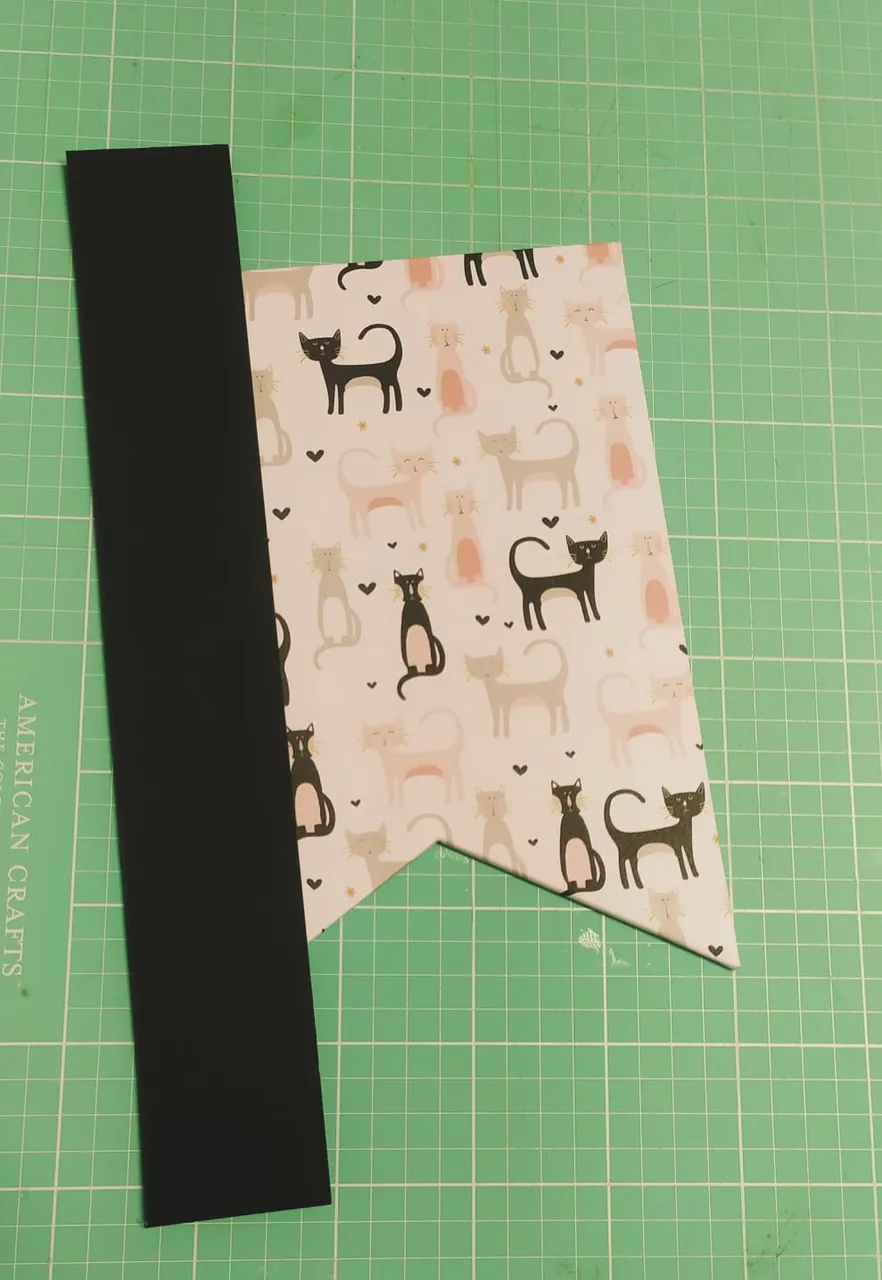
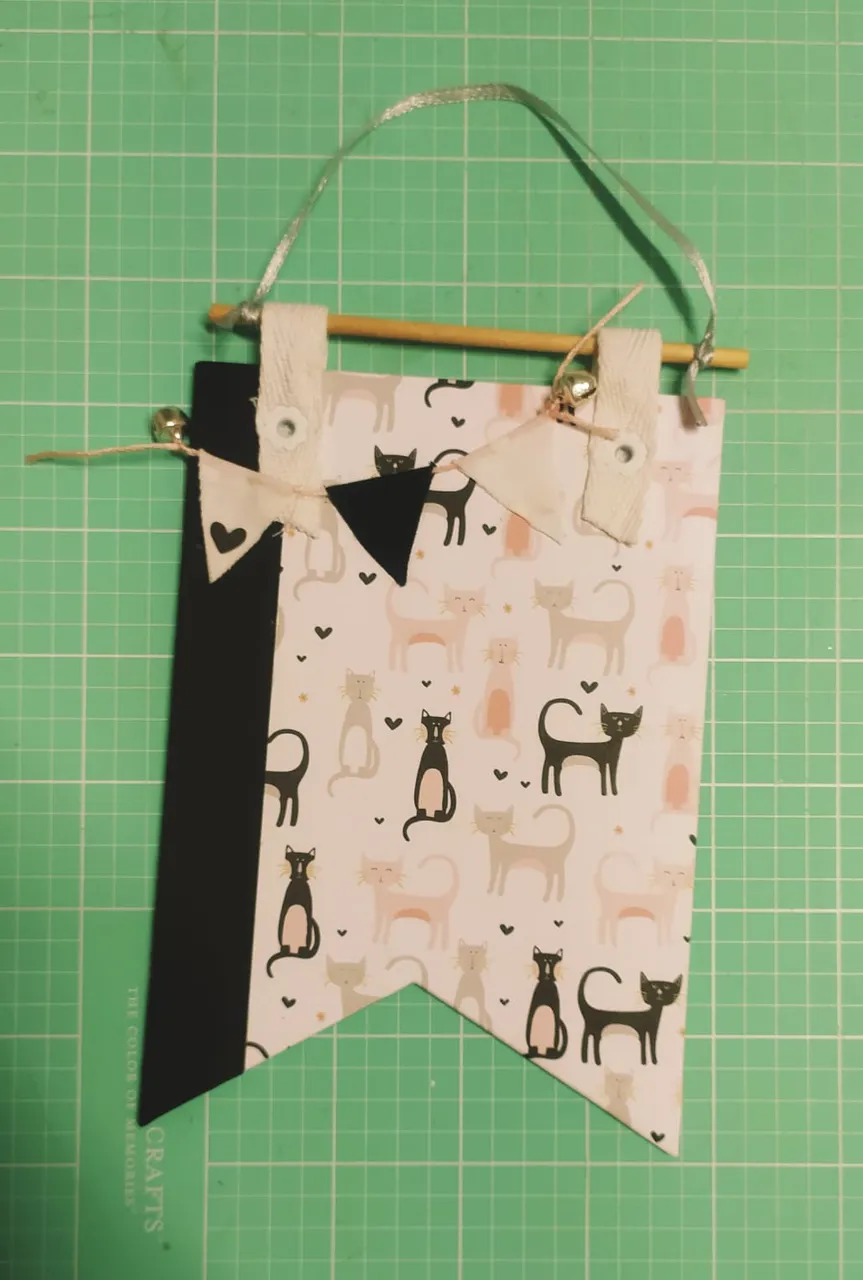
4.- Le vamos a añadir una tira de papel a la izquierda, para decorar el banderín. He elegido el negro para que haga un contraste bonito, y haga resaltar los gatos negros del dibujo. Es un papel liso y mate, de un gramaje alto, 300gr/m2. Este también hay que encolarlo y plegarlo de la misma manera.
4.- We are going to add a strip of paper to the left, to decorate the pennant. I have chosen black to make a nice contrast, and to highlight the black cats in the drawing. It is a smooth and matt paper, with a high grammage, 300gr/m2. This also needs to be glued and folded in the same way.
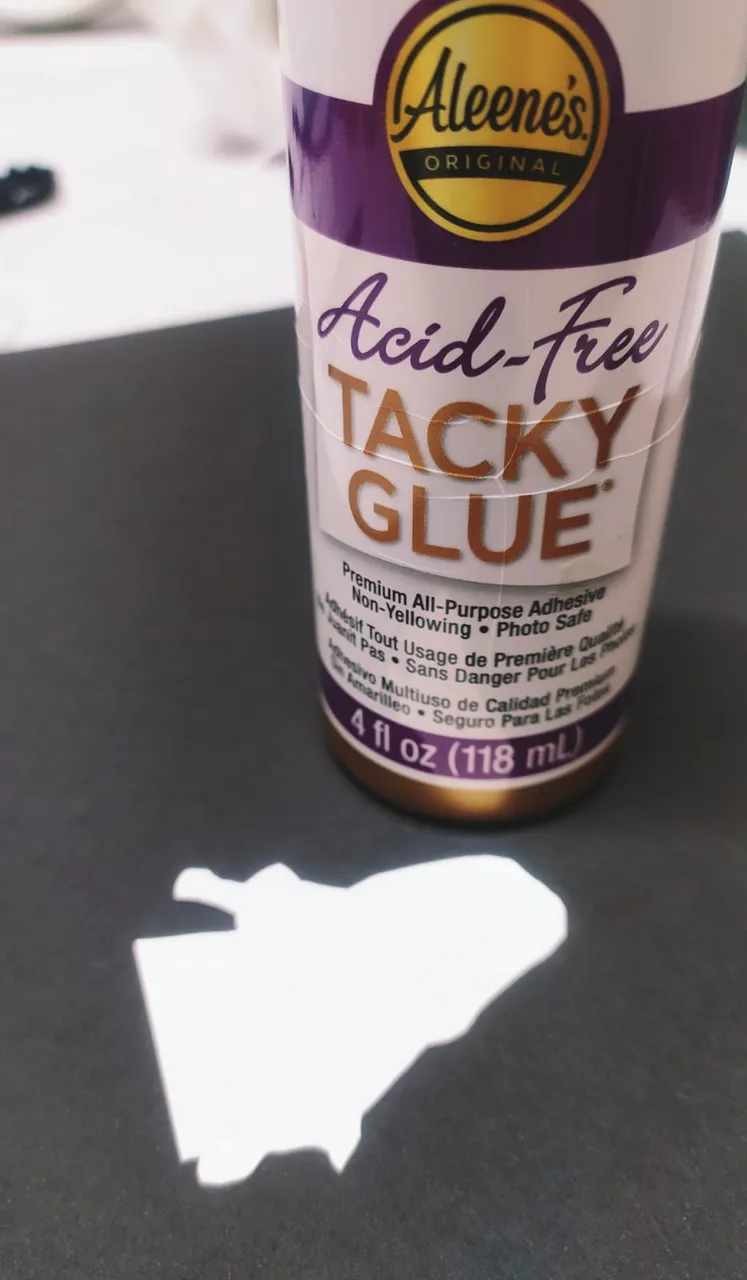
5.- Vamos a recortar la foto y a pegarla sobre cartulina de alto gramaje, para regruesarla. Es importante usar un adhesivo sin ácidos, para que no estropee las fotografías. Recuerda que en scrapbooking todos los materiales que usamos son libres de ácidos y ligninas (puedes leer sobre esto en la publicación @marguimiau/los-protagonistas-los-papeles-the-protagonists-the-papers.
En este caso he usado adhesivo líquido libre de ácidos Tacky, de la marca Aleene.
5.- We are going to cut out the photo and glue it on heavy cardboard, in order to thicken it. It is important to use an acid-free adhesive, so that it does not damage the photographs. Remember that in scrapbooking all the materials we use are acid and lignin free (you can read about this in the publication @marguimiau/los-protagonistas-los-papeles-the-protagonists-the-papers
In this case I used Tacky acid-free liquid adhesive from Aleene.
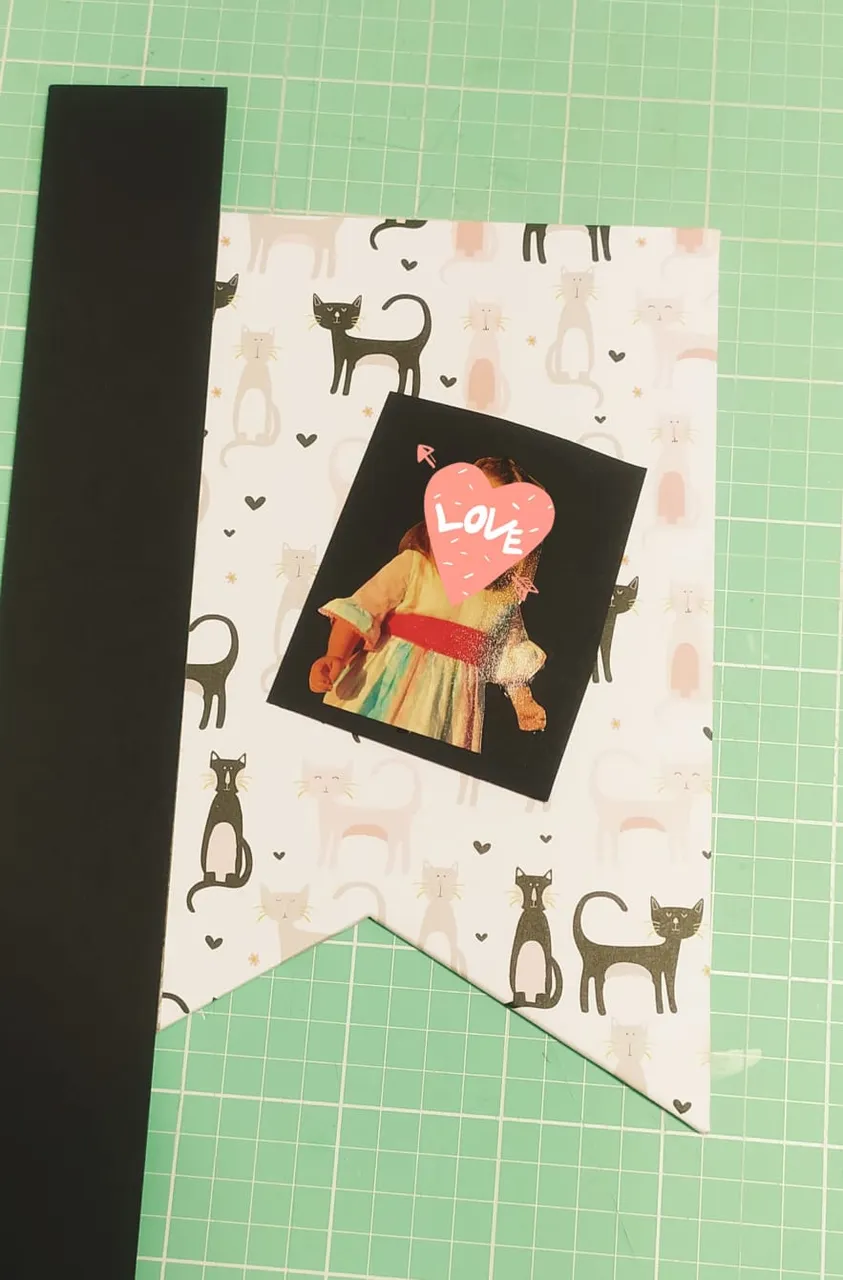
¡Va a quedar genial con la foto recortada!
It's going to look great with the cropped photo!
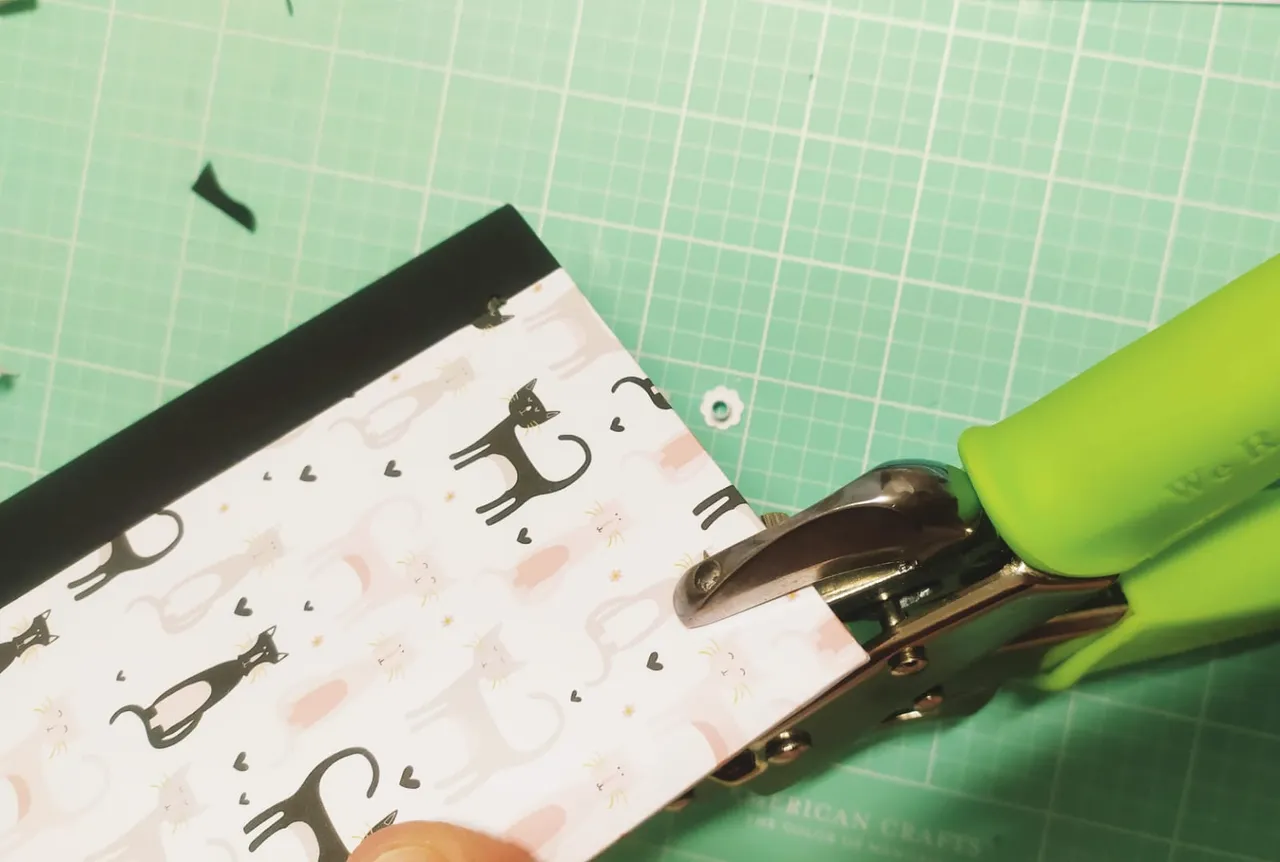
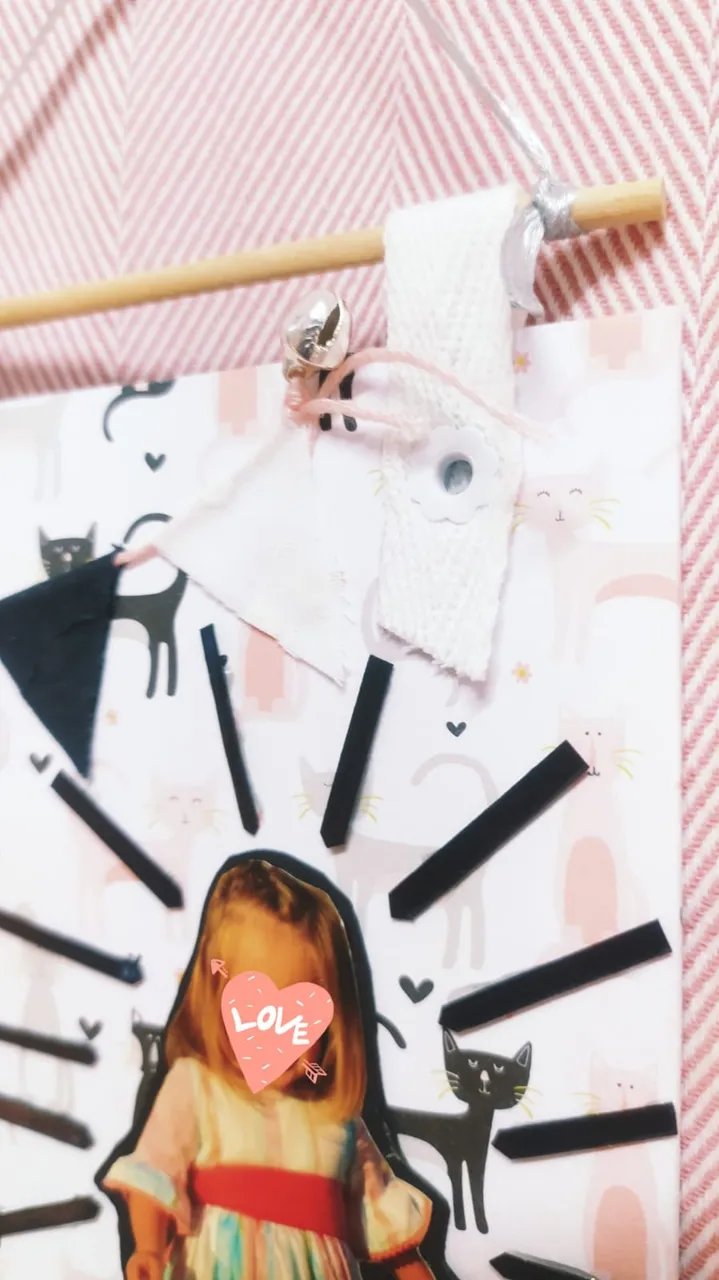
6.- Marcamos los agujeros en la parte superior del banderín y los perforamos. Ya podemos colocar ahí las cintas de algodón que usaremos para colgarlo. Los ojales sujetarán esa cinta.
6.- Mark the holes on the top of the pennant and pierce them. We can now place the cotton ribbons that we will use to hang the pennant. The eyelets will hold the ribbon.
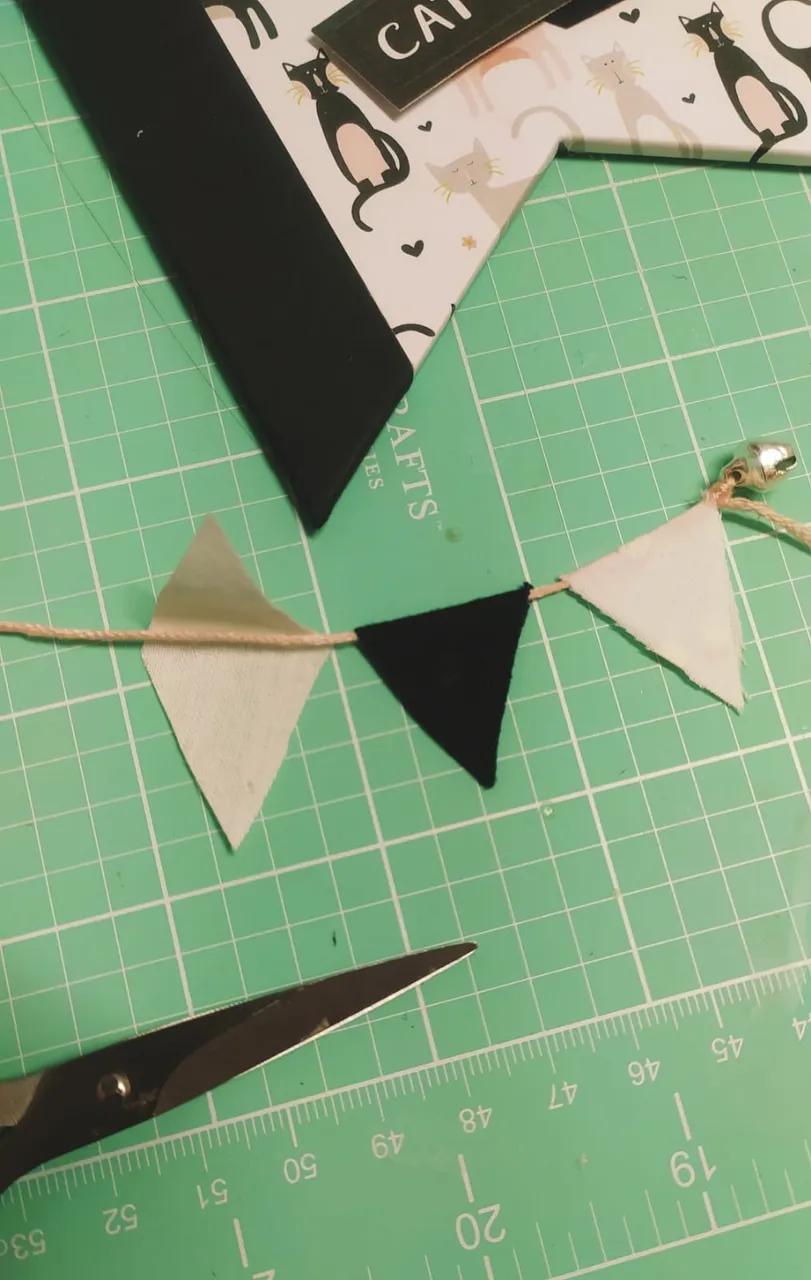
7.- Con trocitos de tela crearemos unas banderitas pequeñas, que sujetaremos con un cordón de algodón en rosa pastel. En los extremos ataremos unos cascabeles, tan típico de los gatos.
7.- With small pieces of fabric we will create small flags, which we will attach with a pastel pink cotton cord. At the ends we will tie some bells, so typical of cats.
8.- En la cinta de algodón introducimos un palito redondo de madera y anudamos en los extremos un estrecho lazo de raso en gris. Esta será la sujeción del banderín, y lo podremos colgar en el rincón que queramos de casa.
8.- We insert a round wooden stick into the cotton ribbon and tie a narrow satin ribbon in grey at the ends. This will hold the pennant in place, and we can hang it in any corner of the house.
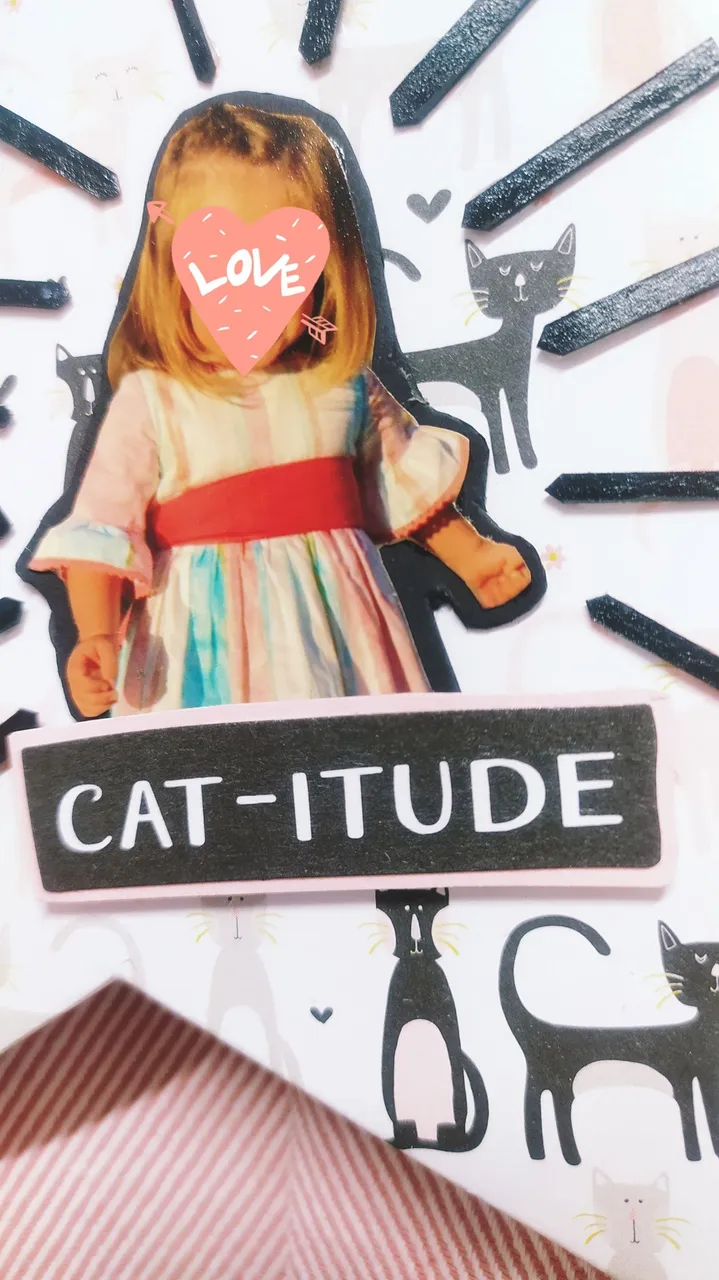
9.- Pasamos ya a colocar los detalles que tenemos preparados: la foto recortada y regruesada, un cartel decorativo "cat-itude" que pegamos con adhesivos de foam y así lo elevamos un poco, un número 3 en madera y un pequeño corazón de papel.
9.- We now move on to the details that we have prepared: the cut-out and thickened photo, a decorative "cat-itude" sign that we stuck on with foam stickers to raise it up a little, a wooden number 3 and a small paper heart.
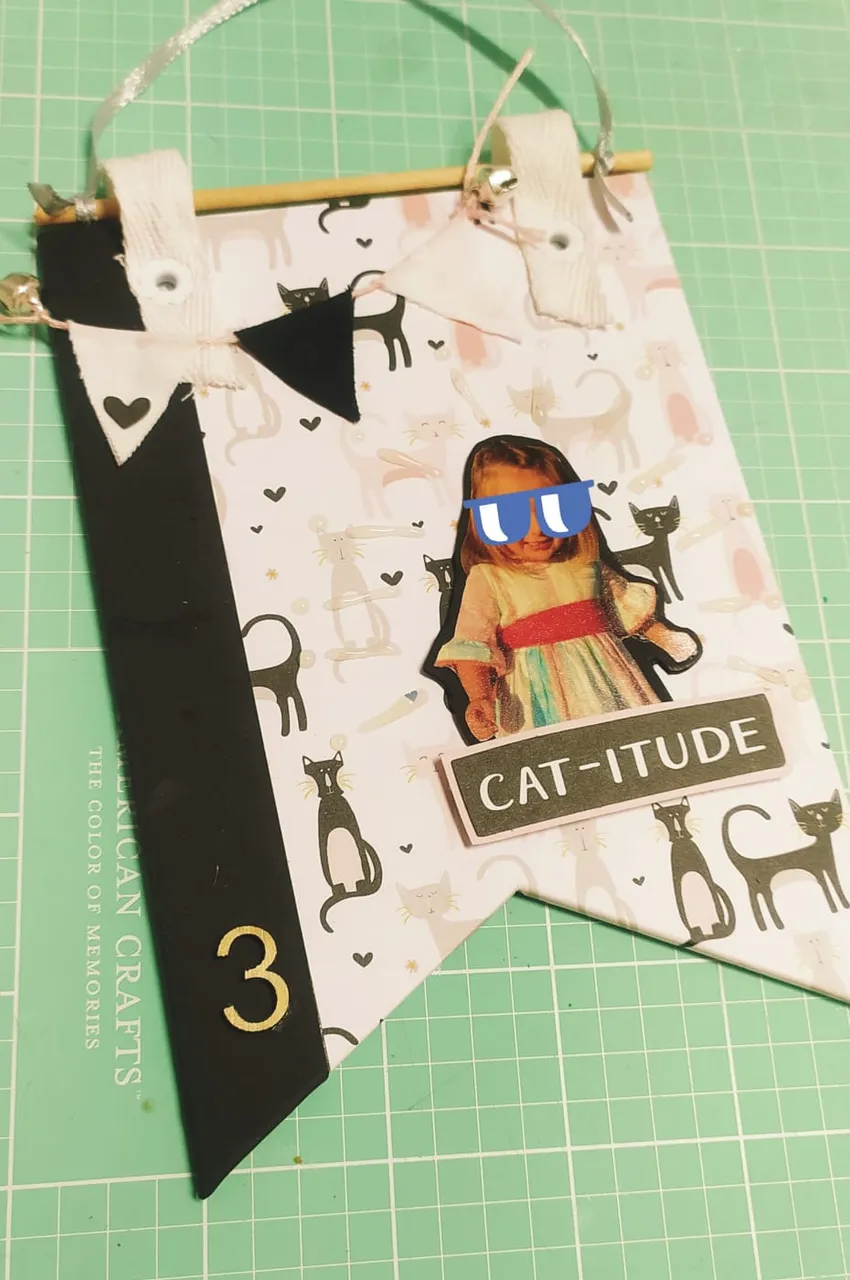
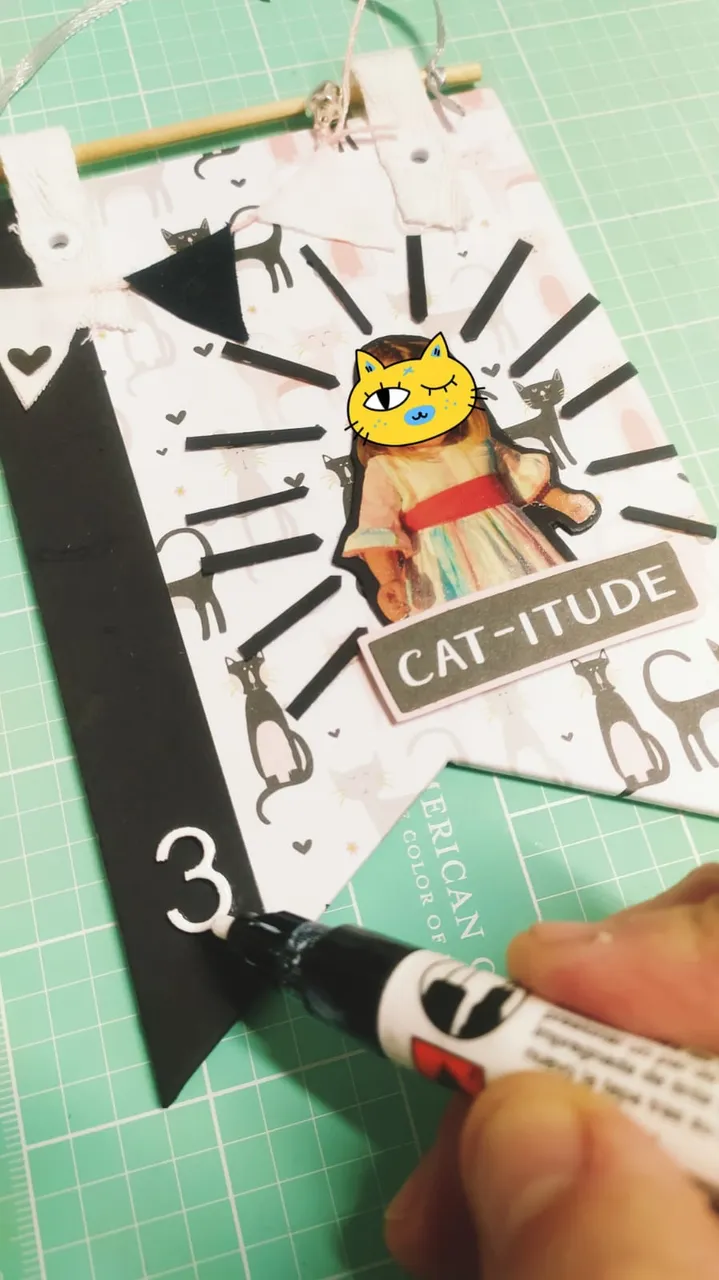
10.- Y seguimos con los detalles, porque vamos a rotular el número de madera en blanco brillo, para que coordine con el conjunto. Y le vamos a pegar unas tiras en negro alrededor de la foto, para hacerla resaltar.
10.- And we continue with the details, because we are going to label the wooden number in glossy white, so that it coordinates with the whole. And we are going to stick some black strips around the photo, to make it stand out.
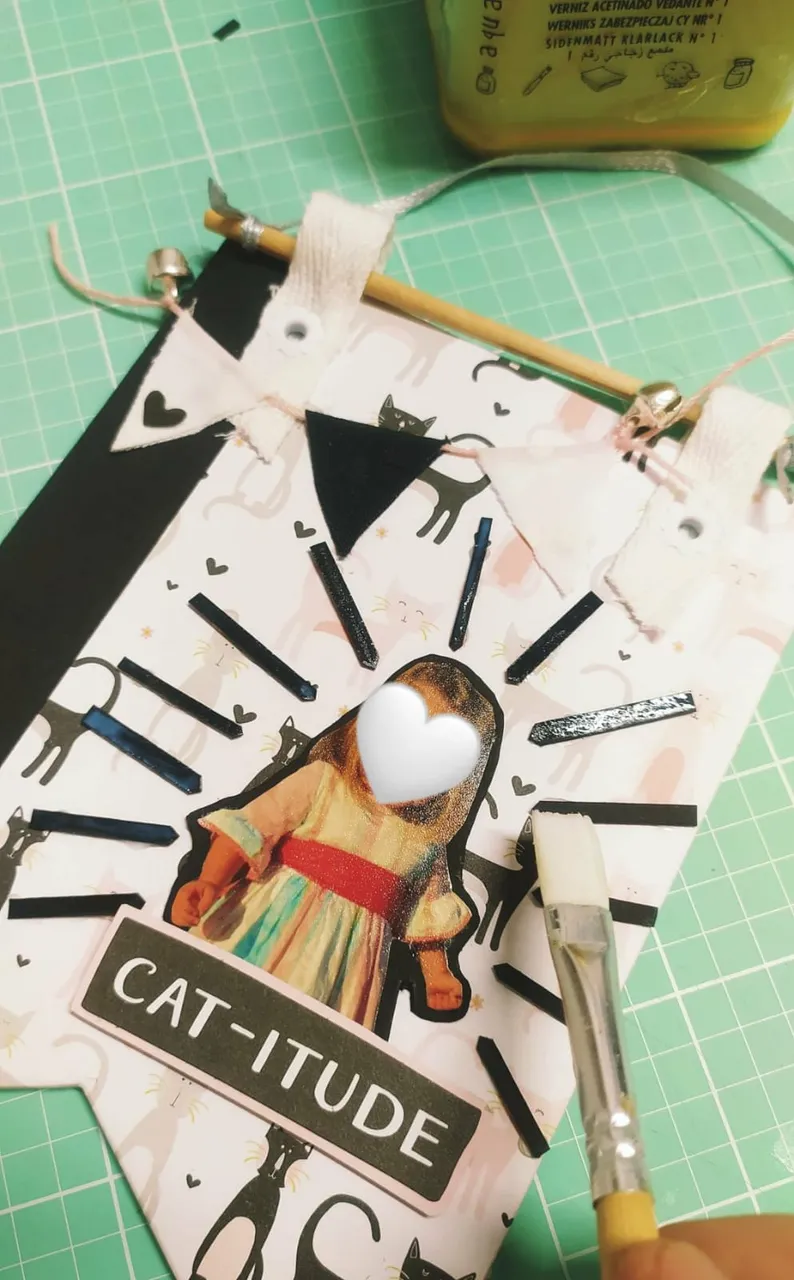
11.- Y barnizamos las tiras finitas negras, el pequeño corazón de papel y el cartel de "cat-itude"
11.- And we varnished the thin black strips, the little paper heart and the "cat-itude" sign.
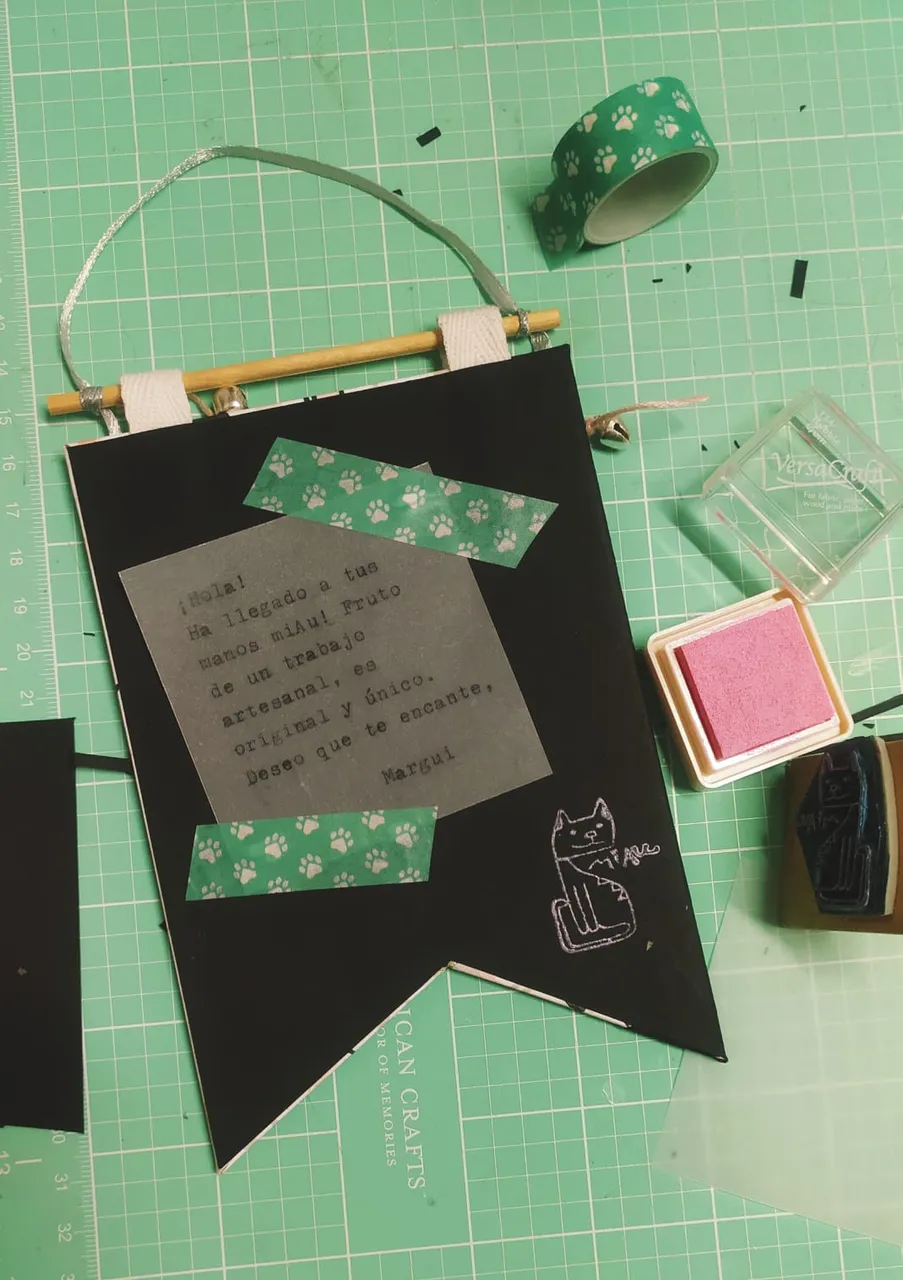
12.- La parte trasera debe quedar también terminada. Para ello recortamos otro banderín de la misma forma pero unos milímetros más pequeño, y lo encolamos. Recuerda dejar siempre lo que vayas pegando bajo un peso para que no se curve mientras se seca.
Previamente habíamos escrito a máquina en papel vegetal blanco uno de los eslóganes de miAu! y con tinta permanente estampamos el logo. Pegamos este papel al banderín con washitape (cinta de papel decorada).
12.- The back should also be finished. To do this, cut out another pennant of the same shape but a few millimetres smaller, and glue it on. Remember to always leave what you are gluing under a weight so that it doesn't curl while it dries.
We had previously typed one of the miAu! slogans on white tracing paper and stamped the logo with permanent ink. We stuck this paper to the pennant with washitape (decorated paper tape).
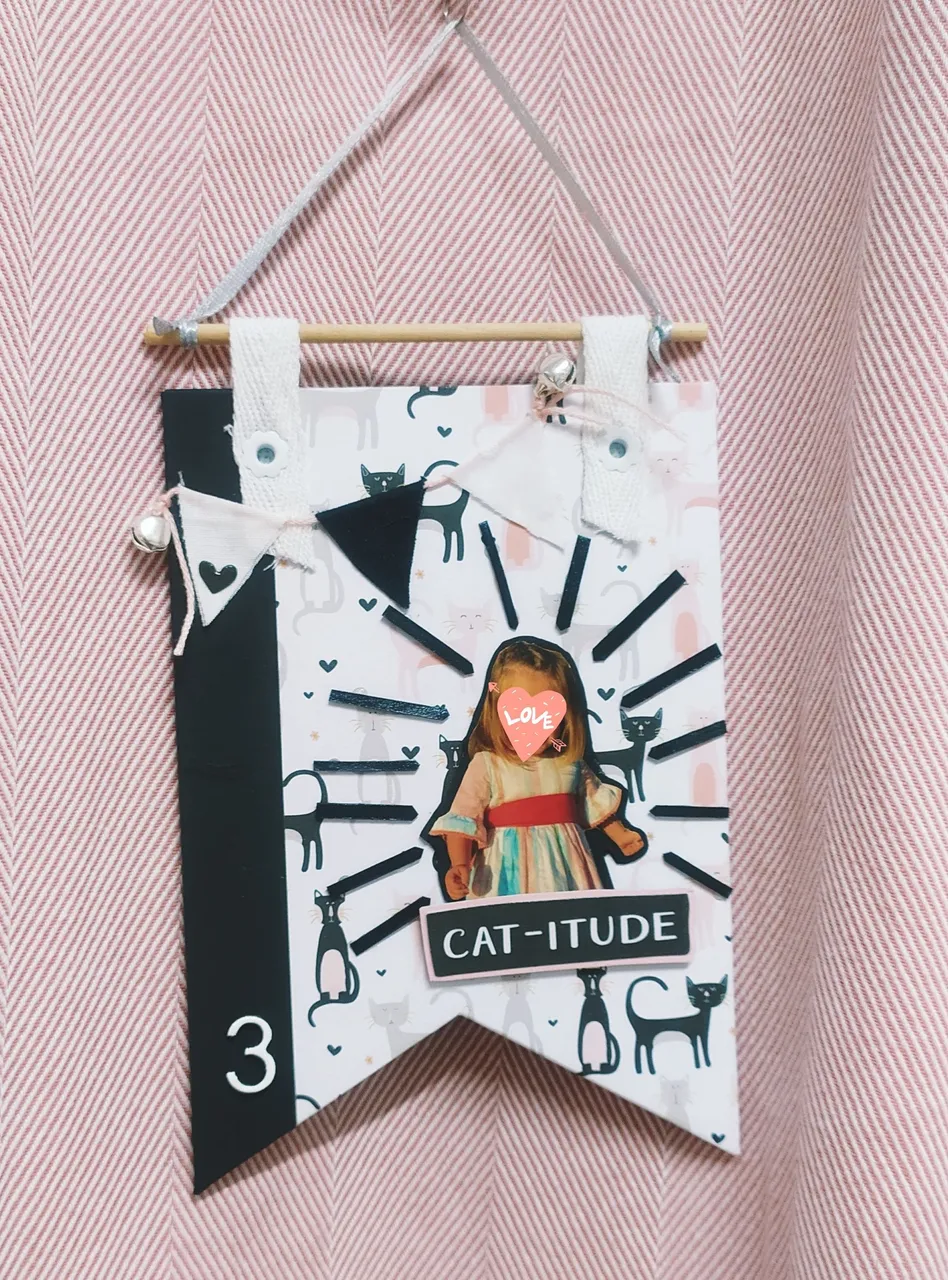
¡Ya está listo!
It's ready!
Me encantó el detalle de los cascabeles y la combinación de tela y papel.
**I loved the detail of the bells and the combination of fabric and paper. **

Barnizar algunos detalles te permite jugar con texturas:
Varnishing some details allows you to play with textures:
Ha quedado un trabajo muy dulce. A mi amiga y a su mamá les encantó el regalo. ¿y a ti?
It was a very sweet job. My friend and her mum loved the gift, how about you?
Gracias por leerme.
Te doy la bienvenida a miAu!
Thank you for reading me.
I welcome you to miAu!
Traducido gracias a la versión gratuita de www.DeepL.com/Translator
Translated with www.DeepL.com/Translator (free version)