
This tutorial I will make a simple application using Node.js, to start this tutorial we have to install node js, please open its website at https://nodejs.org/en/.
in addition we will also ask for help https://expressjs.com/ for the tutorial that we make easier to apply.
Express.js is a very popular framework to pair with node.js . So later we will not be too complicated. section of the functions of the node. And for the core of its application we will use Socket.io. Socket.io is used for realtime applications such as notifications, or in this tutorial will be in use in the chat app, and later we will be a little help from jquery
What Will I Learn?
- Install Package-Package (Node.js, Express.js , Socket.io)
- Learn Use Socket.io
- Make Realtime Chat With Node
Requirements
- Internet Connection
- Install Package-Package (Node.js, Express.js , Socket.io)
- Javascript intermediate, Basic Node.js
Difficulty
- Intermediate
Preparation
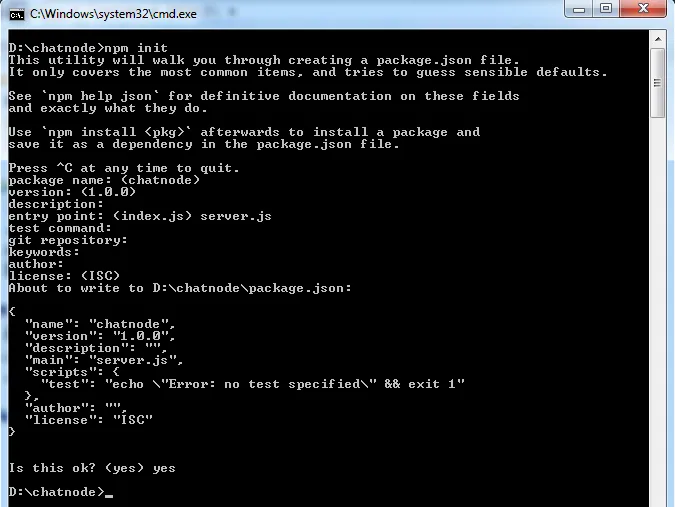
We will start by installing package.json or preparing any package package that must be installed. You can start it with npm init in you command prompt. Make sure you have installed the node, I created a folder with the name of chatnode.
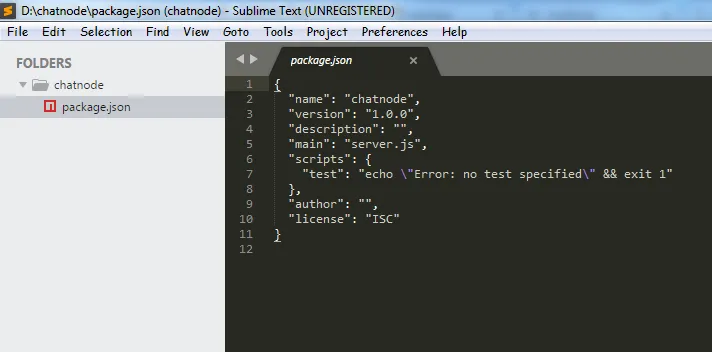
{
  "name": "chatnode",
  "version": "1.0.0",
  "description": "",
  "main": "server.js",
  "scripts": {
    "test": "echo \"Error: no test specified\" && exit 1"
  },
  "dependencies": {
    "express": "*",
    "socket.io": "*"
  },
  "author": "",
  "license": "ISC"
}
I installed Express and install socket.io "express": "*" , "socket.io": "*" , for the latest version "*" .
https://cdnjs.cloudflare.com/ajax/libs/jquery/3.3.1/jquery.min.js
Index.html
<!DOCTYPE html>
<html>
<head>
    <meta charset="utf-8">
    <title>Chat Apps With Node</title>
    <link rel="stylesheet" type="text/css" href="">
</head>
<style type="text/css">
html{
    width: 100%;height: 100%;
}
*{
    margin: 0px;padding: 0px;
}
.wrapper-chat{
    padding: 15px 50px;
}
.input-chat{
    width: 60%;
    height: 65px;
    border-radius: 40px;
    display: inline-block;
    border: none;
    padding: 0px 20px;
    font-size: 30px;
    color: #4a4a4a;
}
.button-chat{
    width: 20%;
    height: 65px;
    display: inline-block;
    float: right;
    background: white;
    border: none;
    border-radius: 10px;
    font-size: 17px;
    color: #0770cd;
    font-weight: bold;
}
.chat-field{
    position: absolute;
    width: 100%;
    height: 100px;
    background: #0770cd;
    bottom: 25px;
}
</style>
<body>
    <ul id="chats"></ul>
    <div class="chat-field">
        <div class="wrapper-chat">
                        <from>
                  <input class="input-chat" type="text" id="text_chat">
                  <button class="button-chat">Send</button>
                        </from>
        </div>
    </div>
</body>
<script type="text/javascript" src="https://cdnjs.cloudflare.com/ajax/libs/jquery/3.3.1/jquery.min.js"></script>
</html>
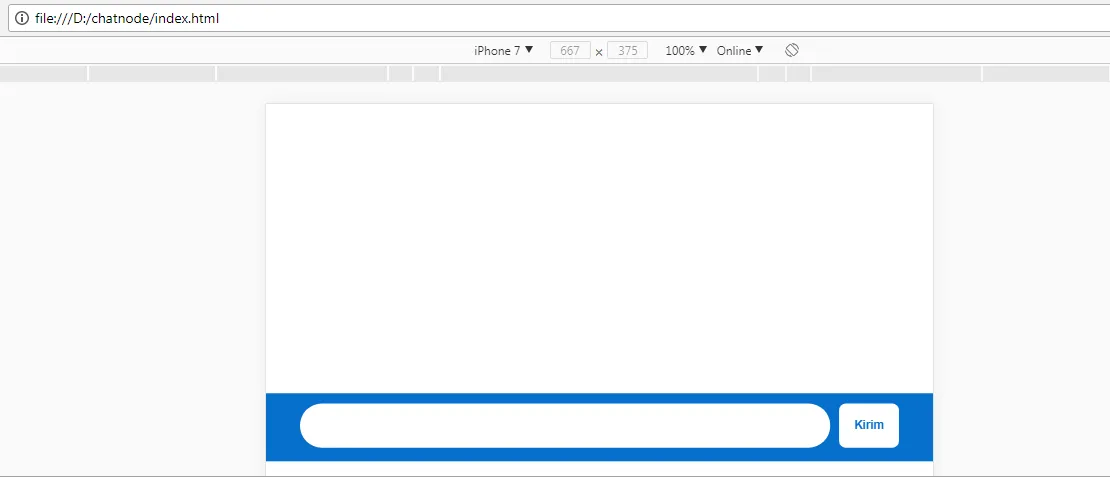
Because we have not created a server inside our node, to see it we have to open our index.html file in the browser. We have finished creating a static file in our project, next kiata will make its application
Make Chats Apps
We will immediately create its node.js part now, using express and also socket.io in the chat section.
We will start by creating a server.js.
var app     = require('express')();
var http            = require('http').Server(app);
var socket          = require('socket.io')(http);
app.get('/', function(req,res){
    res.sendFile(__dirname + '/index.html');
});
http.listen(3000, function(){
    console.log("listen 3000");
});
var app = require('express')(); : Import module Express .
var http = require('http').Server(app); : http module already exists and in the bundle in the module node, so we do not have to install it again separately.
var socket = require('socket.io')(http); : Import module Socket.io .

socket.on('connection',function(socketIo){
    //for handle new message
    socketIo.on('newMessage',function(msg){
        socket.emit('newMessage',msg);
        console.log("New message :" + msg);
    });
});
socket.on('connection',function(socketIo){} : This code will be called if there is a connection, with the command 'connection' is a function of socket.io .
socketIo.on('newMessage',function(msg){ } : This code will be called if there is new message 'newMessage', This is not a function of socket.io but the name will be used in the frontend, so the name here should be the same as the name we will use in the frontend. so that socket.io knows which function to run. We also pass function(msg) the function which later will be a parameter that contains the value of the user input.
socket.emit('newMessage',msg); : This code will install a method named emit derived from socket.io method, serves to announce to all users that there is a new message.
< script type="text/javascript" src="/socket.io/socket.io.js" >
Next we will make the script in the frontend.
< script type="text/javascript">
var socket = io();
$('form').submit(function(){
socket.emit('newMessage',$('#text_chat').val());
$('#text_chat').val('');
return false
});
//for display in frontend
socket.on('newMessage',function(msg){
$('#chats').append($('').text(msg));
});
< /script >
var socket = io(); : Initialization socket.io in a variable to make it easier to use.
$('form').submit(function(){
socket.emit('newMessage',$('#text_chat').val());
$('#text_chat').val('');
return false
});
The following code will be invoked when the user submit.
First parameter :The socket we have connection with server.js will trigger a function named 'newMessage'
Second paramter : The second parameter is the value of the input text$('#text_chat').val().
And we will reset the input text we have used $('#text_chat').val('');
And we return false to prevent the original from submitting so as not to request the server.
Testing The Chat App
After we follow the steps above and there is no error then we can test whether our code goes well.
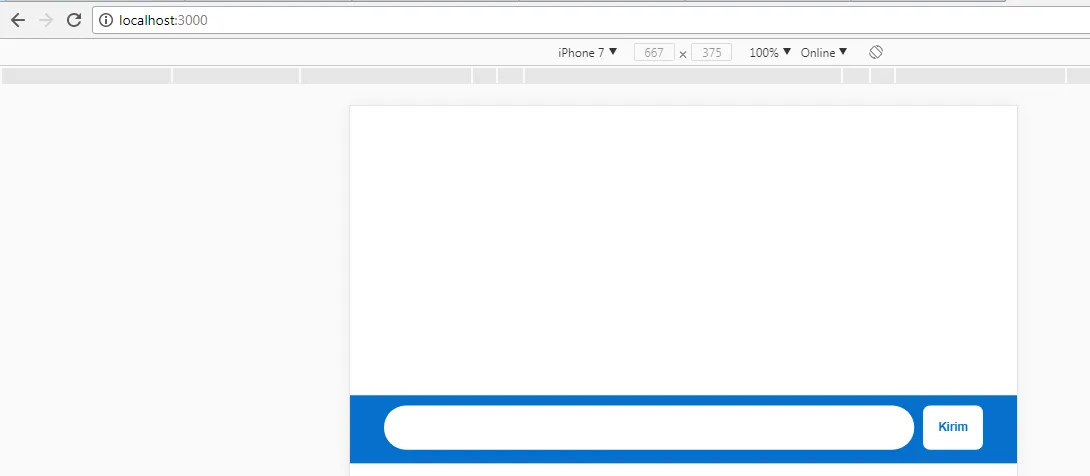
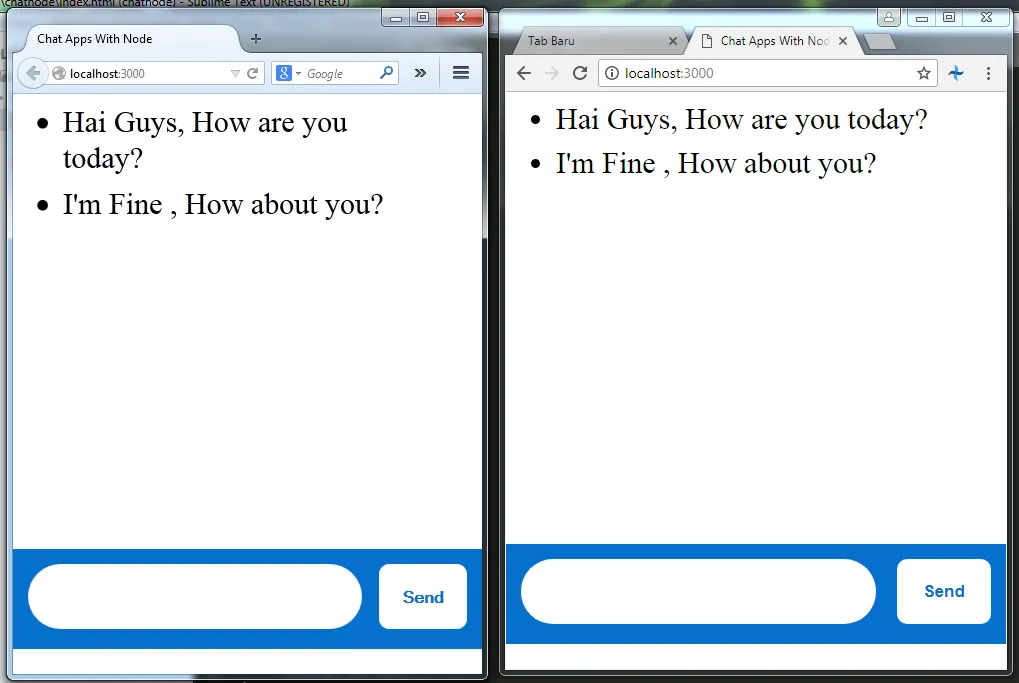
I will open two browsers at once (Chrome and Firefox), to prove the chat goes well on port 3000 .
Chat From Browser Mozilla

Chat From Browser Chrome
Console log in Command Prompt
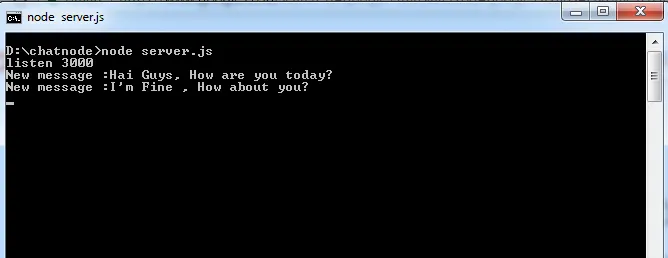
We see although in different browsers chat in the receive remains the same, because the server is the same that is on localhost: 3000 </ b> server that we created on server.js, Selesaai already part one of the simple chat application with node.js, in the next section I'll add a new feature feature that further enhances its frontend part, enough of me, see you in the second part of this tutorial. thank you.
Posted on Utopian.io - Rewarding Open Source Contributors