
This tutorial is a continuation of the first part of the tutorial series to create a simple chat application with node.js, so if you have not followed the first part of the tutorial, I suggest to follow it first, so you are not confused to follow this second part tutorial, I will add a lot of User Experience (UX), for our chat app more interesting, we just start the tutorial.
What Will I Learn?
- Add Style and Add Time
- Add Username in Chat
Requirements
- Install nodejs
- Javascript Intermediate,
- Basic Css , Html
Difficulty
- Intermediate
Add Style and Add Time
Now we will add two things first time and add style to be more clear between the previous chat, and add some unique in the chat.
list-style:none;, and give width:35%; , So I like to share the two chats, between chat before ny with the current chat.
and I will also give background # f5f5f5 in < body > to make the chat balloon look more clear
body{
    background:#F5F5F5;
}
#chats li{
    margin: 10px 0px;
    width: 35%;
    list-style: none;
}
Next , I will make a background between the chat before and the current chat, and I will divide the two between the chat. We can use Css : nth-child (even) or : nth-child (odd).
Chat List Odd
 #chats li:nth-child(odd){
   background: white;
    clear: both;
    color: #4a4a4a;
    padding: 10px 20px;
    border-radius: 5px;
    -webkit-box-shadow: 0 10px 6px -6px #777;
    -moz-box-shadow: 0 10px 6px -6px #777;
    box-shadow: 0 5px 6px -6px #777;
}
Chat List Even
#chats li:nth-child(even){
    background: #DCF8C6;
    color: #4a4a4a;
    float: right;
    padding: 10px 20px;
       border-radius: 5px;
    -webkit-box-shadow: 0 10px 6px -6px #777;
    -moz-box-shadow: 0 10px 6px -6px #777;
    box-shadow: 0 5px 6px -6px #777;
}
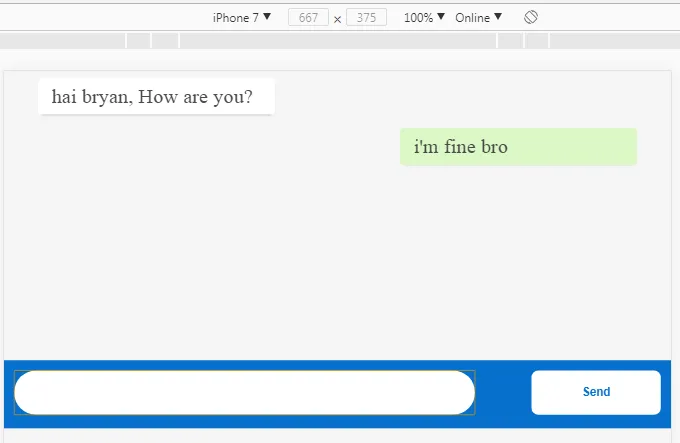
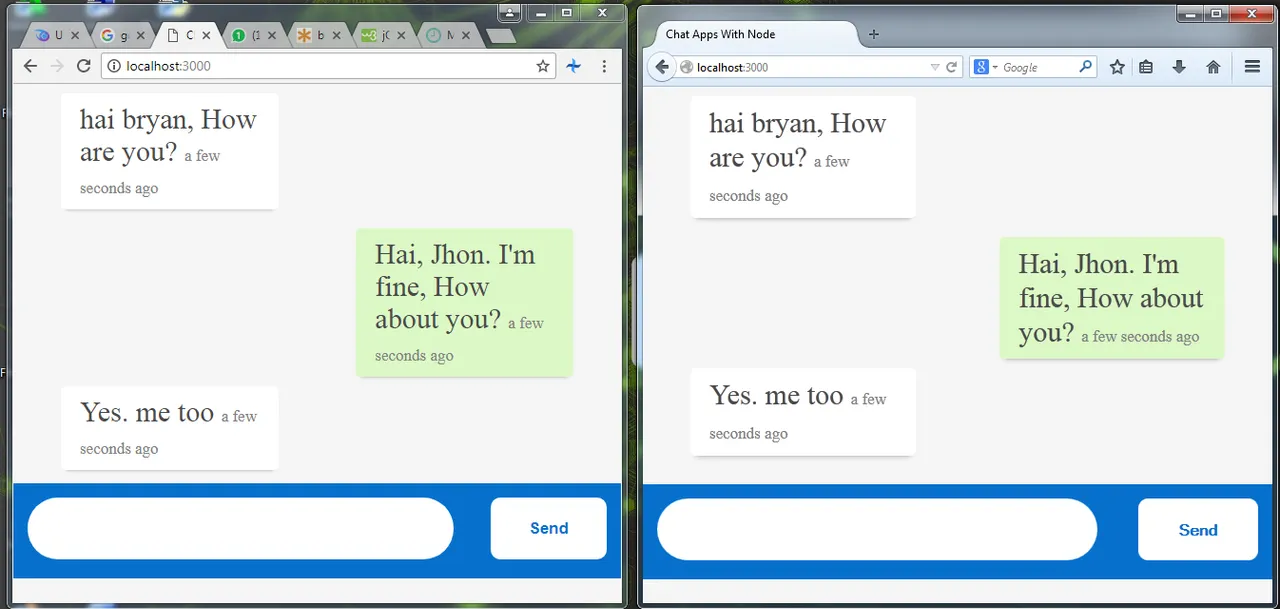
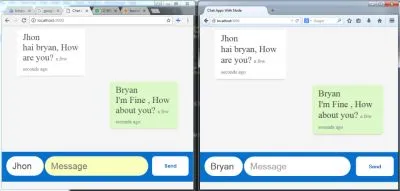
and we will see the result like this, I give float: right there is list Even and clean the float effectclear:both; in list Odd, it is important to do to the list is not messy
npm install moment

And for its use like this, in file server.js .
var moment = require('moment'); : We will import moment .
socket.emit('newMessage',msg, moment().fromNow()); :
Now we will pass two variables, the first variable is the message and the second is the time.
And on its frontend we can capture the parameters that are in the passing of the backend and bring it up.
html
socket.on('newMessage',function(msg,date){
$("#chats").append(""+msg+""+date+"");
});
Css
I will styling the time < span > like this :
#chats li > span{
color: grey;
font-size: 17px;
}
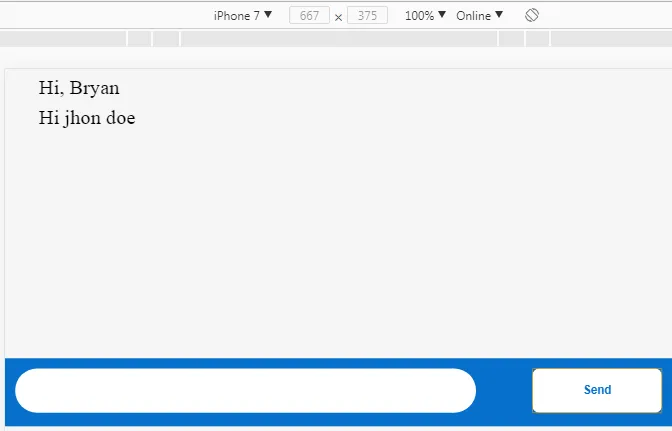
Add Username in Chat
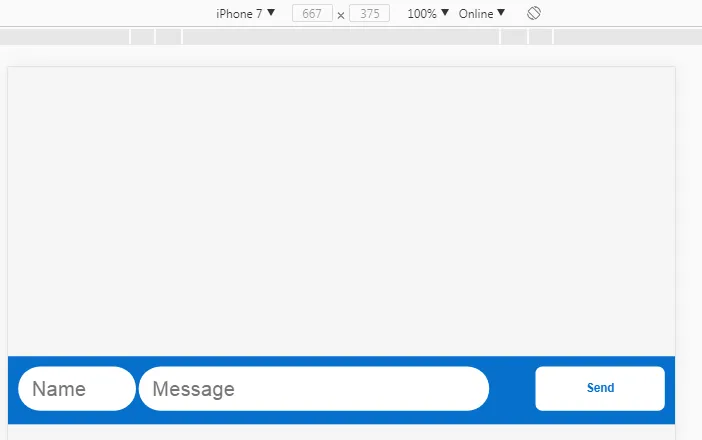
We see our chat app, there is no username chat, so we will not know who wrote that chat, well in this section I will add the name of the sender of the message. My first step will be to add name input in our application.
Html
<div class="wrapper-chat">
<form>
<input class="input-username" type="text" id="username" placeholder="Name">
<input class="input-chat" type="text" id="text_chat" placeholder="Message">
<button class="button-chat">Send</button>
</form>
</div>
I added the input name < input class="input-username" type="text" id="username" placeholder="Name" > .
Css
.input-chat{
width: 50%;
height: 65px;
border-radius: 40px;
display: inline-block;
border: none;
padding: 0px 20px;
font-size: 30px;
color: #4a4a4a;
}
.input-username{
width: 14%;
height: 65px;
border-radius: 40px;
display: inline-block;
border: none;
padding: 0px 20px;
font-size: 30px;
color: #4a4a4a;
}
.button-chat{
width: 20%;
height: 65px;
display: inline-block;
float: right;
background: white;
border: none;
border-radius: 10px;
font-size: 17px;
color: #0770cd;
font-weight: bold;
}
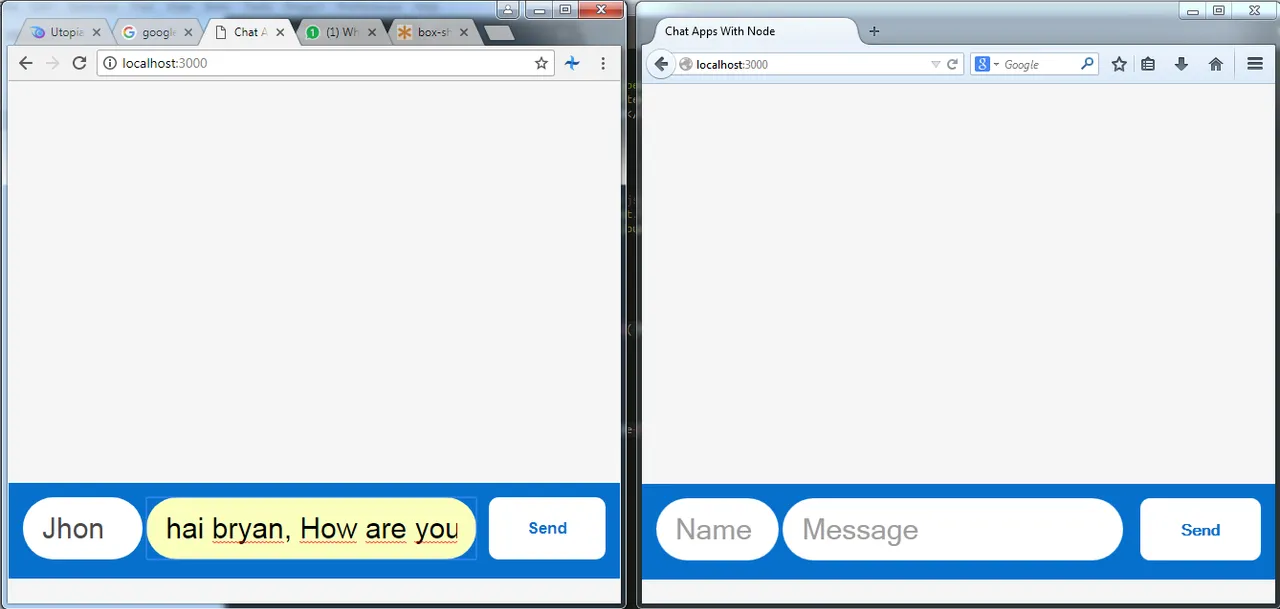
Next step, we will add username in chat. The way is quite easy, we just need to pass the username to the backend and merge in the msg parameter .
Javascript
<script type="text/javascript">
var socket = io();
$('form').submit(function(){
var username = $('#username').val();
socket.emit('newMessage',username +'
'+ $('#text_chat').val());
$('#text_chat').val('');
$('#username').val('')
return false
});
socket.on('newMessage',function(msg,date){
$("#chats").append(""+msg+" "+date+"");
});
</script>
var username = $('#username').val(); : Store the value of the input # username into the var username variable.
socket.emit('newMessage',username +'
'+ $('#text_chat').val()); : Combining username and message username +'
'+ $('#text_chat').val() in passing into parameter msg
$('#text_chat').val(''); : To empty Value Input Id # text_chat after Submitted.
$('#username').val(''); : To empty Value Input Id # username after Submitted.
socket.on('newMessage',function(msg,date){
$("#chats").append(""+msg+" "+date+" ");
});
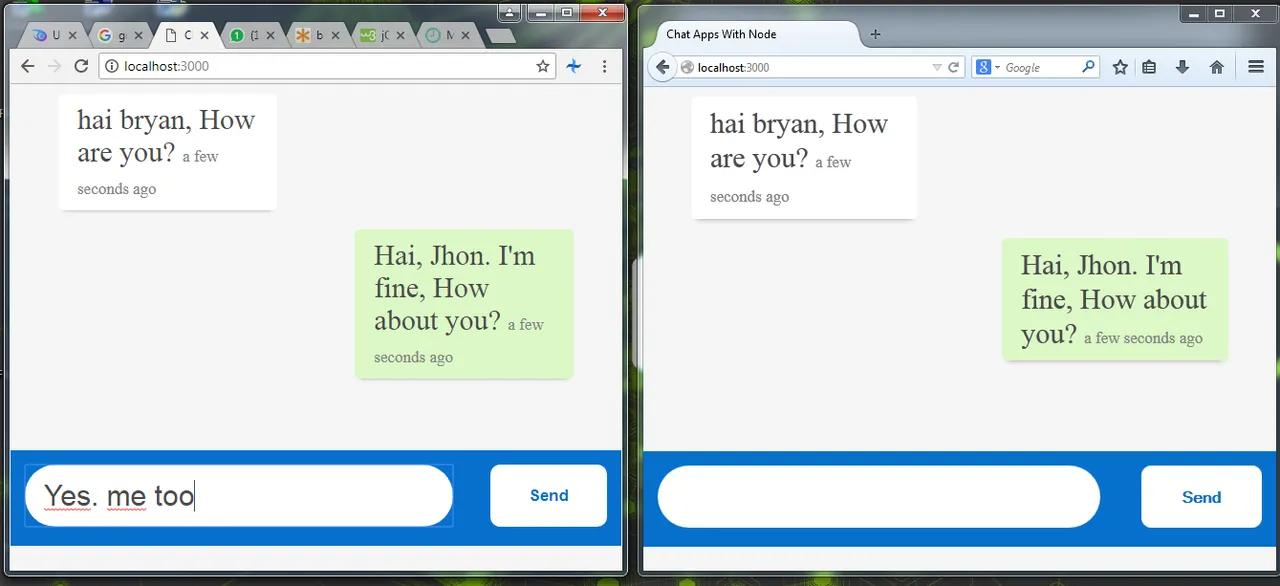
Append the message on the frontend.
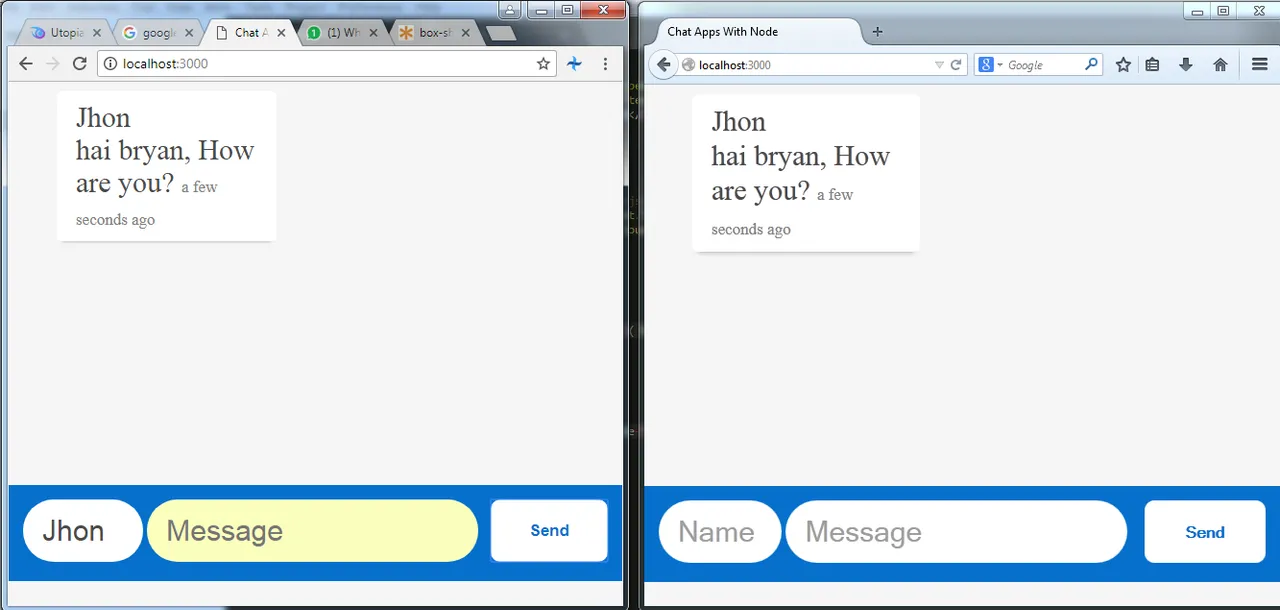
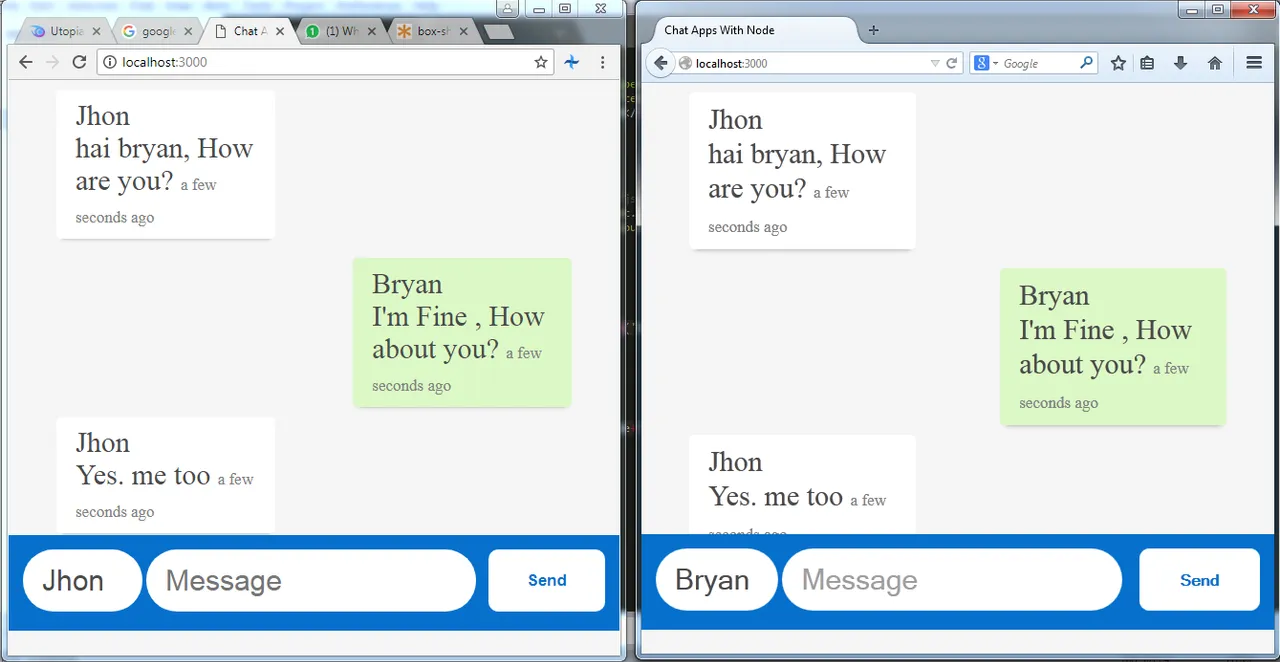
If there is no error, then we will see the results as above, the end of this tutorial in this second part, we can add a style and give a better UX to the user. in the next section I will add other features. hopefully this tutorial can help you. thank you
Curriculum
Posted on Utopian.io - Rewarding Open Source Contributors