
Hello everyone Anidel here for another simple and easy to follow tutorial. Today I would like to share with you how to run one of my favorite console of all time the Sony Play Station 2. I will try to keep the tutorial as simple as possible so that newbies and techies alike can follow my instructions.
Introduction
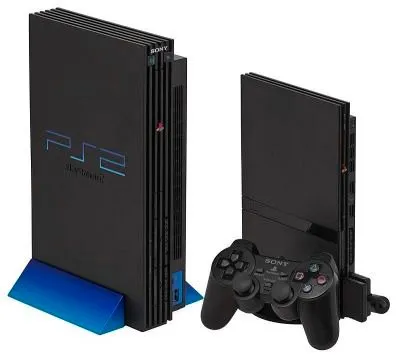
Sony Playstation 2 is the premier 6th generation game console. It main competitors were Sega Dreamcast, Microsoft's Xbox and Nintendo's Gamecube. Although it was met by fierce competition by a technology superior new entrant XBOX and proven veterans like Nintendo and Sega it has garnered majority share of the gaming console market with sales totaling more than twice the total sales of all of its competitors.
Here is the technical specification of Playstation compared to to its competitors:
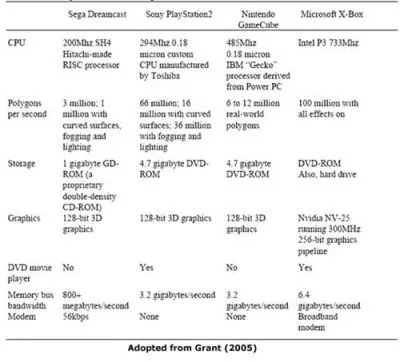
Image source
Requirements
- Intel Dual core class computer with at least 2 GB of RAM and 80 GB of hard disk space. Its graphics card should be able to process Pixel Shader 3.0 .
- PCSX2 emulator
- Game ROM image for game sampling
- PS2 Bios from your existing PS2 console. You may watch this video to learn how to do it. For demonstration purposes I will be providing a link to custom PS2 bios here.
5. 7-zip zip extraction program (if not yet installed)
Procedures
Step 1: Downloading the required files
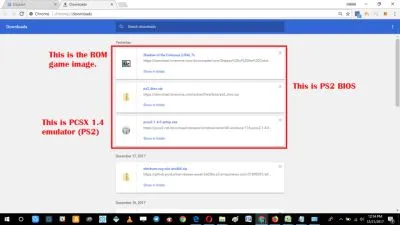
The first thing we would like to do is to download all the necessary files. The links for these files are provided below:
Emulator
Bios
sample Game ROM image
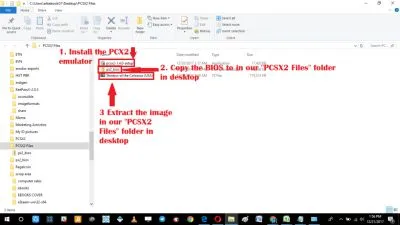
Step 2: Locate and move the necessary files into one folder
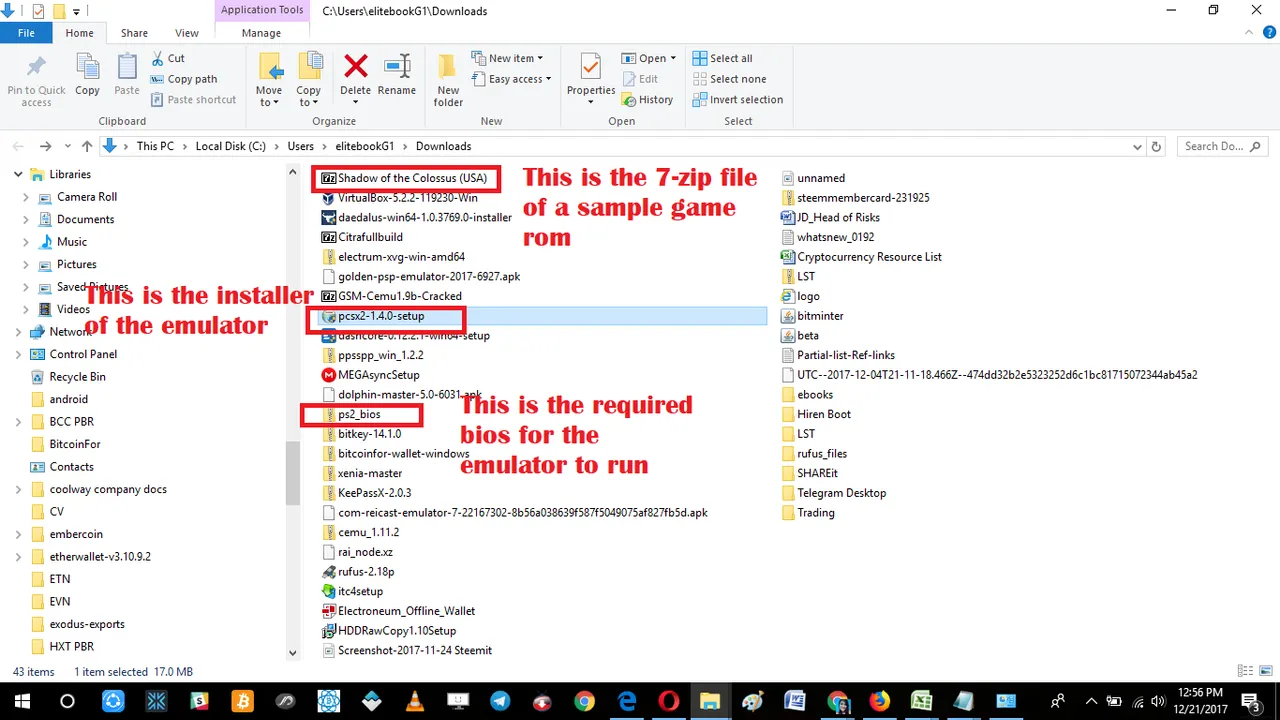
To keep everything orderly I always like to keep my files on a specific program or project in one folder. Once the necessary files are downloaded I locate the downloaded files in my default download page and move them in to one folder in my Desktop. In this tutorial I use the "PCSX2 Files" folder in Desktop.
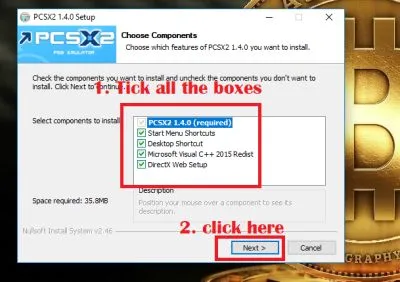
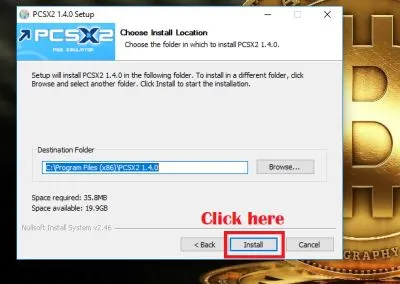
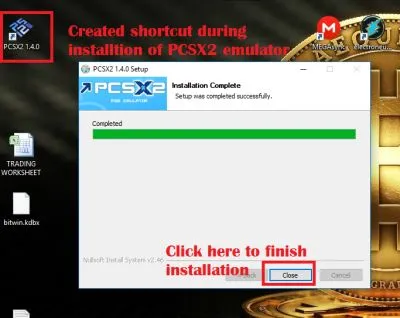
Step 3: Install the emulator
After moving the necessary files in to one common folder we proceed to install the PCSX2 emulator program.
Just follow the succeeding screenshots below of the instructions on how to install the emulator.
Step 4: Setup the Bios and Game ROM image
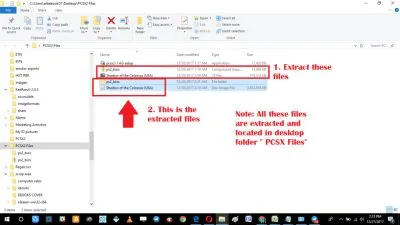
Once we are done installing the emulator we then proceed to extract the necessary files to our folder in desktop "PCSX2 Files" so that we can configure the bios directory of PCSX2 emulator.


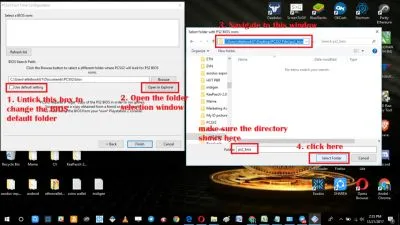
We set the bios directory to "\Desktop\PCSX2 Files\ps2_bios" directory that we have created earlier where we extracted the PS2 Bios files.
After setting the proper directory of the PS2 bios we will be presented with these different PS2 Bios roms. We select that one that is compatible with the Game ROM image we will load later. The game ROM image is of US origin so we select the US PS2 Bios. You may change this later so there is no problem if it was the wrong bios.
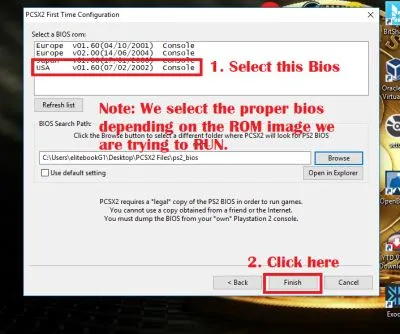
Once we click finish we will be presented with the window like this one below
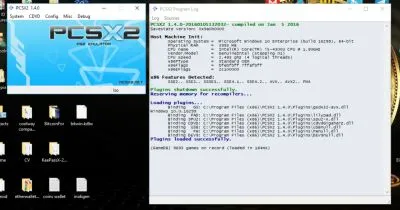
Step 5: Run the Emulator
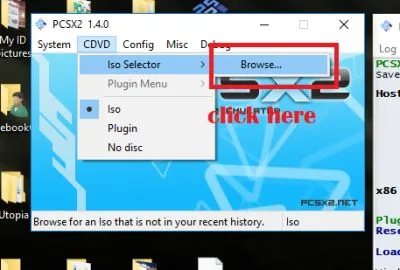
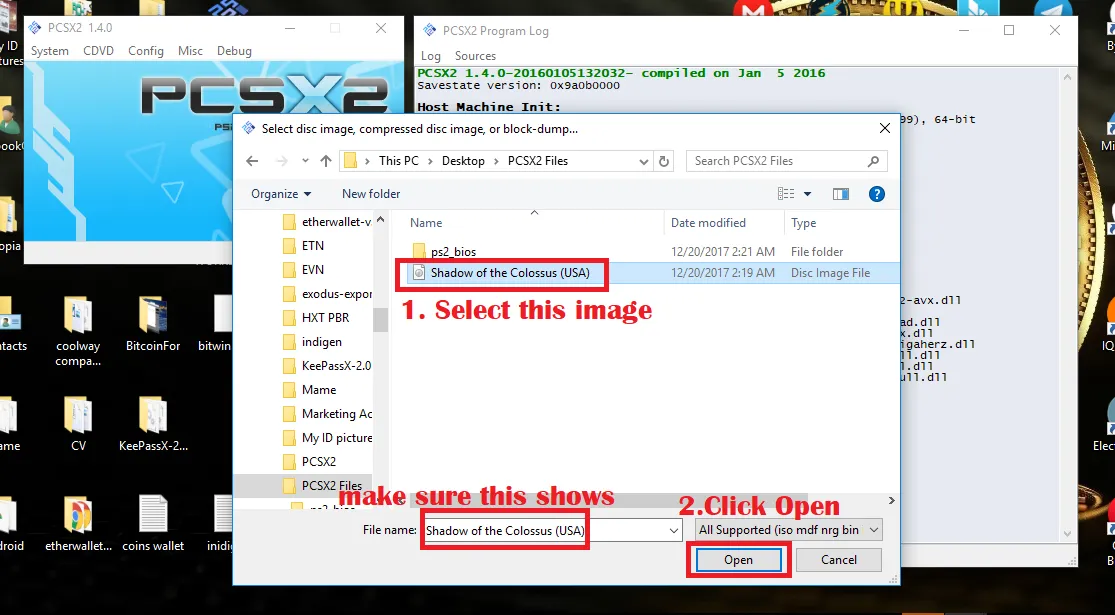
Finally, We can now run our game ROM file. To do this you just have to click on the "CDVD" menu and navigate to the location of the ROM image file we have extracted earlier "\Desktop\PCSX2 Files"
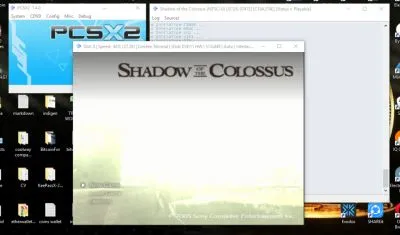
After selecting the Game ISO ROM image we can now boot the game in our emulator. This is done by clicking on the "System" menu tab and selecting "Boot CDVD (Full)"

Congratulations! you have successfully Run a PS2 game in you Personal Computer.
Thank you for reading my simple but detailed tutorial. Until next time bye for now :)
Posted on Utopian.io - Rewarding Open Source Contributors