Google Chrome has marked all HTTP sites as "not secure" from July, check more from their early blog post and some people also found their website lose ranking in Google search results. That's why I decided to change my blog from HTTP to HTTPS. But the site is non-business and no income at this stage so I would rater to use some free SSL Certificate.
After research I found Wordpress sites which on Plesk can be easily to do it with free SSL Certificate of "Let’s Encrypt". The following tells you how to install it to your Wordpress site one by one. You just need about 5 minutes and then your site will have a SSL Certificate.
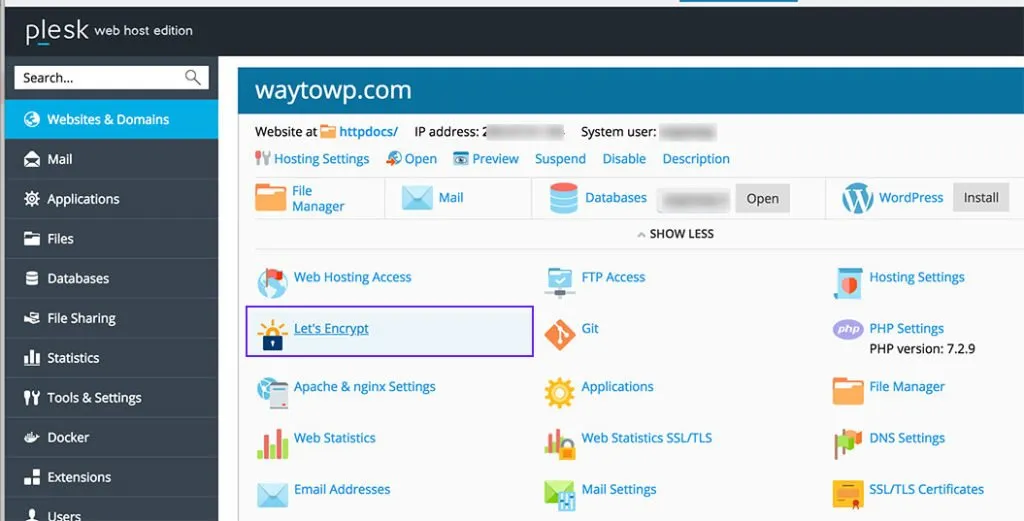
Step 1:
Go to your hosting Plesk panel and find out the site you want want add SSL Certificate. There's an anchor named "Let's Encrypt" like the following screenshot, click it to next step.
Step 2:
Enter your right email address and check the option of "Include www...", if you use webmail of the domain then you need also check the second checkbox of "Secure...". And then click the button of "Install".
After that, Plesk will install a free SSL Certificate automatically. How it easy?
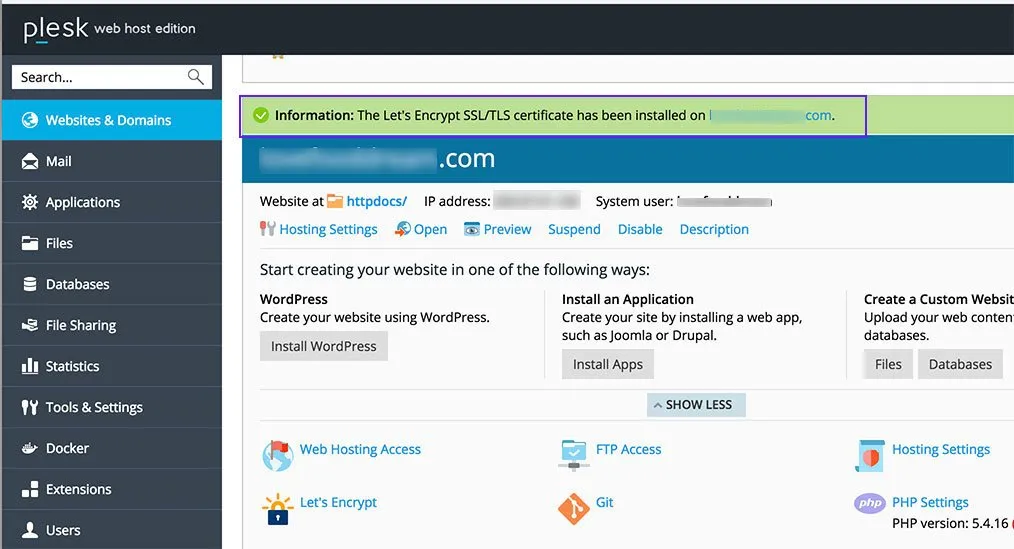
Step 3:
After several minutes, it will back to the sites list screen and with info message of succesful installation.
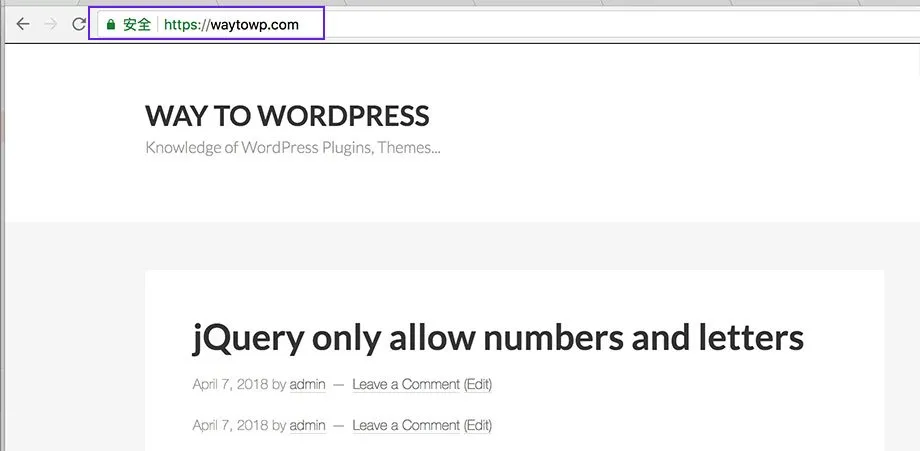
Step 4:
And now you may visit your site with https start.
Step 5:
As your sites already has content and links or someone may visit your site without https so you still need to do the further setting to make sure all links start http://waytowp.com can redirect to https://waytowp.com automatically. Here please use a simple plugin and then DONOT need to edit your .htaccess file.
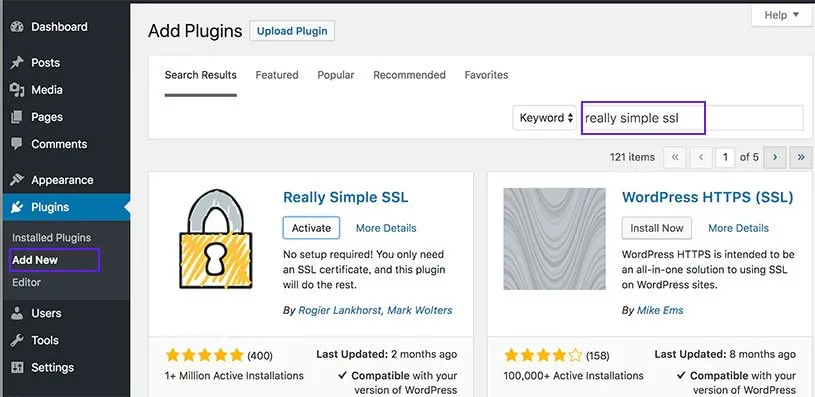
Sign in your Wordpress Dashboard with https such as https://waytowp.com/wp-admin/, you will be asked to sign in again as http and https are take as different session. Navigate to your Wordpress plugin page by click Plugins --> Add New as the following screenshot.
Enter "really simple ssl" to query the plugin from Wordpress's repository. Click the "Install" button on the first plugin and then you'll see "activate" button in 1 minute. Don't forgot to click "Activate" button when it appears there.
Step 6:
Once the plugin activated you will be navigates and with the following admin notice. Just click the button of "Go ahead, activate SSL".
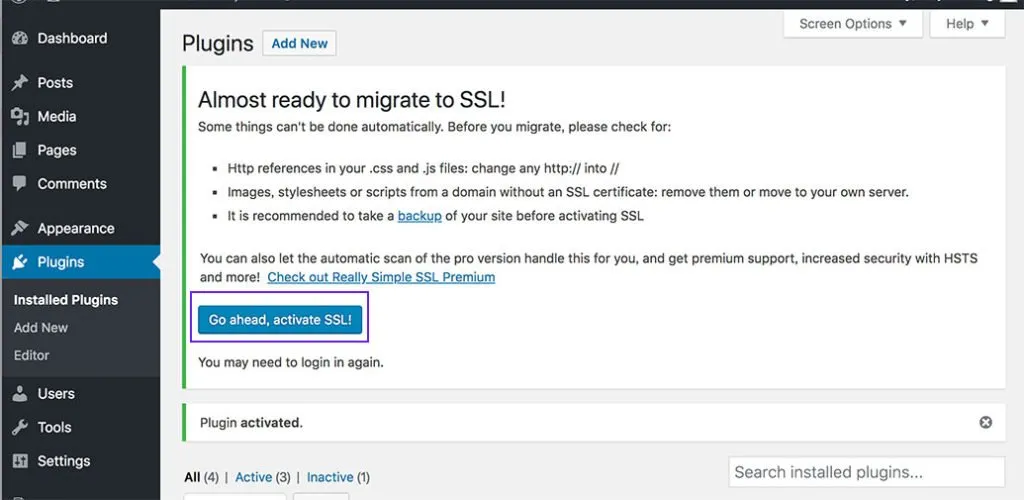
That's all and you may enjoy your site with SSL Certificate now.
Step 7:
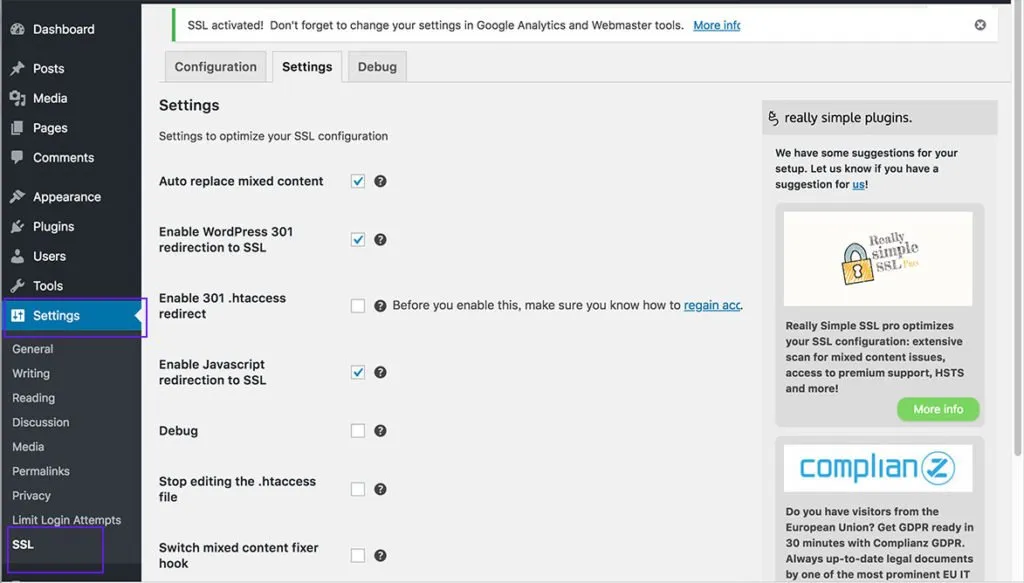
If you want to change some redirect settings then you may visit Settings -> SSL in your dashboard. But I suggest you to keep default settings if you are not clear what you do.
Posted from my blog with SteemPress : https://waytowp.com/install-free-ssl-certificate-to-wordpress-on-plesk/