Summary:
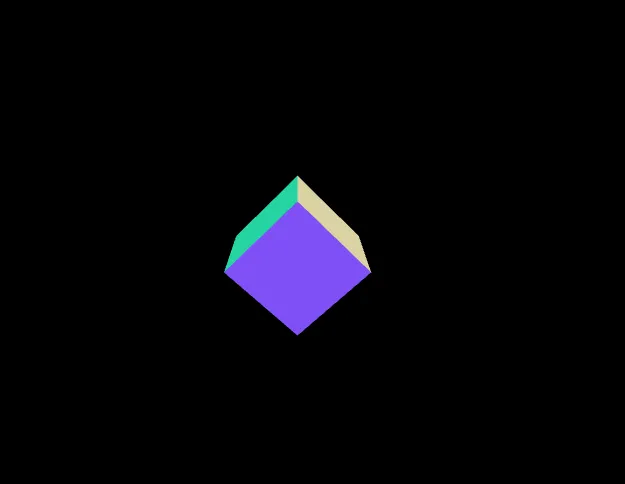
The goal of this tutorial is to give a brief introduction to three.js. I will start by setting up a scene, camera and renderer, so that I can render the scene with camera and a spinning cube.
Result
What Will I Learn?
- html, css and javascript code structure
- how to set canvas with css
- how to rerfer to three.js library
- how to create a Perspective Camera
- how to create scene
- how to create 3D object
- how to create Material
- how to add 3D object in scene
- how to create renderer
- how to create animation
Requirements
- source code editor, for example: vim, notepad++ etc.
- A browser that support webgl, for example: Google Chrome 9+, Firefox 4+, Opera 15+, Safari 5.1+, Internet Explorer 11 and Microsoft Edge etc.
Difficulty
- Intermediate
Tutorial Contents
- step 1: html, css and javascript code structure
<html>
    <head>
        <title>Three js Cube</title>
        <style>
            body { margin: 0; }
            canvas { width: 100%; height: 100% }
        </style>
        <script src="http://threejs.org/build/three.min.js"></script>
    </head>
    <body>
        <script>
        // three js code
        </script>
    </body>
</html>
html整体结构,创建3D场景的代码是js语句,所以关键代码是放在里面。下面将详细讲解关键代码。
- step 2: how to set canvas with css
canvas { width: 100%; height: 100% }
- step 3: how to rerfer to three.js library
<script src="http://threejs.org/build/three.min.js"></script>
- step 4: how to create a Perspective Camera
camera = new THREE.PerspectiveCamera( 70, window.innerWidth / window.innerHeight, 0.01, 10 );
camera.position.z = 1;
- step 5: how to create scene
scene = new THREE.Scene();
- step 6: how to create 3D object
geometry = new THREE.BoxGeometry( 0.2, 0.2, 0.2 );
- step 7: how to create Material
material = new THREE.MeshNormalMaterial();
mesh = new THREE.Mesh( geometry, material );
- step 8: how to add 3D object in scene
scene.add( mesh );
- step 9:how to create renderer
renderer = new THREE.WebGLRenderer( { antialias: true } );
renderer.setSize( window.innerWidth, window.innerHeight );
- step 10: how to create animation
requestAnimationFrame( animate );
mesh.rotation.x += 0.01;
mesh.rotation.y += 0.02;
renderer.render( scene, camera );
- full source code:
<html>
    <head>
        <title>Three js Cube</title>
        <style>
            body { margin: 0; }
            canvas { width: 100%; height: 100% }
        </style>
        <script src="http://threejs.org/build/three.min.js"></script>
    </head>
    <body>
<script>
    var camera, scene, renderer;
    var geometry, material, mesh;

    init();
    animate();

    function init()
    {
        camera = new THREE.PerspectiveCamera( 70, window.innerWidth / window.innerHeight, 0.01, 10 );
        camera.position.z = 1;
        scene = new THREE.Scene();
        geometry = new THREE.BoxGeometry( 0.2, 0.2, 0.2 );
        material = new THREE.MeshNormalMaterial();
        mesh = new THREE.Mesh( geometry, material );
        scene.add( mesh );
        renderer = new THREE.WebGLRenderer( { antialias: true } );
        renderer.setSize( window.innerWidth, window.innerHeight );
        document.body.appendChild( renderer.domElement );
    }
    function animate()
    {
        requestAnimationFrame( animate );
        mesh.rotation.x += 0.01;
        mesh.rotation.y += 0.02;
        renderer.render( scene, camera );
    }
</script>
</body>
</html>
- verify:
copy&paste above full source code to editor,save it to HTML file,then load it into the browser that supports webgl. Enjoy!
Below is the chinese version
可以学到什么?
- html,css javascript代码整体结构
- 怎么设置画布大小
- 怎么引用three.js
- 怎么创建透视投影的相机
- 怎么创建场景
- 怎么场景3D几何体
- 怎么创建材质
- 怎么将3D几何体添加到场景中
- 怎么创建渲染器
- 怎么创建动画
需要的准备条件
- 代码编辑器,比如vim,notepad++等
- 支持webgl的浏览器,比如Google Chrome 9+, Firefox 4+, Opera 15+, Safari 5.1+, Internet Explorer 11 and Microsoft Edge等
难易程度
- 中等
教程内容
- 步骤1:html,css javascript代码整体结构,用于创建3D场景的代码是javascript语句,放在里面。下面将详细讲解关键代码。
<html>
    <head>
        <title>Three js Cube</title>
        <style>
            body { margin: 0; }
            canvas { width: 100%; height: 100% }
        </style>
        <script src="http://threejs.org/build/three.min.js"></script>
    </head>
    <body>
    <script>
        // three js code
    </script>
    </body>
</html>
- 步骤2:怎么设置画布大小
canvas { width: 100%; height: 100% }
- 步骤3:怎么引用three.js
<script src="http://threejs.org/build/three.min.js"></script>
- 步骤4:怎么创建透视投影的相机
camera = new THREE.PerspectiveCamera( 70, window.innerWidth / window.innerHeight, 0.01, 10 );
camera.position.z = 1;
- 步骤5:怎么创建场景
scene = new THREE.Scene();
- 步骤6:怎么场景3D几何体
geometry = new THREE.BoxGeometry( 0.2, 0.2, 0.2 );
- 步骤7:怎么创建材质
material = new THREE.MeshNormalMaterial();
mesh = new THREE.Mesh( geometry, material );
- 步骤8:怎么将3D几何体添加到场景中
scene.add( mesh );
- 步骤9:怎么创建渲染器
renderer = new THREE.WebGLRenderer( { antialias: true } );
renderer.setSize( window.innerWidth, window.innerHeight );
- 步骤10:怎么创建动画
requestAnimationFrame( animate );
mesh.rotation.x += 0.01;
mesh.rotation.y += 0.02;
renderer.render( scene, camera );
- 完整代码如下:
<html>
    <head>
        <title>Three js Cube</title>
        <style>
            body { margin: 0; }
            canvas { width: 100%; height: 100% }
        </style>
        <script src="http://threejs.org/build/three.min.js"></script>
    </head>
    <body>
<script>
    var camera, scene, renderer;
    var geometry, material, mesh;

    init();
    animate();

    function init()
    {
        camera = new THREE.PerspectiveCamera( 70, window.innerWidth / window.innerHeight, 0.01, 10 );
        camera.position.z = 1;
        scene = new THREE.Scene();
        geometry = new THREE.BoxGeometry( 0.2, 0.2, 0.2 );
        material = new THREE.MeshNormalMaterial();
        mesh = new THREE.Mesh( geometry, material );
        scene.add( mesh );
        renderer = new THREE.WebGLRenderer( { antialias: true } );
        renderer.setSize( window.innerWidth, window.innerHeight );
        document.body.appendChild( renderer.domElement );
    }
    function animate()
    {
        requestAnimationFrame( animate );
        mesh.rotation.x += 0.01;
        mesh.rotation.y += 0.02;
        renderer.render( scene, camera );
    }
</script>
</body>
</html>
- 验证:
将上面完整的代码复制粘贴到编辑器中,保存为扩展名为html的文件,然后在支持webgl的浏览器中打开即可以看到旋转的方块。