Repository
https://github.com/vuejs/vue
https://github.com/jnordberg/dsteem/

Outline
In this tutorials we’re going to make a website for a Steem Blog feed that loads post data from the Steem API. We’ll utilise Vue to handle templates and routing. We’ll look at Dsteem to retrieve data from the Steem blockchain.
This is a hands on project based tutorial.I prefer to make things rather than learn every possible function avaible. With that in mind this tutorial does not deep dive into specifcs but aims to hit the ground running. If you have questions about different aspects please feel free to ask in the comments. Enjoy.
Requirements
- A plain text editor (I use VS Code )
- Node.js Installed
Difficulty
Beginner - but not shy about digging into code. This tutorial is intended to be beginner friendly. If you’ve had some experience with Javascript and interacted with the command line before you should have no issues.
Learning Goals
- Setup a Vue.js Project with the command line
- Create and use custom component with Vue
- Create and use custom route within Vue
- Retrive data from the Steem Blockchain using Dsteem library
Check the Github commit history here to follow along with different steps and see the finished code.
Setup
First make sure you have Node.js installed and up to date.
Next lets install the latest version of Vue. You can use NPM or yarn for installing packages, from here I’ll be using yarn.
yarn global add @vue/cli
Once you’ve got Vue installed we can use it from the command line to create all of the boilerplate files we need to kickstart a Vue based website.
vue --version Check you’re working with the latest version. For this tutorial I am work with vue version 3.2.1
Let’s go. We’ll run the vue create command and will be prompted to select which features to install. Select ‘Manually select features’
vue create project-name
![[screenshot of command line]](https://images.ecency.com/p/7ohP4GDMGPrUMp8dW6yuJTR9MKNu8P8DCXDU9qmmoUoWaMZJgVehmAWqz7Z5C4UpZr6YccmGyu61bvBZYR21W9aHThr8KPBbLfdH.png?format=match&mode=fit)
Make sure to select ‘router’. Navigate using the arrow keys and hitting spacebar to select.
Once setup. Navigate to the project and run the development server. Jumping the browser once it’s running to check out the standard Vue starter site.
cd project-name
yarn serve
![[basic website page screenshot]](https://images.ecency.com/p/7ohP4GDMGPrUMp8dW6yuJTR9MKNu8P8DCXDU9qmmpUmTbMkJG6rgr6JCcK8eoWwWVCvsgmeHaZ5vxrwpmV3jjDr7FMA4PQ4yfCCs.png?format=match&mode=fit)
Add Your First Component
Open the project in your text editor and familiarise yourself with the structure. The Vue app is built up of View and Component template files.
Create a new component within the components directory. src/components/SteemFeed.vue. To start we’ll keep ip super simple, following the vue template structure and exporting the component in a script tag.
<template>
    <div class="steemfeed">
        <h1>Steem Feed</h1>
    </div>
</template>

<script>
    export default {
        name: 'SteemFeed'
    }
</script>
When using a component in a view there are three steps.
- Import the component
import SteemFeed from '@/components/SteemFeed.vue' - Include the component in the exported view
  components: {
    HelloWorld,
    SteemFeed // <- added here
  }
- Include it where appropriate in your template
  <div class="home">
    <img alt="Vue logo" src="../assets/logo.png">
    <SteemFeed/>
    <HelloWorld msg="Welcome to Your Vue.js App"/>
  </div>
Now try removing the default HelloWorld component leaving only our custom Feed.
Step 2 - Load Steem Posts With Dsteem
Let’s make the component a little more exciting and include DSteem.
First add DSteem as a dependency to the project. (I’ve been having problems compiling the latest version of dsteem with vue. For simplify I’m going to set the version specifically)
yarn add dsteem@0.10.0
Within our component include DSteem.
<script>
    const dsteem = require('dsteem')

    export default {
        name: 'SteemFeed'
    }
</script>
Next initialise dSteem and request data from the Database API. We’re going to hook into one of Vues actions. The created action. You can learn more about the ordering of Vue events here. For this simple app we’ll just run our DSteem code as the template is created.
    export default {
        name: 'SteemFeed',
        created () {
            const client = new dsteem.Client('https://api.steemit.com')
            client.database.getDiscussions('blog', { tag: 'sambillingham', limit: 20 })
            .then(result => {
                console.log(result)
            })
        }
    }
You can see we’re requesting 20 posts from a specific user and sending the result to the console. Now is a good time to fire up the server and check you are seeing the output in the console.

To make use of the data we can store i in the compontents data first and then use it in the template. Create a data function without the exported component. Set the value to null on creation, we’ll then update this with the STEEM response.
 data () {
    return {
      posts: null
    }
  },
 created () {
 const client = new dsteem.Client('https://api.steemit.com')
            client.database.getDiscussions('blog', { tag: 'sambillingham', limit: 20 })
 .then(result => {
     this.posts = result
  })
  }
Now we have access to this data from within our due template. Double curly brackets will render data {{ posts }}. Try this and you’ll see the raw text output of the 20 item array.
In plain javascript or jQuery we would look over this data within Javascript and append a html item to the DOM. Within v we can use a vue directive to do this for us.
        <main v-for="post in posts" :key="post.id">
            <h2>{{post.title}}</h2>
         </main>
This will output a heading tag for each of the items in the posts data array.All being well you’ll see a list of post titles on your homepage.
Step 3 - Vue Router
Let’s turn those title into link and setup a post page
The router.js file handles navigation for vue. Take a look at the default and you’ll see data for both the Home and About pages. Add a new route to the list.
    {
      path: '/:username/:permlink',
      name: 'post',
      component: SteemPost
    }
Instead of using a set value. We’re going to use placeholders :username and :permlink. We don’t know what these values are and we don’t want to code them. Infact these values are what will let us load the correct data from the blockchain. These values act as parameters.
make sure to also include your component or view at the top of the router.js file e.g import SteemPost from './components/SteemPost.vue'
Set a name and component. Component can be a view or single Component. Let’s go ahead and create another component for the individual Steem Posts.
// src/componets/SteemPost.vue
<template>
  <div>
    <h1>STEEM Post</h1>
  </div>
</template>

<script>
const dsteem = require('dsteem')

export default {
  name: 'SteemPost',
  data () {
    return {
    }
  },
  created () {

  }
}
</script>
Now turn the titles into links to our SteemPost component
<h2>{{post.title}}</h2>
<router-link :to="`${post.author}/${post.permlink}`">
      <h2>{{post.title}}</h2>
</router-link>
You can see a :to property making use of the Steem data that is saveable within the loop.
The router link renders an an anchor tag but is setup within vue to automatically block page reloading and dynamically update the content while keeping history correct.
You should be able to navigate to individual posts with a correct url structure. You’ll only see the output of the SteemPost template though, which still looks the same for each post.
Step 4 - Steem Post Data
Pull individual post data for each post. We’ll work within the SteemPost.vue component.
  created () {
    const client = new dsteem.Client('https://api.steemit.com')
  }
setup the esteem client
  created () {
    const client = new dsteem.Client('https://api.steemit.com')
    client.call('condenser_api', 'get_content', [this.$route.params.username, this.$route.params.permlink])
    .then(response => {
        console.log(response)
    })
  }
Make a steem data request. You’ll notice I’m having to use the call method and the corresponding ‘get_content’ method directly. There is no helper for this yet (working on a PR for this).
The call to the STEEM API takes two parameters the username and permlink. We can access these from Vue’s this.$route property. e.g this.$route.params.username.
Add data attributes for the properties we’re interested in using within out view. The title and content.
  data () {
    return {
      title: null,
      content: null
    }
  },
  mounted () {
    const client = new dsteem.Client('https://api.steemit.com')
    client.call('condenser_api', 'get_content', [this.$route.params.username, this.$route.params.permlink])
    .then(response => {
        this.title = response.title
        this.content = response.body
    })
  }
From within our view. Make use of this new Data.
<template>
  <div>
    <h1>{{ title }}</h1>
    <main>{{ content }}</main>
  </div>
</template>
The content is currently the raw markdown stored on the blockchain. We can use ‘marked’ package to render the makrdown to html and include it within the view.
yarn add marked- import marked from 'marked' within SteemPost.vue
- Update the function that stores the response data to make use of marked -
this.content = marked(response.body, { sanitize: true }) - use the
:v-htmldirective to render html directly instead of data.<main v-html="content"></main>
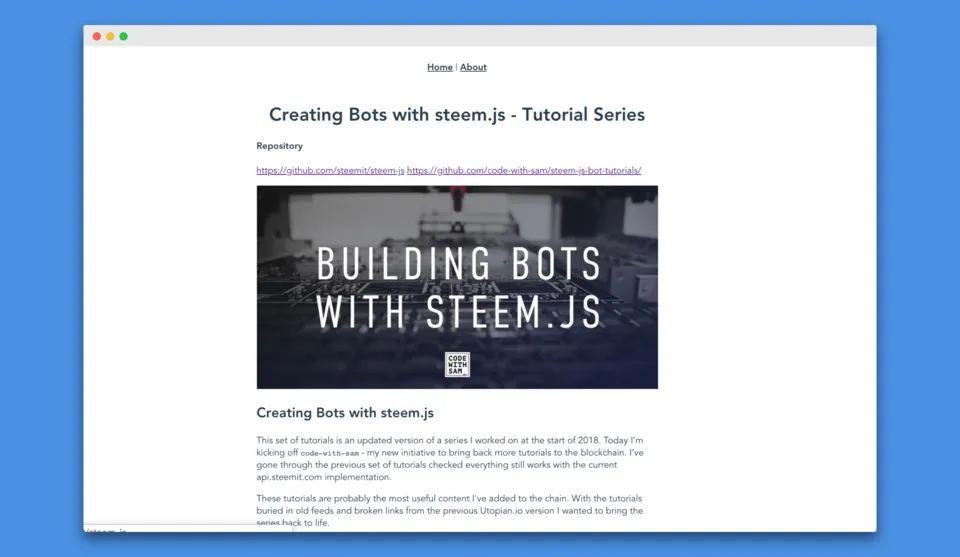
Awesome! You should be seeing the post html instead of the raw marked down.
Step 5 - Tidy up CSS
You can add style directly within the vue components. Style as necessary.
main {
  max-width: 700px;
  margin: 0 auto;
  text-align: left;
}
You might notice that you can’t style tags that that have been added with :v-thml directive. You can use the Demo selector to target specific elements. e.g
    *>>> img {
            max-width: 100%;
    }
Conclusion
You should have a working Vue website that display links to posts on the homepage and individual steem posts on a post page. I hope you’ve enjoyed this first look at Vue.
🚀View the finished Code on Github
If you have questions or any issues with the tutorial please reach out.