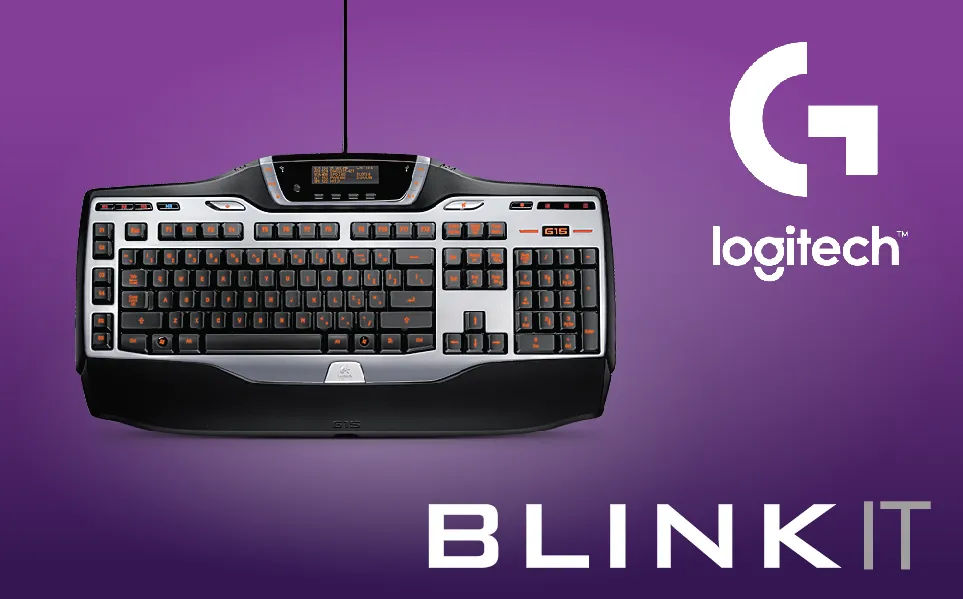
After doing the first integration of the Logitech RGB/Monochrome keyboards @techtek and I had the idea to use the build in LCD screens of some of these keyboards to show notifications too.
The developed Logitech LCD program can be used stand alone, or be integrated in other applications and is added to my repository, the program is optimized to work with Blinkit, and will be further integrated inside Blinkit soon.
Repository: LogitechLCDanimation
What is Blinkit?
Blinkit is a notification software that can be used to give to regular and widely available devices a Steem purpose.
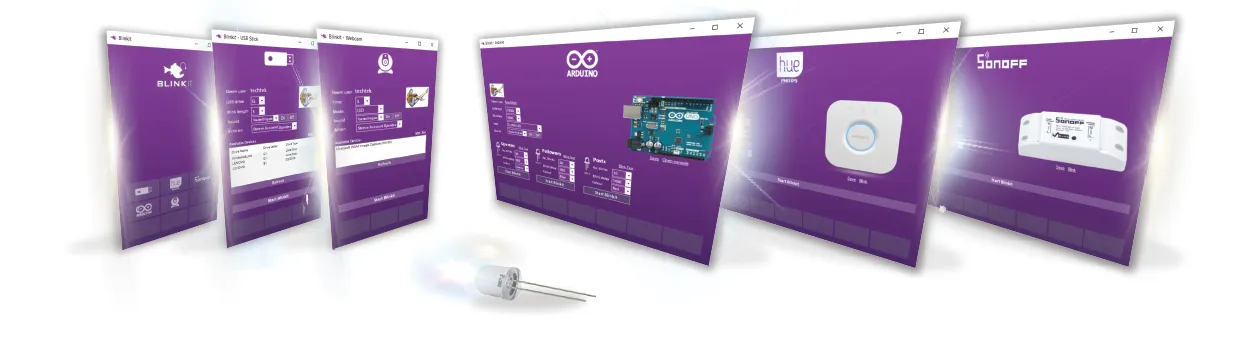
Supported devices/features:
- USB Sticks (status light)
- Philips HUE lamps
- Sonoff devices
- Arduino boards (LED's and RGB LED's)
- Camera status LED blink
- Take photos on upvote/post/follow
- Logitech RGB/Backlight Keyboards (done by me)
- Steem Price Visualizer
- Steemmakers/Utopian.io Upvote Bot Visualizer
- Logitech LCD notifications (new)
Blinkit is a free and open source project created by @techtek
and can be downloaded from his Github page:
https://github.com/techtek/Blinkit
Newly prepared feature:
- Show a specific animation on the LCD screen, based on the newly detected (Steem) action.
Requirements
To be able to use this new feature it is necessary to have a Logitech keyboard which has a build in monochrome LCD screen.
Also you need to have the Logitech Gaming Software installed. Download (also is supplied with the keyboard)
Compatible Logitech products
The following Logitech keyboards are supported:
- G510
- G13
- G15 v1
- G15 v2

How is it implemented
As in the previous version I used the by Logitech provided SDK. But this time the "LogitechLcd.dll" is used instead of the "LogitechLed.dll".
This DLL can be found in the Logitech Gaming Software installation path.
(Standard: C:\Program Files\Logitech Gaming Software\SDK\LCD\x86)
To be flexible with the installation path I added a function from the "kernel32" library which handles the path to the dll.

The path will be added in the main function.
To get the functions from the LogitechLcd.dll the Dllimport function from the System.Runtime.InteropServices library has to be used.
he LogitechLcd.dll is not a .net compiled dll
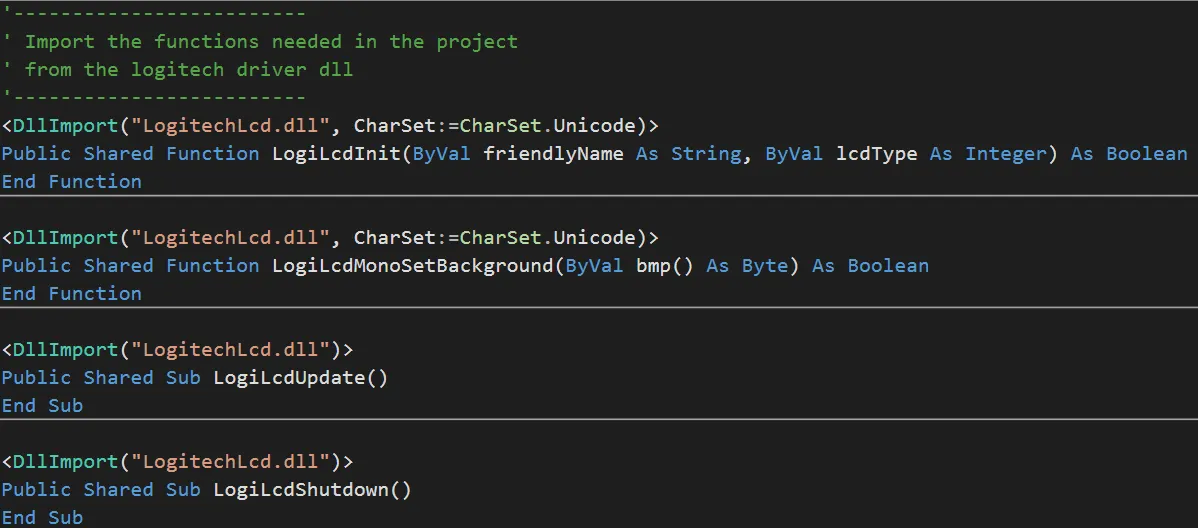
All information what the functions are doing and which parameters they need can be found in the official documentation here
To start the main program two handles are created. One starts when the form is loaded and the other one when the form gets closed.
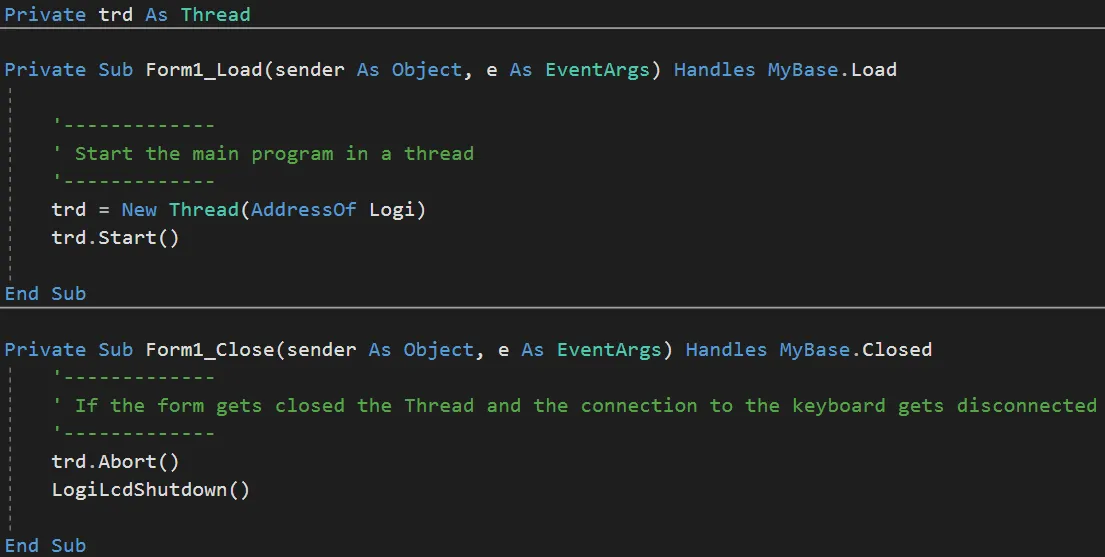
The main program (Logi) and the Form are running in two different threads.
- The MyBase.Load handle starts the new thread.
- The MyBase.Closed kills the thread and stops the communication to the keyboard so it can be canceled everytime.
Main logic
Firstly all Variables are defined
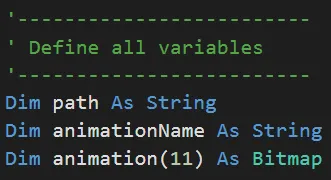
After that the variables are assigned to their values
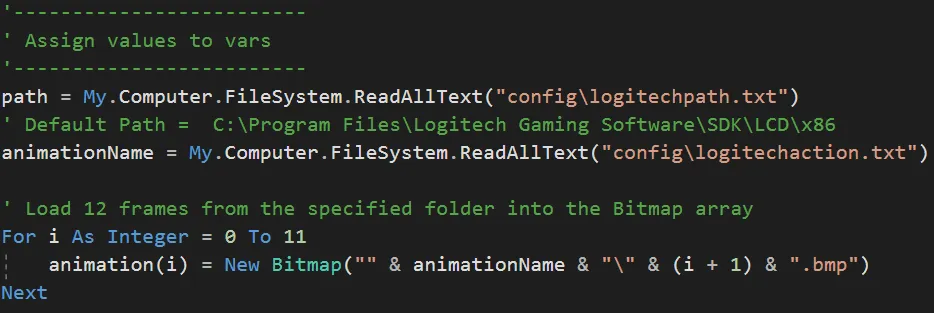
These values are stored in a seperate .txt file created by the Blinkit software. These files can also be edited by hand if it is used as a stand alone. For the Bitmaps a folder is created with the name of the animation and in this folder there are 12 files (frames) named 1.bmp, 2.bmp etc.
So by writing different names of the action into the "logitechaction.txt" file the coresponding animation is played.
(All .bmp files have to be at a resolution of 160x43px)
With the "path" variable it is possible to use the function form the kernel32. Thats the next thing done.

Now it is possible to use the functions from the LogitechLcd.dll.
At first the LCD has to be initialised. Thats done with the "LogiLcdIntit" function which takes two parameters:
- Name that is shown in the Logitech Gaming Software
- Display type (1 for monochrome, 2 for color LCDs)

The next part "plays" the animation
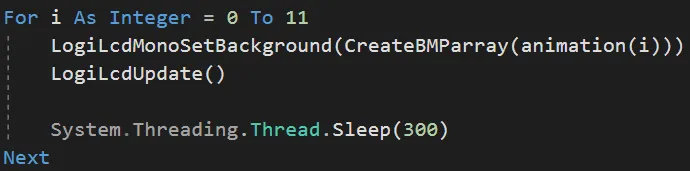
It sets the background to each frame and waits between each frame. So it looks like an animation.
The "LogiLcdMonoSetBackground" function takes one parameter which is a byte array... but all we got are bitmaps which are in the wrong format.
So the function "CreateBMParray" is called which converts the bitmap into the right format. The format the Logitech function needs is given in the official documentation.
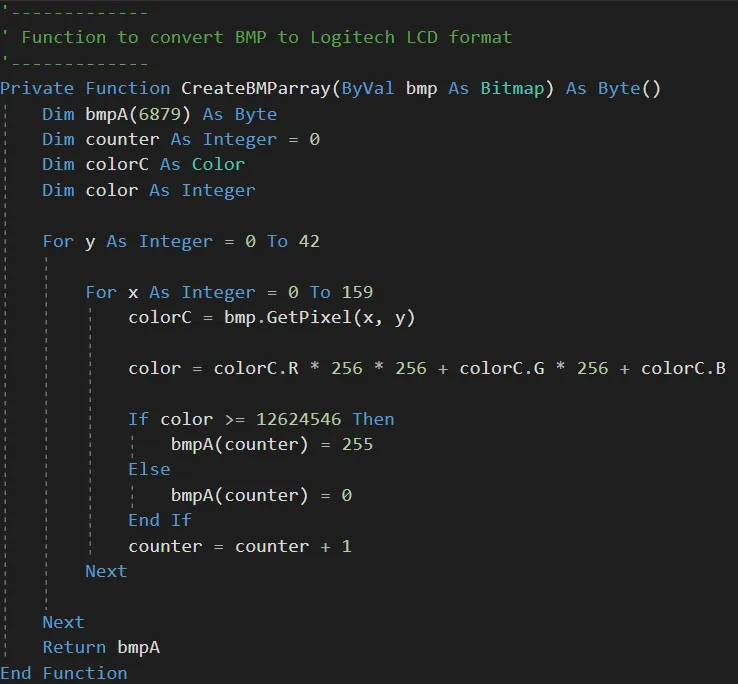
What this function does is that it cycles trough every pixel of the bitmap and converts the RGB value into just two colors (black or white -> on or off)
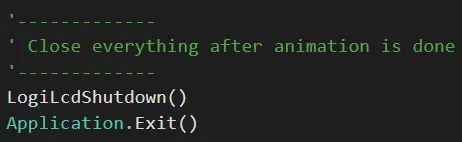
After the animation has played the program closes.
The hole code as one piece can be seen and downloaded on my github page
Testing the code while developing it
I personally own the Logitech G510 and tested it only on this keyboard, @techtek tested it on the G15 v2.
But as mentioned in the other post there is a virtual environment inlcuded in the Logitech Gaming Software where it is possible to test the code in a virtual way for all supported keyboards.

There you can see an emulated monochrome LCD with buttons that are also on the keyboard. The button on the far left is used to cycle trough the different apps. The four buttons at the bottom can be used to navigate inside an app. The animation will always play on top of the previously openend screen.
The following files where added to my repository
- Project files
- blinkitlogitechlcd.exe
- config files: logitechaction.txt and logitechpath.txt
- animation images
In the near future the LogitechLCDanimation program will be integrated in Blinkit made by @techtek