Repository: https://github.com/bonuschain/byteball.js
https://steemitimages.com/0x0/https://ipfs.busy.org/ipfs/QmT9msxL9VDxgs3xrnP1pNBZRTBj51mKHwwKUhg66Bdmwo
image taken from :- src
What Will I Learn?
In brief, write details of what the user is going to learn in a bullet list.
- How to use testnet client of byteball for the purpose of this.
- How to use byteball paper wallet for our purpose.
- How to send byteball payments to any address.
- Creating front end to send bytes.
Requirements
State the requirements the user needs in order to follow this tutorial.
- Basic understanding of HTML is required
- Basic understanding of Javascript and Materialize css.
- Any text editor (Atom, VS code, etc.)
- Javascript supported any Web browser with an updated version (e.g. Chrome, Mozilla Firefox, edge etc.)
Difficulty
Choose one of the following options:
- Basic
Tutorial Contents
I will be teaching in this post that how to send bytes or any other asset to any byteball address with the help of byteball js, which is a powerful library to create web applications for byteball. The tutorial will be divided in 5 parts as for introducing you each concept clearly. Download and setup project files link

Tutorial Begins From Here:
1):--
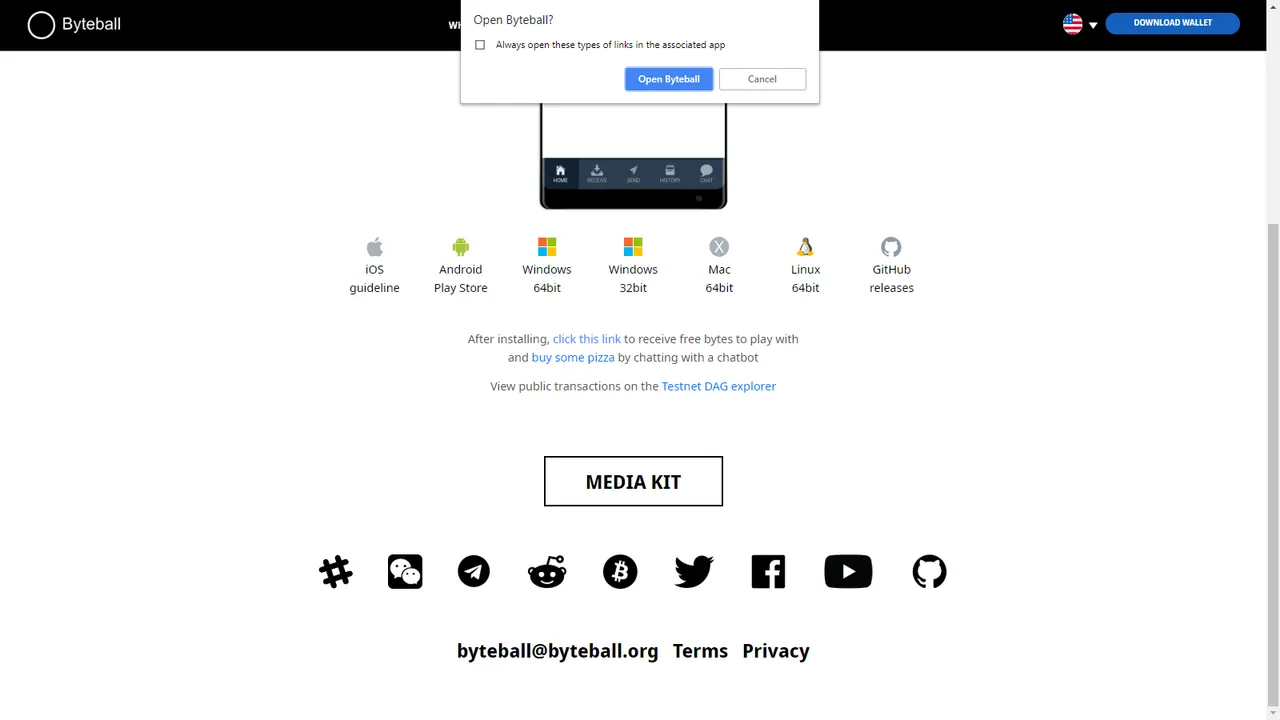
Go here and download the testnet client based on your operating system.

After installing the bot, Click on the link given below the downloading option to start chatting with testnet bot and to get your first 75000 of free
testnetbytes, The link is also given on the website. Follow below steps if confused.
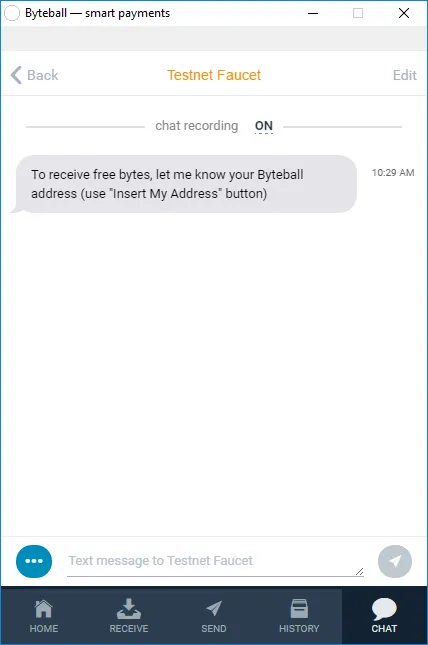
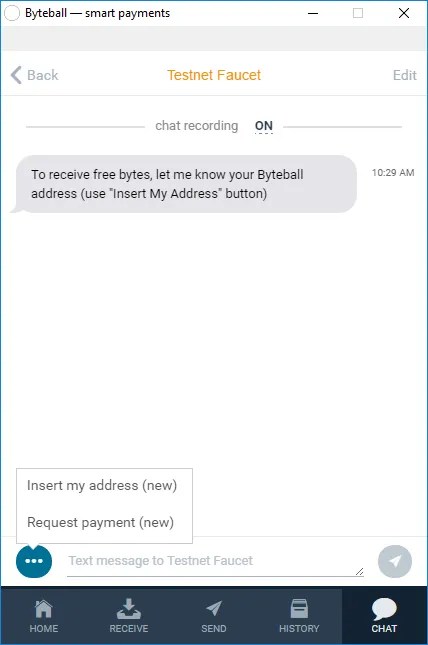
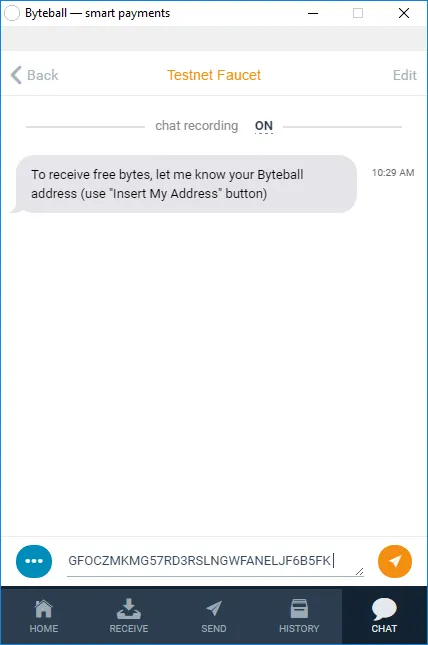
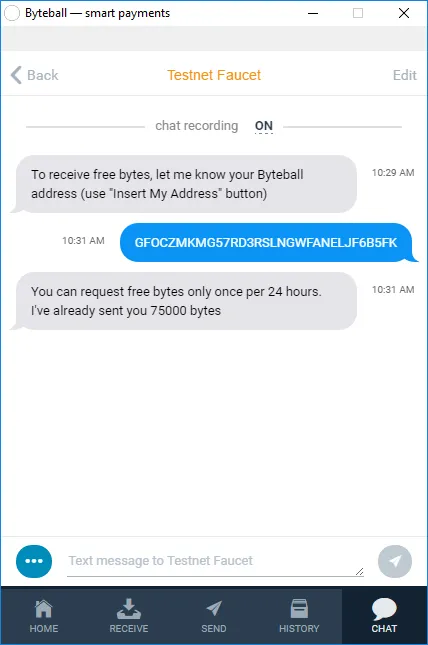
You can request only once per 24 hours, I already got mine :D
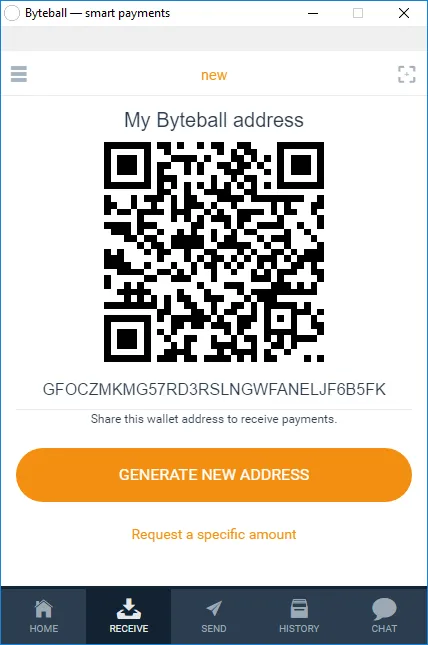
Go to receive tab to see your byteball account address, this light wallet is very easy to follow and understand.

2):--
Now go here. Create your paper wallet private key or wif, public key and seed for byteball.
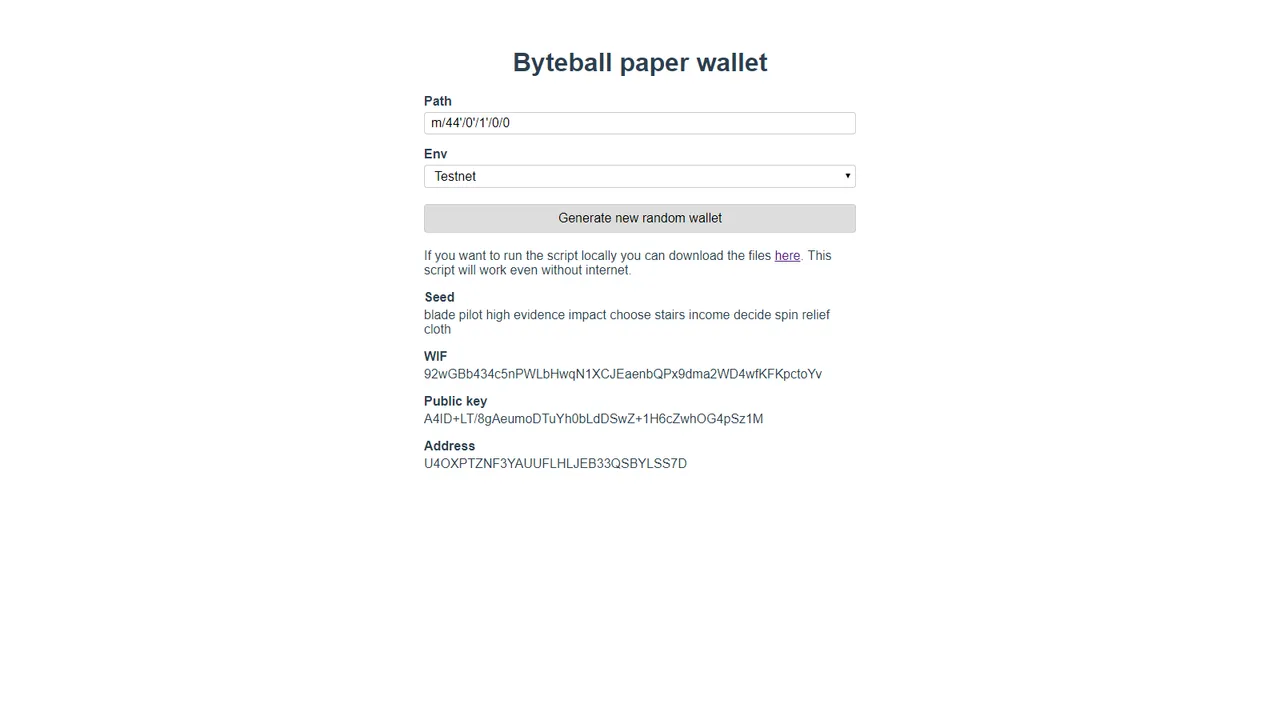
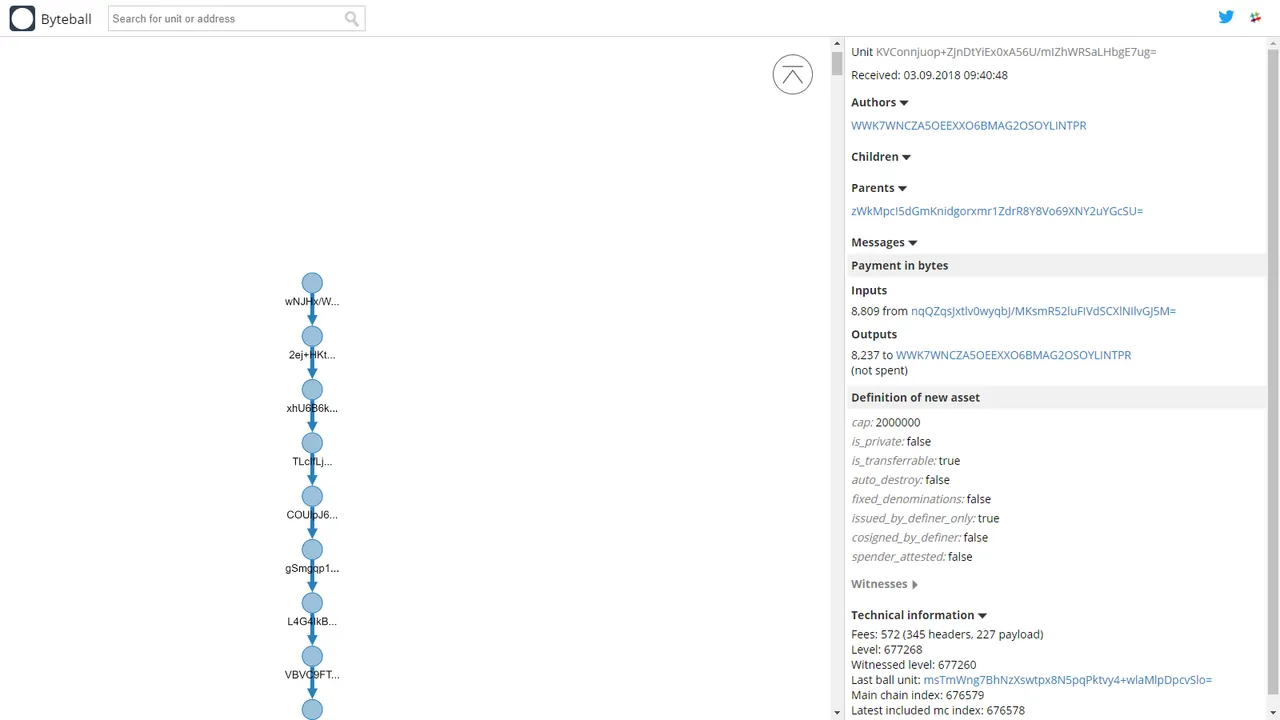
These wallets won't work in byteball client but they are connected with the byteball main chain, So you can see all of the transaction units and get details about your account but only after you do some transaction over it like sending bytes, you can found all you account details here :- Byteball testnet Explorer Link. Just search for address or unit id.
3):--
There is a function in byteball js to mane our stuff easy. In docs you can watch more info about code.
const params = {
outputs: [
{ address: 'NX2BTV43XN6BOTCYZUUFU6TK7DVOC4LU', amount: 1000 }
]
};
client.post.payment(params, wif, function(err, result) {
console.log(result);
});
Code Explained:-
In the output field, we are adding address of the receiver and the amount to send. Then using client.post.payment() we are broadcasting the send request by giving wif of the account.
Note: Accounts created with byteball client don't have wif , they only have seed. So to get a wif, you have to work with paper wallet accounts and transect from these accounts, By that means first you should send some bytes to the paper wallet account and then you can search your account address in testnet explorer and then you can work with Byteball JS methods easily.
It will print out a unique unit id that can be searched in testnet explorer. The docs are very clear with every bit of info for byteball js, so make sure to take a look that them:- https://byteballjs.com/post/payment
4):--
From Here the tutorial is further divided in 2 parts, make sure you have downloaded the repository of part 1 (linked above).
Remove all previous code in Index.html and put this code instead.
<!DOCTYPE html>
<html lang="en" dir="ltr">

<head>
  <meta charset="utf-8">
  <link rel="stylesheet" href="https://cdnjs.cloudflare.com/ajax/libs/materialize/1.0.0-rc.2/css/materialize.min.css">
  <title></title>
</head>

<body>
  <div class="container">
    <div class="row">
      <form class="col s12">
        <div class="row">
          <input placeholder="Enter byteball address" id="address" type="text" class="validate">
        </div>
        <div class="row">
          <input placeholder="Enter amount" id="amount" type="text" class="validate">
        </div>
      </form>
    </div>
    <div class="row center">
      <span id="un_id"></span>
    </div>
    <div class="row center">
      <a class="waves-effect waves-light btn grey darken-4">Send</a>
    </div>
  </div>
  <script type="text/javascript" src="https://cdnjs.cloudflare.com/ajax/libs/jquery/3.3.1/jquery.min.js"></script>
  <script type="text/javascript" src="https://cdn.jsdelivr.net/npm/byteball@0.1.0/dist/byteball.min.js"></script>
  <script src="https://cdnjs.cloudflare.com/ajax/libs/materialize/1.0.0-rc.2/js/materialize.min.js"></script>
  <script type="text/javascript" src="index.js"></script>
</body>

</html>
It's simple, Added 2 input fields and a button of materialized design. Another thing added is <span> tag where i can show the result (unit id) that can be searched on testnet block explorer talked above.
Remove all previous code in Index.js and put this code instead.
// Javascript code.
//Initialized client first...
 const client = new byteball.Client('wss://byteball.org/bb-test', true); // for test net client
//Sender wif's can be generated with paper wallet.
 const wif = "92jcZ8iVfmAoipDCmNA4ummBYfuCv8YqBjjjhWo1G77foAtyPU8"; // Wif of sender account
 $('.btn').click(() => {
   if ($('#address').val() != "" && $('#amount').val() != "") {
     console.log($('#address').val() + " - " + $('#amount').val())
     const params = {
       outputs: [{
         address: $('#address').val(),
         amount: parseInt($('#amount').val())
       }]
     };
     client.post.payment(params, wif, function(err, result) {
              console.log("HEllo")
       if (!err) {

         $('#un_id').html(result);
         M.toast({
           html: 'Successfully transferred!'
         });
       }
       console.log(err, result);
     });
   } else {
     M.toast({
       html: 'Please enter address and amount correctly!'
     })
   }
 });
Code working:
First initialized byteball client with test net
const client = new byteball.Client('wss://byteball.org/bb-test', true);
Then initialized a wif of sender (Wif can be created as explained above)
const wif = "92jcZ8iVfmAoipDCmNA4ummBYfuCv8YqBjjjhWo1G77foAtyPU8";
Then inside button click even, I am checking that make sure to fill all required fields
address&amount, You can add more validating requirements for address or amount.I am passing values pf address and amount to required properties but amount should be in int so i am converting it.
         address: $('#address').val(),
         amount: parseInt($('#amount').val())
Printing certain toasts to map user with current progress, like this.
   M.toast({
           html: 'Successfully transferred!'
         });
Printing unit id in span to give it to user/
$('#un_id').html(result);
Also giving a console.log output for error and other information but you can sure use a toast to indicate that as well .
Open index.html with browser to see your output.
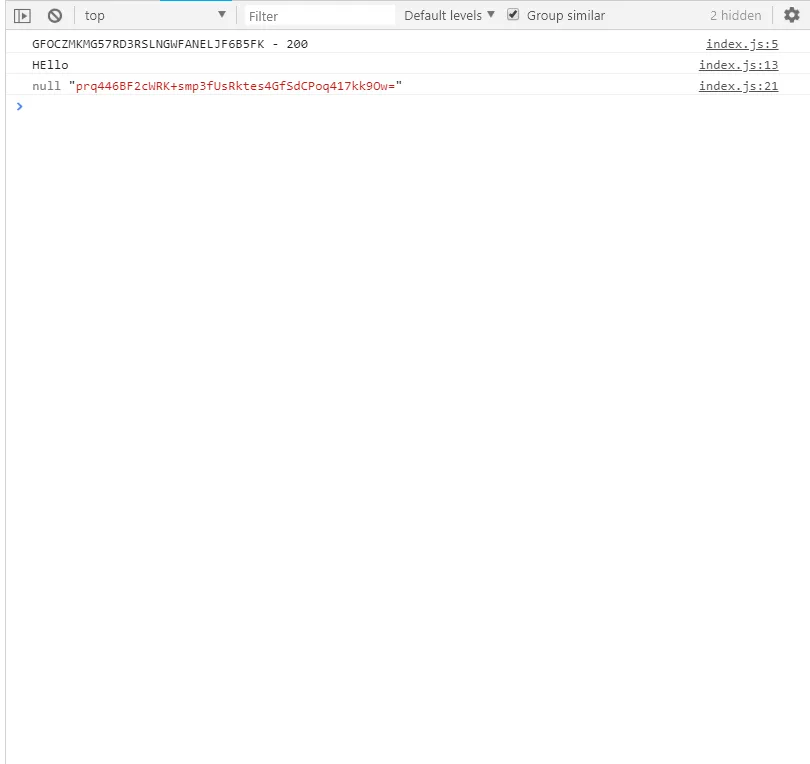
Output: