The ‘Hello World!’ of Arduino, it’s the Blinking LED! so if you are learning arduino for the first time Blinking LED is your first project, beacause its the basic of arduino and its very easy. so on this post i will share my little work on Blinking LEDs
SOFTWARE
1.i will going to start with the software first. the first thing you need to have is the arduino ide you can download and install the software here: https://www.arduino.cc/en/Main/Software after the installation open the ide.
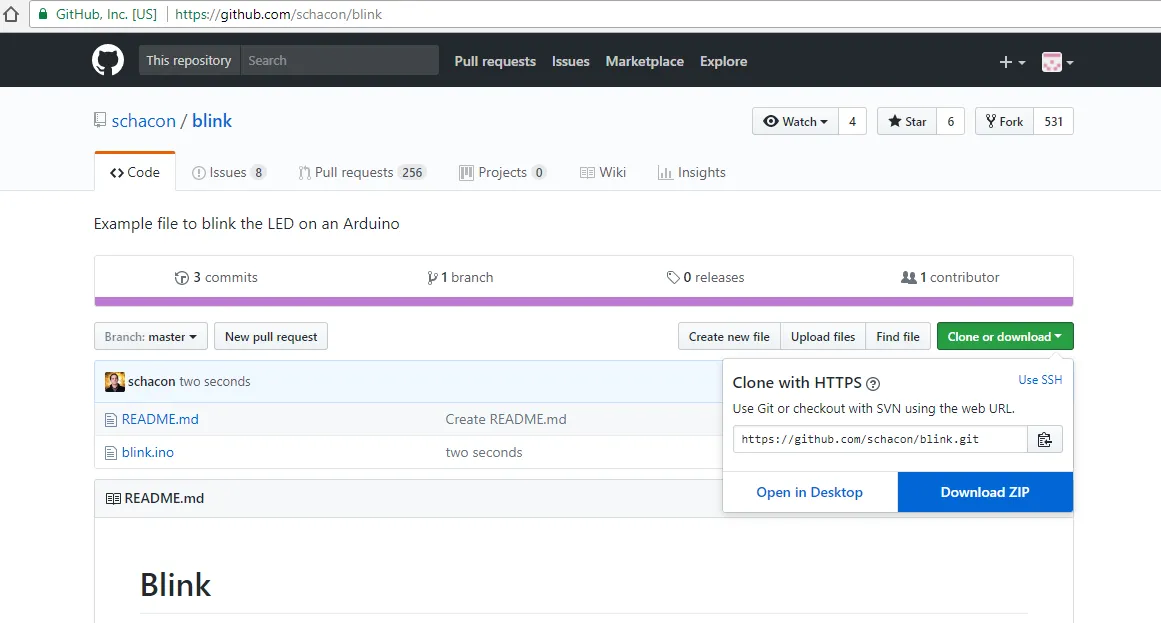
2. we need to download the sketch/code for LED basic blink i use this repository that might help you using the sketch inside the file, go to this link: https://github.com/schacon/blink click the >>CLONE/DOWNLOAD<<then>>DOWNLOAD ZIP<<..
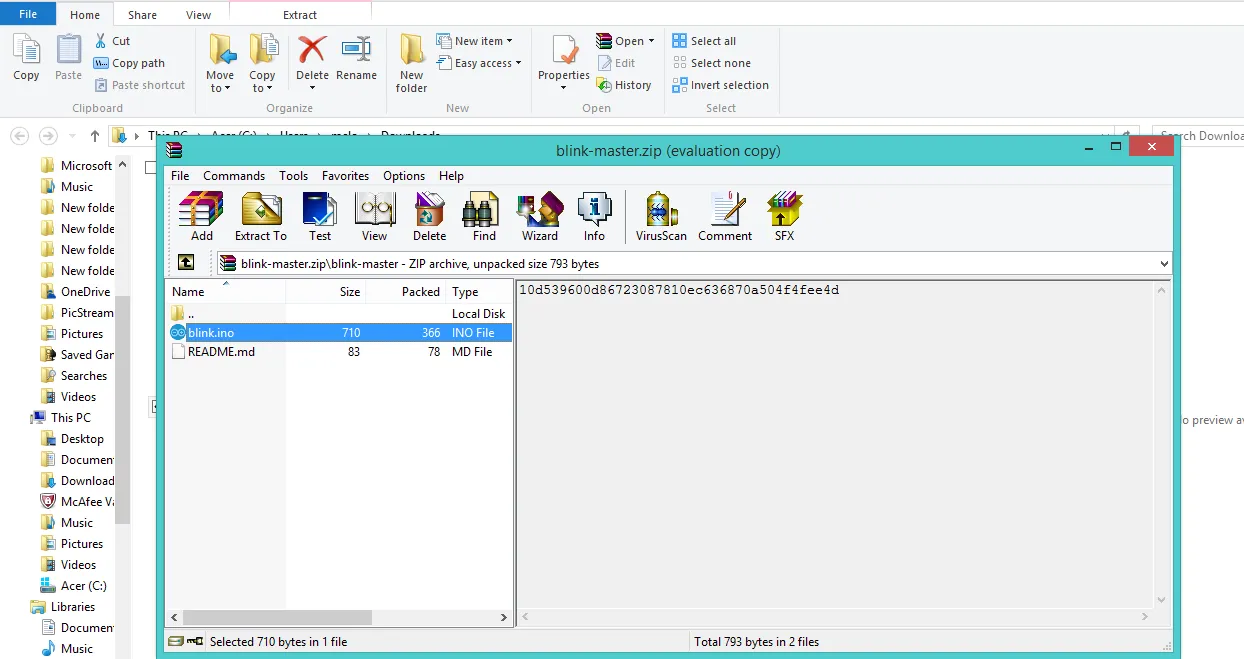
3. after the download has been completed open the downloaded zip file on your player i use winrar as you can see. aftr you open it, left click the blink.ino file to show the option, if the file cant open select>> OPEN WITH<< then loacate the arduino ide, ino file is for arduino.
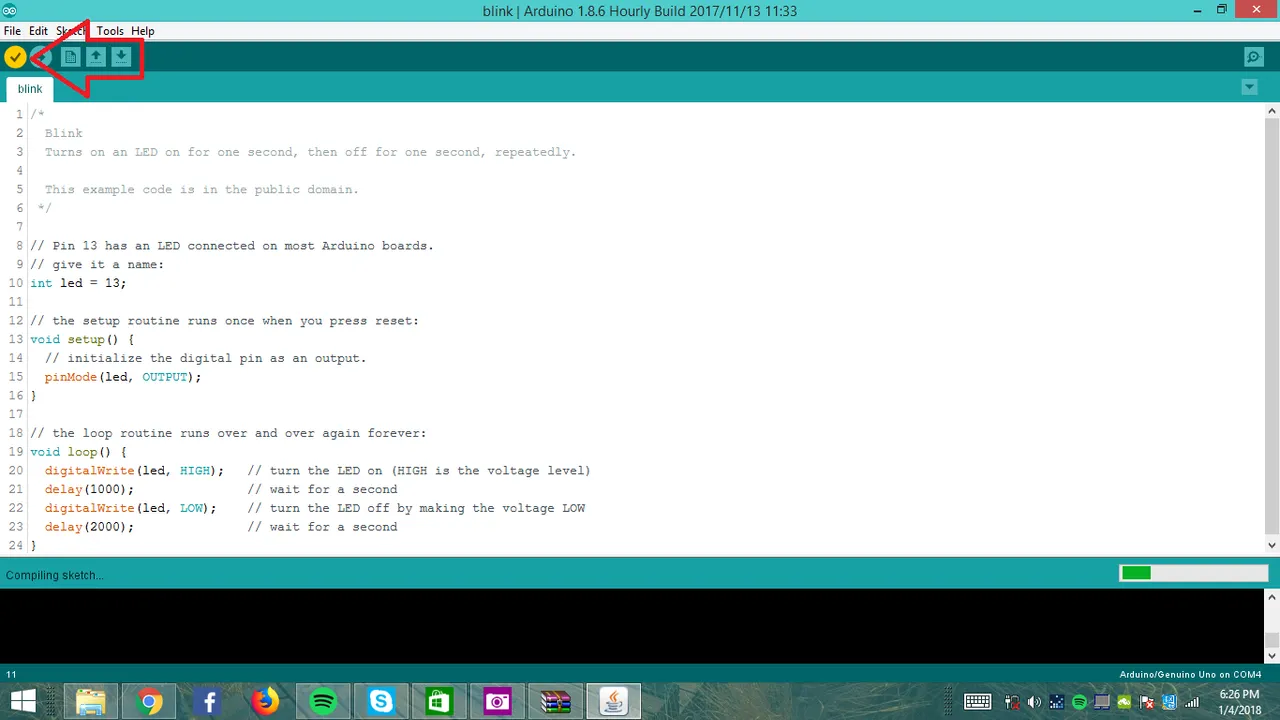
4.once its done the code sketch will appear on the ide this is the basic blink sketch
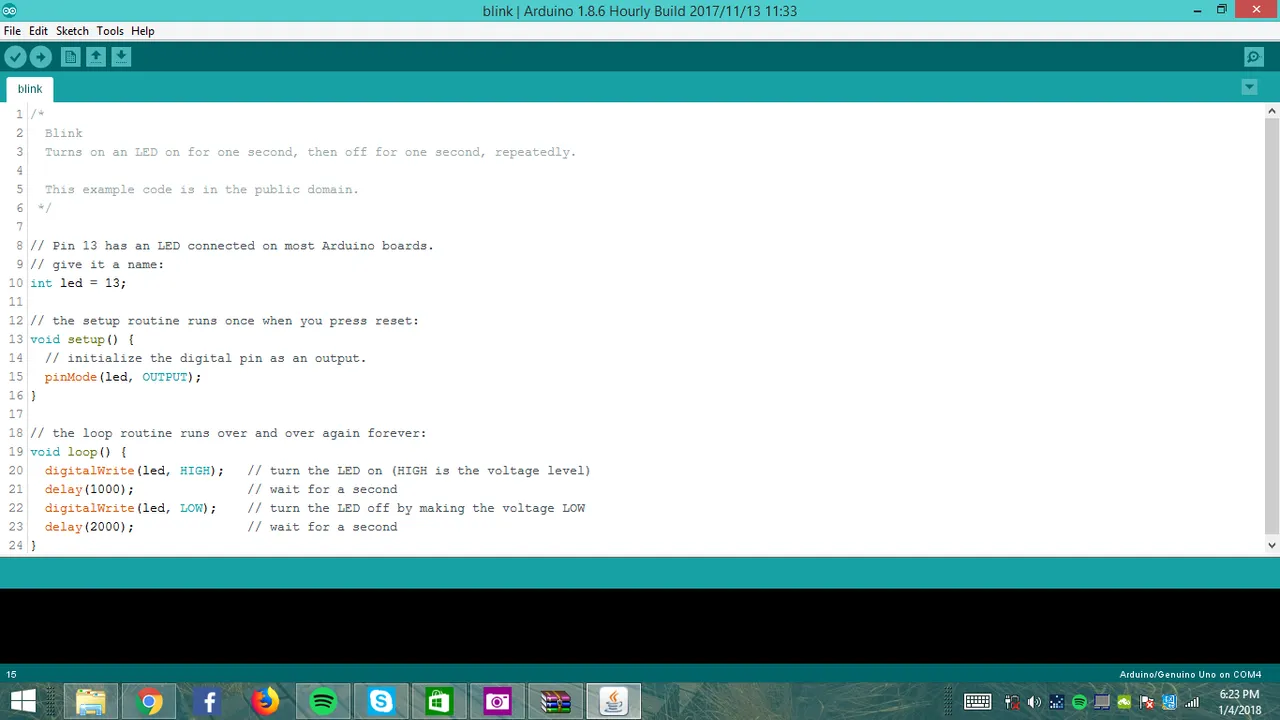
Or simply you can copy the sketch code here:
/* Blink Turns on an LED on for one second, then off for one second, repeatedly. This example code is in the public domain. */// Pin 13 has an LED connected on most Arduino boards.// give it a name:int led = 13;// the setup routine runs once when you press reset:void setup() { // initialize the digital pin as an output. pinMode(led, OUTPUT); }// the loop routine runs over and over again forever:void loop() { digitalWrite(led, HIGH); // turn the LED on (HIGH is the voltage level) delay(1000); // wait for a second digitalWrite(led, LOW); // turn the LED off by making the voltage LOW delay(2000); // wait for a second}5. this part you have to plug your arduino uno to your pc using the usb type B cable of the uno. verify your board by selecting TOOLS>> BOARD MANAGER>> select uno.
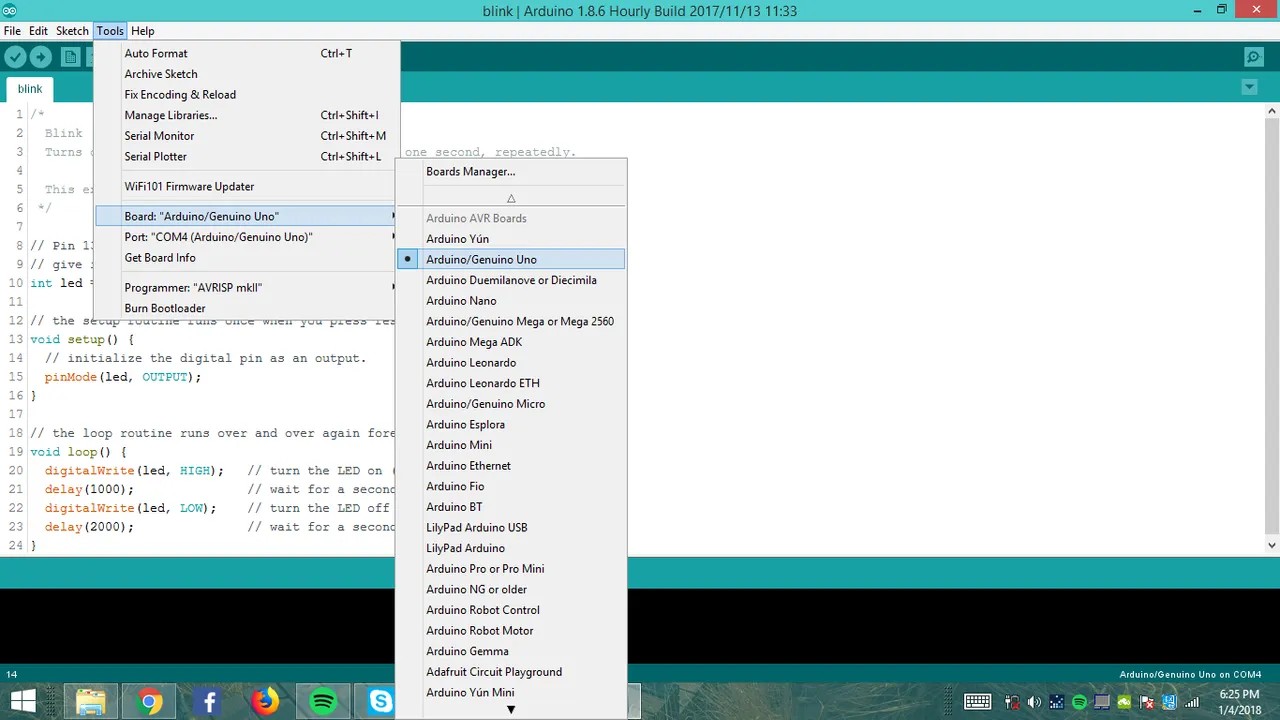
6. verify the port driver, select >>TOOLS>>PORT<< then select the arduino driver has plug in. if you cannot find this name then there is a problem with your drivers.

HARDWARE
the parts that we will be using are:
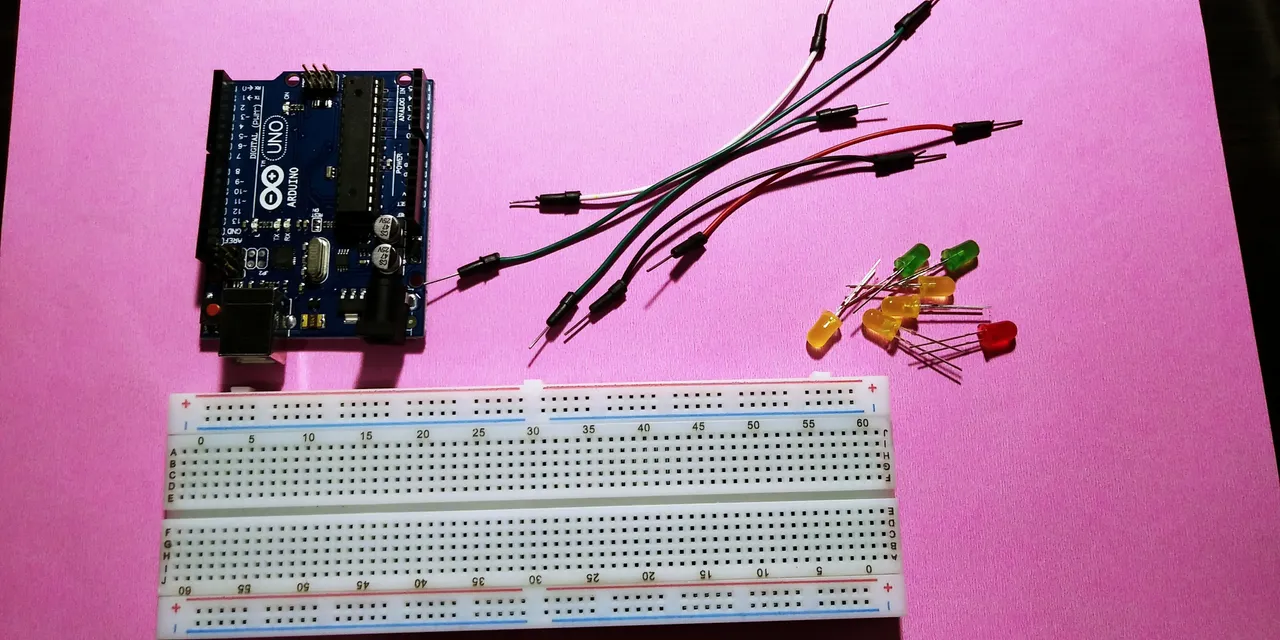
- arduino uno
- male-male jumpers
- resistors
- Breadboard
- LEDs
process:
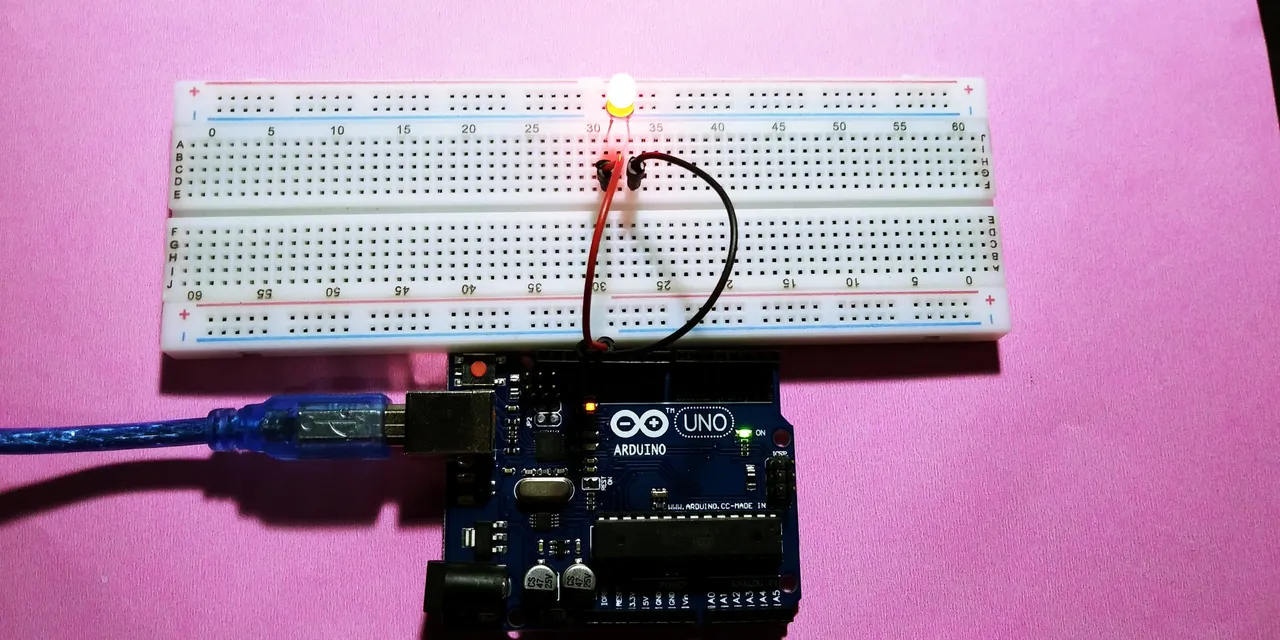
Take the board and place the led on it, the solderless breadboard has 2 circuit lanes of wires the both side of the bread with the +- sign has horizontal wiring while the mid part has vertical wiring. iplace the led at the center of the breadoard the long leg of the led is the possitive and the short will be the gnd negative, as you can see the negative has black jumper and the + one i choose red on it.
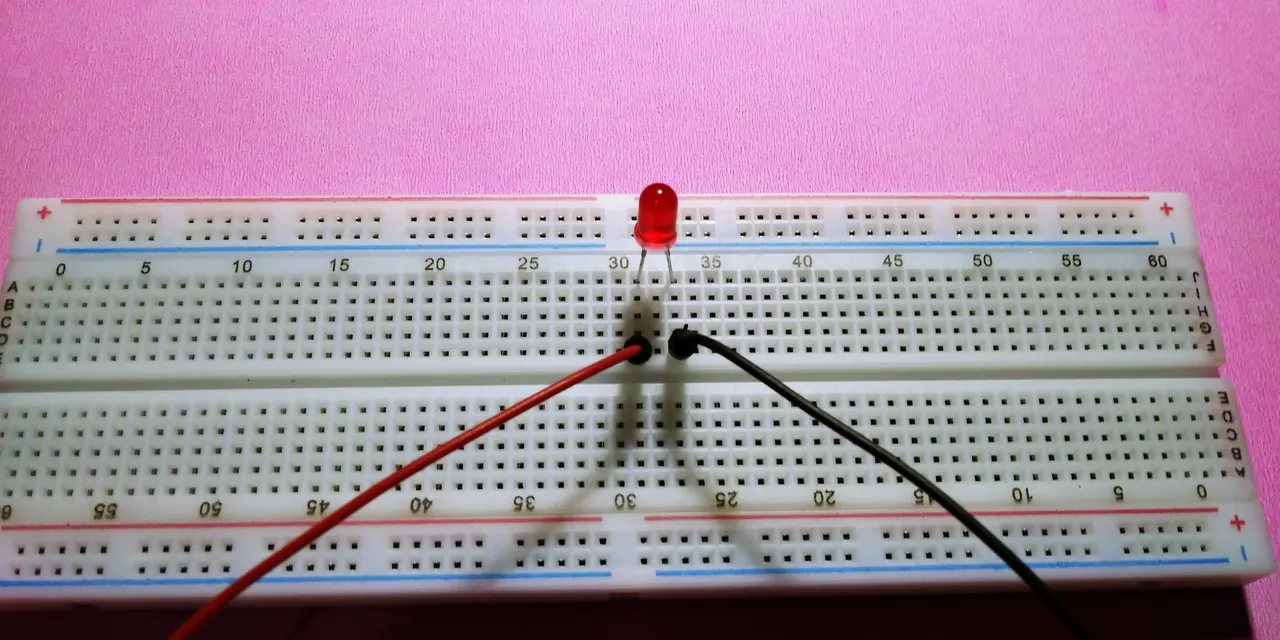
place the negative( black) jumper to the arduino board on pin GND. the red one jumper is for the pin 13 on the uno board.
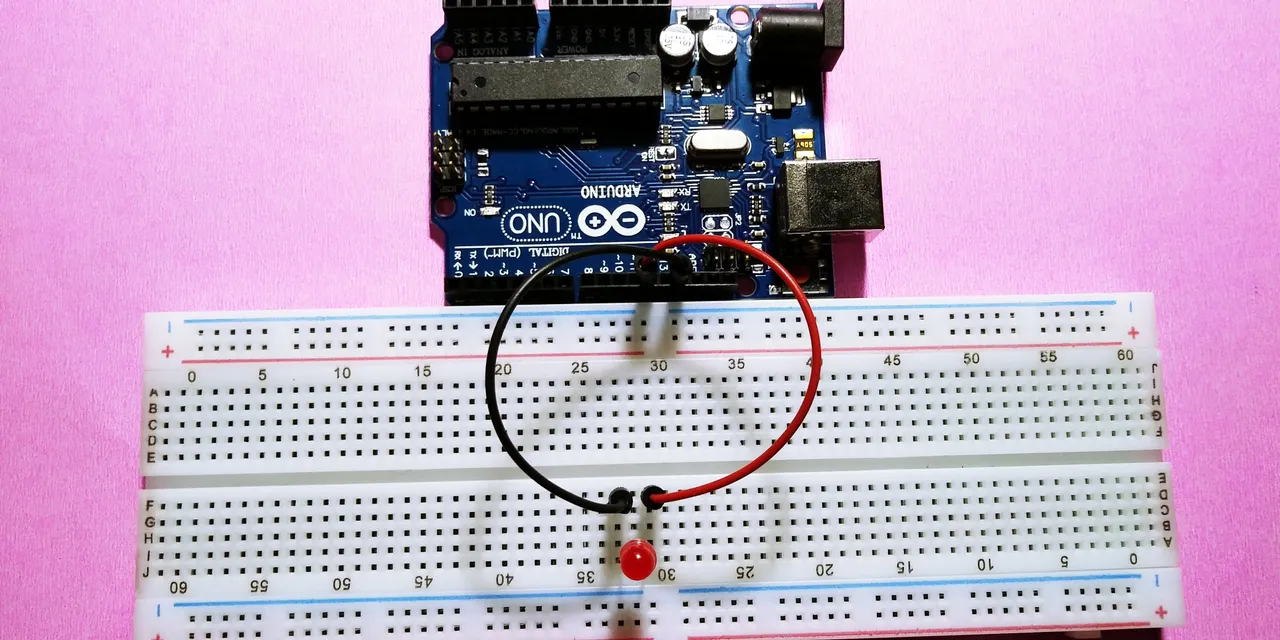
Plug the arduino uno board on your pc then open the ide with the sketch code that we have recently downloaded,
on the ide click the check sign to verify/ compile the sketch
once done click the upload the sketch to the arduino board.
once the sketch is uploaded to the board you can see the led blinks the delay time of the blinks is depends on the sketch, you can edit the delay time on the sketch (1000) is 1 sec.
im sorry if i make this too long and hard actually you can get the blinking led on the arduino ide just click>sketch then examples>basic>blink. if you want to copy a sketch code in zip file this is the basic way.
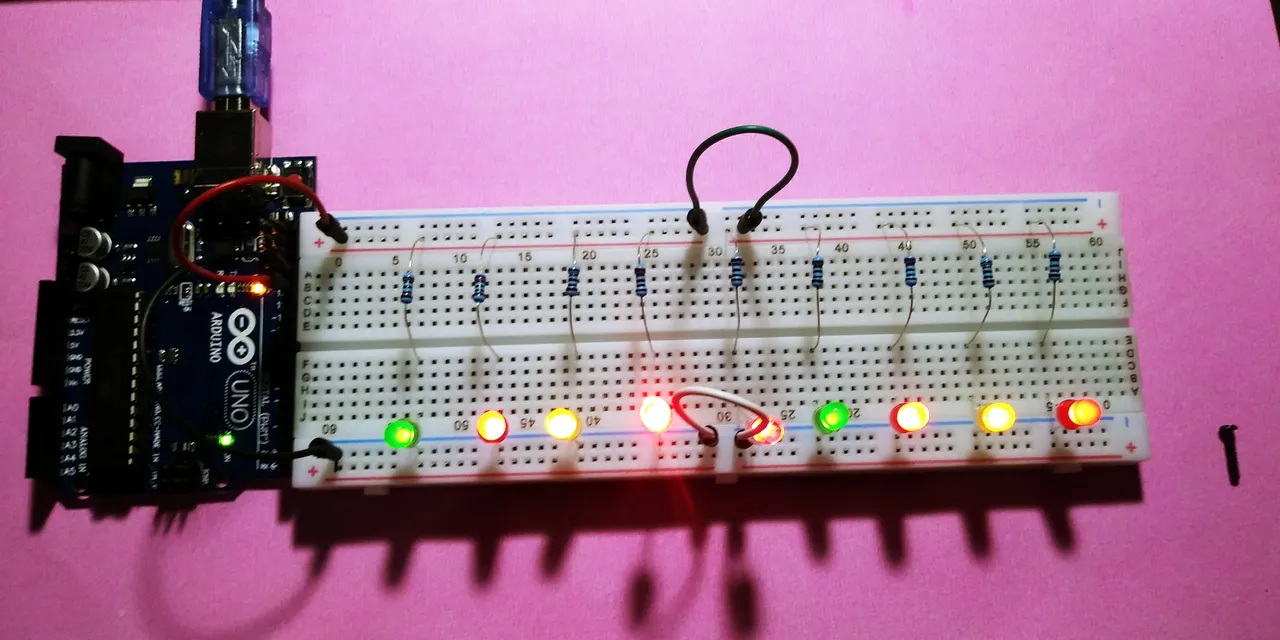
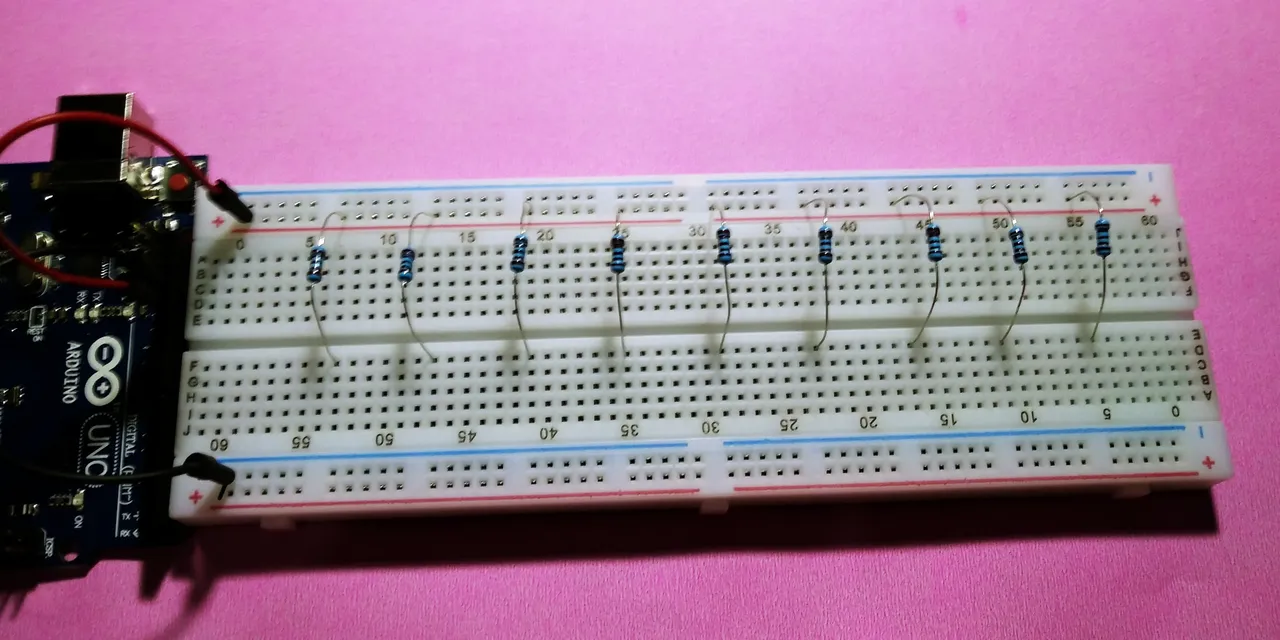
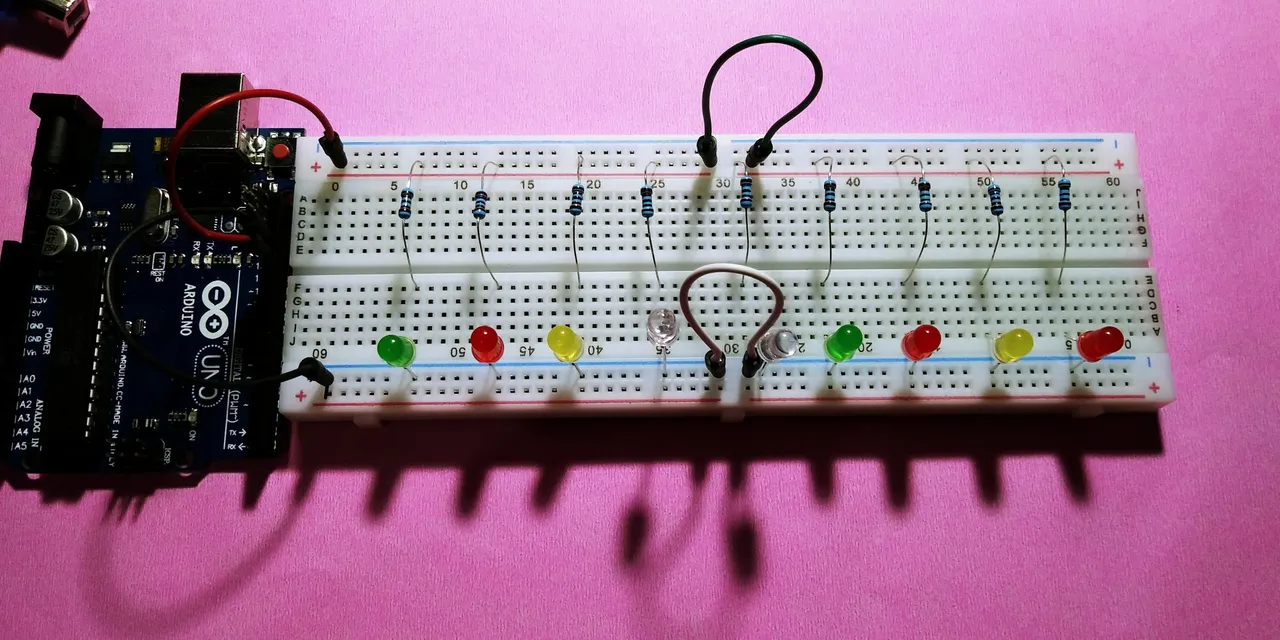
If you want to put 9 leds on the breadboard, i put the 13 pin on the + lign horizontal wiring on the board and the GND for the negative.

i put the resistor on here in my 1 led i didnt put resistance bcoz its just a testing. i place 1 leg of the resistor where the 13 pin is connected to it. and the other leg is on the mid vertical lane.
i put another jumper wires at the center beacasue the circuit is break at the center 30cm.
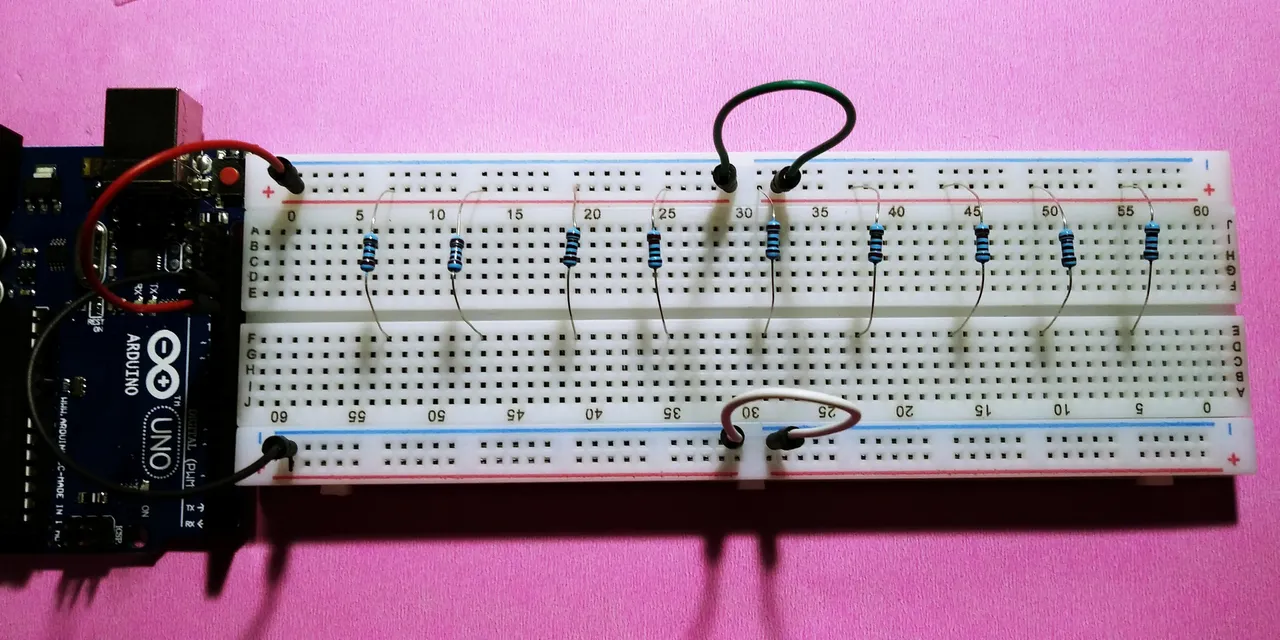
i place the long left of the led where the resistor is connected and the short leg of the led is connected to the where the gnd is connected.
beacause the sketch is already on the uno board i dont need to put it on the my pc unless i change the sketch, i plug my power bank here to add power source for the uno board.
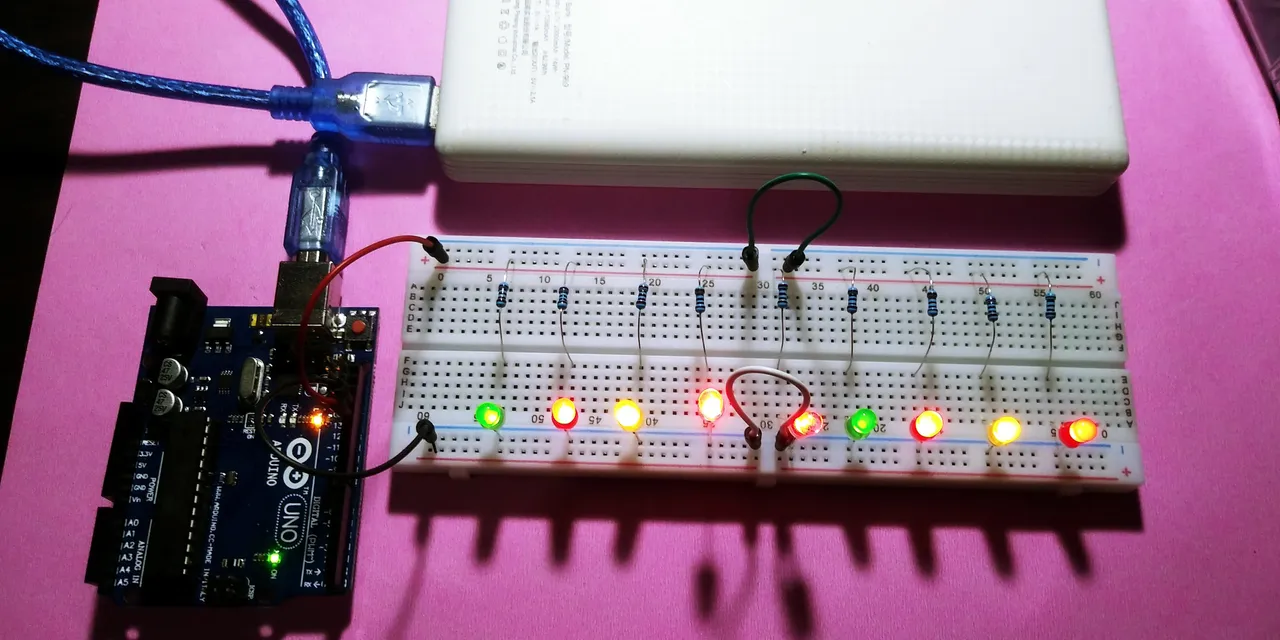
So thats it for my little basic led blinking arduino project. thatnk you:)
Posted on Utopian.io - Rewarding Open Source Contributors