
What Will I Learn?
Write here briefly the details of what the user is going to learn in a bullet list.
- You will learn basic of the function and its uses
- You will learn setting up your obs and recording output
Requirements
In this tutorial, you will need the following application and some website as an example to learn some of obs features
- OBS software
- Some basic understanding of how to use the software.
Difficulty
Either choose between the following options:
- Intermediate
Tutorial Contents
On my first tutorial, I discuss the basic function of some features that the OBS Studio have, (e.g., the Basic function of the menu and its uses, Setting up your Stream to Dlive and You Tube you can check the tutorial on this link click here)
And now were going to study how we can set the OBS studio's out put in advance mode.
Lets Get started
- Open your Obs Studio
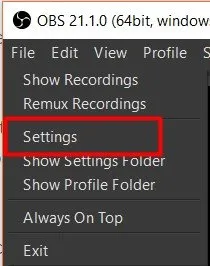
- Click File > Settings
- Click the Output tab
3.1. on the output mode dropdown choose
advance

after doing that action your view will turn from this.
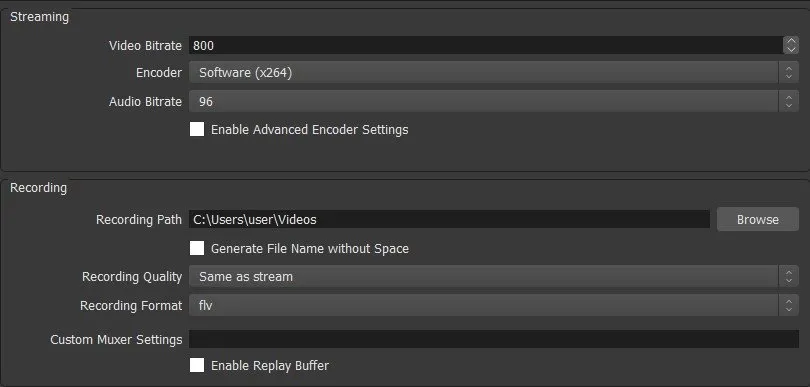
to this
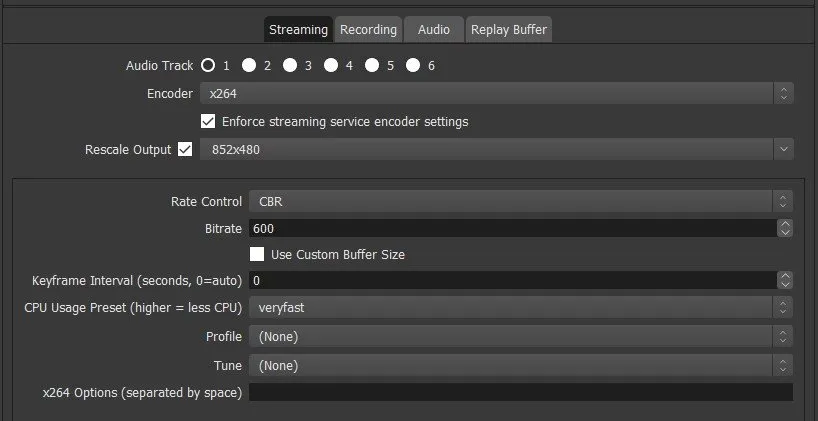
you will see a new 4 tabs option there, and now we will discus what is there use, and how to use them.

3.2. if you are streaming and using multiple audio tracks, you can simply click on the radio button with the number of 1,2,3,4 and 5 to activate how many audio tracks you want to be recorded, on mine I use two one for the application track and one for my mic, I used these settings especially when doing game live streaming.

3.3. You need to figure out which is the best suitable settings on your encoder that is compatible with your computer. You need to know that if you are to use x264 it will affect the game recording if you are recording games, But if you are using an i3, i5, i7 you will not feel that your usage getting slow nor lagging.

for me the best option is quicksync thou quicksync can't give the quality of the streaming or recording you want, it will give more suitable and fine stream/recording result that will guarantee the good performance of the video. but if you have High spec PC/Laptop use x264.
And Also don't forget to uncheck the specially when you have a low spec pc/laptop because it will Enforce the requirement of the service encoder settings as written on it, and when the service provider required a settings that cannot bear on your computer it will cause a laggy output of your streaming.
3.4. Rescale Output and how it works.

When you are streaming your canvas may set to a high definition like 1024x720 or 1280x820
but when you enable Rescale Output it will enable you to choose wheater 720p or 480p even your canvas was set at a higher definition.3.5. at Rate Control there will be 4 option to choose, but I will recommend only 1 especially when it't your first time using OBS but I will explain how this 4 control works.

3.5.1 CBR - Constant Bit Rate CBR have no different actually with VBR but there some services that are only used CBR since it will require you much more cpu and memory usage with the same quality that VBR gave so only a few are using CBR as their Rate control.
3.5.2 ABR is an Average BitRate it was after all used only by people who have a low spec device this Rate Control gives lower quality output but will only require low spec device, cpu, and memory usage.
3.5.3 VBR - Variable BitRate this one only use by some user that is after for the customization of the max BitRate set 50 as minimum and 6000 as maximum which is not available to other 3 options, while more are preferred to use CBR and VBR some using VBR for this reason.
3.5.4 CRF - Constant Rate Factor this is the default setting of bitrate for x264 and x265 encoder, I recommend to use 22CFR when using this as a BitRate Controler.
Okay, That's All thanks for following the tutorial, Hope you enjoy this series tutorial for OBS basic Technical usage and its function and hope you learn a lot. on my next tutorial, I'm going to discuss audio and Video settings.
Curriculum
You can also visit the first part of this tutorial if you never read it before, follow the link below.
Posted on Utopian.io - Rewarding Open Source Contributors