What Will I Learn?
- The user will learn the concept behind the Swing Construct called
JTabbedPane - The user will learn how to create a Tabbed Pane and associate it with events together with other Swing constructs.
Requirements
- A computer System is required for this tutorial.
- Java Software Development Kit(JDK) must be installed on your computer.
- An Integrated Development Environment(IDE) such as Eclipse or NetBeans is required to be installed on your computer.
Get JDK here
Get Eclipse here
Get NetBeans here
Difficulty
Intermediate.
Tutorial Contents
This tutorial follows from previous tutorials, on the topic of Swing constructs in GUI beginning with ‘J’. The tutorial introduce another interesting construct;
JTabbedPane
JTabbedPane in Swing enables you to group several swing component groups on the same container. To view a particular component group, you need to select the tab corresponding to the component group in the tabbed pane. To create a tabbed pane, create an instance of JTabbedPane class and add various tabs to it using the addTab() method of JTabbedPane class. The syntax to create a JTabbedPane is:
JTabbedPane pane = new JTabbedPane();
Constructors used to create a Tabbed Pane
JTabbedPane(): Creates an empty JTabbedPane with default placement of JTabbedPane.Top. The placement specifies the division of JTabbbedPane.
JTabbedPane(int placement): Creates a JTabbedPane with specified placement that is passed as an argument to the constructor. The various placements for a JTabbedPane are JTabbedPane.TOP, JTabbedPane.BOTTOM, JTabbedPane..LEFT and JTabbedPane..RIGHT.
JTabbedPane(int placement, int tabLayoutPolicy): Creates a JTabbedPane with the placement and tabLayoutPolicy passed as an argument to the constructor.
A JTabbedPane component provides quick access to the mulitiple JPanels using the same space and Window.
In this tutorial, we will create two classes;
- Class 1: We will create a Tabbed Pane containing three panels, each panel will have a JLabel, JTextField and JButton objects allowing the user to enter information. When the user clicks the button, the information he entered is returned.
- Class 2: Contains main method for run instructions.
This tutorial is done in assumption that the user follows through previous tutorials and is familiar with the coding terms used therein, also, have basic Java programming knowledge.
IMPORTANT NOTE
If you follow previous tutorials, you will notice these Swing Constructs are created the same way, however, their functionalities differ.
You may use the same line of code to create objects of these constructs, but making them function requires different methods of coding.
This is where this tutorial comes in handy. The tutorial uses an example to illustrate its functions and actions that can be associated with it.
CODE BLOCK
tabbedPane Class
import java.awt.*;
import java.awt.event.*;
import javax.swing.*;
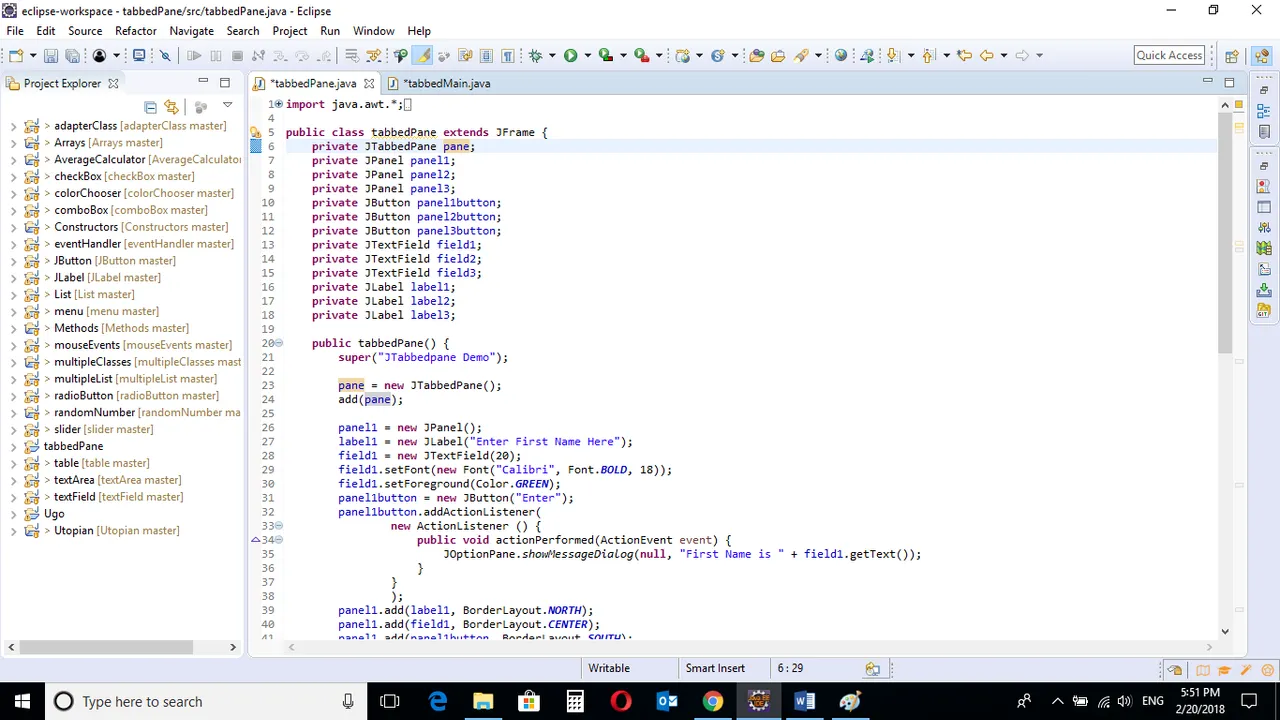
public class tabbedPane extends JFrame {
    private JTabbedPane pane;
    private JPanel panel1;
    private JPanel panel2;
    private JPanel panel3;
    private JButton panel1button;
    private JButton panel2button;
    private JButton panel3button;
    private JTextField field1;
    private JTextField field2;
    private JTextField field3;
    private JLabel label1;
    private JLabel label2;
    private JLabel label3;
    public tabbedPane() {
        super("JTabbedpane Demo");
        pane = new JTabbedPane();
        add(pane);
        panel1 = new JPanel();
        label1 = new JLabel("Enter First Name Here");
        field1 = new JTextField(20);
        field1.setFont(new Font("Calibri", Font.BOLD, 18));
        field1.setForeground(Color.GREEN);
        panel1button = new JButton("Enter");
        panel1button.addActionListener(
                new ActionListener () {
                    public void actionPerformed(ActionEvent event) {
                        JOptionPane.showMessageDialog(null, "First Name is " + field1.getText());
                    }
                }
                );
        panel1.add(label1, BorderLayout.NORTH);
        panel1.add(field1, BorderLayout.CENTER);
        panel1.add(panel1button, BorderLayout.SOUTH);
        pane.addTab("First Name", panel1);
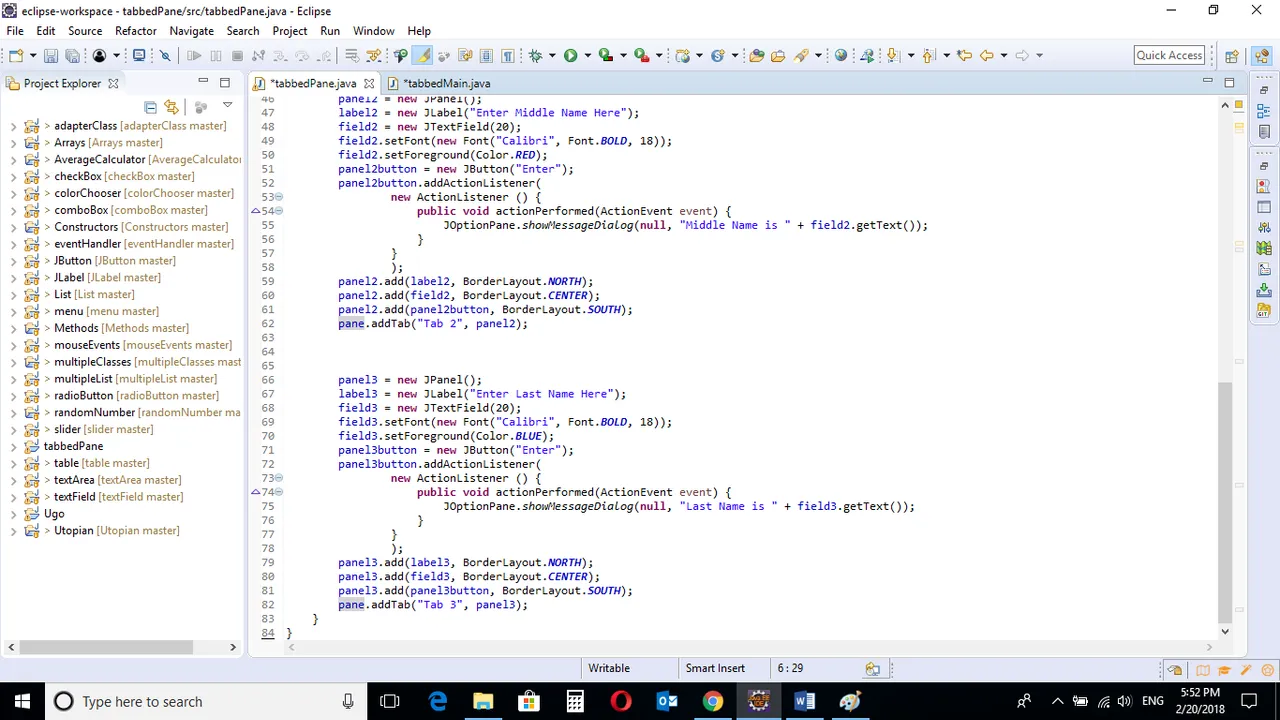
panel2 = new JPanel();
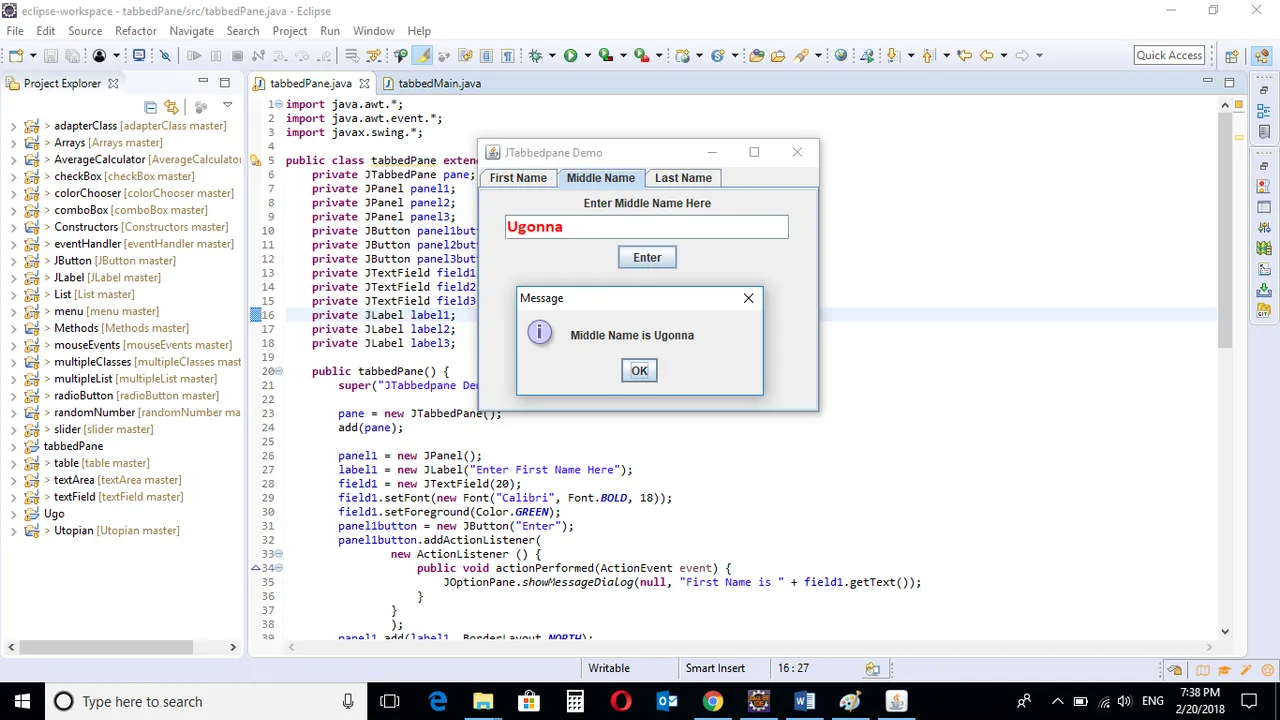
label2 = new JLabel("Enter Middle Name Here");
field2 = new JTextField(20);
field2.setFont(new Font("Calibri", Font.BOLD, 18));
field2.setForeground(Color.RED);
panel2button = new JButton("Enter");
panel2button.addActionListener(
new ActionListener () {
public void actionPerformed(ActionEvent event) {
JOptionPane.showMessageDialog(null, "Middle Name is " + field2.getText());
}
}
);
        panel2.add(label2, BorderLayout.NORTH);
        panel2.add(field2, BorderLayout.CENTER);
        panel2.add(panel2button, BorderLayout.SOUTH);
        pane.addTab("Middle Name", panel2);
panel3 = new JPanel();
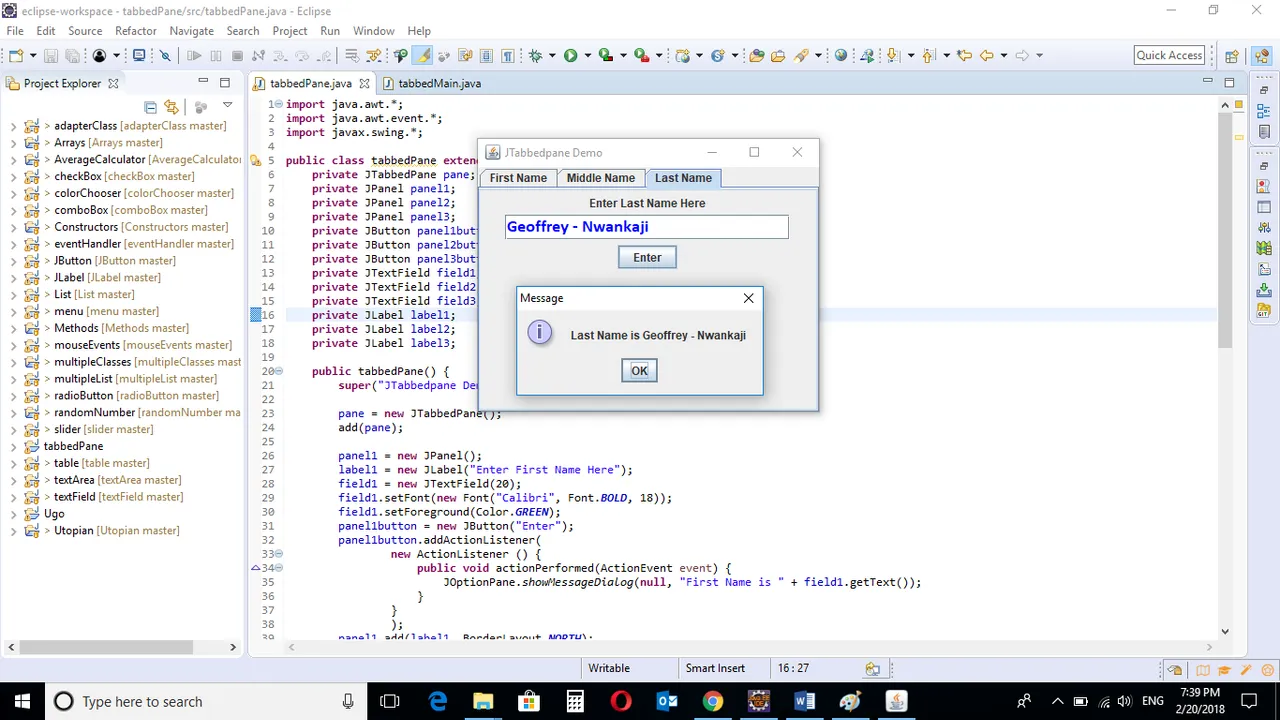
label3 = new JLabel("Enter Last Name Here");
field3 = new JTextField(20);
field3.setFont(new Font("Calibri", Font.BOLD, 18));
field3.setForeground(Color.BLUE);
panel3button = new JButton("Enter");
panel3button.addActionListener(
new ActionListener () {
public void actionPerformed(ActionEvent event) {
JOptionPane.showMessageDialog(null, "Last Name is " + field3.getText());
}
}
);
        panel3.add(label3, BorderLayout.NORTH);
        panel3.add(field3, BorderLayout.CENTER);
        panel3.add(panel3button, BorderLayout.SOUTH);
        pane.addTab("Last Name", panel3);
    }
}
tabbedMain Class
import javax.swing.JFrame;
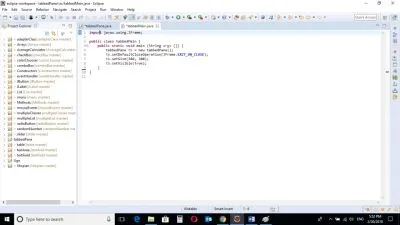
public class tabbedMain {
public static void main (String args []) {
tabbedPane tb = new tabbedPane();
tb.setDefaultCloseOperation(JFrame.EXIT_ON_CLOSE);
tb.setSize(380, 300);
tb.setVisible(true);
}
}
Output
tabbedPane Class
pane = new JTabbedPane();
add(pane);
A JTabbedPane object with no argument is created using the new JTabedPane syntax and added the frame.
panel1 = new JPanel();
label1 = new JLabel("Enter First Name Here");
field1 = new JTextField(20);
field1.setFont(new Font("Calibri", Font.BOLD, 18));
field1.setForeground(Color.GREEN);
panel1button = new JButton("Enter");
panel1button.addActionListener(
new ActionListener () {
public void actionPerformed(ActionEvent event) {
JOptionPane.showMessageDialog(null, "First Name is " + field1.getText());
}
}
);
A JPanel container is created. JPanel containers are used to hold components when using a JTabbedPane.
A JLabel object will inform the user of the information required to be inputted. The object is created using label1 = new JLabel("Enter First Name Here").
A JTextField object is created. The user will enter a single line of editable bold text here. The Color of the text is set to Green and the length of text is set to 20.
A JButton is created to prompt the program to return the entered text. ActionListener interface is associated with the button containing instruttions using the .getText() method to return text from the field. The . .showMessageDialog in the JOptionPane class is used to display the message.
panel1.add(label1, BorderLayout.NORTH);
panel1.add(field1, BorderLayout.CENTER);
panel1.add(panel1button, BorderLayout.SOUTH);
pane.addTab("First Name", panel1);
The .add() method is used to add the JLabel, JTextField and JButton objects to the panel named “panel1”.
The .addTab() method is used to now add the panel container to the pane.
Soft Note
The programmer can add as many tabs as the programmer wishes, this program contains three tabs requiring the user to enter information and then click the “Enter” button for the text to be returned by the program.
The same sequence is repeated in the second and third tabs with minor adjustments made in the color of the text.
panel2 = new JPanel();
label2 = new JLabel("Enter Middle Name Here");
field2 = new JTextField(20);
field2.setFont(new Font("Calibri", Font.BOLD, 18));
field2.setForeground(Color.RED);
panel2button = new JButton("Enter");
panel2button.addActionListener(
new ActionListener () {
public void actionPerformed(ActionEvent event) {
JOptionPane.showMessageDialog(null, "Middle Name is " + field2.getText());
}
}
);
As in the first tab, a JPanel container is created together with JLabel, JTextField and JButton objects prompting the user to enter an information, The entered text is then returned when the user clicks the enter button.
The Color of the text is now set to Red, unlike in the first tab where it is Green.
panel2.add(label2, BorderLayout.NORTH);
panel2.add(field2, BorderLayout.CENTER);
panel2.add(panel2button, BorderLayout.SOUTH);
pane.addTab("Middle Name", panel2);
The objects are added to the second panel, and the second panel is added to the tabbed pane. All this is done using the .add() method.
This sequence is repeated in the last tab.
panel3 = new JPanel();
label3 = new JLabel("Enter Last Name Here");
field3 = new JTextField(20);
field3.setFont(new Font("Calibri", Font.BOLD, 18));
field3.setForeground(Color.BLUE);
panel3button = new JButton("Enter");
panel3button.addActionListener(
new ActionListener () {
public void actionPerformed(ActionEvent event) {
JOptionPane.showMessageDialog(null, "Last Name is " + field3.getText());
}
}
);
panel3.add(label3, BorderLayout.NORTH);
panel3.add(field3, BorderLayout.CENTER);
panel3.add(panel3button, BorderLayout.SOUTH);
pane.addTab("Last Name", panel3);
In the last tab, the color of the text in the text field is set to Blue.
tabbedMain class
import javax.swing.JFrame;

public class tabbedMain {
public static void main (String args []) {
tabbedPane tb = new tabbedPane();
tb.setDefaultCloseOperation(JFrame.EXIT_ON_CLOSE);
tb.setSize(380, 300);
tb.setVisible(true);
    }
}
Main class containing main method with instructions on how the program runs.
An object of the Slider class is created. The slider class holds instructions for running the program.
The program Exit Mode is set. This will close the program when user clicks the “X” button on the frame.
Size of the window is set using inbuilt methods .setSize
Visibility setting is set, making the frame visible, the code .setVisible(true) is used.
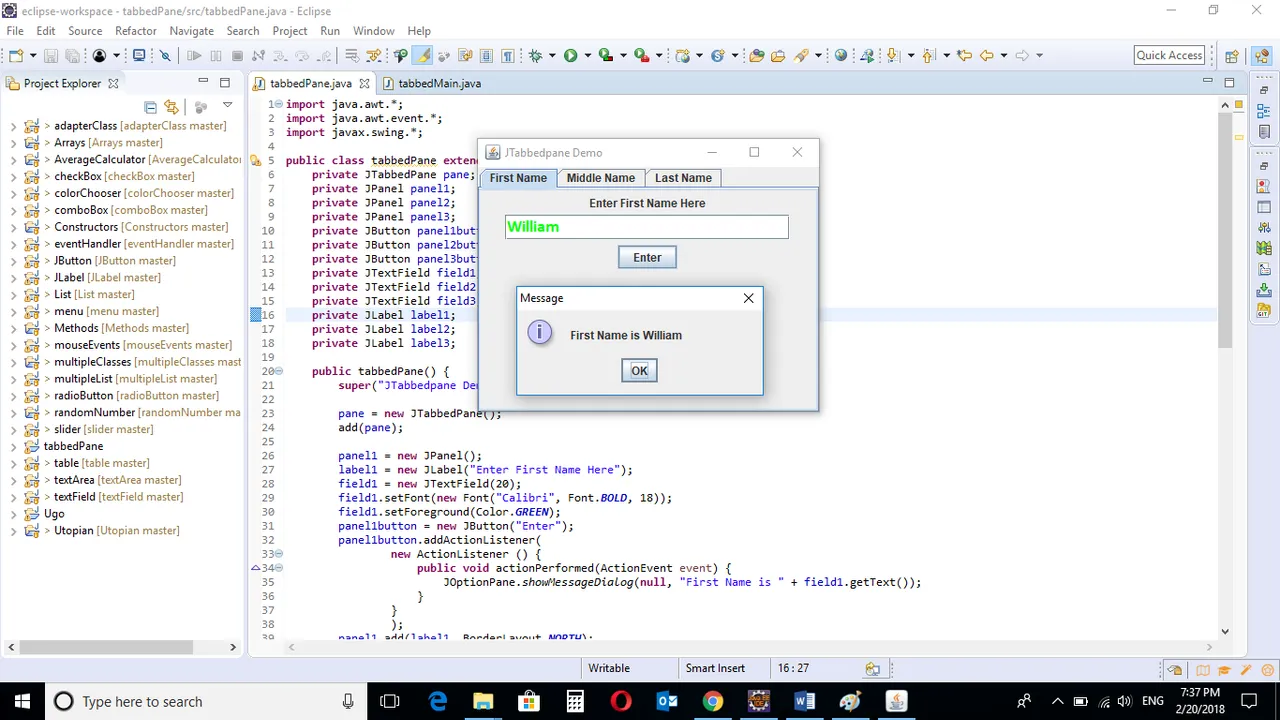
When the program is run, the frame contains three panes named First Name; Middle Name and Last Name. When the user enters information and clicks enter, the input is returned.
You can get the codes at my GitHub Account if you want to try it on your own.
REFERENCES
Curriculum
Similar posts already posted on Utopian are:
Java Graphical User Interface(GUI): JSlider Functions and ChangeListener Interface Using Eclipse IDE
Java Graphical User Interface(GUI): JTextArea Using Eclipse IDE
Posted on Utopian.io - Rewarding Open Source Contributors