I build a app using Ruby on Rails recently using the Steem Blockchain, so show the followers for a particular user. I'll be doing a similar application, but this time in JavaScript, with a bit more functionality. We will use the official steemit/steem.js JavaScript library.
The final app I'll be building in this article is live here so you can try it out. I assume some programming knowledge but nothing too advanced. The source code is here on my Github.
The final app looks like this:

I'll be using React, a popular framework for building websites created by Facebook to build the interface, and allow the app to scale up into something large like Steemworld in the future. Other websites like Netflix, Instagram, and Airbnb are build with React.
It will also give a bit more real world context on how to build and mange client side JavaScript apps. Steemit.com it also built using React, so if you learn it, you might be able to contribute back to the platform we all know and love.
This will be a relatively long tutorial, since we are not only building the app, but laying the base for what can scale into a larger, robust platform with lots of features like voting, analytics, etc.
Technologies:
- npm to manage the modules (in this case, react and the steem.js
- create react app to configure the app in one line of code
- steem.js, the official JavaScript library for the Steem blockchain.
Installation
You will be needing Node.js, which includes npm. Go download it and run the installer.
To check if it was installed, open a terminal and run node -vand npm -v. I get:
node -v
v8.4.0
npm -v
5.3.0
Next we need to install create-react-app. This package helps you configure a new React app in just one line.
Open a terminal, and run npm install -g create-react-app to install the package. Once that finishes, you can create a new React app by running:
create-react-app followers
Wait a bit, and if everything went well, you should see:
Success! Created followers at /Users/lachlan/javascript/steemit-followers/followers
Inside that directory, you can run several commands:

  yarn start
    Starts the development server.

  yarn build
    Bundles the app into static files for production.

  yarn test
    Starts the test runner.

  yarn eject
    Removes this tool and copies build dependencies, configuration files
    and scripts into the app directory. If you do this, you can’t go back!

We suggest that you begin by typing:

  cd followers
  yarn start

Happy hacking!
As suggested, run cd followers to change into the app directory. I had to run npm install again here -- not sure why, perhaps a conflict between npm and yarn (another package manager that create-react-app defaults to, but we are using npm).
Adding Steemit.js
Now we have our application installed, we need to add steem.js, a package that will give us access to all the data on the Steem blockchain. To install steem.js, inside of your app folder (mine is followers), run:
npm install steem --save
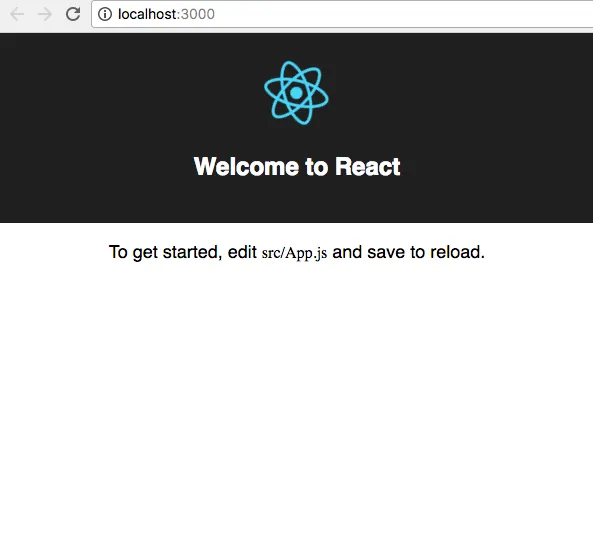
Now you should be able to run npm run start and visiting localhost:3000 in should display:
Setting up the form
Ok, now the fun part, actually using the Steem blockchain to show some data. Inside of src, open App.js. You should see:
import React, { Component } from 'react';
import logo from './logo.svg';
import './App.css';

class App extends Component {
  render() {
    return (
      <div className="App">
        <header className="App-header">
          <img src={logo} className="App-logo" alt="logo" />
          <h1 className="App-title">Welcome to React</h1>
        </header>
        <p className="App-intro">
          To get started, edit <code>src/App.js</code> and save to reload.
        </p>
      </div>
    );
  }
}

export default App;
We are going to update a bunch of stuff here - the explanation follows the code. I included line numbers to help with the explanation:
  0 import React, { Component } from 'react';
  1 import './App.css';
  2
  3 class App extends Component {
  4   constructor(props) {
  5     super(props);
  6     this.state = {username: ''};
  7
  8     this.handleChange = this.handleChange.bind(this);
  9     this.handleSubmit = this.handleSubmit.bind(this);
 10   }
 11
 12   handleChange(event) {
 13     this.setState({username: event.target.value});
 14   }
 15
 16   handleSubmit(event) {
 17     console.log('Submitted', this.state.username);
 18     event.preventDefault();
 19   }
 20
 21   render() {
 22     return (
 23       <div>
 24         <form onSubmit={this.handleSubmit}>
 25           <label>
 26             Name:
 27             <input type="text" value={this.state.username} onChange={this.handleChange} />
 28           </label>
 29           <input type="submit" value="Submit" />
 30         </form>
 31       </div>
 32     );
 33   }
 34 }
 35
 36 export default App;
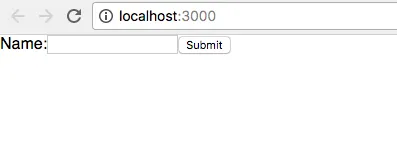
Before explaining, let's make sure it's all running correctly. Save you file and check locahost:3000. If you typed it all correctly, you should see:
If you enter something into the input box and press enter, you should see Submitted [name] App.js.18 in your browsers devtools like this:
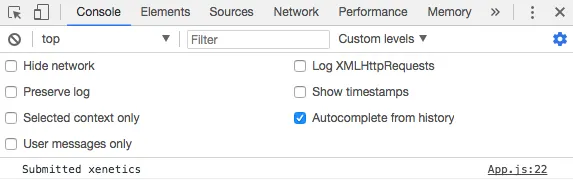
If you don't know how, Google how to open your browser devtools. In Chrome it's ctrl+shift+c on Windows and cmd+shift+c on MacOS.
So what's going on here? A ton of new code.
The first new thing is the constructor on line 4. super() is required, as explained in here in the React docs, so I won't go into it. Basically, the constructor will be called immediately when the app is mounted.
We then set the initial state on line 6, an object containing a username property. This is where we will save the username. In React, anything variable we expected to be changing goes in the component's state object, which is declared in the constructor.
I want to let the user query lots of different Steem account's followers - I expected username to change - so I put it in the state object.
Line 8 and 9 use bind to let any functions I create have access to the constructor's this value, which includes state. Now I can access the usernamein both the handleChange and handleSubmit functions.
handleChange is called whenever the user inputs a new username. It simply updates this.state.username to reflect the current input. handleSubmitdoesn't do anything yet, but it will make a request using steem.js to get the followers soon.
The render function sets up some basic HTML and binds onChange and onSubmit events to the functions I created above. This example is basically copied from React's form example. See there or post below if you don't understand something.
Using steem.js
Now we need to use Steem.js to make some queries. At the top of App.js, add:
import steem from 'steem'
To import steem.js. To see if it's working, inside of constructor add:
steem.api.setOptions({ url: 'https://api.steemit.com' });
steem.api.getFollowers('xenetics', 0, 'blog', 100, (err, result) => {
  console.log(result)
})
The first line sets the endpoint where we will query the Steem blockchain. There are lots of servers, this one was working for me at the time of writing this. The next line uses the Follower API, which is detailed here. Basically the followings arguments are available:
steem.api.getFollowers(following, startFollower, followType, limit)
following is the username - I'm using mine for now. startFollower is the follower number to start from, I used 0 to get all the followers. type is blog - I am not sure what other options are available at this point. limit is how many followers to get - I just put 100 for now. I then print the followers out using console.log(result).
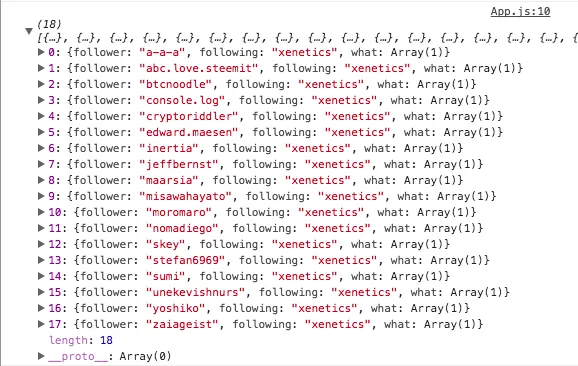
Refresh localhost:3000 and check the terminal. You should see something like this:
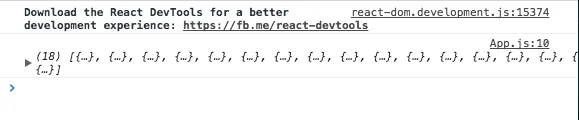
Clicking reveals more details:
Displaying the followers
Let's display the follows on the screen. We need to do a few things.
- add a
followersproperty to thestateobject - move
steem.api.getFollowersto ahandleSubmitmethod. - use
setStateto update the component'sstateobject. - render the followers.
1. Adding followers to the state object
We need somewhere to store the followers. Update this.state in the constructor:
this.state = {username: '', followers: []};
2. Move steem.api.getFollowers to handleSubmit
We want to get new followers for the user when the form is submitted. Move
steem.api.setOptions({ url: 'https://api.steemit.com' });
steem.api.getFollowers('xenetics', 0, 'blog', 100, (err, result) => {
  console.log(result)
})
to handleSubmit:
handleSubmit(event) {
    console.log('Submitted', this.state.username);
    event.preventDefault();

    steem.api.getFollowers('xenetics', 0, 'blog', 100, (err, result) => {
      console.log('followers', result)
  })
}
3. Use setState to update the component's state.followers
Update handleSubmit to look like this:
handleSubmit(event) {
    console.log('Submitted', this.state.username);
    event.preventDefault();

    steem.api.getFollowers('xenetics', 0, 'blog', 100, (err, result) => {
      this.setState({ followers: result })
  })
}
Which will save the followers to the this.state.
4. Render the followers
Time to render the followers. We will do it like this:
{this.state.followers.map((user, idx) =>
  <div key={idx}>
    {user.follower}
  </div>
)}
What is happening here? followers is an Array, which has a map method. map just iterates over each element, like a for loop. Then we just display the follower using {user.follower}. If you haven't seen JSX before, it's a bit strange, but it's definitely my favorite way to build interfaces.
Put this code in render. The updated render is like this:
  render() {
    return (
      <div>
        <form onSubmit={this.handleSubmit}>
          <label>
            Name:
            <input type="text" value={this.state.username} onChange={this.handleChange} />
          </label>
          <input type="submit" value="Submit" />
        </form>
        {this.state.followers.map((user, idx) =>
          <div key={idx}>
            {user.follower}
          </div>
        )}
      </div>
    );
  }
This is all the code. See the full App.js here.
If you did everything right, get back to the brower and enter a username in the input box. Press enter or click submit, and:
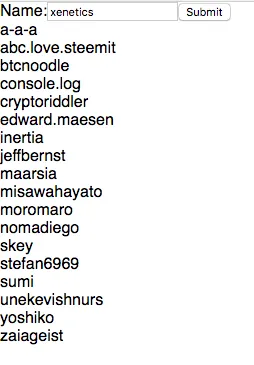
Perfect! I added some styling in App.css, which you find in the source code (see the top of the article for hte link). Now it looks like this:
Phew! That was a lot of work. We could have done it without React, and it would have been faster and less complex, but I want to continue this app in the future to something more robust. Putting the extra work in at the start pays off down the road.
If anything in this tutorial doesn't work, it's entirely possible I made some mistakes, typos or missed something. I am using a Mac, so Windows users might have some variations - we can work through it, though, Node and React work fine on any OS.
Please leave a comment and I'll get back to you as soon as possible and update the article to reflect any errors. Thanks to [-]jeffbernst and [-]edward.maesen for the kind comments on my previous article, and giving me the motivation to write this, and to all the great devs working on the incredible Steem platform.
Posted on Utopian.io - Rewarding Open Source Contributors