I had been trying to find a solution to designing and building a kiln for wood drying and was looking to create something that the [t]ax man could not ding me for as another out-building. At times I feel I just pay rent to them on things I make from our family forest.
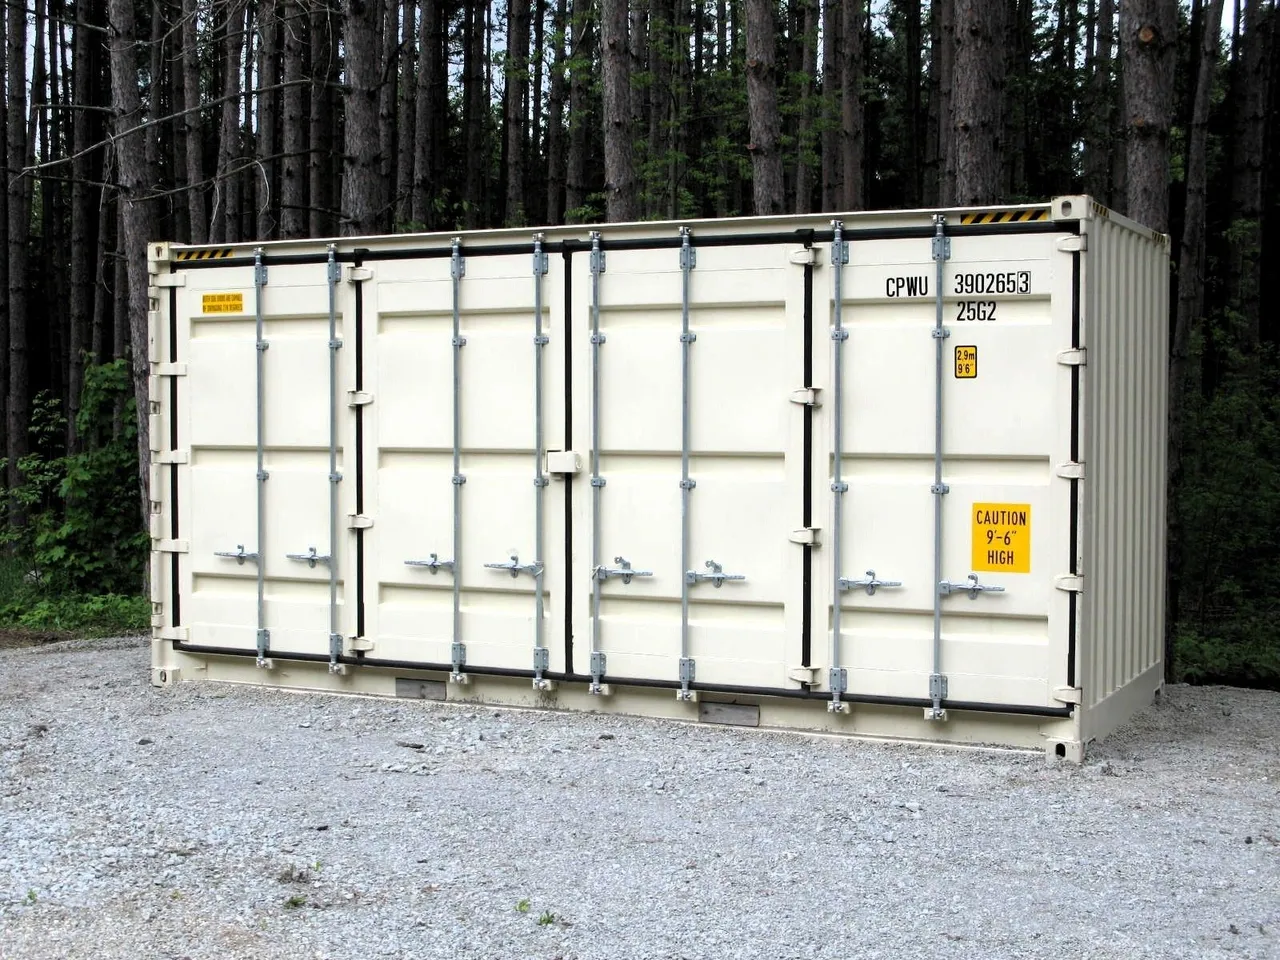
I thought about using a self-contained shipping container to solve this problem. However, most sea cans open end to end. And building a conveyor type system was not a solution. Enter... front open-sided containers. This type of container would work, but they are more expensive; about double the price with an extended height. I could though easily load a pallet of wood into the front side with my tractor.
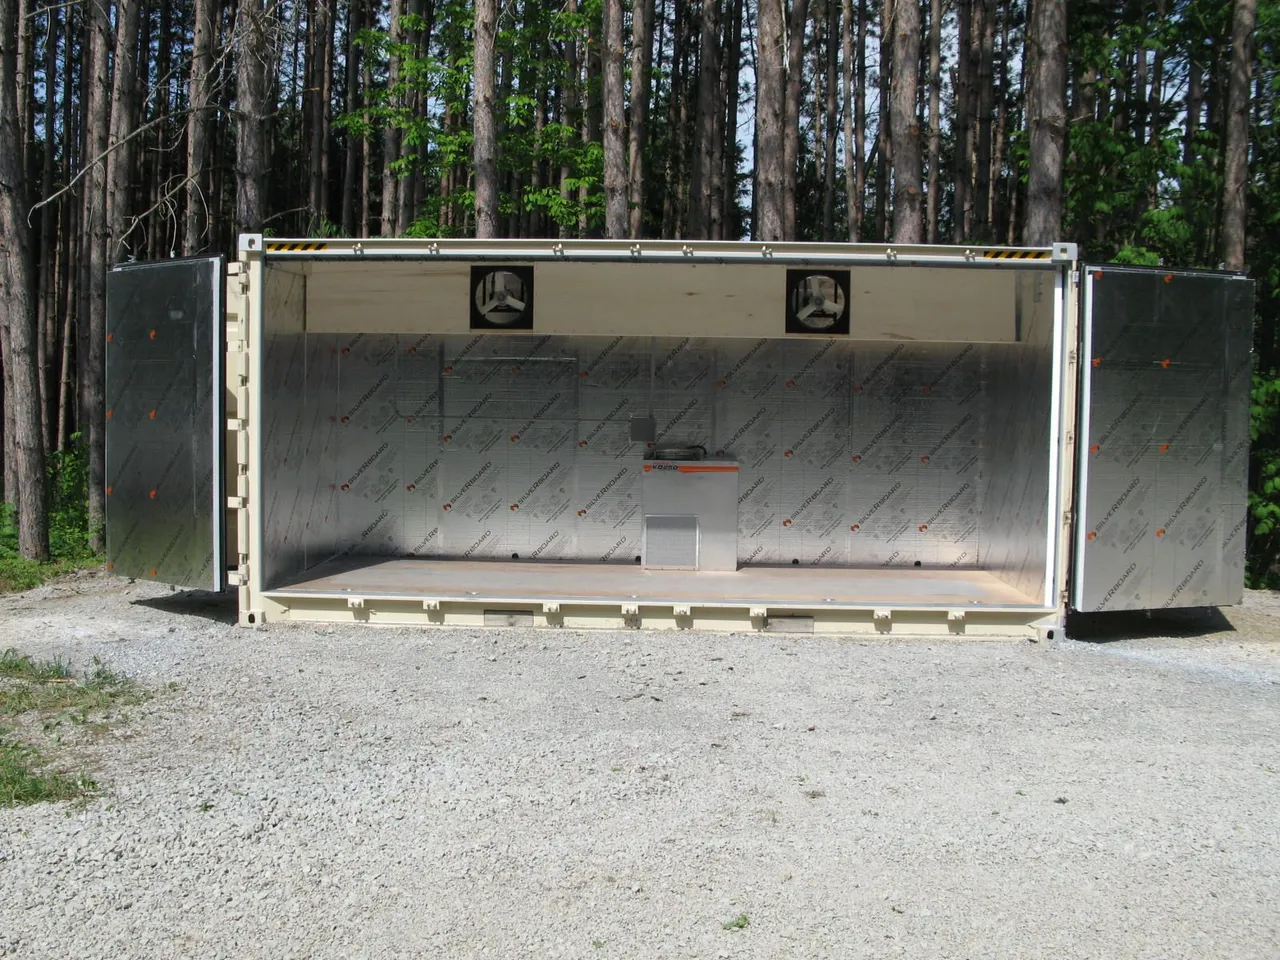
In the end, I went with a 20' x 8' x 9.6h front open-sided container. The cool part about using a container is that it is sealed and airtight; which would increase the efficiency. The next problem that needed solving was that sea cans are made of Corten or "weathering" steel, and are intentionally designed to rust in saltwater or otherwise corrosive environments. Many containers are only designed for a five-year service life, which is a long time for a shipping container, but a short time for a kiln.
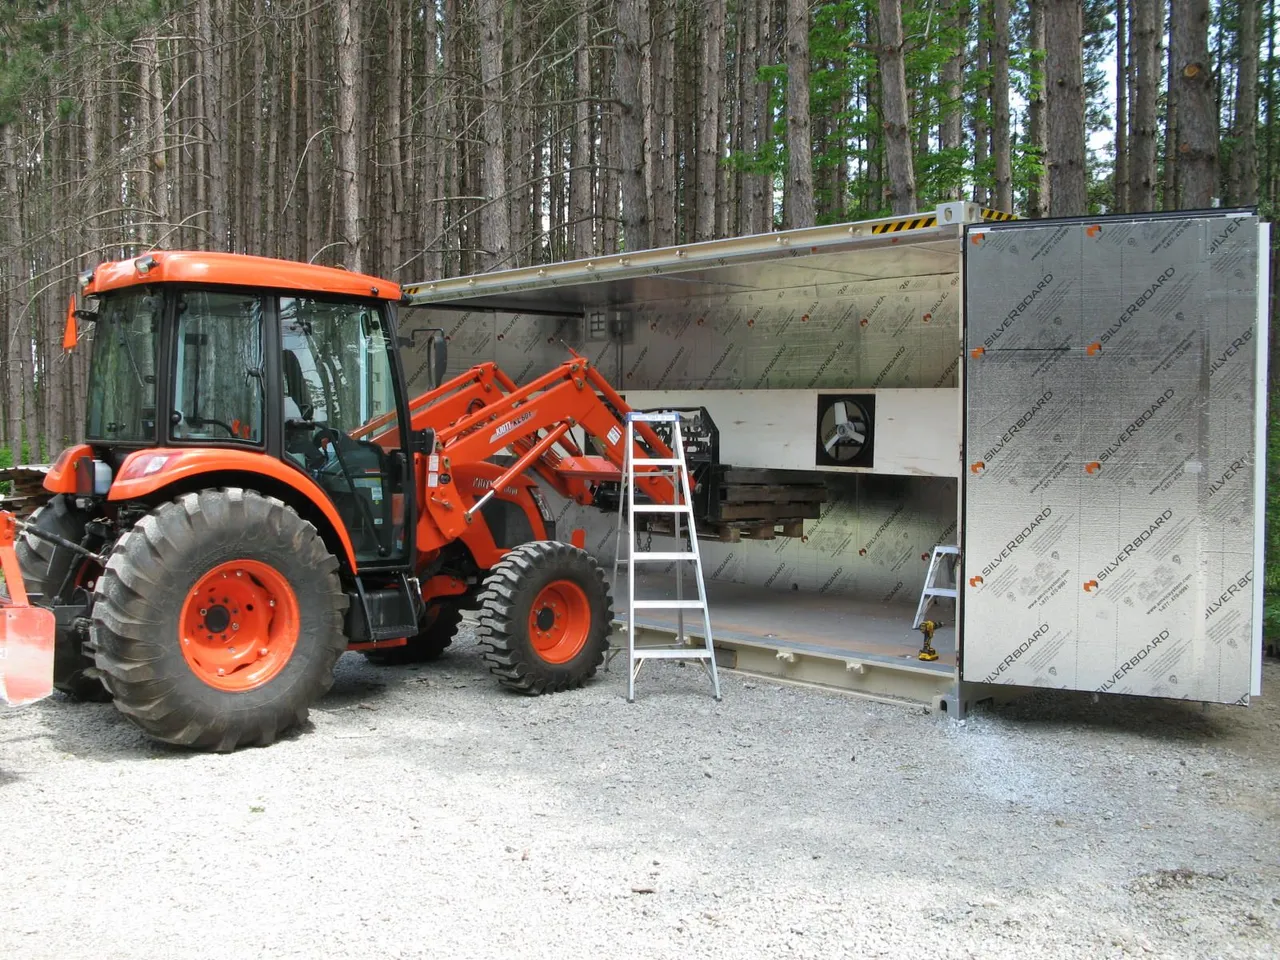
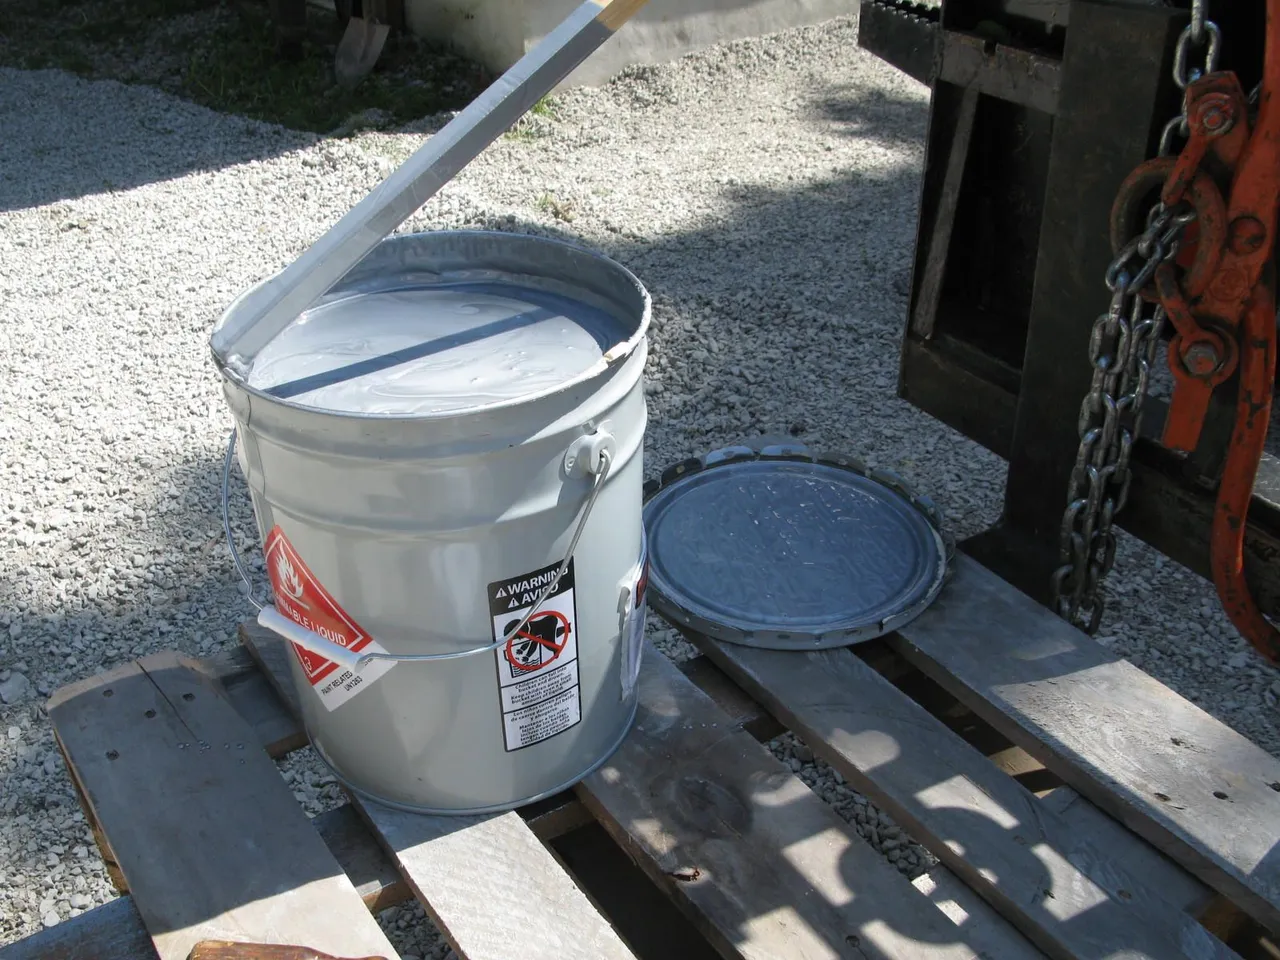
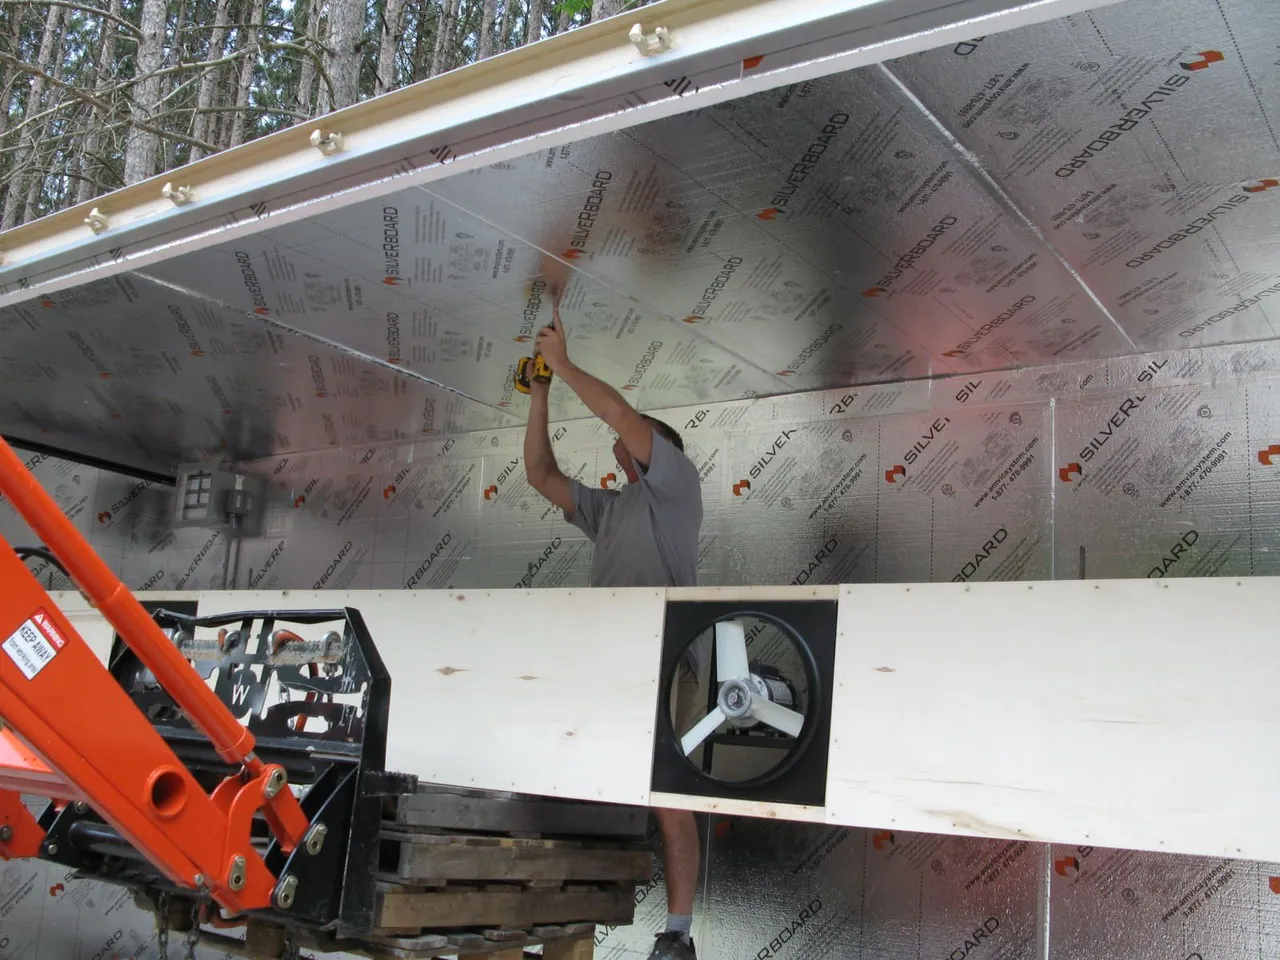
To solve this problem, I located a rather expensive solution of using a special paint that is used for bridges, tunnels, etc. which can also be used to paint over rust to stop it from spreading. Here is the link to where I found the paint. http://www.spicoatings.com/products_solutions/rust_grip It took a while to get it, but in the end, after it arrived I sprayed the inside of the can in under four hours. After the second coat had dried, I began to glue in the 2" silver board. I carefully cut out the door panels and had the wife help with the silver taping.
Rigging up the kiln itself involved three things:
- Ventilation
- Power
- The actual kiln unit
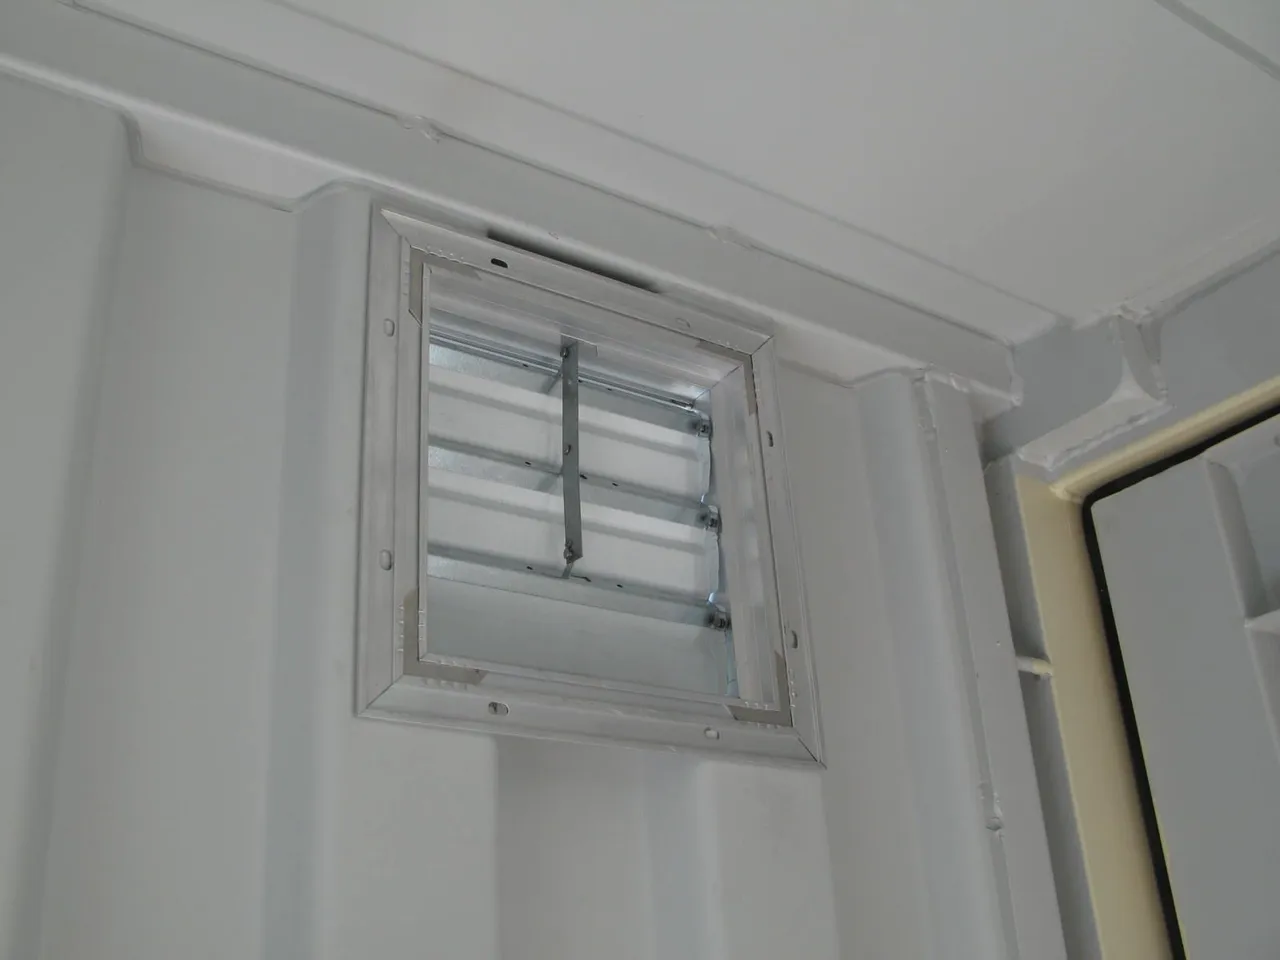
I cut out two vent/fan holes and installed shutter-type vertical vents. One on the back corner and one on the opposite side of the can. These are over-temperature vents and automatically open when the container reaches a certain threshold.
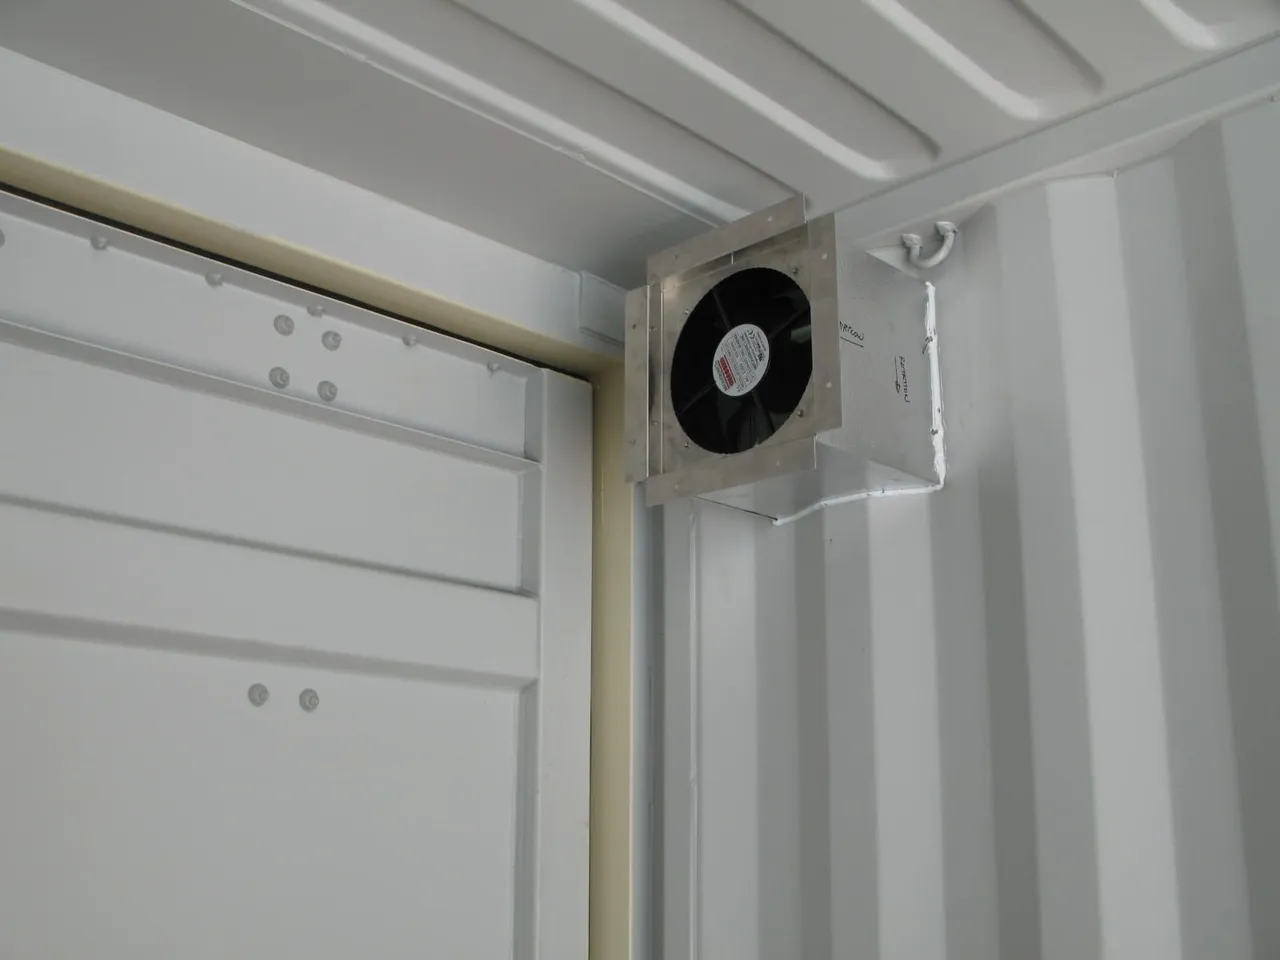
I designed a wood header that ran from end-to-end and would hold two 240w fans. These fans will circulate the dry air around and around inside the container to assist in the drying processes. These fans are always on when the kiln is operating.
Next came the hard part. Buying the best kiln I could find in my budget, and how to persuade the wife it was the best investment. It ended up being an easy sell as I convinced her that I would build all her beautiful things she wanted me to design/make (after I utilize it for some of my things first, like a huge wooden workbench, of course). I ended up going with this bad boy.
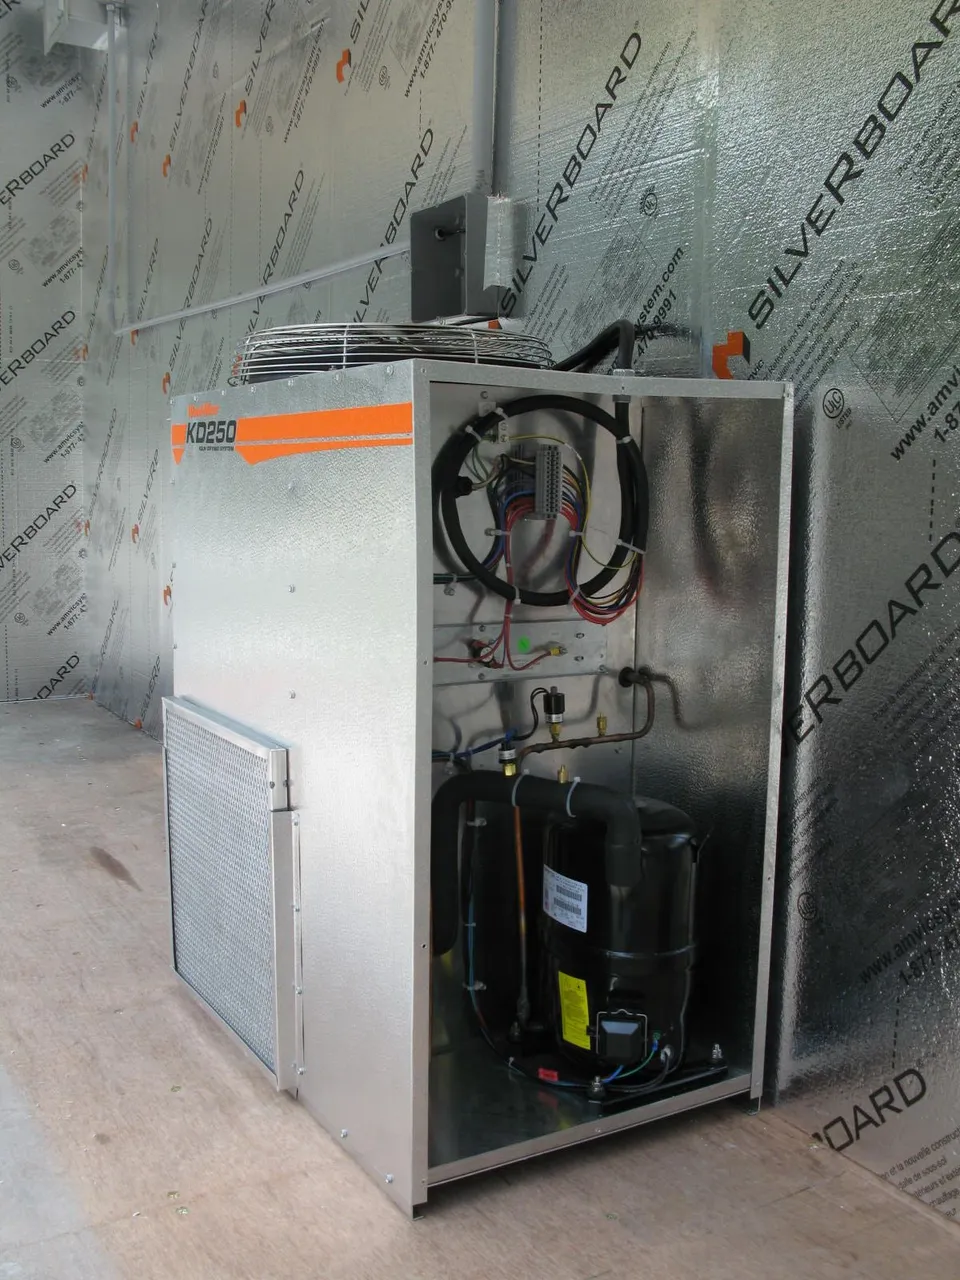
The KD250 is a compact, high-performance dry kiln system. It will dry up to 4,000 board feet of 4/4 green oak in approximately 4-5 weeks. It will dry up to 2,500 board feet of green softwood in about 1-2 weeks.
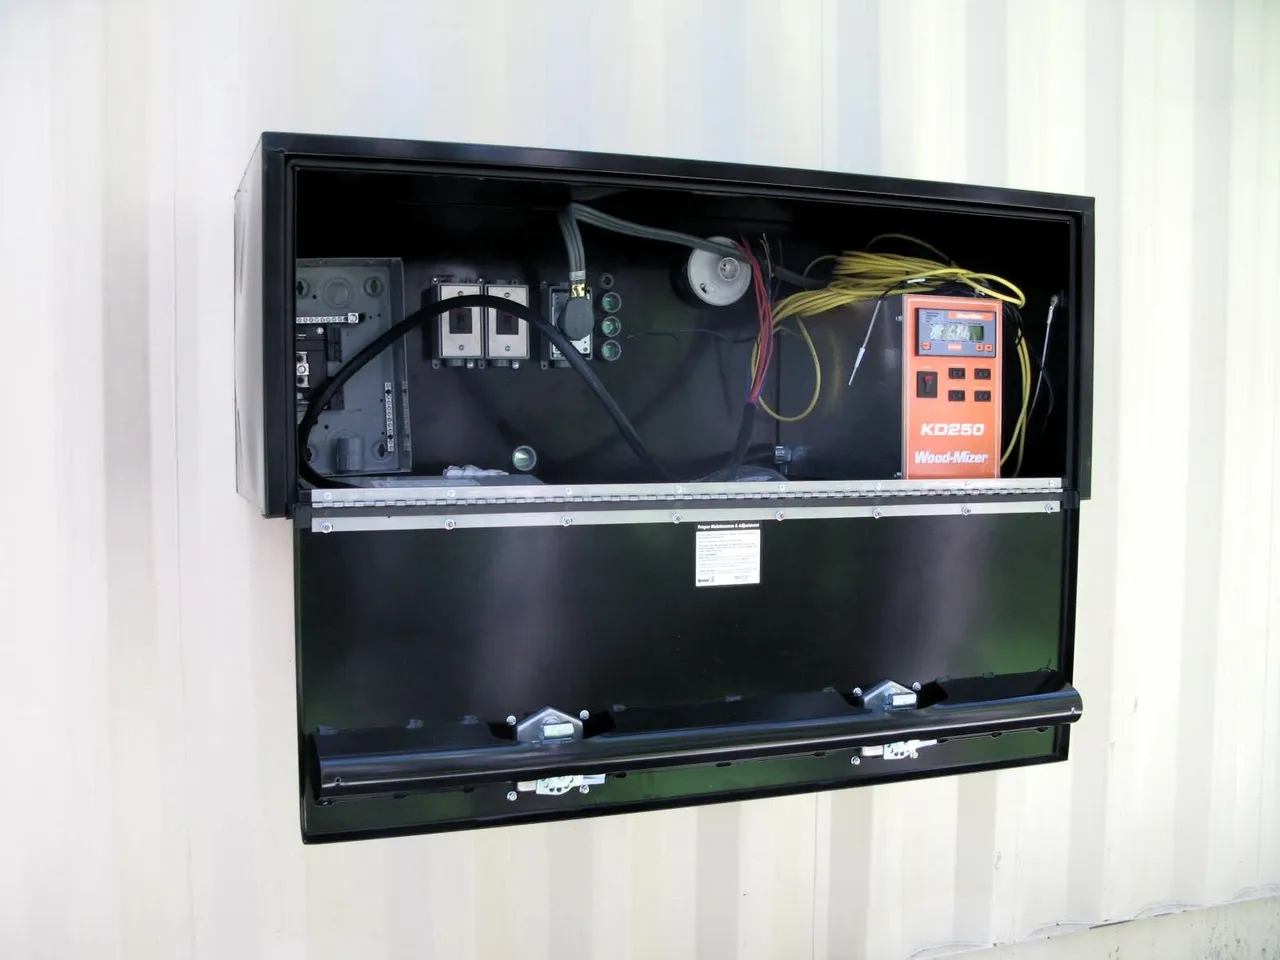
The final step was the power connections. I purchased a truck toolbox and mounted it on the backside on the outside of the sea can. I had turned it sideways, so I was able to access the control panel with ease. Inside the box, I secured the kiln terminal, electrical connections, and a light bulb to keep the frost off the controls. I hired a local journeyman to connect the underground 220 - 40 amp cable to the kiln and also into the shop electrical box.
And we flicked the switch! It turned on first attempt.
Time for a test...
I decided to try out a pallet of red pine lumber culled and sawed from my forest that had air dried for approximately one year. When I first connected the probes to wood the moisture content registered above 22%. Over the next few days, it was mesmerizing to watch the water buckets fill and drain. Fill and drain. In the end, it took three days for the lumber to reach 7 - 8 %. Success!
An approx budget for the above worked out to the following:
10k Sea can delivered
12k Kiln delivered
1600 Paint delivered
1500 Electrician and parts
1000 Silverboard
Feel free to ask me any questions or leave your comments below.