“How can I start a blog?”
“How am I going to link the website source to my blog?”
“How can I put the texts in the center and align it back to the left?”
“Oh my God! I didn’t know blogging is this hard. I’m getting a headache!”
I bet you also asked yourself these questions when you were making your introduceyourself. I did! I needed to take breaks a lot of time that it probably took me 2 days to finish my first blog.
My friend requested me to make this blog so here it is. In this blog, I’ll be sharing with you some helpful formats/codes that I have learned. I decided to compile them for future purposes and for Steemians who find this helpful for their future blogs. Also, I will be telling you some things I have learned that isn't in the markdown styling guide. Please note that I'm not a coder and all of this information that I've learned were from the Internet. Sure! I want to share the info with you.
=Text Formats (HTML)=
- BOLD, italics and
crossed out
I guess, you already knew how to use these three formats but I will still include them since there might be some beginners who don’t know about these.
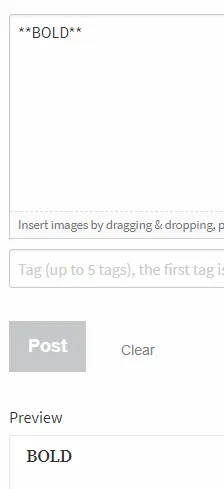
Use two asterisks (**-- **) in the beginning and end of the word, phrase or sentence, just like what you can see in the picture.
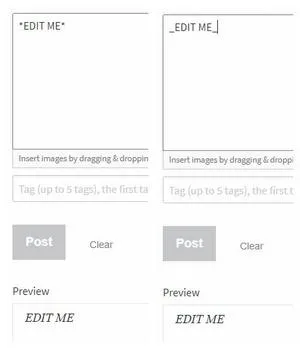
For italic, you can use either one asterisk (*__*) or underscore (_*_) at the beginning and end of a word, phrase or sentence.
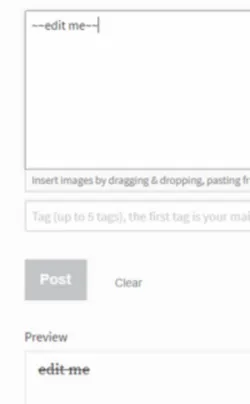
For crossed out, you can just use two tildes (~~ ~~). Please refer to the picture.
- Text alignment (center, left and right)
This one made my first blogging life difficult. I have tried a format to align the lines of the sentences from the center to the left but it didn’t work. I found two formats on how to align the lines from the center to the left or right. You can use any of these.
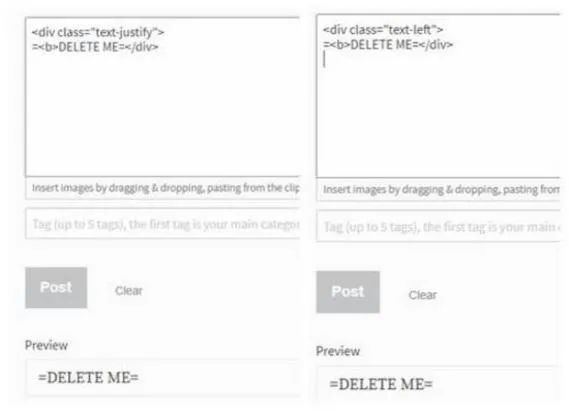
You can use either 'text-left' or 'text-justify, they both work. <div class="text-left">edit me</div>; edit mediv>
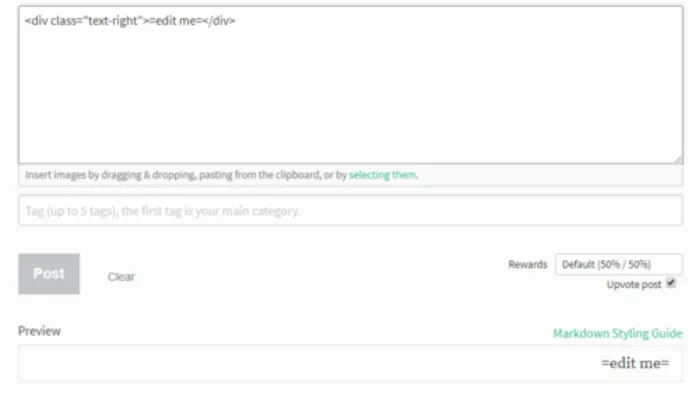
It is the same thing with aligning the text to the right. Just change the word 'left or justify' to RIGHT. <div class="text-right">edit me</div>
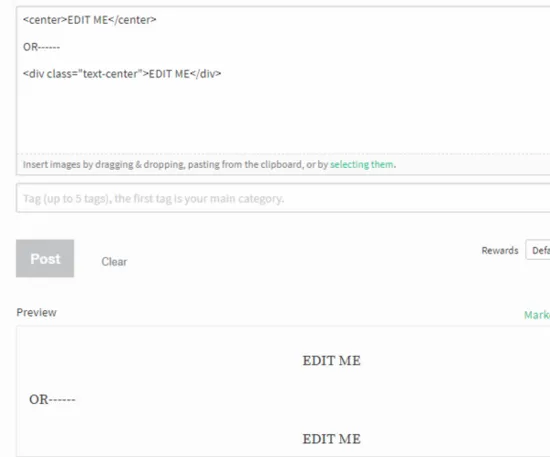
For the center alignment, there are two formats that I have learned that you can use. Both work! <center>EDIT ME</center>; EDIT MEdiv>
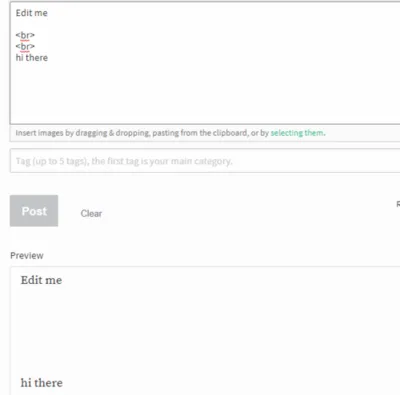
If you want bigger spaces for your paragraphs or pictures, just use <br> (Refer to the picture)
- Uploading and linking pictures
These are just easy since you can easily upload pictures from your computer by clicking that 'selecting them' or by dragging the pictures from your files onto here.
Now, if you want to link a picture from the web, you can use this format here. 

Change this highlighted one to the picture's address that you want like to link. Of course, we should put the source address because that is important for disclaimer purpose. All you have to do is copy the same format and paste it at the bottom, side, top or wherever you like and then change the word [rose] to 'CLICK HERE', 'SOURCE' or anything that you would like to write or caption.

SAMPLE PICTURE: CLICK HERE
I notice that pictures look so big after being uploaded here. I have found this cool website where you can resize, create a meme or even change a video to GIF. I bet this can help you a lot in your future blogs. CLICK
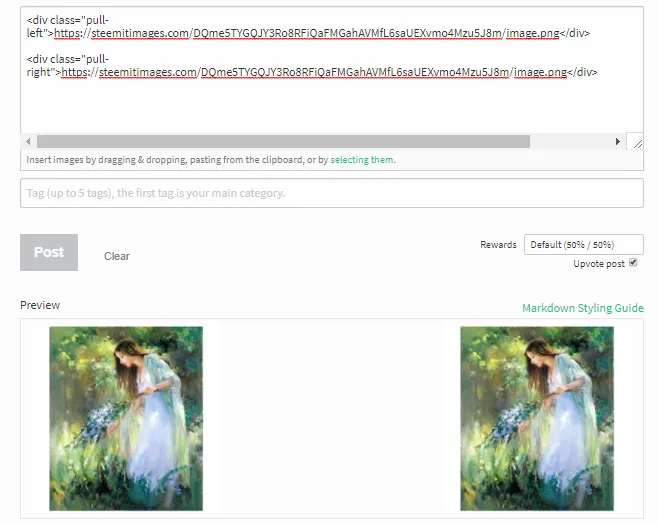
You can also align the pictures on either left, center or right, like this.
DISCLAIMER: The painting picture isn't mine. CLICK HERE
You can use these format (**LEFT**) <div class="pull-left">PASTE HERE</div> ; (**RIGHT**) PASTE HEREdiv>; (**CENTER**) <div class="pull-right">PASTE HERE</div> OR simply,
- Linking videos
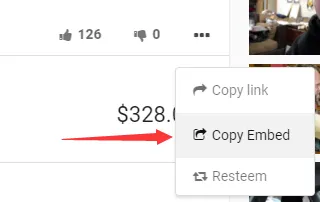
This is the easiest one. Just go to Dtube or Youtube then highlight embed, copy and paste the link into your blog. Reminder: if the video is not yours, give it a credit.
=Emoji=
The emojis in the markdown styling guide did not work on my side. I don’t know if it doesn't work on yours, either. And so, I tried to search online the emojis that we can use if you want to use them on your blogs. I found this website of emojis and it really works. CLICK HERE. You just have to copy and paste it. You try it! It's very easy, right? 🤗
Lastly guys! If this guide is too difficult for you or even the formats, and you have your own laptop or computer, you can just download Typora. It is totally free. It is a markdown editor and reader. Here is the website: https://typora.io/.
Here are the links to the sources where I got the information from:
CLICK HERE
CLICK HERE
CLICK HERE
CLICK HERE
I hope this blog’s helpful to you Steemians, especially for beginners like me. Let’s keep steeming guys. Thank you for passing by. See you next time!