In this tutorial,I am describing about automation of Facebook sharing from Steemit.Learners will learn how can they automatically share their steemit posts to Facebook.I used Zapier platform to automate this tasks.

image source
If our steemit.com posts could be shared automatically in social media, how much time would be saved, thinking? If we post 1 on an average daily, we save 6 hours per year. It is a lot of time. Time is too much for a blogger. At 6 hours, he could write at least 6 posts.
I was recently exploring the strategy of optimizing time with my Steemit post through my friends and family ... I was trying to influence the lives of others by sharing my steam post. It will spread my posts to everyone at the same time. This will help you. The template is not as popular in Bangladesh yet, this is automatic sharing It will save my time. And the campaign of Steveet will also go on.
One way to bring your friends to Stevemeet. Share your post with them only.
Yes because ... your friends will appreciate you and they will undoubtedly enjoy discovering this opportunity that you have published on your blog ...
In this article, I will share with you how to use automated methods to publish your Steem post directly to your Facebook profiles.
What is Zapier and how does it work?
Wikipedia says
Zapier is an American profit-profit corporation and a web-based service that allows end users to combine the web applications they use.
Zapier is an integration platform, through which we can automate various tasks. It is possible to save time on time. In fact, it acts as a third party.
Using Zapier Zaps, which connects between two or more applications, which automates our tasks.
As an explanation given by the official documentation: Zap triggers form (for example: when I get a new email to Gmail ...) and an action (ex: ... send me an SMS).
From now on, Zap is conducting and managing the data without any action from you: Everything is automatic! This service is completely free up to 100 shares per month ... To switch to a paid version, you should have more than 3 stem posts.
Why do you use Zapier?
To save time on one hand. We live in an extraordinary time, where our needs are important
Work may be automation and sharing our work on Steem, can have significant positive effects ...
But I know that you are tired of your daily work / life, you do not think about the things you already worked on, you still do not have time to open another social network to share with Steam.
So it is important for me to show you the advantages of Zapier (and you are glad to use it for you in turn)
Positive effect on you:
- More feedback or feedback on the post.
- More people will know about your post.
- Good job automation.
Impact on Steam Account:
- More Follows.
- More comments.
- More uppot.
- Increase in popularity in Bundhu Mahal.
How to Make Your First Zap?
I will show you how to integrate Facebook account with Stevemeet. Let's get started.
My goal is that every article published in Steem will automatically be published in my Facebook account.
To follow this tutorial, you need to have a Facebook account and a SteamIT account.
1. Create a Zapier Account (free):
To create an account , go to [Zapier]

(https://zapier.com/sign-up/) .
The free account is a little hidden ... click the small arrow on the left to discover the free plan ... they are not stupid markers. In addition, they force you to direct them with their sentences, you have your 14 days left to your trial - choose the best plan for you Please. Whatever. If you select Free, then it is for your lifetime.
2. Make your first Zap:
Click on a Zap

3. Select the Zap that triggers the application:
Here you have to select RSS feed.

4. Select New Item in Feed

5. Enter the RSS URL:
Your URL should be URL. My URL is https://streemian.com/rss/@amulla505 . This format is https://streemian.com/rss/@username.

This is how your RSS feeds look
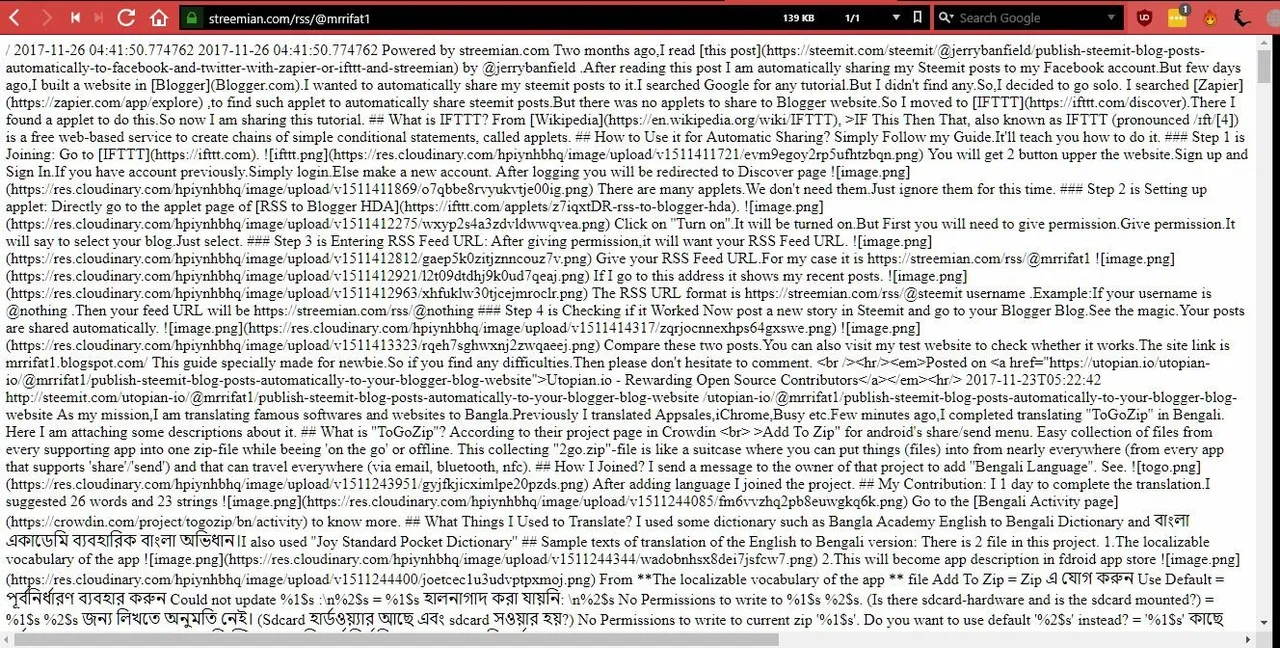
The rationale for RSS is Really Simple Syndication.
6. Test RSS by Zapier

Click Fetch and Continue.
7. Click Continue


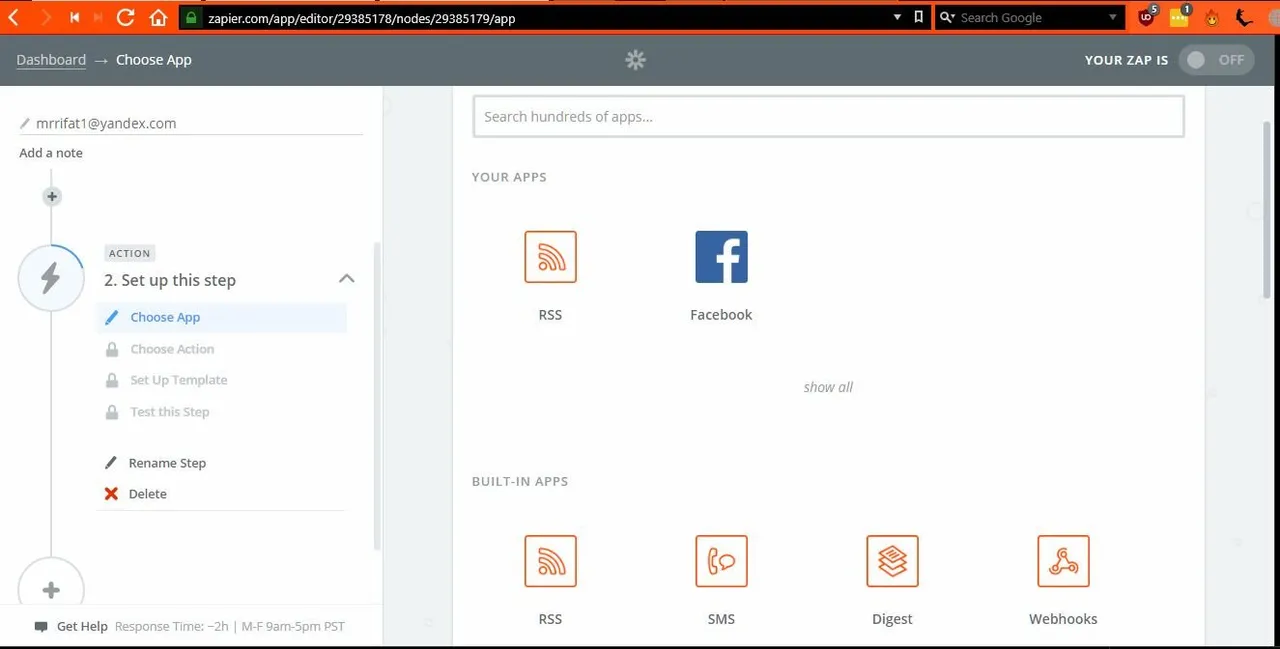
8. Choose a Action App
Select Facebook
9. Post to Timeline

10. Connect the account

Connect an account by clicking Connect an Account.
Click Save and Continue.
11. Set Up Template
Here Zapier can customize how your facebook publication will create. Ideally, to select your preferences from the drop down menu, according to your sensitivity, click the small category with a menu. If you do not know what it will do, then you can still show the next step as you can still run different tests on Facebook.

Click Continue.
12. Try your pursuit of success.

Click on "Create and Continue"
13. Click Finish

14. Activate your Zap

15. Check Zapier Dashboard

16. Check out the Facebook timeline.
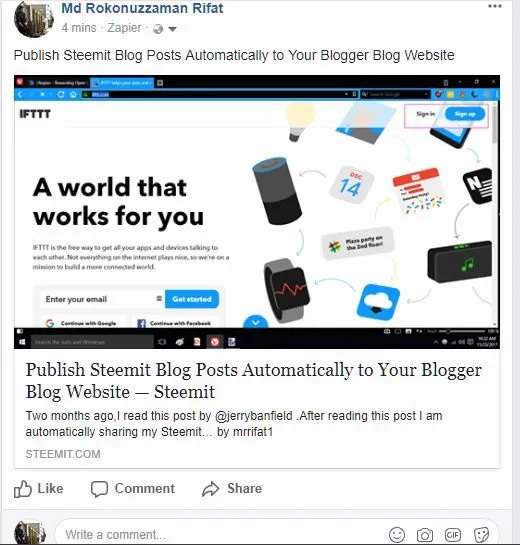
Zapier can take up to 5 minutes to setup, but saved it for 6 hours in 1 year. This is the magic of digital world !!!
Note: All photos are collected.