Edited on Canva
Last time, I shared here 4 different patterns of crocheted tulip flowers and the output of each pattern.
You may check my previous post: Different Patterns of Crochet Tulip (Part1) if you're interested with it.
I prepared 5 patterns at that time though I wasn't finished yet with the output of the 5th pattern due to insufficient time since I still had orders that needed to be done. Thus, it makes me split my post and today I will show you the 2nd part of it, the 5th pattern of a crochet tulip flower.
I purposely look for a video tutorial of this design as I have no time for trial and error which is very unusual to me since I don't like watching tutorials. Why? Because it's like I have to wait longer to finish those tutorials with lots of talking. 🤣 Good thing that this video I found only had instrumental music as background and the pattern has already been plastered on the screen. I just speed up the video and a minute later, I'm done.
By the way, here's the link to that video tutorial. In case you want to check it yourself. 🔗Crochet Tulip
 Edited on Canva
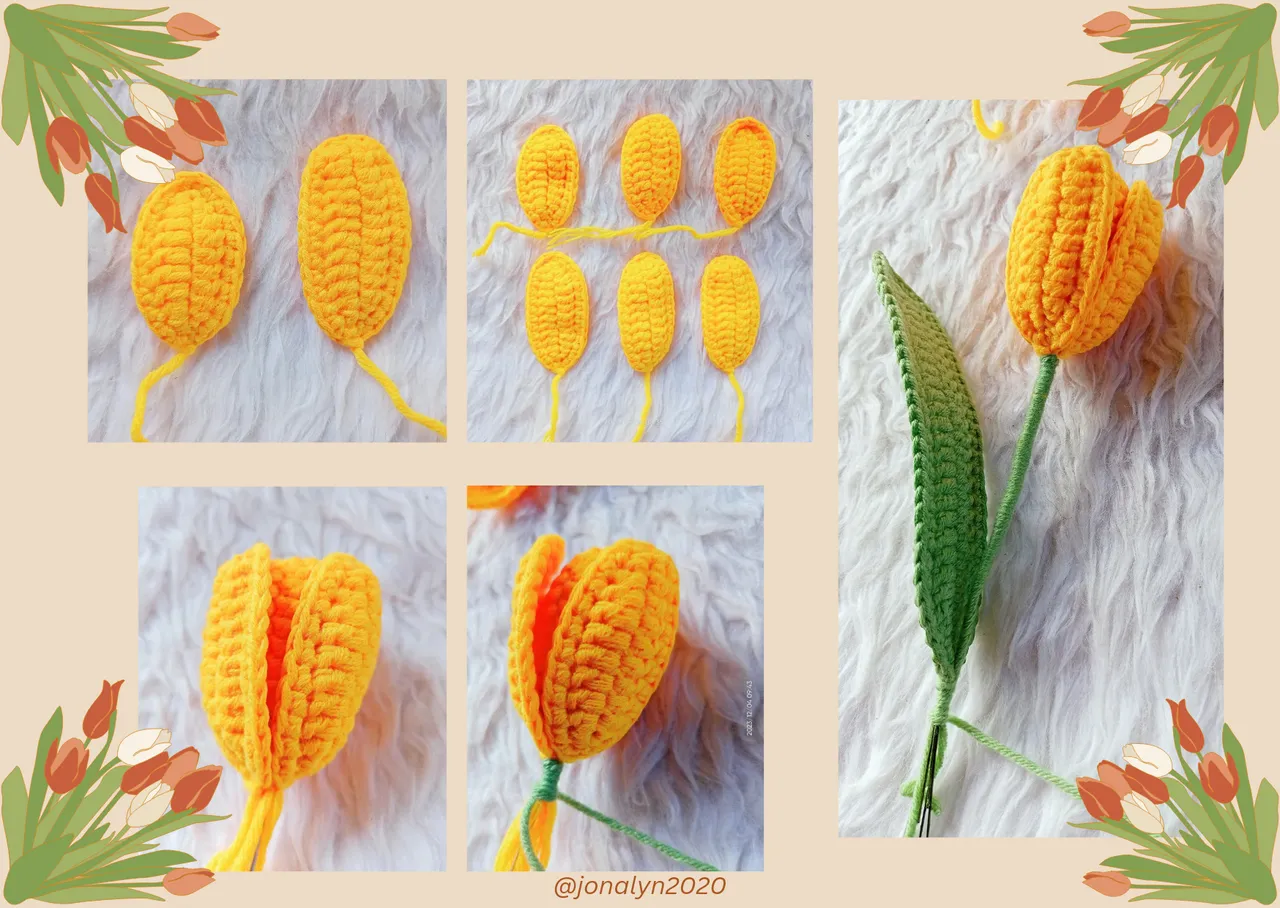
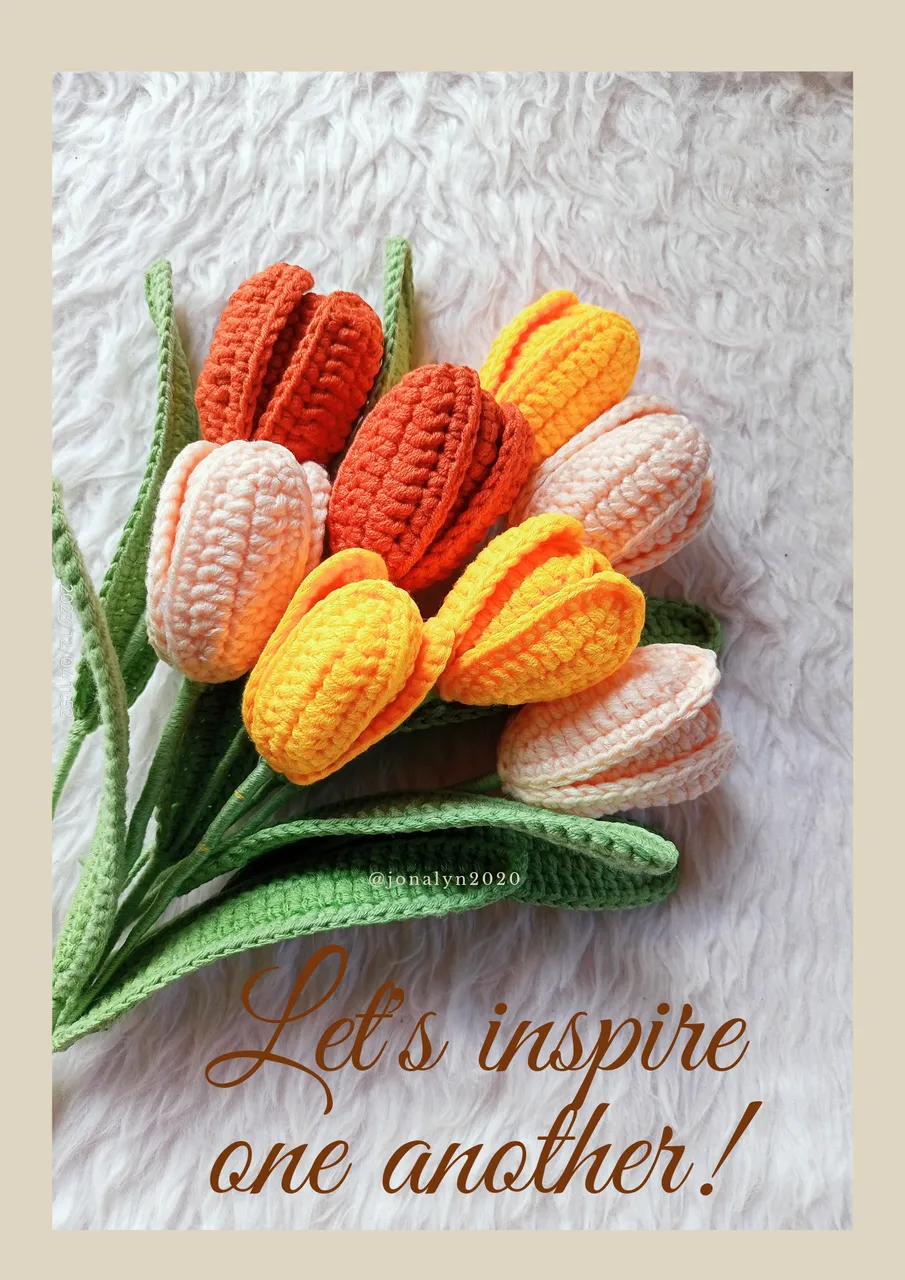
When making this kind of tulip, we only need two different sizes of petals. I made 3 pieces of small-sized petals and another 3 pieces of big-sized petals. We call this pattern a realistic tulip flower.
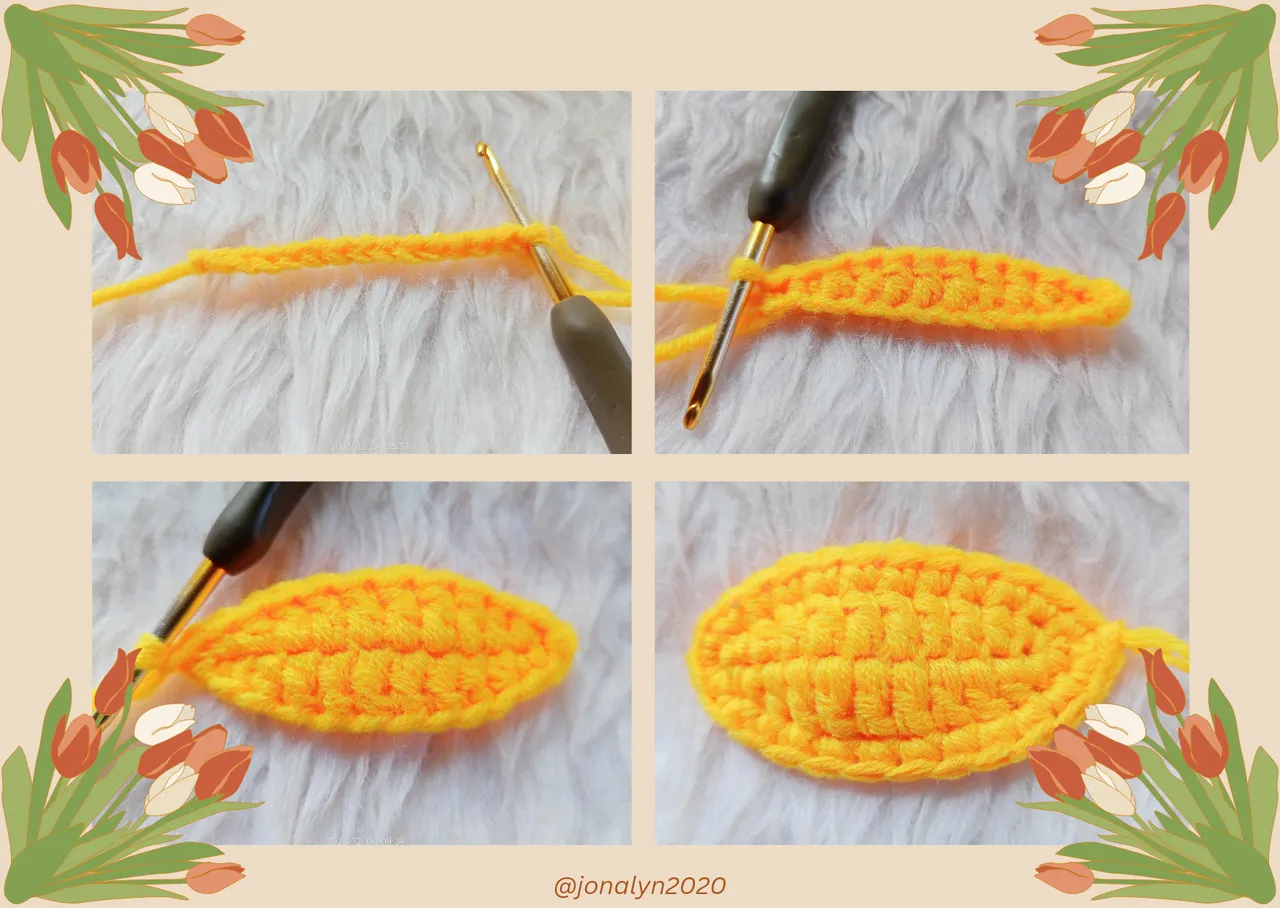
SMALL PETAL
- Chain 13
- R1 - (working on one side) SS on the 12th chain, 1 SC on the next stitch, 1 HDC after, then 6DC, 1 HDC, 1SC, 1 SS
- (working on the other side) 1 SS, 1 SC, 1 HDC, 6DC, 1 HDC, 1SC, 1SS.
- R2 - SC on all stitches, ss on the last stitch, lock and cut the yarn
BIG PETAL
- Chain 15
- R1 - (working on one side) SS on the 14th chain, 1 SC on the next stitch, 1 HDC after, then 8DC, 1 HDC, 1SC, 1 SS
- (working on the other side) 1 SS, 1 SC, 1 HDC, 8DC, 1 HDC, 1SC, 1SS.
- R2 - SC on all stitches, ss on the last stitch, lock and cut the yarn.
For the leaf pattern, just refer to this video tutorial.
 Edited on Canva
The pattern was so easy to follow and I had no problem following it. I was enjoying the process and the pattern was easy to remember.
So after making 2 sets of realistic tulip flowers, I proceeded by joining the petals. And I admit that I was having a hard time connecting the petals with the use of glue sticks.
After 3-5 times assembling the tulip petals, I was finally satisfied with the outcome.
Tip: don't put too much glue stick when connecting the big petals. Only put a small amount of melted glue stick on the lower portion (bottom area) of the big petals before sticking it to the structured smaller petals.
 Edited on Canva
And finally, the output of my 5th tulip pattern was amazing. I was beaming when I was taking these pictures. I love the colors I used and decided to make more of this design with lots of color variations.

 on Canva
Hope you enjoy reading this post and learn something new.
Thank you and God bless everyone. 😘
Yours truly,
@jonalyn2020 😘😘😘
Kung nagustuhan mo ang aking sinulat ngayon, pakipusuan mo naman. 😍😉

For orders, please message me or visit these links.
To God Be The Glory