Hi everyone! 😄
This is the next episode of my series dedicated to the learning of anatomy, for drawing use. 😉
Here are the previous topics :
- Intro
- Head & Neck
-> + Bonus How to draw hairs ? - The torso & the pelvis
-> + Bonus How to draw breasts ? - The arms
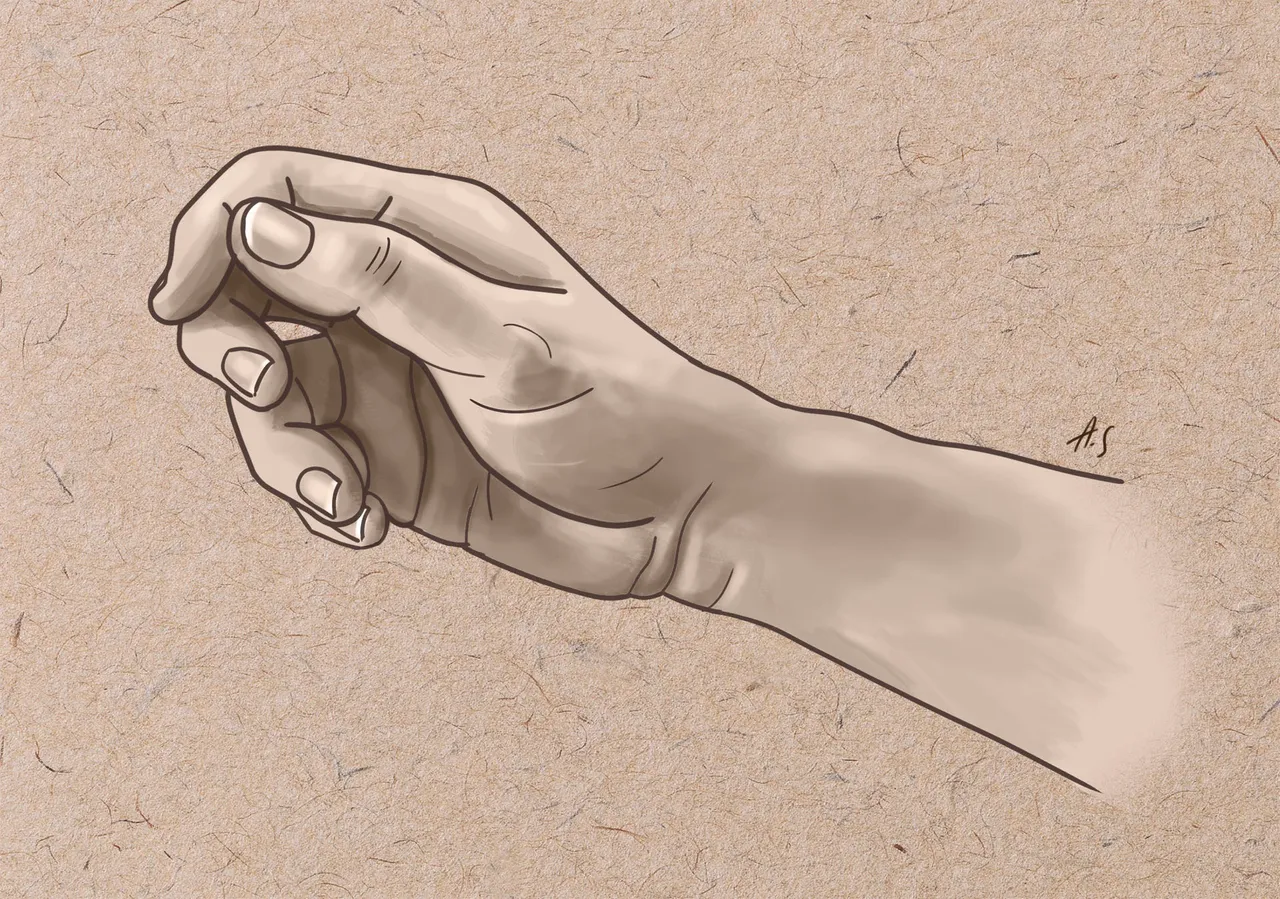
This part will be dedicated to the hands. It's a very difficult topic ; hands are deemed to be hard to draw. So let's check all this step by step.
Proportions of the hand
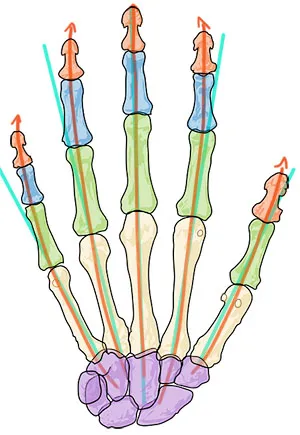
- The length of the hand is equal to the length of the head.
- There is a easy way to find the proportions of the fingers and the phalanges in relation to the hand :
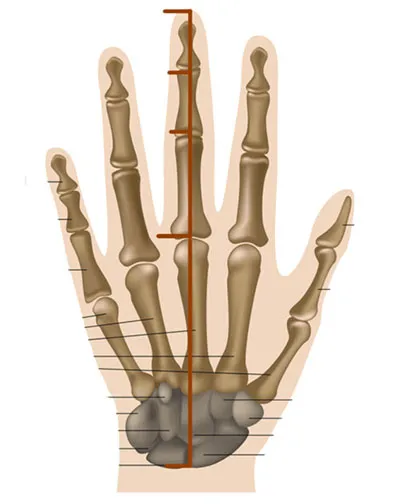 We can trace a line from the top of the finger to the bottom of the hand.
-> If we divide this line in two, we come across the end of the metacarpal
-> If we divide again in two, we come across the next phalange
-> If we divide over again, we come across the last phalange.

Bones of the hand
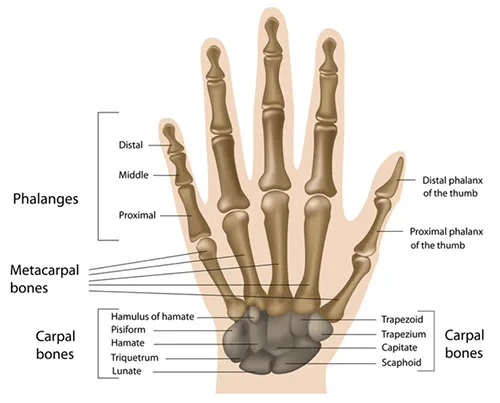
- The carpal bones are numerous and complex ; but fortunately they don't impact the major form in drawing. So we can resume it into one big form.
- Next to it, they are the metacarpal bones.
- Finally, they are the phalanges which are divided in three, named according to their distance from the metacarpals : the proximal, the middle and the distal.
/!\ The thumb has only 2 phalanges.
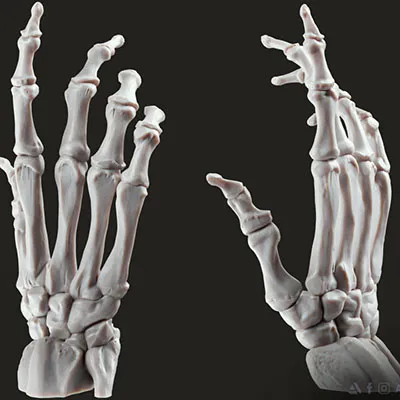
-> You can see here the particular form of the fingers bones. They are straight on the back, and curvy on the bottom, alternating concave and convex shapes. It forms a kind of bridge shape.
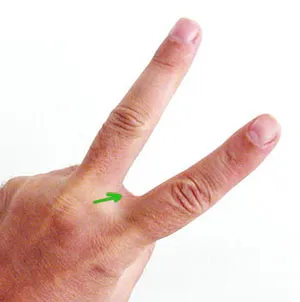
 We can observe that the fingers bones do not extend straight (blue line), they curved slightly around the central finger (red line).
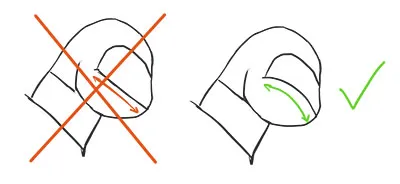
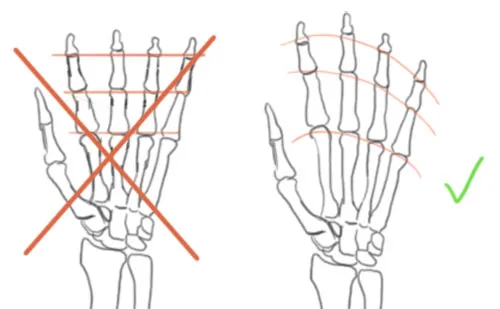 Then, keep in mind that the general form of the hand is curvy and not straight.
Muscles of the hand
Several muscles that control the hand are located on the arm. You can see them in my precedent post about the arms. It is the extensors muscles for the back side, and the flexors muscles for the palm side.
-> The extensors muscles ends in tendons at the back side of the hand. They are highly visible. Notice that we can't see them on the wrist. It's because they are tendinous sheats at this place.
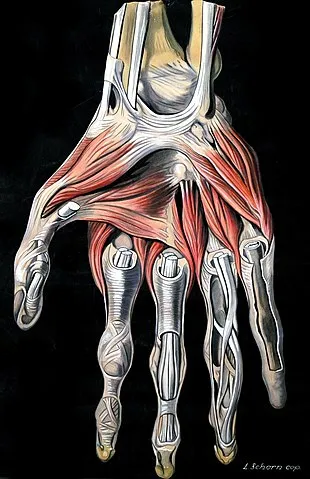
-> You can see that there is no muscles on the fingers. They just have bones, tendons and fats.
The Thenar Eminence
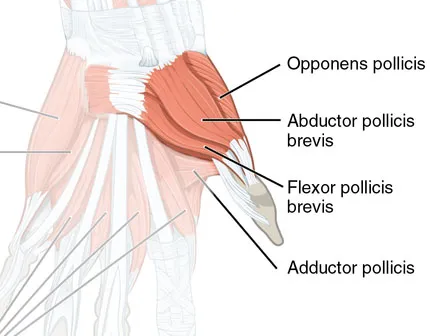
It's a group of muscles that moves the thumb. This is the big mass that we can see on the palm side. It takes its origin on the wrist.
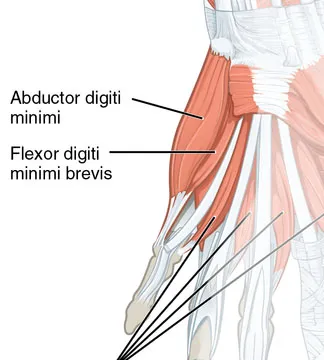
The Hypothenar Eminence
It's a group of muscles that moves the little finger. This is the big mass that we can see on the palm side. It takes its origin on the wrist.
 The Thenar & Hypothenar Eminence shows two big forms that fold into certain positions, separate by a tendinous gap.
The Dorsal Interosseous
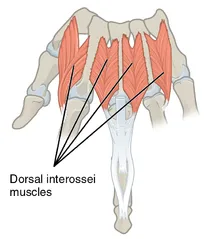
It's the muscles that connect the bones of the different fingers, at the back side. (as its name suggests)
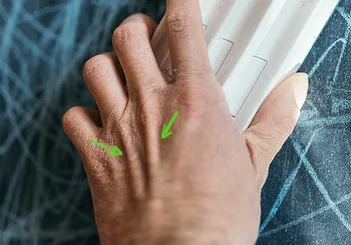
Fats of the hand
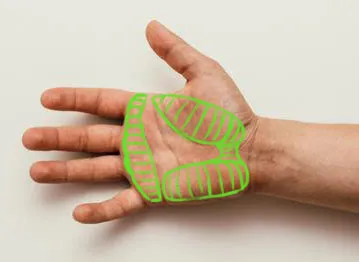 There are several fats zones on the hand. (in green)
The superior layer of fat protect the head of the metacarpals.
 It explains the mismatch between the back side and the palm side of the hand, making this known palm effect between the fingers.
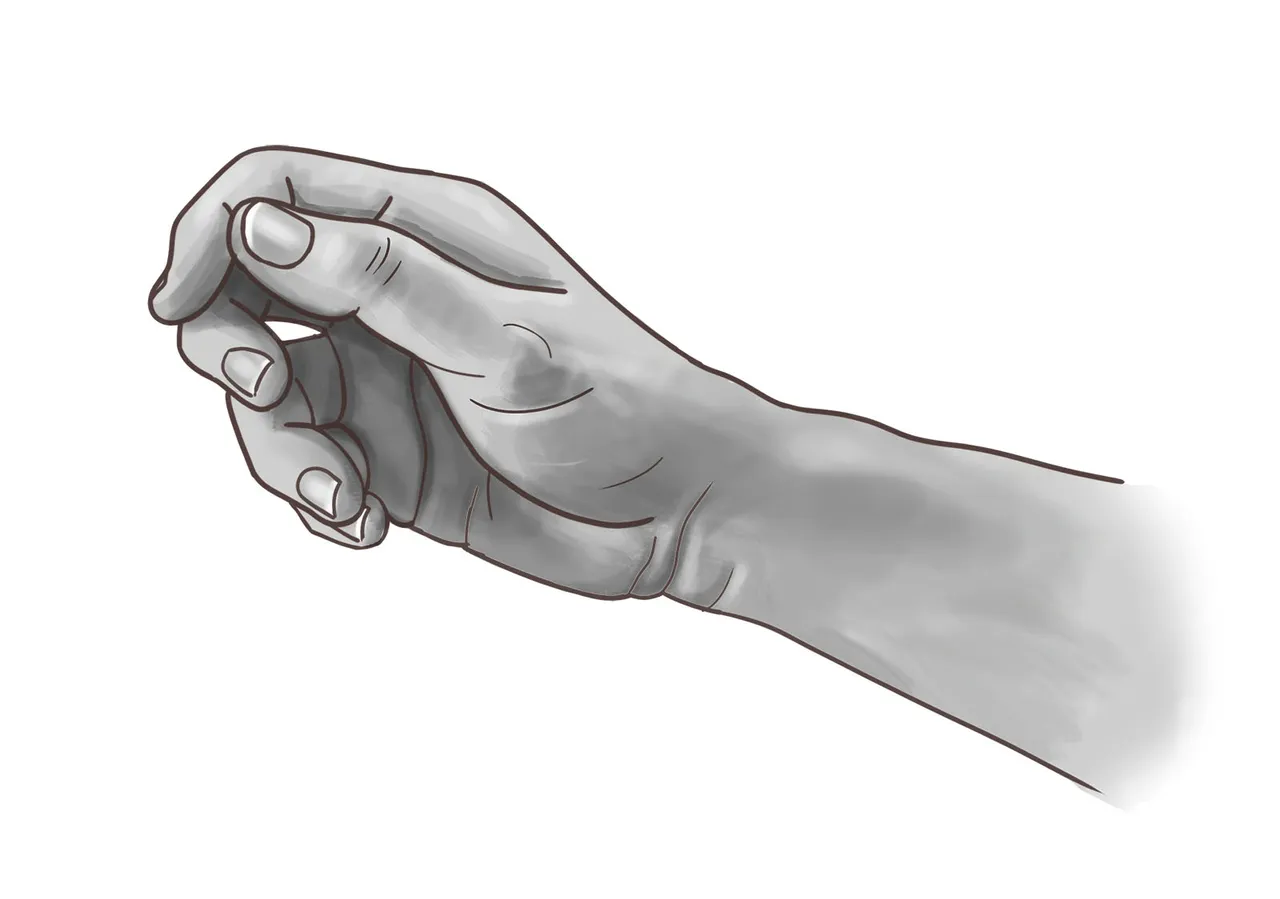
So... How to draw the hands ?
-> We will think it as a volume.
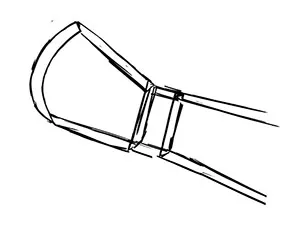 The hand form is near to a rectangle box, with a circular shape on top, due to the different height of the fingers.
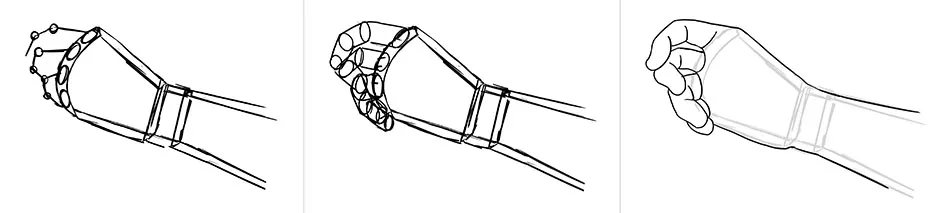
- Now, we will trace the fingers. It's the more complex part. We will have to think them as a kind of cylinders, and pay attention to respect the perspective. And it is, in my opinion, the most difficult part.
I used different methods, sometimes I prefer to quickly sketch the major form of the fingers to have the gesture and the direction of it, but here I used the wire method ; I thought the finger like a wire to consider the proportion and the direction quickly.
After it, I traced the cylinders. And as it can be draft-like and illegible, I quickly redraw the contours properly in the next step, before even thinking about drawing the thumb.
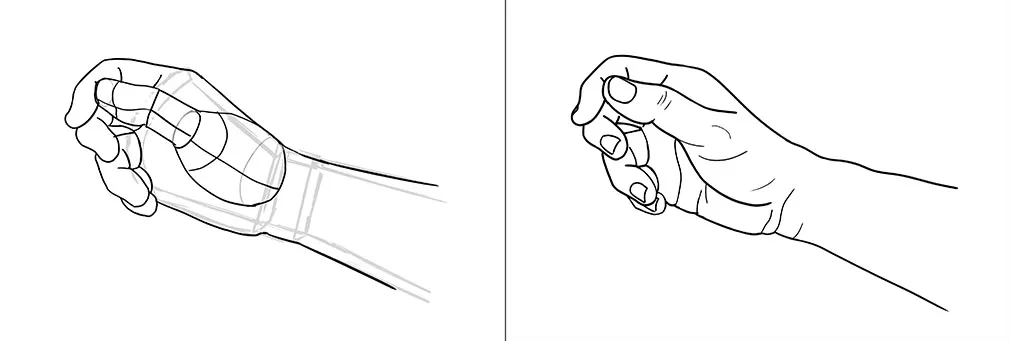
Now, let's draw the thumb.
You can see the base of it like a triangular shape in addition to the rectangular shape of the hand.
But the entire volume of it looks more like a chicken leg.
-> After tracing the thumb, I draw some strokes, which show the main folds of the hand.
/!\ You don't have to trace all lines of the hand!
Identify the most important ones, those that describe the action and represent well the movement of the hand. Your drawing will be much more dynamic than if you try to draw all the lines, without making distinctions of importance. (Unless you want to do hyper-realism, of course).And finally, the last step, the shading.
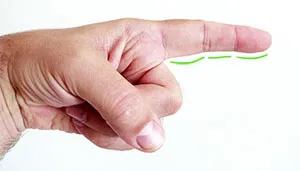
Some tips for drawing fingers :
- Observe your finger, stretched or folded, you will see that the top is composed by straight lines, and the bottom by curved ones. Don't hesitate to exaggerate this characteristic on your drawings, to be more dynamic.
- Also, the curve that form the middle phalange section is straighter than the two others. It's slight, but visible when you stretch your finger.
3 . The nails are not flat ! They curved around the finger.
Conclusion
Even if hands are very difficult to draw, there is one good news : it's the most visible part of our body, we have a living model in front of us !
Observe your hands, the folds that form in different poses,...
And practice a lot, it's the only secret. Theory is good, but practice is the most important thing in drawing.
Hope this tutorial has been useful for you. The next topic of this serie will speak about legs.
Don't hesitate to leave me a comment if you want some clarifications or if you have any opinion to give.
See you soon for others creations! 😄🌸