
Summoner Focus
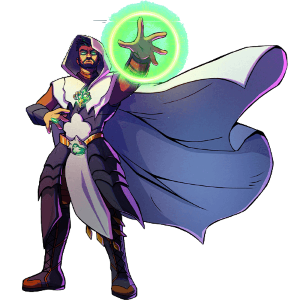
In this week's Social Media Challenge, allow me to introduce you to a Legendary Summoner hailing from the Life Splinter, proudly representing the Chaos Legion collection: meet GRANDMASTER RATHE 👀
For those familiar with my posts, it's no secret that I frequently deploy GRANDMASTER RATHE in my battles with a carefully crafted strategy, elevating my odds of success on the battlefield. When employed with foresight, the abilities granted by this Summoner can be nothing short of a game-changer. When it comes to my battles with the Life Splinter, GRANDMASTER RATHE is typically my go-to Summoner of choice as compared to using the General Sloan 😜
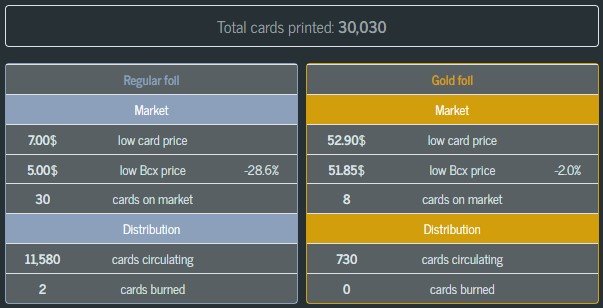
According to Splintercards, there are only 30,030 copies of GRANDMASTER RATHE printed and they are currently trading at the below prices (at the time of writing) for both the Regular and Goil foil copies!

Abilities and Ruleset Focus
GRANDMASTER RATHE is able to grant the lineup with these buffs through its abilities!


GRANDMASTER RATHE,particularly when confronted with the following rulesets.


Enemy units that use melee attacks receive damage back.
Enemy units that attack with magic receive damage back.
Enemy units that attack with ranged attacks receive damage back

The Battle
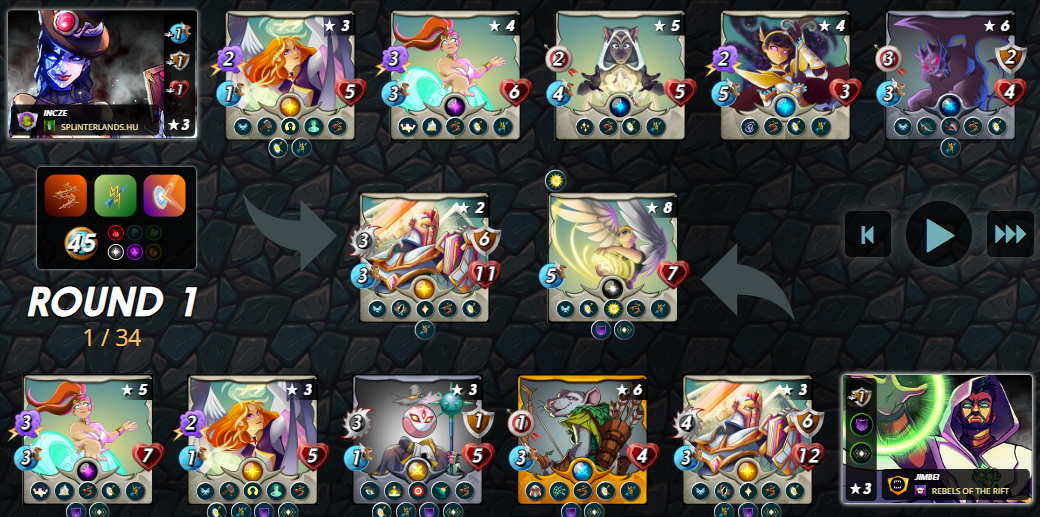
In my alt account, jimbei, I was able engage in a battle that showcased the impressive capabilities of using the GRANDMASTER RATHE. To get right into the action, the battle link can be found here. Otherwise, do read on as I go into more detail regarding the lineup and fight.

Let's begin by diving into the rules governing this battle. It's worth noting that this particular combination of rulesets is definitely unique and it was my first time encountering such a hilarious restrictions. The battle could be aptly summarized as "EVERYTHING SHALL BE DENIED" 😂
First up is the Briar Patch ruleset, which bestows the Thorns ability upon all units right from the start. Next, there's the Counterspell ruleset, which provides all units with the Magic Reflect ability as soon as the battle commences. Lastly, there's the Fire & Regret ruleset, which ensures that all units come equipped with the Return Fire ability right from the get-go. This battle operates under a mana cap of 45 and allows for the use of Fire, Life, and Death Splinters.

Summoner, Grandmaster Rathe
When faced with the challenge posed by this combination of rulesets that practically counters all forms of attack, the selection of GRANDMASTER RATHE was a clear choice. This Summoner is known for his remarkable ability to enhance your team's overall resilience in battles. His set of abilities, +1 Armor and Void Armor, synergize effectively, providing a substantial defensive boost to your team. Additionally, the Amplify ability comes into play when enhancing the counterattacks that are prevalent in this unique battlefield setting 😏

First Position, Pelacor Conjurer
Pelacor Conjurer emerges as an cost-effective tank in this battle. With its low mana cost of just 2, it exhibits impressive Speed and Health attributes. What sets this monster apart are its valuable abilities, encompassing Fly, Phase, and Divine Shield. These combined attributes elevate Pelacor Conjurer to a formidable adversary, well-equipped to endure the assaults of opposing monsters. Notably, it excels in this specific battle due to its non-existent offensive capabilities, ensuring that it won't provoke any counterattacks 😁

Second Position, Uriel The Purifier
I positioned Uriel The Purifier as my secondary tank for this encounter, capitalizing on its impressive Health and Armor attributes. What truly set Uriel The Purifier apart is its vital Healing prowess, offering the potential to restore a substantial 4 health points per round, a significant supplement to its already high Health pool. An additional perk is its Recharge ability, permitting it to unleash devastating damage only every other turn, a strategic move to mitigate provoking Thorns counterattacks 😆

Third Position, Venari Marksrat
With the emergence of the Martyr ability, Venari Marksrat has assumed a pivotal position in my battle strategy. I've strategically slotted it between Uriel The Purifier and Runi, with the anticipation that if it were to be eliminated early (by the opponent or by itself due to the Return Fire damages) in the battle, it would offer a substantial boost to the adjoining monsters. This calculated maneuver aimed to empower my primary attacking units, furnishing them with the edge required to clinch victory in the battle! 🙂

Fourth Position, Runi
Runi occupies a strategic position next to Venari Marksrat, ready to capitalize on the Martyr ability should Venari Marksrat meet its demise in the battle. Furthermore, its Reflective Shield ability stands as a highly advantageous asset in this particular engagement, shielding it from counterattacking Thorns damage. This sets the stage for Runi to unleash its Opportunity ability, targeting the enemy unit with the lowest Health with fervor! 😋

Fifth Position, Adelade Brightwing
Adelade Brightwing's Repair ability synergizes seamlessly with GRANDMASTER RATHE'S +1 Armor boost, fortifying a sturdy defensive shield that ensures my team's resilience during the battle. Additionally, she bolsters the team's efficiency with a +1 Speed enhancement via her Swiftness ability. Most importantly, her Resurrect ability plays a pivotal role in my strategy, with the goal of reviving Venari Marksrat, the possessor of the Martyr ability, to grant my lineup a significant double stat boost! ✌️

Last Position, Djinn Renova
Djinn Renova remains a constant presence in my lineup whenever I choose the Life Splinter, primarily due to its impressive Magic damage output, along with commendable Health and Speed attributes. What truly sets Djinn Renova apart is its Triage ability, which proves invaluable in Healing my rear-positioned monsters, especially when they suffer counterattacking damages from their own attacks. In this strategic setup, Djinn Renova plays a pivotal role in preserving my team's vigor and effectiveness throughout battles! 💪
The Analysis
When I first encountered this ruleset combination at the beginning of the battle, it left me pretty speechless and I can't help but laugh at the situation. It seemed like the very essence of these rulesets was to dissuade the use of any form of attacks. With the Briar Patch, Counterspell, and Fire & Regret rulesets in place, it felt as though the battlefield was signaling for a more passive approach.
So, I decided to take the battle in that direction. My lineup consisted of Monsters either devoid of any attack abilities or with slow attack speeds, effectively minimizing the risk of experiencing counterattacking repercussions. My overarching strategy revolved around the use of GRANDMASTER RATHE as the Summoner to fortify my defenses, allowing my enemy to unwittingly inflict harm upon themselves through the enhanced counterattacking damages, all while leveraging the Amplify ability granted to my team! 😉
Do you guys have any go-to strategy as well? Do share them with me in the below comments.

If you made it this far, I sincerely appreciate your time and value your encouragement. Please feel free to leave any comments or suggestions so that we can discuss about other strategies. Thinking about giving Splinterlands a try but haven't signed up yet? Feel free to use my referral link: https://splinterlands.com?ref=ak08, and be sure to reach out to me if you have any questions!
Are you interested in reading some of my future writings? Don't forget to follow me! In the meantime, here are some of my most recent blogs if you'd like to view them:
 | |
 |  |
All banners, dividers card and battle images used in this article are open source and obtained from the Splinterlands team or made by flauwy. Do check out his link for other amazing designs!