
Español
Hola queridos amigos 💛 Hoy en día es fundamental e indispensable elegir imágenes u objetos que más nos gusten a la hora de decorar nuestras paredes, por eso, el día de hoy les traigo un nuevo y divertido paso a paso en donde les mostrare como realizar un precioso cuadro de flores hecho con foami y otros materiales fáciles de conseguir. Esta es una idea muy económica para decorar nuestras paredes. Así que, los invito a disfrutar de este divertido momento, ideal y perfecto para el desarrollo de la creatividad tanto de niños como adultos. Además es una idea perfecta para pasar un rato agradable con nuestros pequeños en casa e incentivarlos, ya que, pueden ir, de a poco, desarrollando su ingenio y acercándose un poco más al trabajo artístico.
English
Hello, dear friends 💚 Today it is essential and essential to choose images or objects that we like the most when decorating our walls, that's why today I bring you a new and fun step by step where I will show you how to make a beautiful flower painting made with foamy and other easily available materials. This is a very economical idea to decorate our walls. So, I invite you to enjoy this fun moment, ideal, and perfect for the development of creativity for both children and adults. It is also a perfect idea to spend a pleasant time with our little ones at home and encourage them, since they can, little by little, develop their ingenuity and get a little closer to artistic work.
¿Qué están esperando?
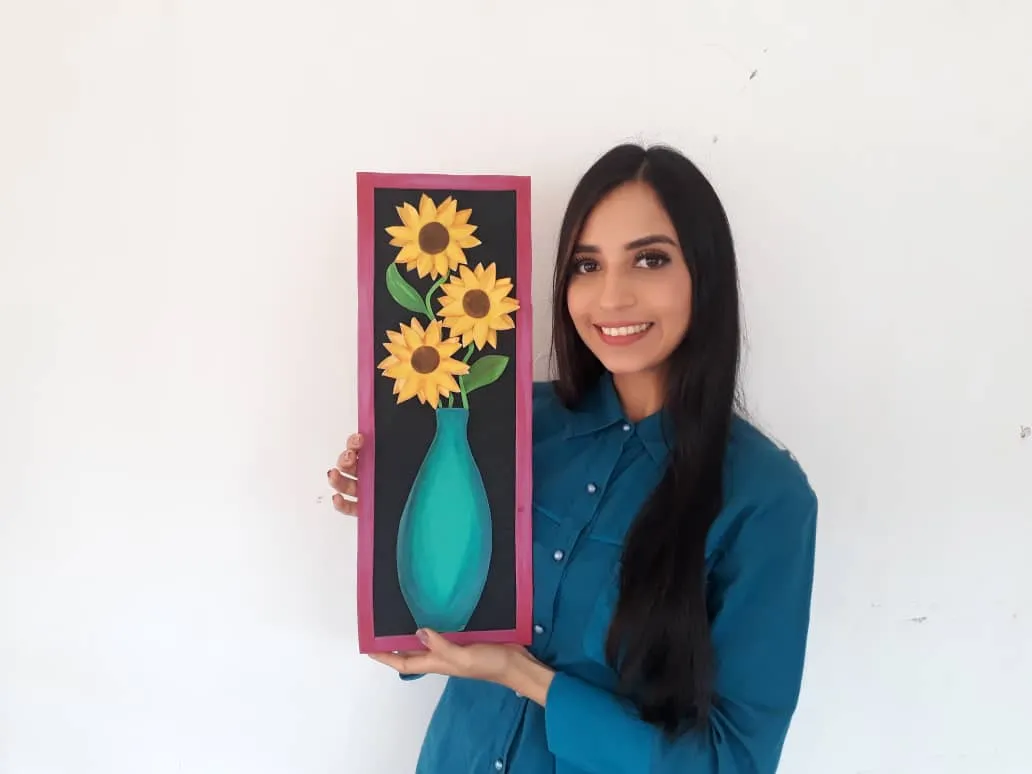
Gracias a esta técnica podemos crear nuestro propio cuadro de flores, además, una hermosa obra hecha en casa, es una manera creativa y muy económica de darle un toque de alegría a nuestro entorno. Antes de comenzar no olvidemos lavarnos nuestras manos.
What are they waiting for?
Thanks to this technique we can create our own flower box, in addition, a beautiful work made at home, it is a creative and very economical way to give a touch of joy to our environment. Before we start, let's not forget to wash our hands.

[Materiales | Materials]
Para hacer este hermoso cuadro necesitaremos:
- Moldes.
- Foami o goma eva.
- Papel vegetal o calco.
- Lamina de cartón.
- Regla.
- Lápiz.
- Tijera.
- Pincel o brocha.
- Pintura de acuarela.
- Silicona caliente o pegamento.
To make this beautiful painting we will need:
- Molds.
- Foamy or eva foam.
- Vegetable paper or tracing.
- Cardboard sheet.
- Rule.
- Pencil.
- Scissors.
- Brush or paintbrush.
- Watercolor paint.
- Hot silicone or glue.
Procedimiento (paso a paso)
Process (step by step)
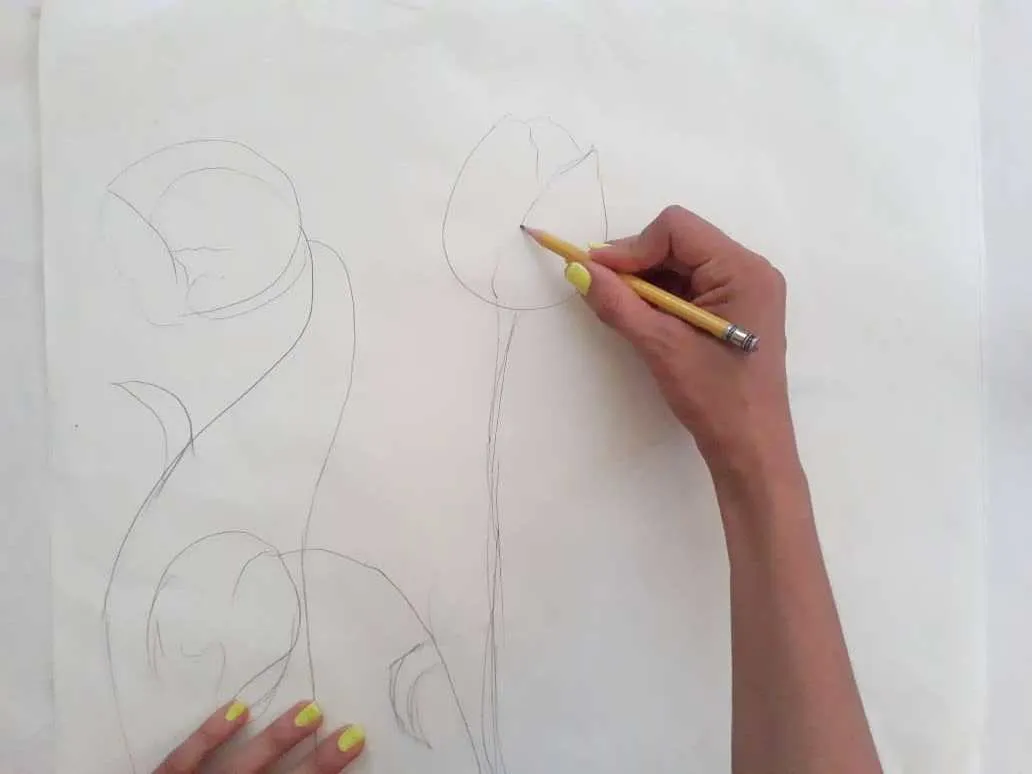
Primero, dibujamos hermosas flores y tallos de diferentes tamaños papel vegetal o de calco, o cualquier otro papel de dibujo que encontremos. Para este paso podemos utilizar un lápiz común de grafito o cualquier otro con el que se sientan más cómodos.
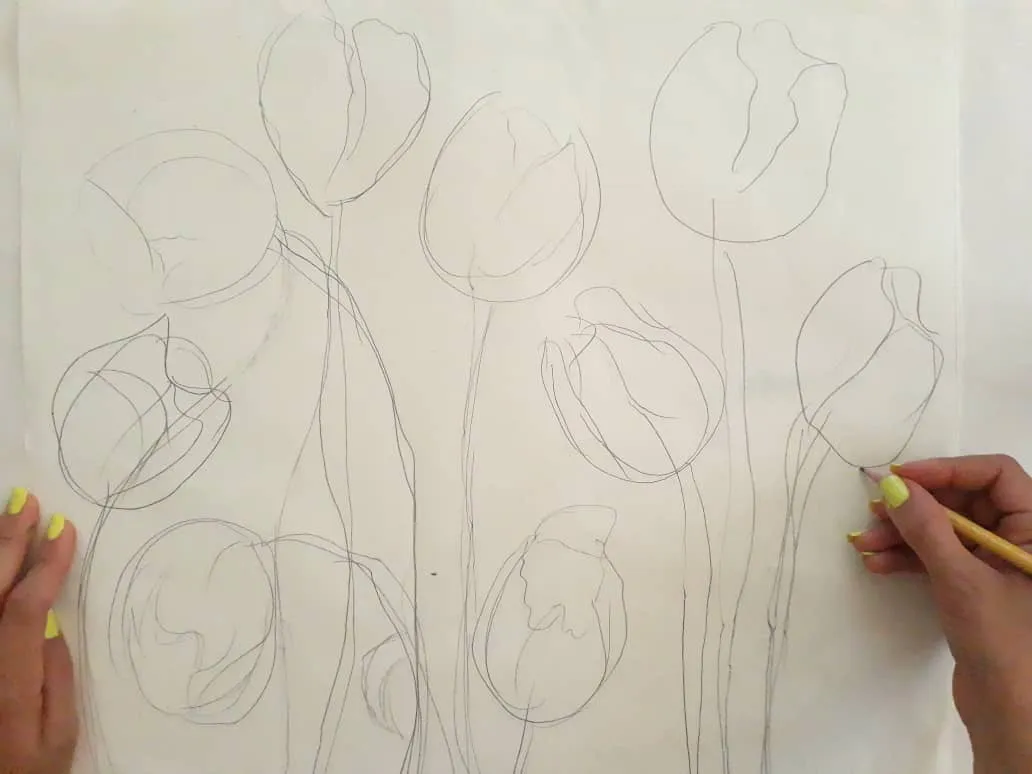
First, we draw beautiful flowers and stems of different sizes tracing paper or tracing paper or any other drawing paper we find. For this step, we can use a common graphite pencil or any other with which they feel more comfortable.
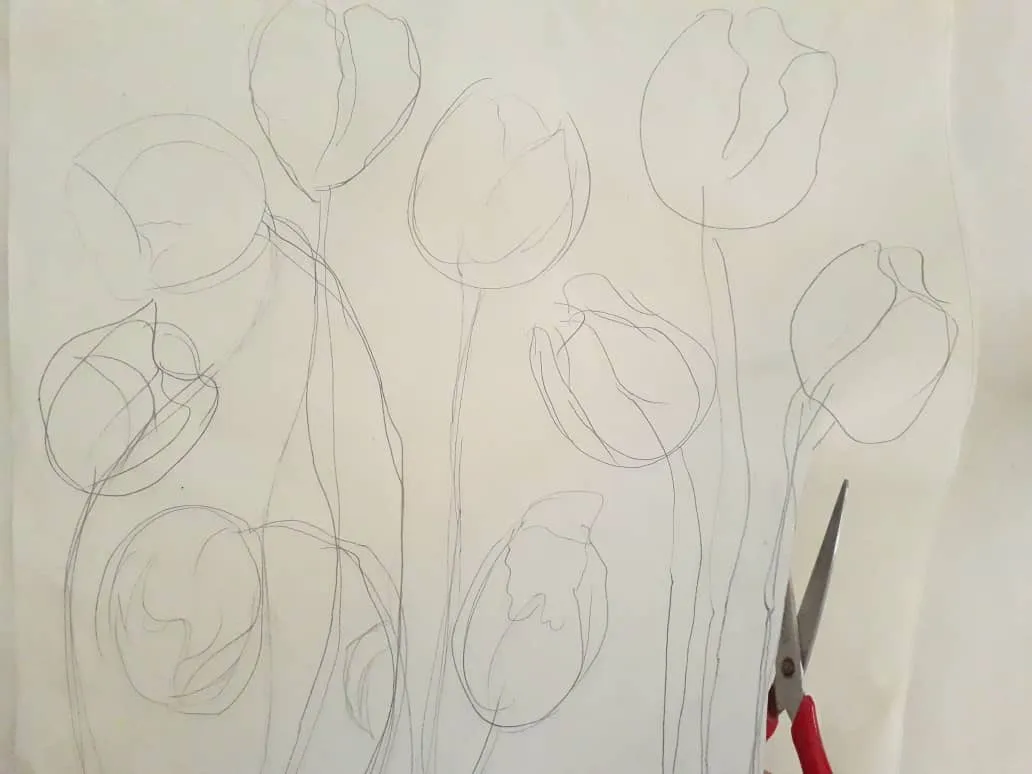
Ahora, con mucho cuidado recortamos los dibujos para extraer los moldes de las flores y tallos. De igual manera debemos ser cuidadosos a la hora de recortar, para conservar las medidas de los moldes en el foami y evitar accidentes al utilizar la tijera.
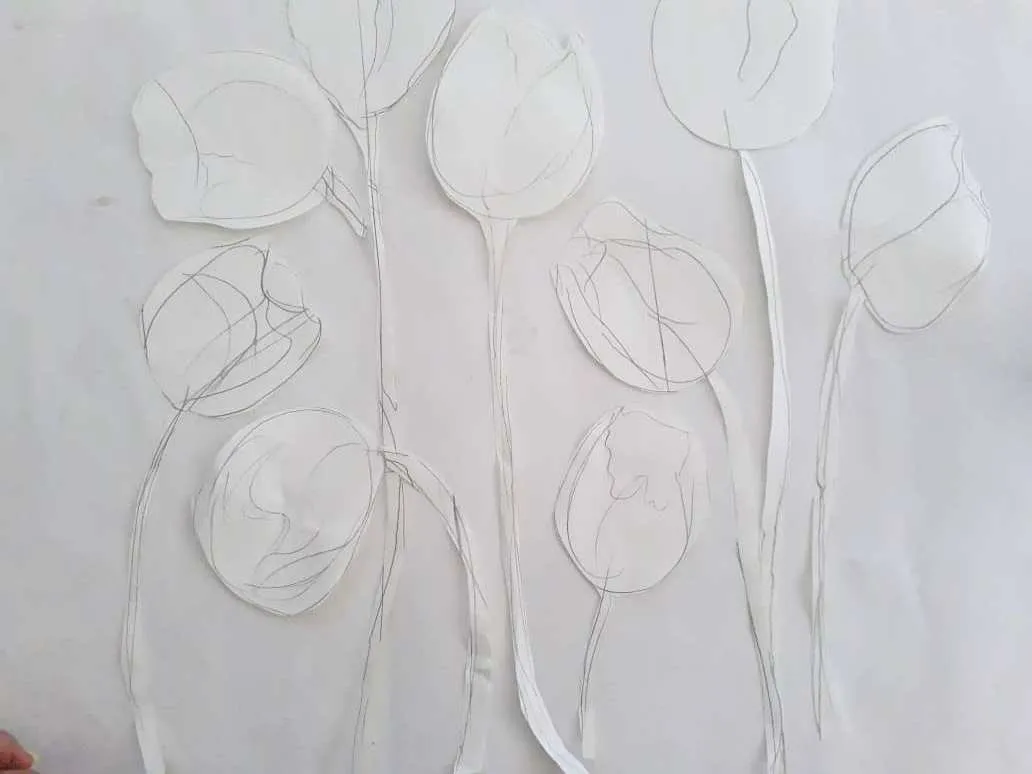
Now, we very carefully cut out the drawings to extract the molds from the flowers and stems. In the same way, we must be careful when cutting, to preserve the measurements of the molds in the foamy and avoid accidents when using the scissors.
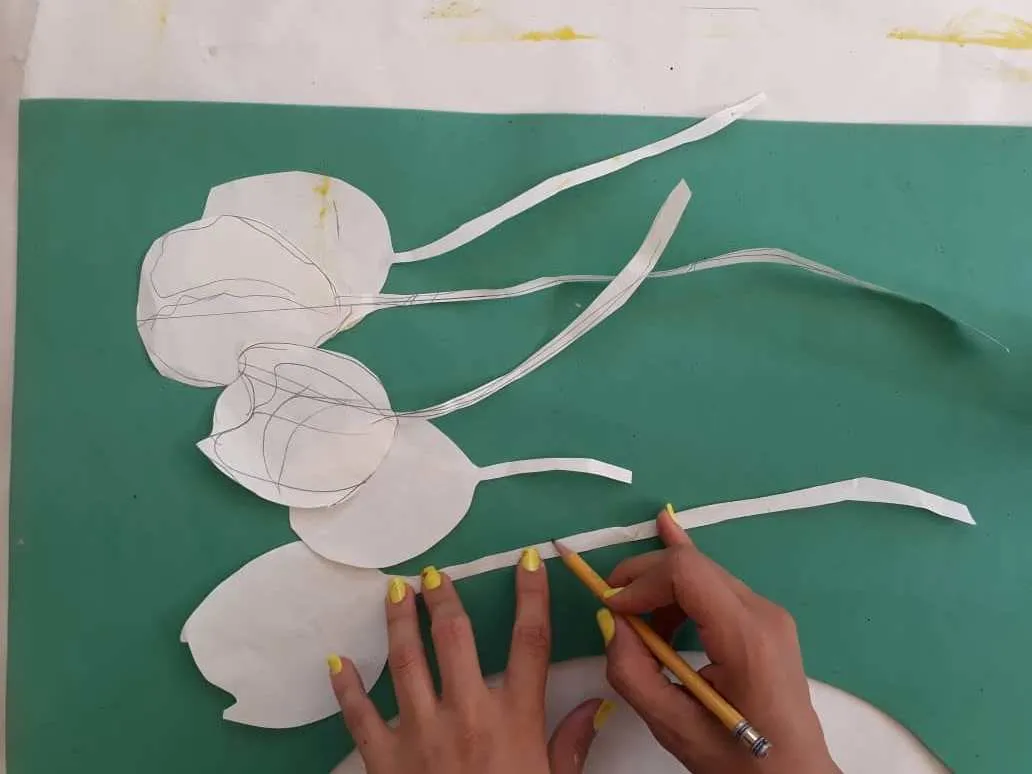
Luego, transferimos las flores y tallos al foami de color que más nos gusten o que tengamos. Recuerden tener cuidado a la hora de recortar, y así, respetar las medidas y tamaños de nuestras figuras. Preferiblemente los tallos serán de color verde, pero si no tienen foami verde puede darle ese tono con ayuda de la pintura.

Then, we transfer the flowers and stems to the color foamy that we like the most or that we have. Remember to be careful when cutting, and thus, respect the measurements and sizes of our figures. Preferably the stems will be green, but if they do not have green foamy you can give it that tone with the help of paint.
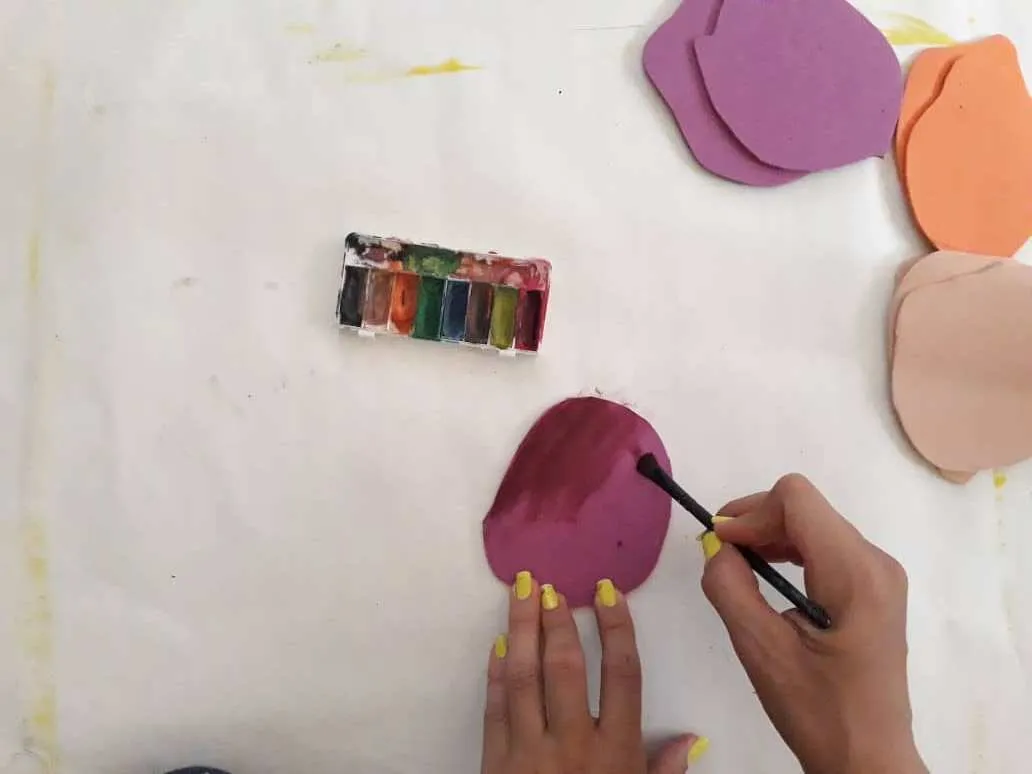
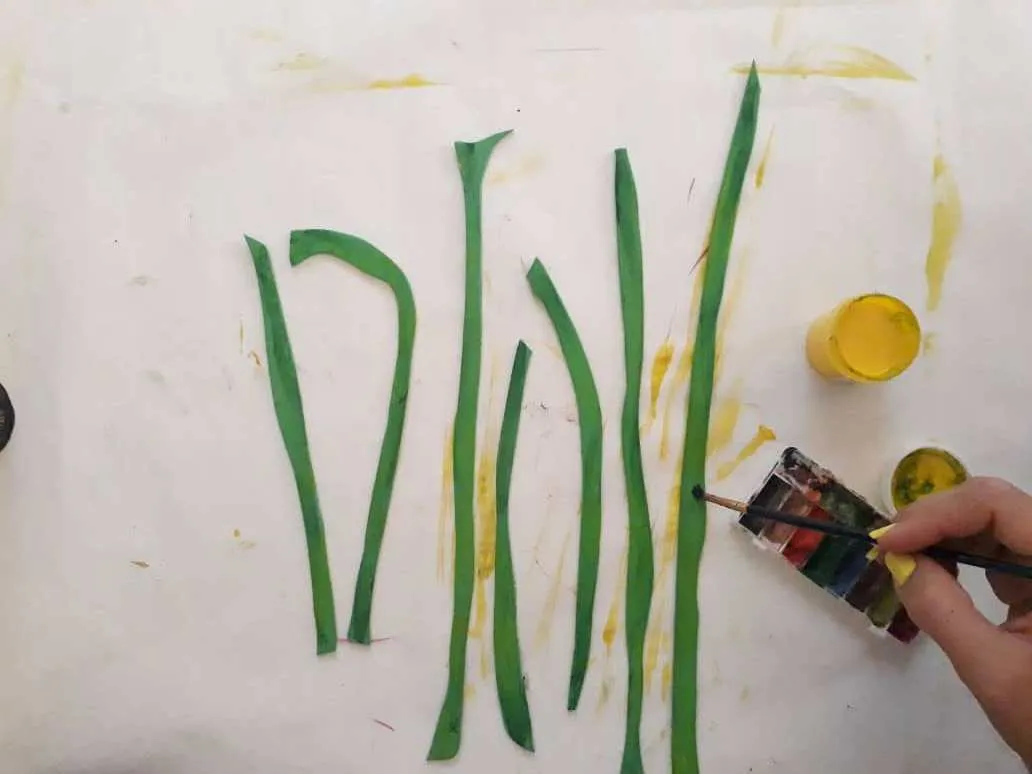
Una vez obtenida nuestras figuras de foami, procedemos a la parte más divertida, que será, pintar y darle un toque mágico y alegre a la figura principal de nuestra obra “las flores”. Para lograr este paso utilizamos pintura de acuarela y un pincel o brocha. Seguidamente definimos los detalles con pincel o marcador de punta fina.
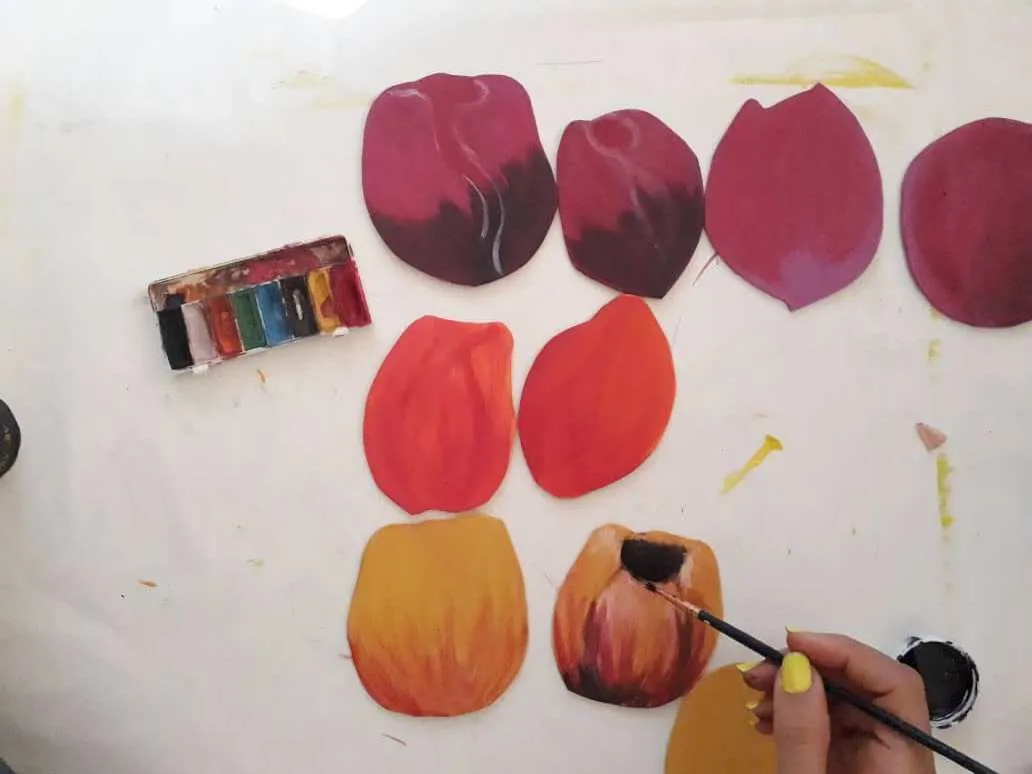
Once our foamy figures are obtained, we proceed to the most fun part, which will be painting and giving a magical and happy touch to the main figure of our work "the flowers". To achieve this step we use watercolor paint and a brush or brush. Next, we define the details with a brush or fine-tip marker.
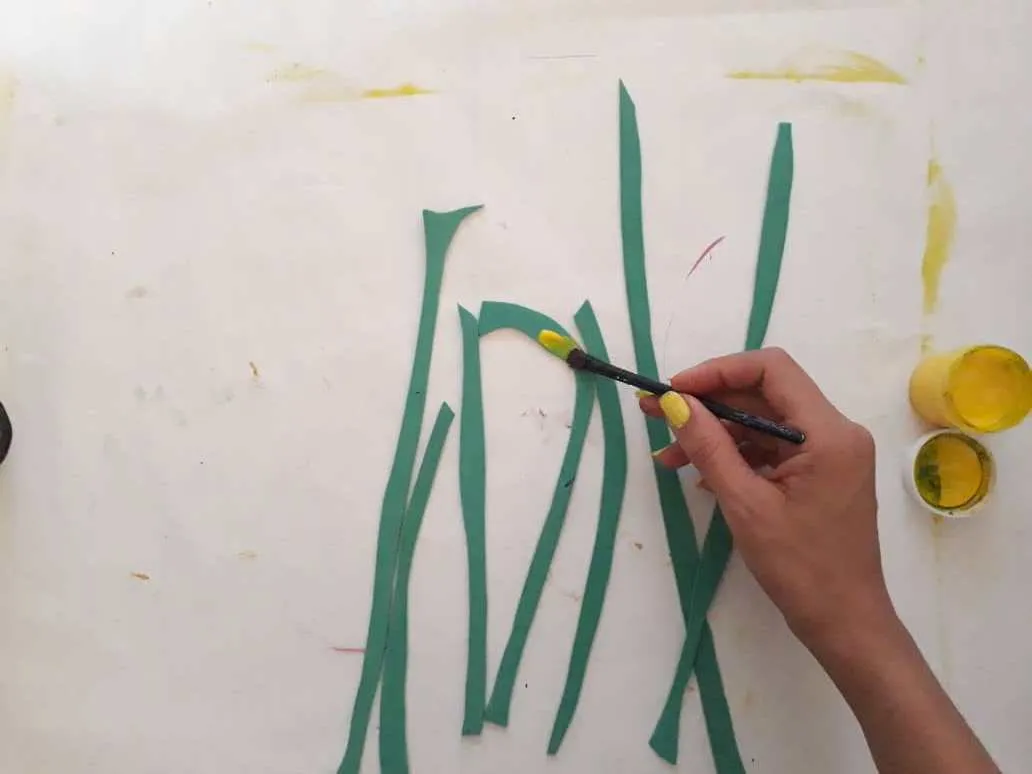
Ahora, le damos un toque mágico y alegre a los tallos de nuestras flores aplicando un poco de pintura amarilla y verde oscura, para que resalte y nuestras flores tengan un mejor acabado.
Now, we give a magical and happy touch to the stems of our flowers by applying a little yellow and dark green paint, so that it stands out and our flowers have a better finish.
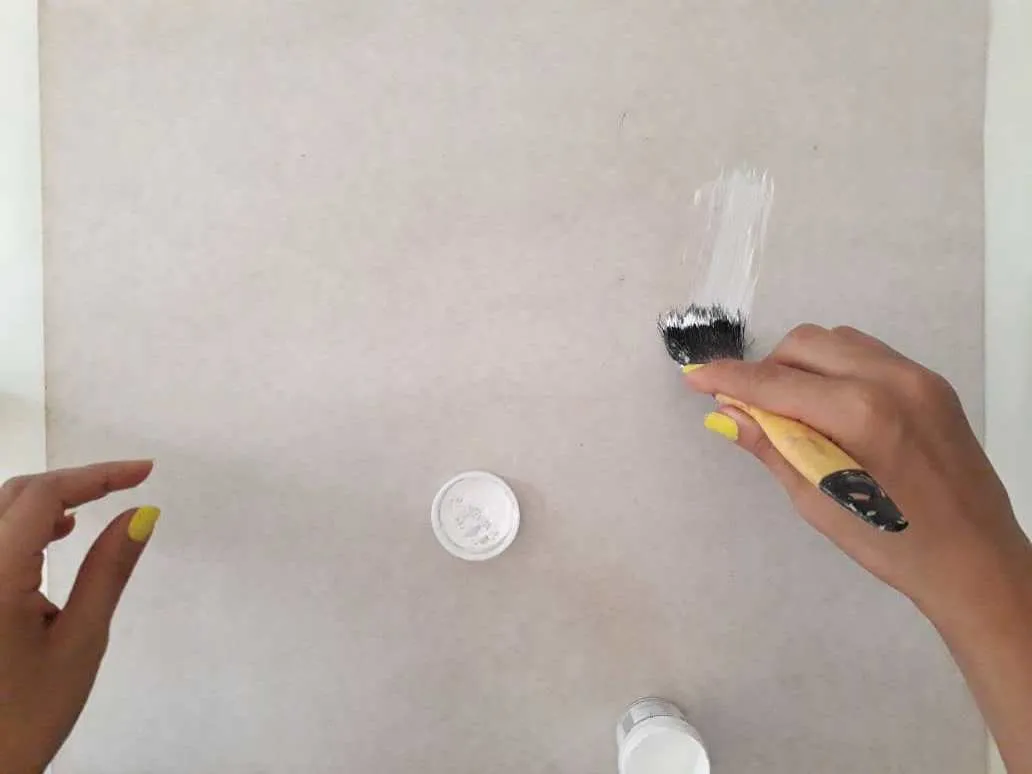
Luego, fabricamos una fondo de cartón para nuestro cuadro. La medida de dicha base será del tamaño que queramos nuestro cuadro. Para lograr un mejor acabado aplicamos pinturas de tonos claros, y en el borde, realizamos un marco con una pintura que resalte perfectamente, como en este caso que utilice este bello color amarillo.
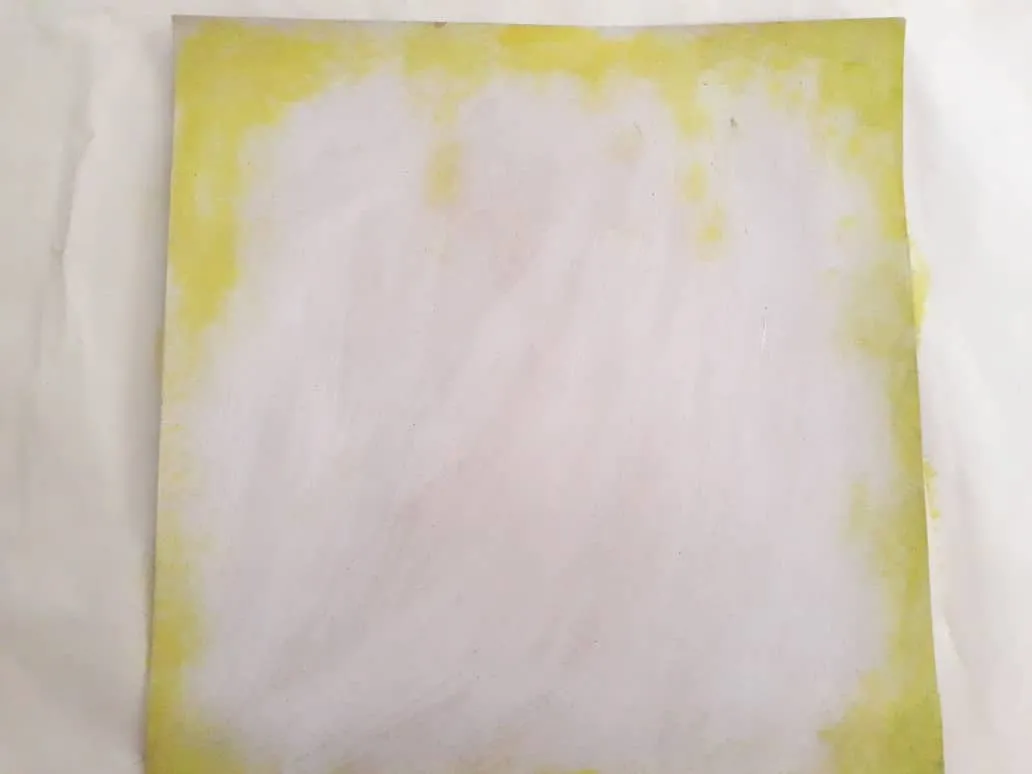
Then we make a cardboard background for our painting. The measurement of the said base will be the size that we want our table. To achieve a better finish, we apply light tone paints, and on the edge, we make a frame with a paint that stands out perfectly, as in this case that uses this beautiful yellow color.
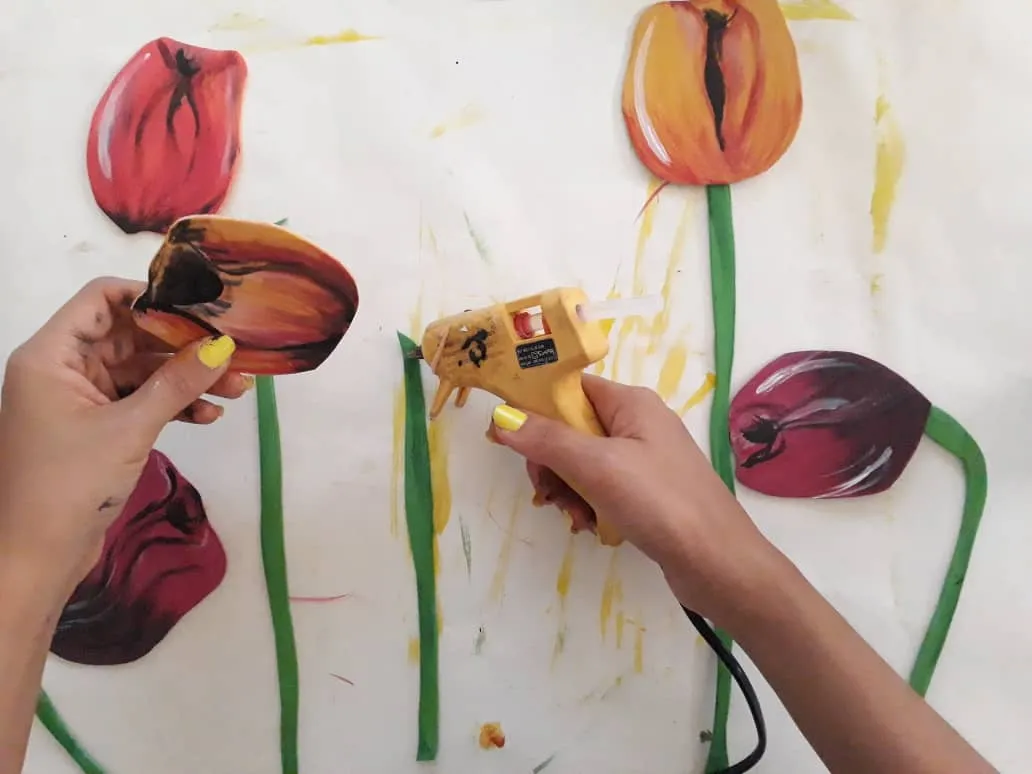
Ahora, unimos las partes de nuestra obra (tallos y flores) y la pegamos al cartón de fondo utilizando silicona caliente o pegamento. Como siempre debemos hacer un poco de presión para asegurarnos que queden bien pegadas.
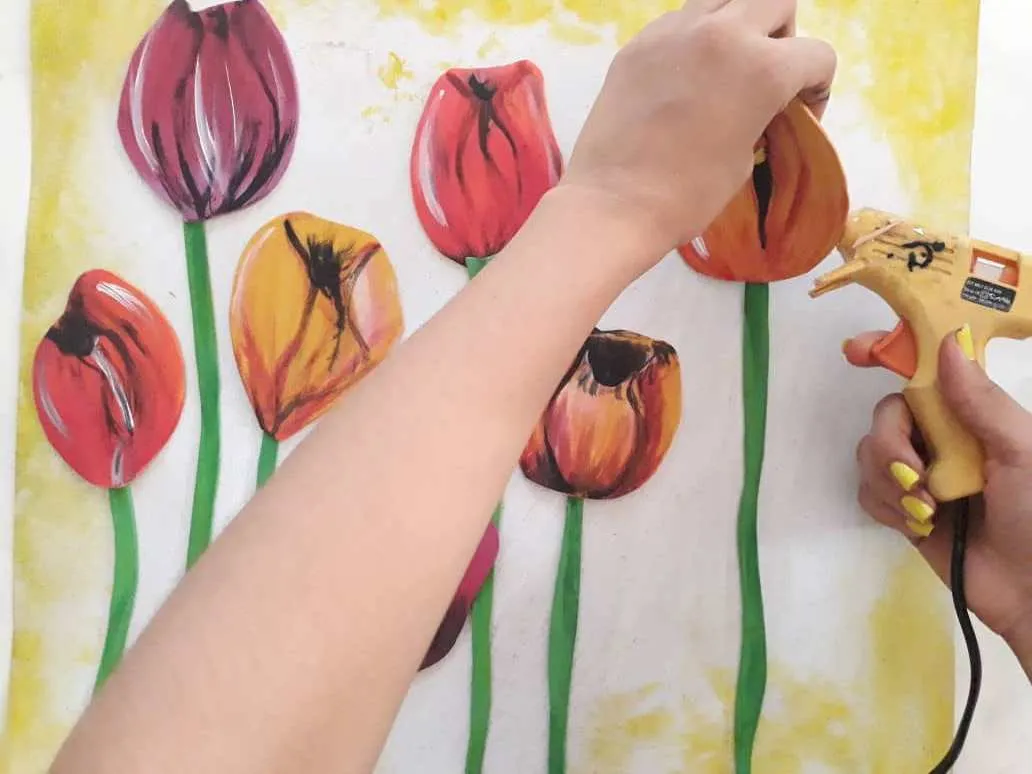
Now, we join the parts of our work (stems and flowers) and glue it to the background cardboard using hot silicone or glue. As always, we should put a little pressure to make sure they are well attached.
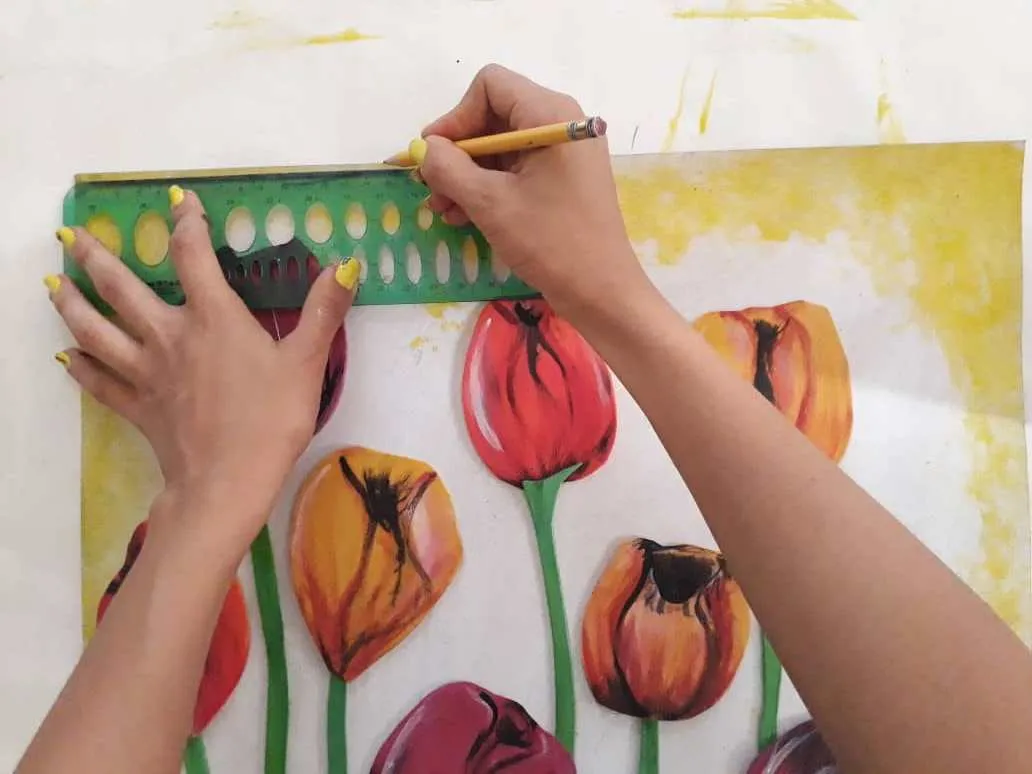
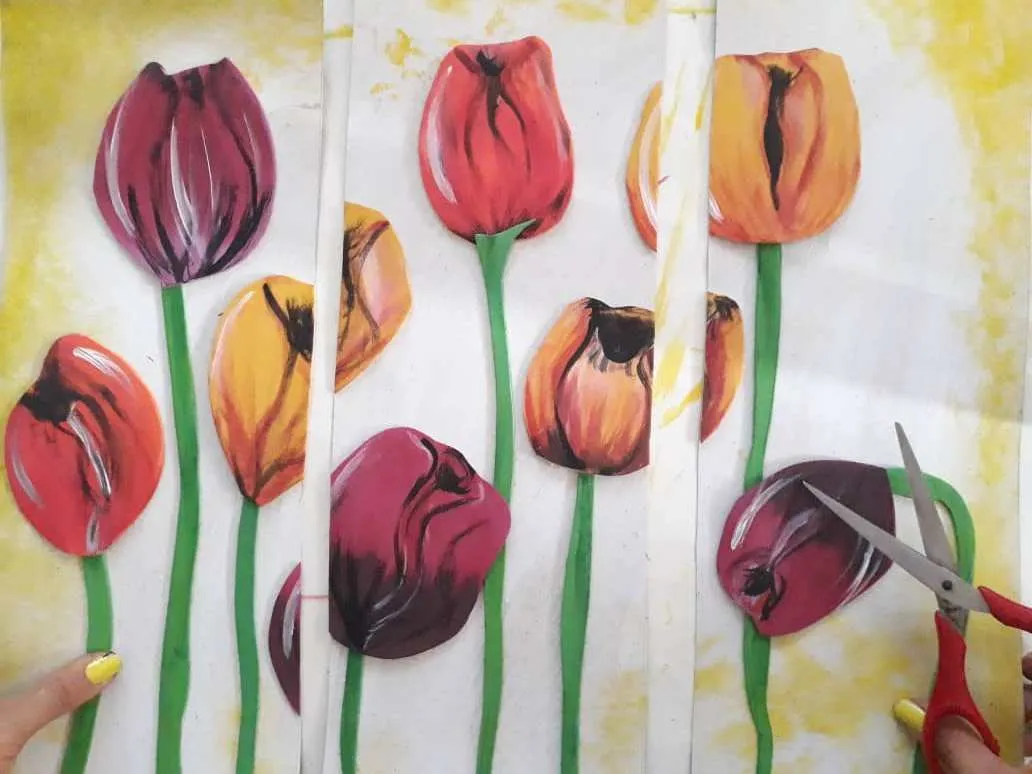
Seguidamente, con la ayuda de la tijera y una regla dividimos la obra en tres (3) rectángulos iguales. La regla nos permitirá realizar un corte recto y perfecto.
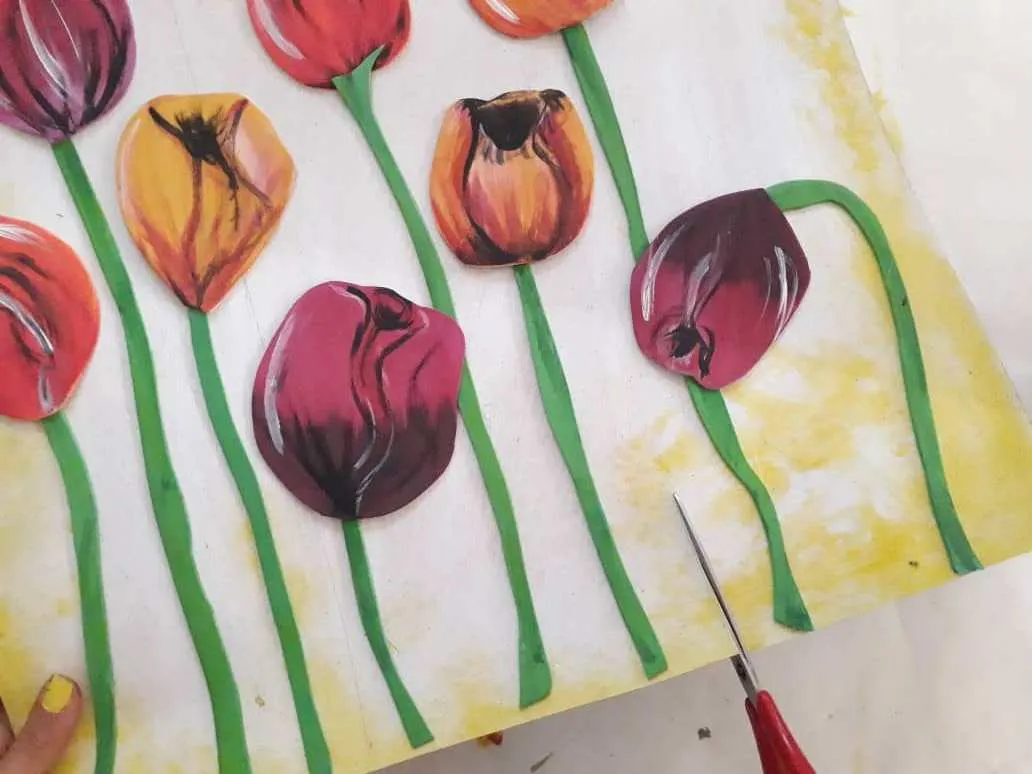
Next, with the help of scissors and a ruler, we divide the work into three (3) equal rectangles. The ruler will allow us to make a straight and perfect cut.
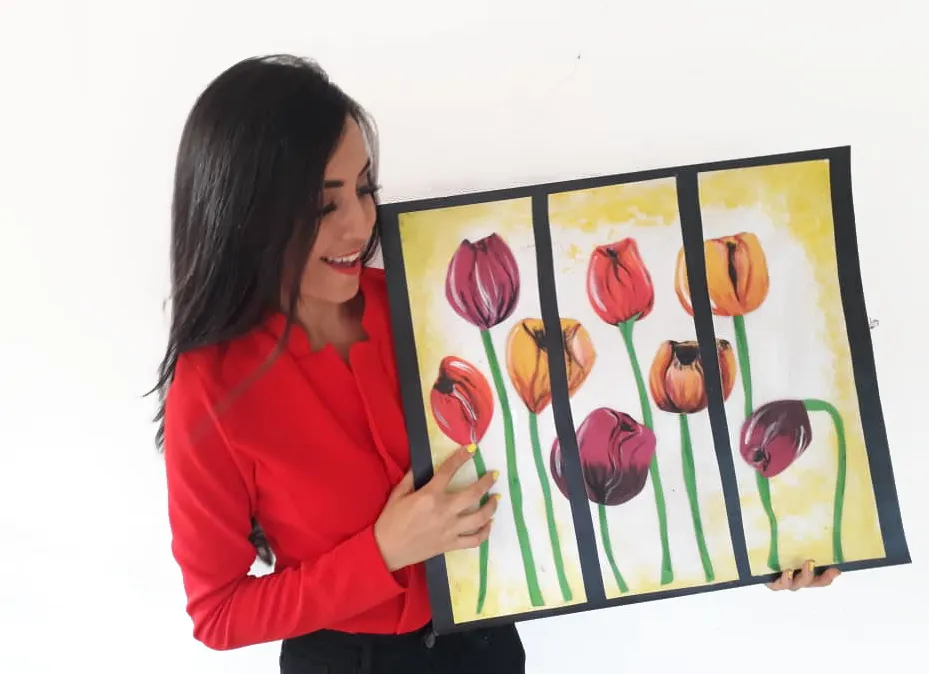
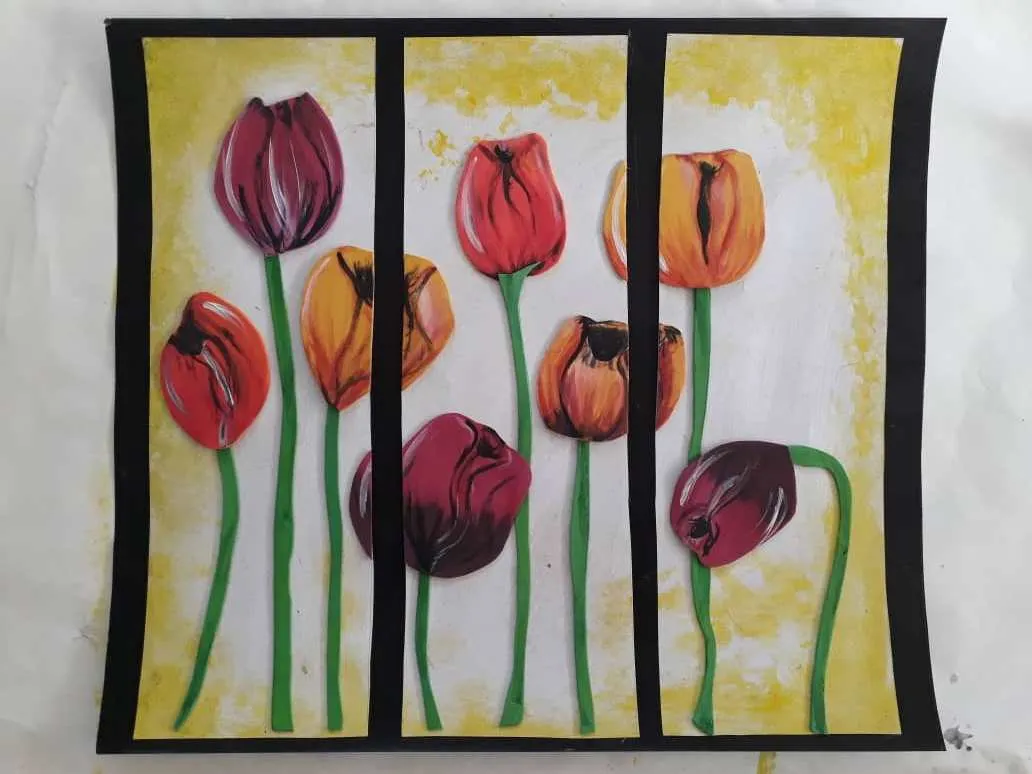
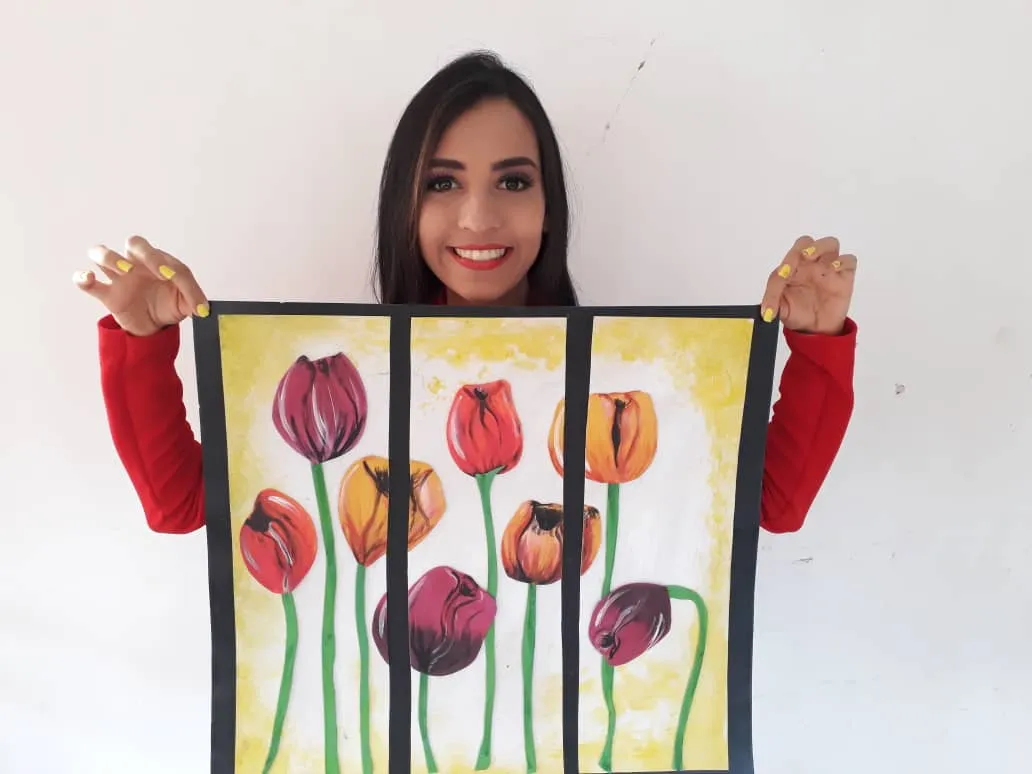
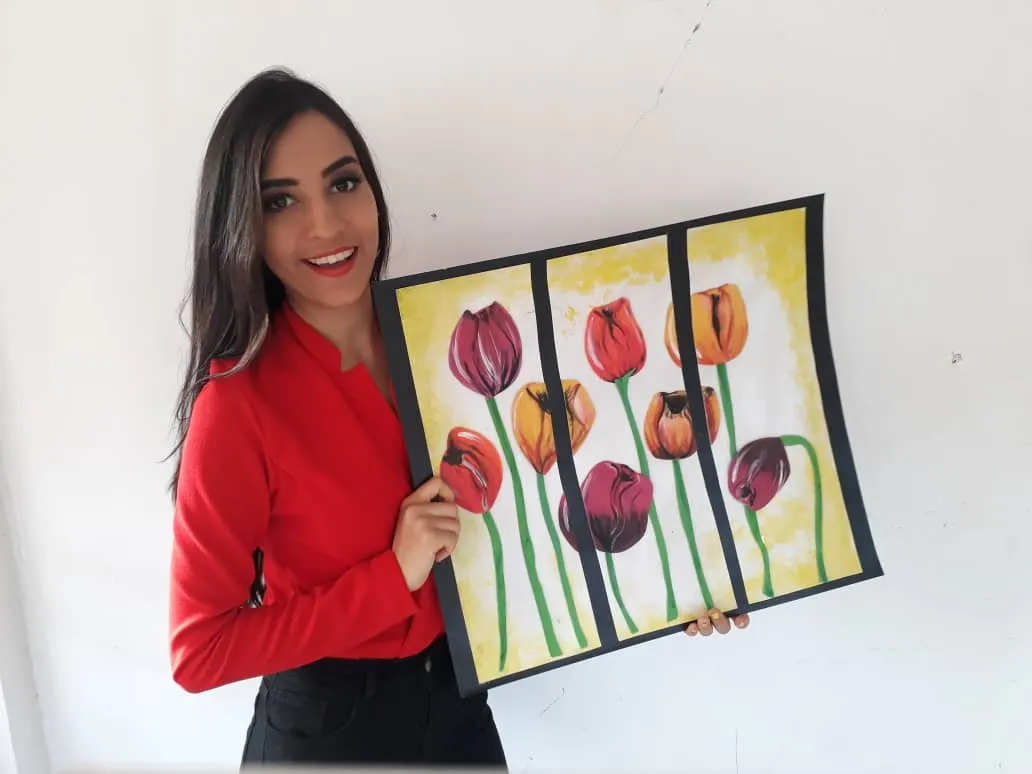
Finalmente, pegamos las tres (3) partes o rectángulos sobre una lámina de cartón de color negra. Manteniendo una distancia prudente entre cada rectángulo. No olvidemos hacer un poco de presión para asegurarnos que todo quede bien pegado.
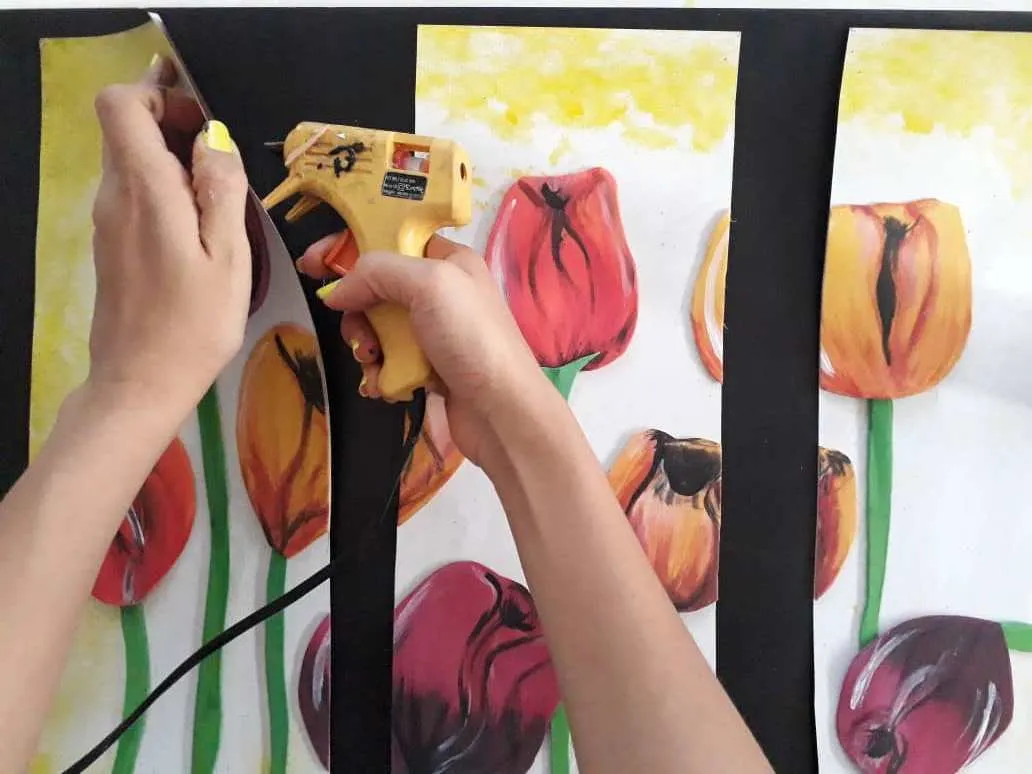
Finally, we glue the three (3) parts or rectangles on a black cardboard sheet. Maintaining a prudent distance between each rectangle. Let's not forget to do a little pressure to make sure everything is well glued.

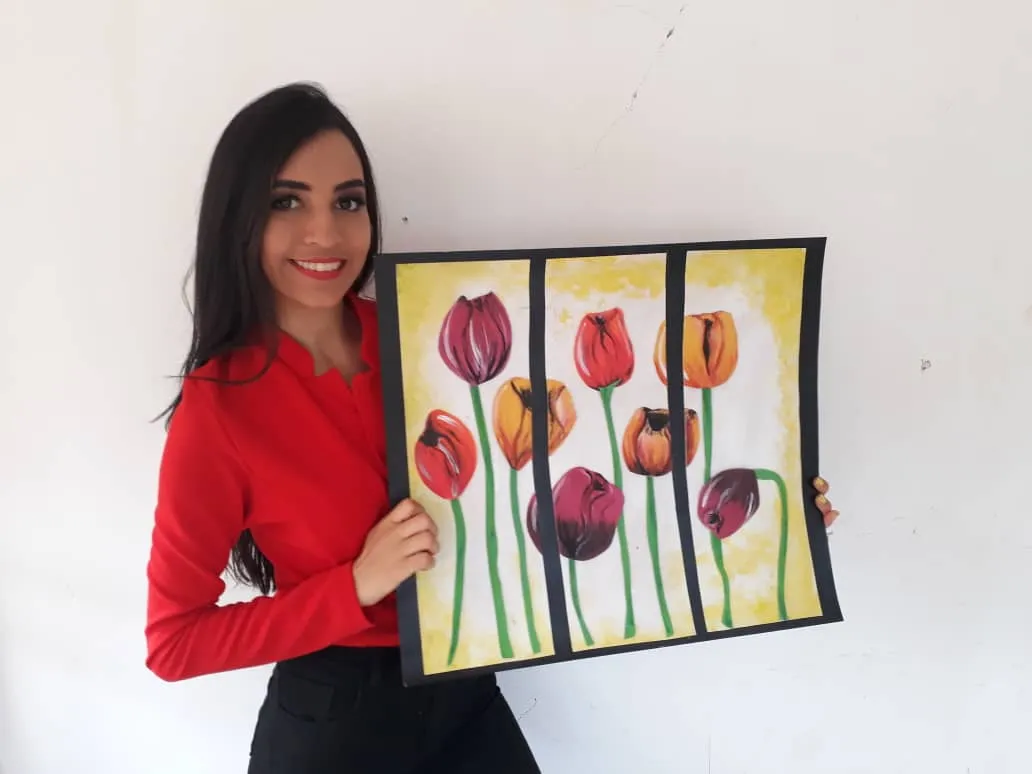
Gracias por acompañarme y espero que lo hayan disfrutado. ❤️
Thanks for joining and I hope you enjoyed it.❤️

Clic para ver trabajos anteriores | Click to see previous works

.jpeg)