Saludos hivers. Regreso con el estilo de planos para tokenizar NFT. Esta vez lo haré con una foto de la sesión a Rosinmar. Puedes ver una edición que le hice aquí.
Tenía más de un mes sin realizar este tipo de trabajo y es exactamente lo que tengo sin tokenizar. Es por eso que me animé a volver con algo que me encanta, aunque todavía mi último NFT, sigue a la venta.
Greetings hivers. I return with the style of plans to tokenize NFT. This time I'll do it with a photo from the session to Rosinmar. You can see an edit I made here.
I had more than a month without doing this kind of work and that's exactly what I have without tokenizing. That's why I was encouraged to come back with something I love, even though I still my latest NFT, is still for sale.
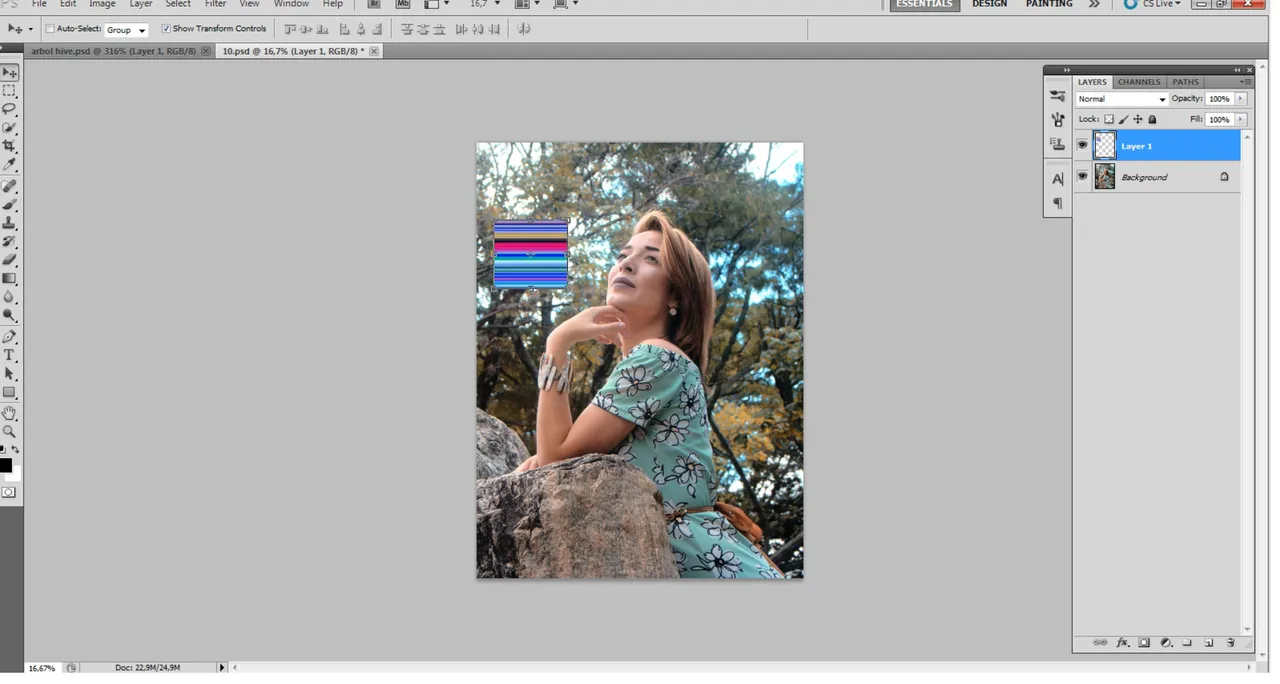
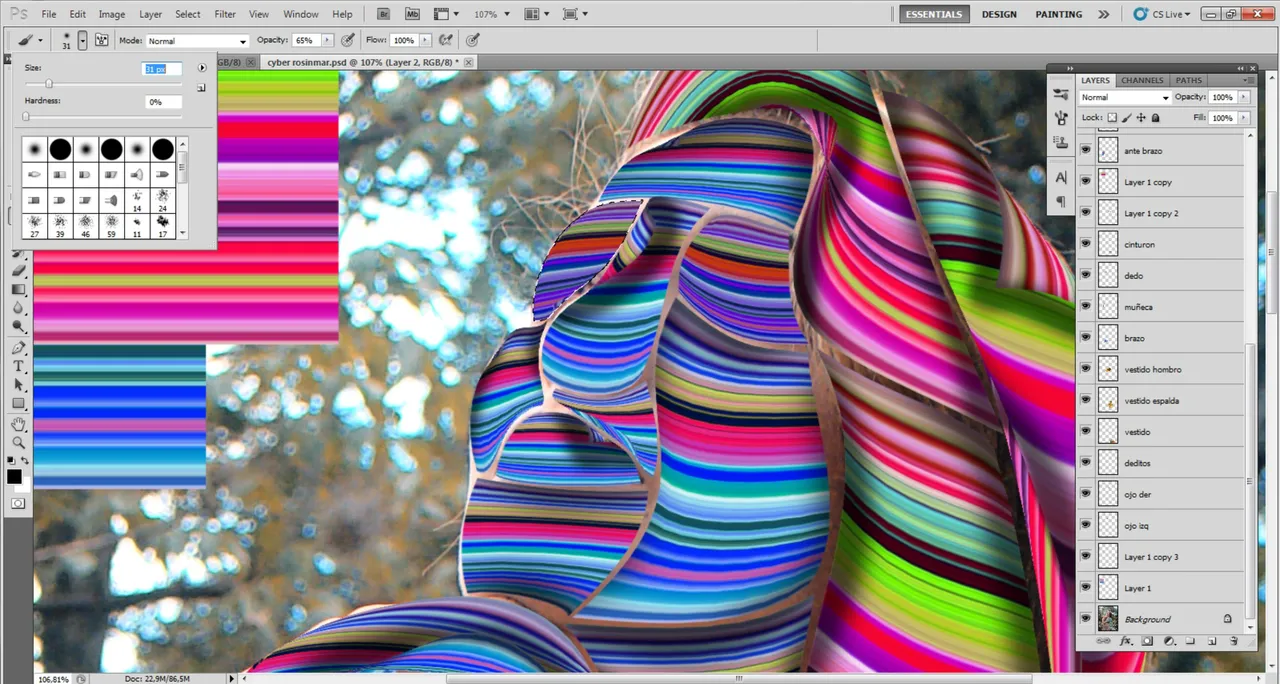
El primer paso es duplicar al fondo para que lo tengamos como capa. Luego creamos una capa de líneas. Para eso abrimos una imagen con muchos colores y que lleguén a los bordes, para aplicar el filtro de offset, repetir bordes. Después con tono, podemos elegir los colores que usaremos, aunque lo más seguro es que después los cambiemos.
The first step is to duplicate the background so that we have it as a layer. Then we create a layer of lines. For that we open an image with many colors and that reach the edges, to apply the offset filter, repeat edges. Then with tone, we can choose the colors we will use, although we will probably change them later.
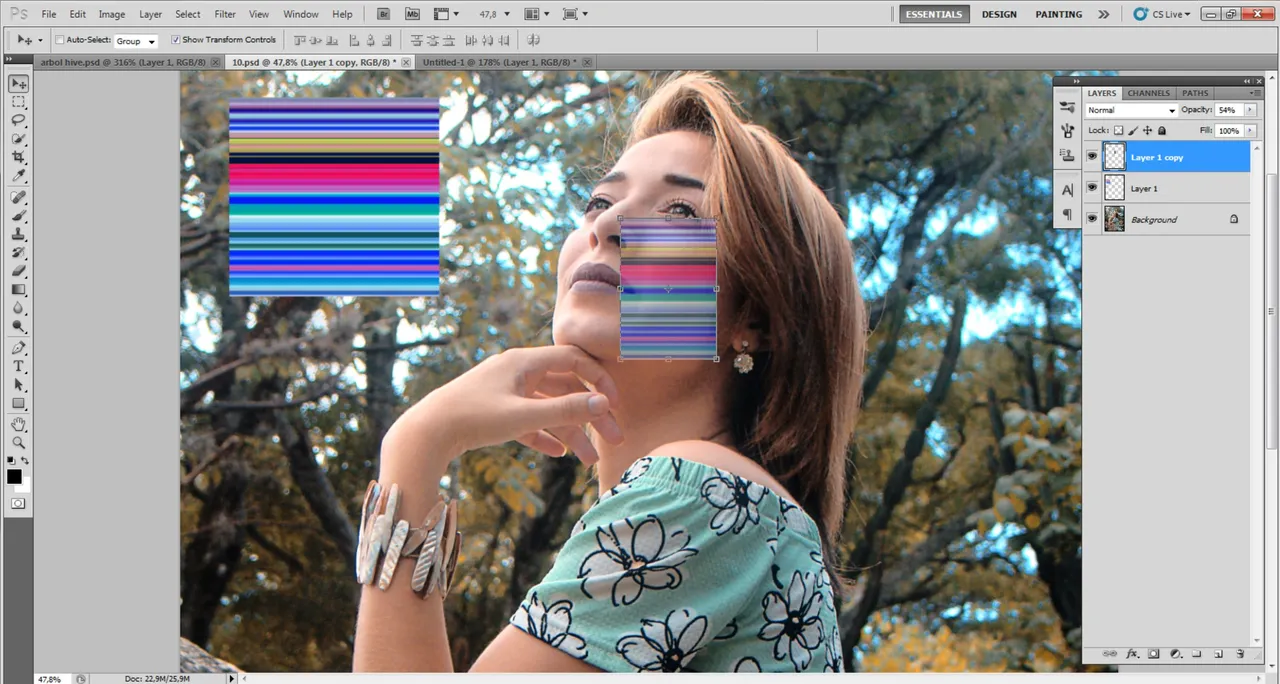
Particularmente comienzo por la cara. Duplico la capa de las líneas y voy al área más grande de la cara. Con la herramienta de wrap le doy la forma adaptada a esa área. Para guiarme bien, coloco la capa al 50% de opacidad.
I particularly start with the face. I duplicate the layer of the lines and go to the largest area of the face. With the wrap tool I give the shape adapted to that area. To guide me well, I set the layer to 50% opacity.
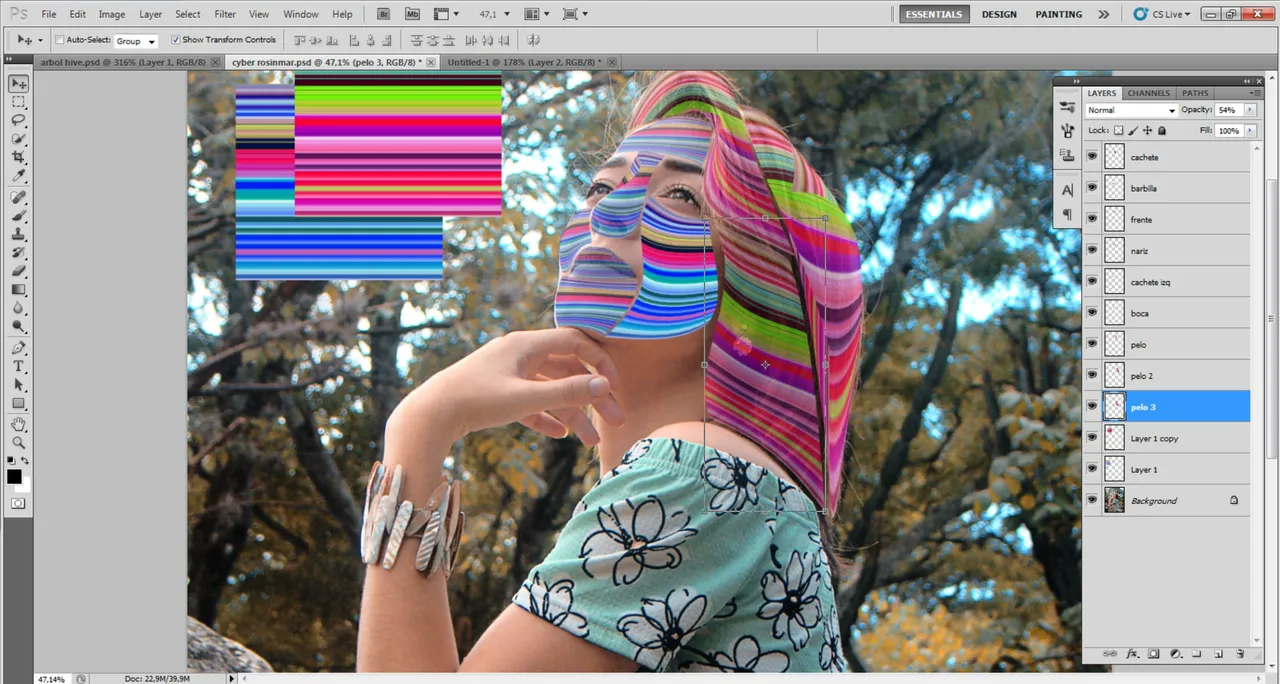
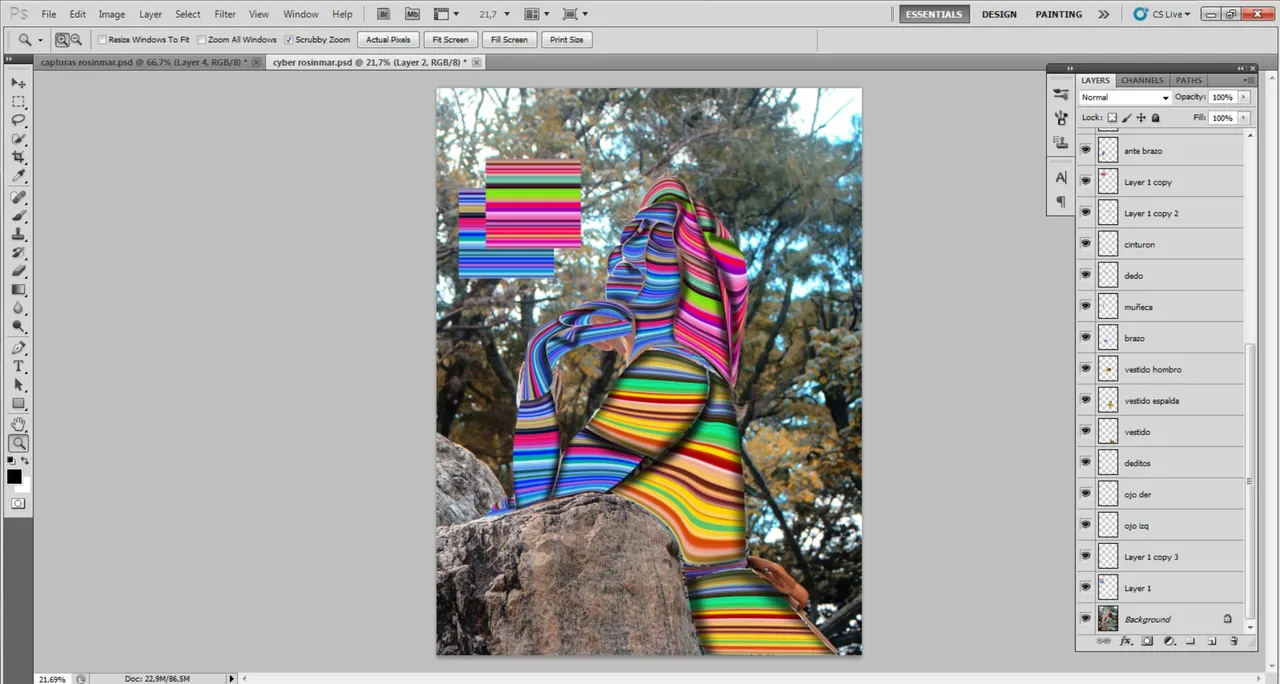
Usa varios colores y varias capas de líneas, dependiendo del fondo a utilizar. Un color para la ropa, otro para el cabello y otro para la piel. Así voy construyendo de arriba hacia abajo.
Use several colors and several layers of lines, depending on the background to be used. One color for the clothes, another for the hair and another for the skin. This way I build from top to bottom.
Después de terminar de contruir la modelo con las capas de líneas de colores, llega un paso muy importante que le da mucha vida al arte y son las sombras. Para esto creo una sola capa de primera donde crearé las sombras, seleccionando capa por capa.
After finishing building the model with the colored line layers, comes a very important step that gives a lot of life to the art and that is the shadows. For this I create a single first layer where I will create the shadows, selecting layer by layer.
Visualizo cómo se ve el arte con todas las capas, atnes de proceder a crear el fondo que tiene que ser colorido y sicodélico.
I visualize how the artwork looks with all the layers, before proceeding to create the background which has to be colorful and psychedelic.
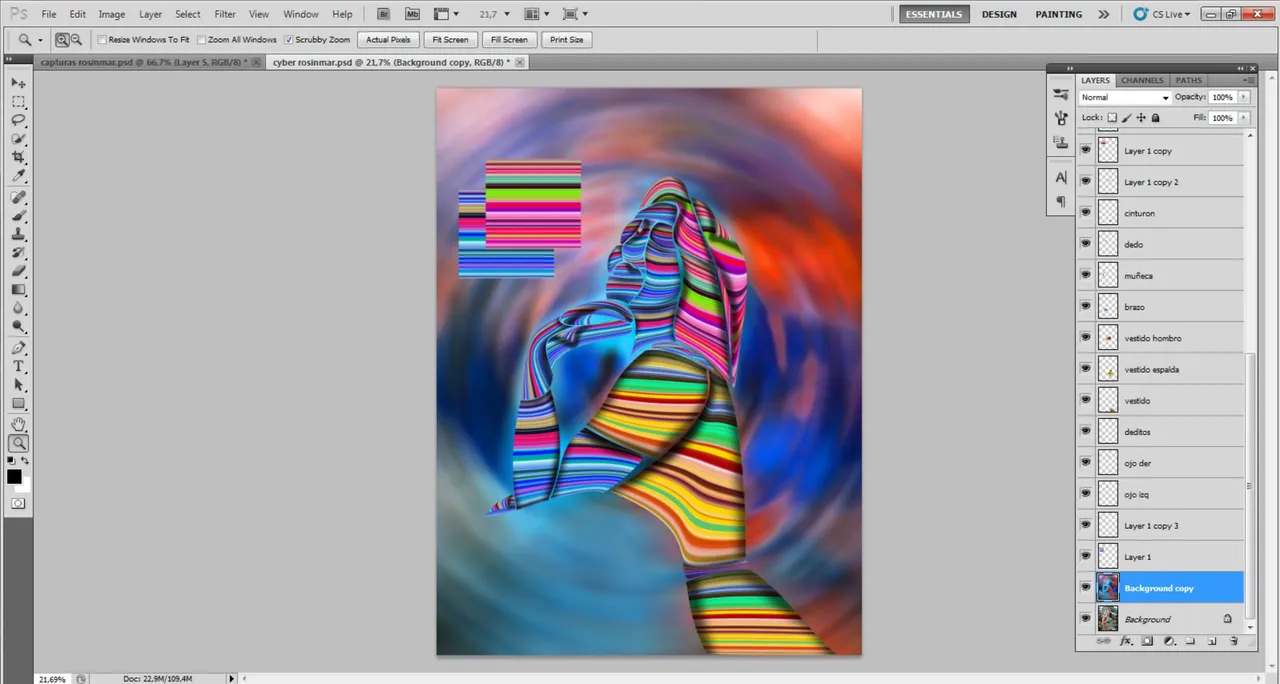
Usé el mismo fondo de la foto original. Lo que hice fue utilizar el efecto de desenfoque gausiano. Después desenfoque radial y le subo la saturación. También modifico el tono. Al final le aplico el filtro de distorción, coordenadas polares.
I used the same background as the original photo. What I did was to use the Gaussian blur effect. Then radial blur and I increase the saturation. I also modify the tone. At the end I apply the distortion filter, polar coordinates.
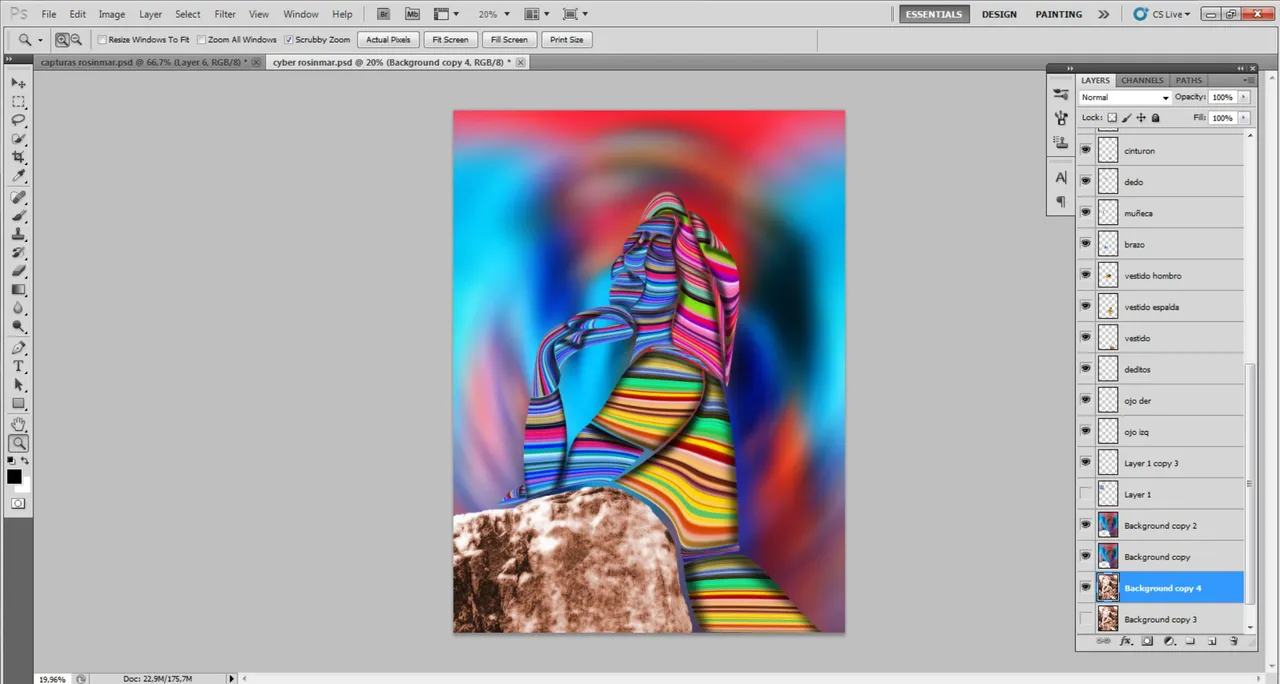
Aquí pruebo con el soporte para su brazo. Primero uso el original y me parecía que chocaba con el resto del arte. Es por esto que decido duplicar el fondo que había creado y lo adapto a la forma de la roca, para luego cambiarle el tono.
Combino las capas para que la figura tenga un solo eecto de capa de trazo y resplandor exterior. Después crea una capa de ajustes para probar diferentes tonos.
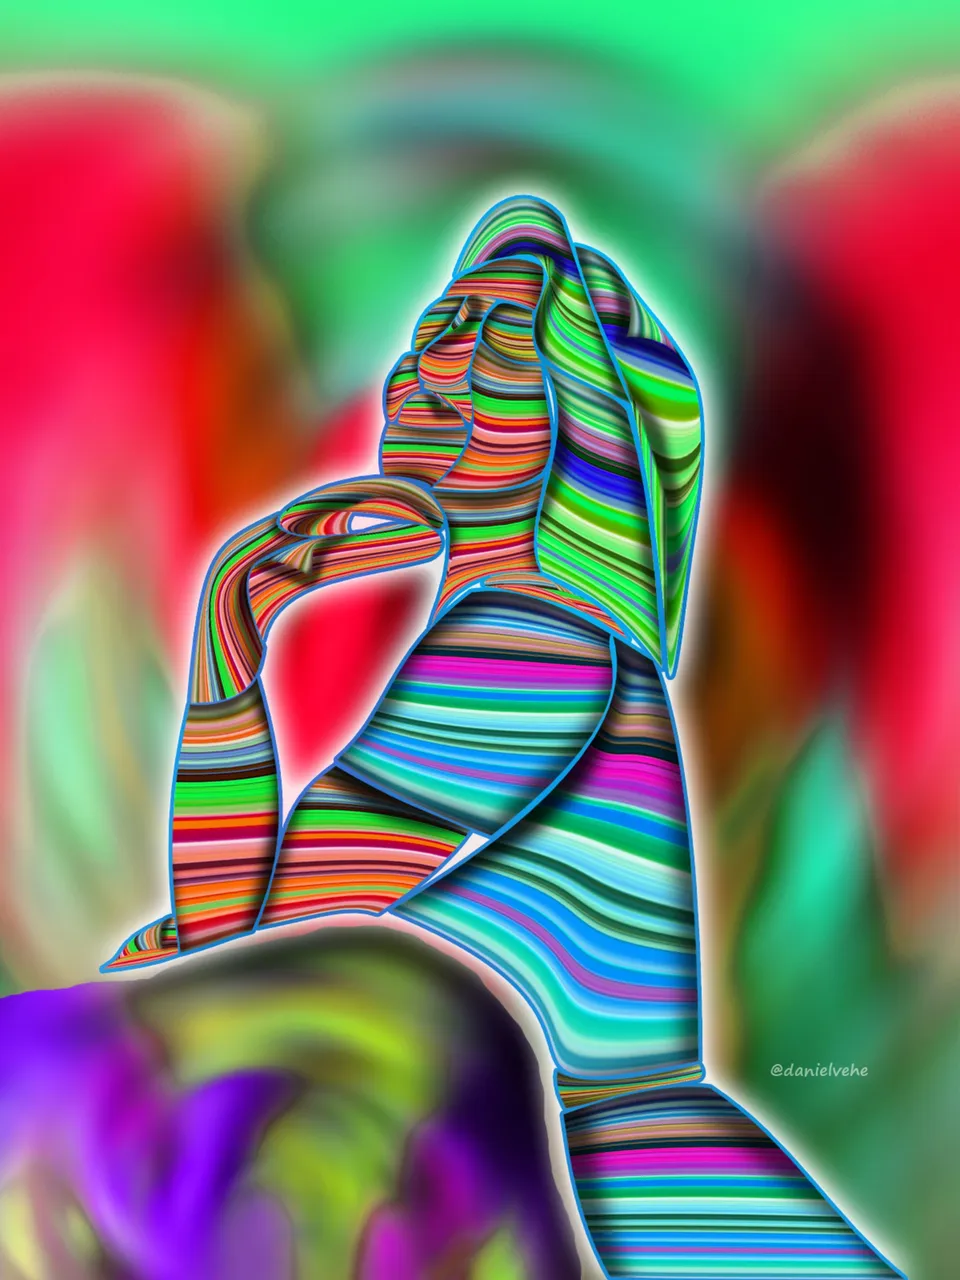
Resultado final.
¿Te guste? ¿Le cambiarías algo?
Here I try the bracket for his arm. First I use the original and it seemed to clash with the rest of the art. That's why I decide to duplicate the background I had created and adapt it to the shape of the rock, and then change the tone.
I combine the layers so that the figure has a single stroke and outer glow layer effect. Then create an adjustment layer to try different tones.
Final result.
Do you like it? would you change anything?
Translated with www.DeepL.com/Translator (free version)