I haven't done a whole lot yet with my new Raspberry Pi, besides dabbling in the same basic computer stuff I do on any other computer, but that is starting to change.
On Friday, there were two special deliveries to my library branch. The first was the outreach tricycle I wrote about earlier. The second was our district's rotating 3D printer. Our turn was interrupted by the COVID-19 shutdown, and the machine was moved to another library to print face shields and other PPE. Now tahat we are beginning to return to normal, our turn was reinstated before it moves on again.
And that means I had the chance to make something.
My monitor has a stand that does not use the same mounting point as the VESA mount holes, so this sparked an idea. Why not mount my Raspberry Pi back there?
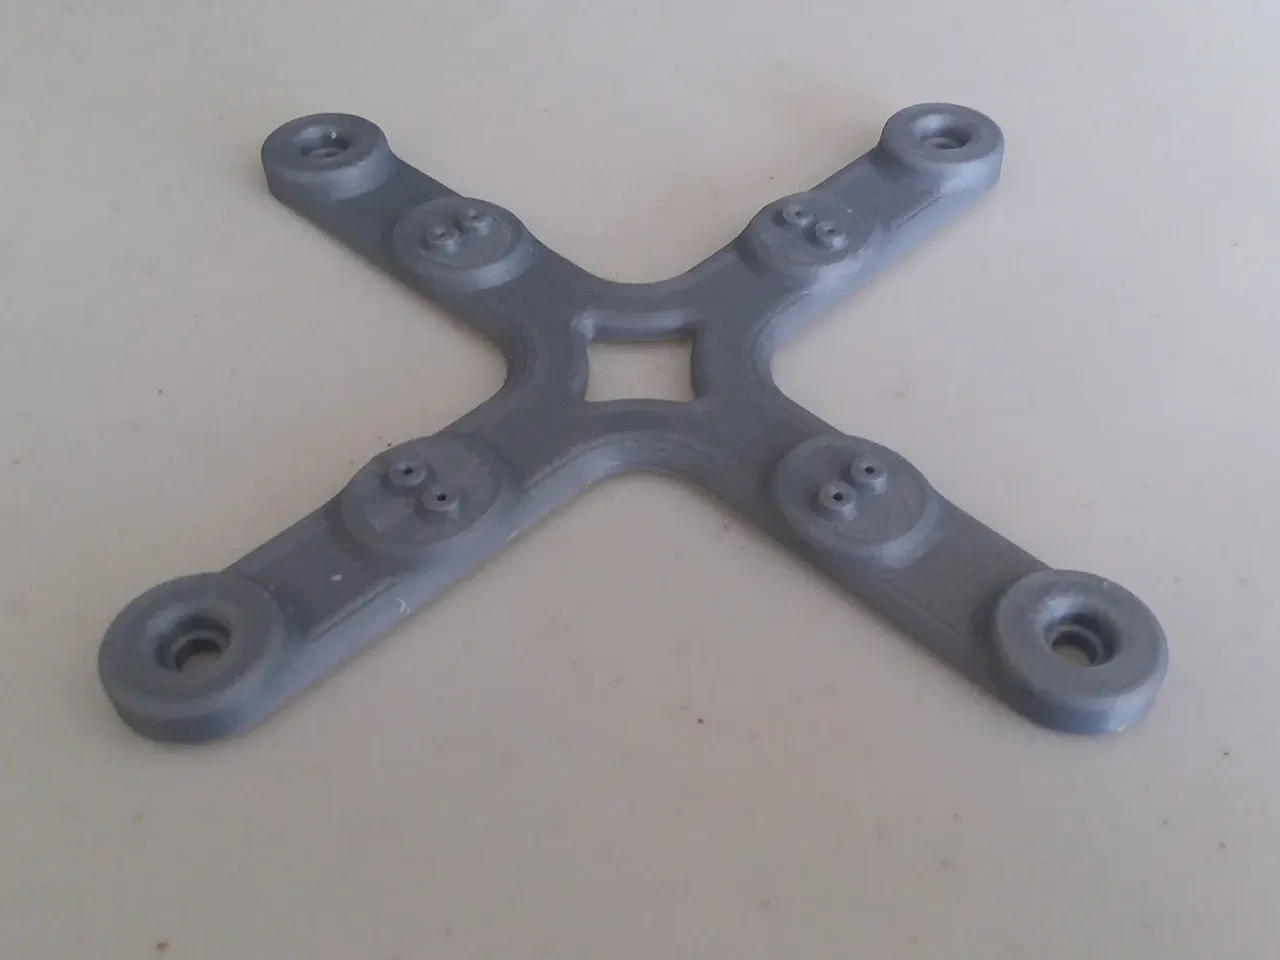
I know my way around CAD, but then another idea occurred to me: I bet I'm far from the first to have this idea. Let's see what other folks have designed already. And sure enough, there were options galore on Thingiverse. I selected this one for its minimalism and printed it out in less than 2 hours on the library machine. It also cost only a bit over $2.00 in filament by our calculations.
Then I just pulled the Pi from the Labists case, used its screws to mount it to this bracket, and ran into a new problem. I didn't have suitable screws to attach the bracket to the monitor. Fortunately, I was able to determine that I would need four M4x10mm screws to put it all together, and the local hardware store had them in stock, so I was able to finish the project with little fuss.
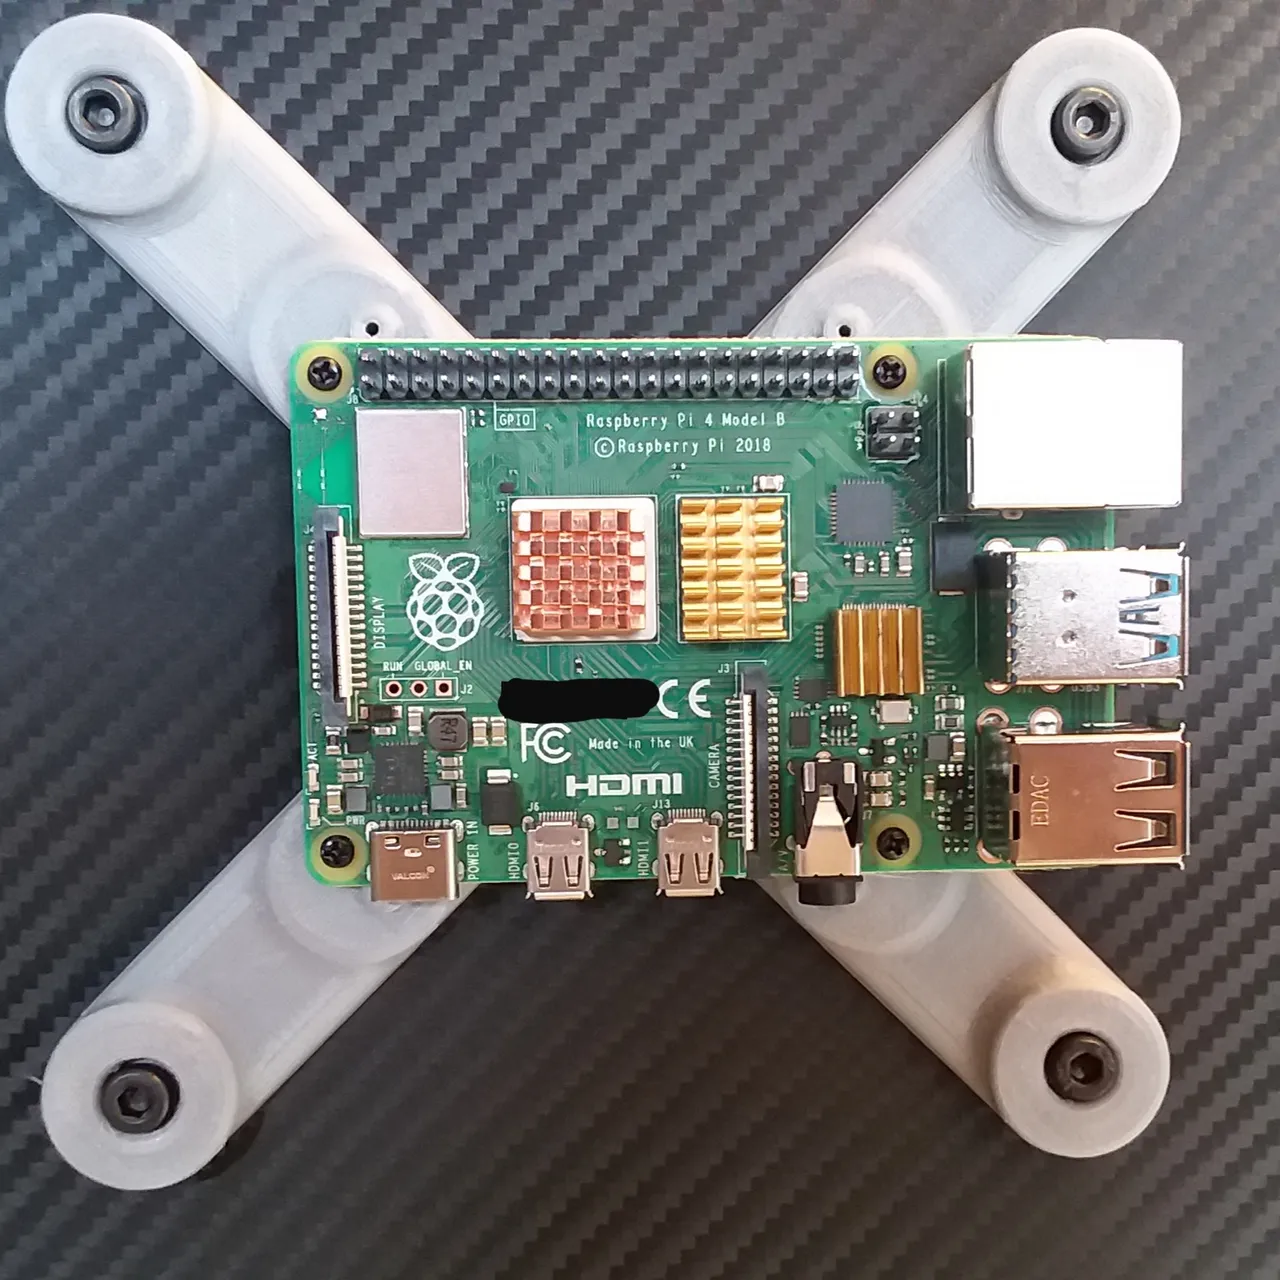
There are two holes on each arm because the mounting holes in these PCBs are not a perfect square pattern. I suppose the entire bracket could just be rotated, but the symmetry of this design minimizes potential frustration for those who don't notice that dimensional detail, too.
The only problems I have with this setup are the risk of something behind the monitor snagging on all those pins, and the issue of the monitor itself seeming to block WiFi signal if it's positioned with the Pi on the side away from the home transmitter. I have had no issues with my wireless mouse, though.
I may fire up TinkerCAD and try remixing the STL file for this design. I am thinking about adding some protective wings to keep stuff from bumping into the Pi, especially if I want to take the kit anywhere. It might ruin the rotational symmetry of this object and interfere with its minimalist aesthetic too much, though, so I may also just use the bracket dimensions from Wikipedia and do my own thing in AutoCAD. We'll see whether I like this setup first. Since I am posting using the Pi right now, so far, so good! I think any of the ideas on Thingiverse might be good options for people who want to keep their computer parts tidily out of the way.
What do you think of this kind of homebrew all-in-one semi-portable PC? What is your favorite raspberry Pi case? How do you prefer to design your own 3D-printable files? Comment below!

