Hello together,
In this documentation I want to show how I have enriched my Hello World Java code to read and write some data via REST API to an elsticsearch database.
In the long run I want to create a simple game with the name "Hammurabi", which uses hive content to influence the run of play.

Preconditions
I have created a naked (Hello World) Springboot Server (@achimmertens/creation-of-the-hammurabi-game-part-1-spring-boot-server-from-scratch) and have put it on a docker container on Raspberry Pi (@achimmertens/creation-of-the-hammurabi-game-part-2-run-the-app-in-a-docker-on-the-raspberrypi).
Also I have installed an elasticsearch database on my Raspberry Pi (@achimmertens/how-i-have-set-up-elasticsearch-and-kibana-on-my-raspberry-pi-to-monitor-token-activities).
Goal
I want to put some new data into my Elasticsearch database. It should look like this:

And with my new Java code, I want to set and read these data. My Springboot Server shall parse the elasticsearch content into a more readable format:

New git branch
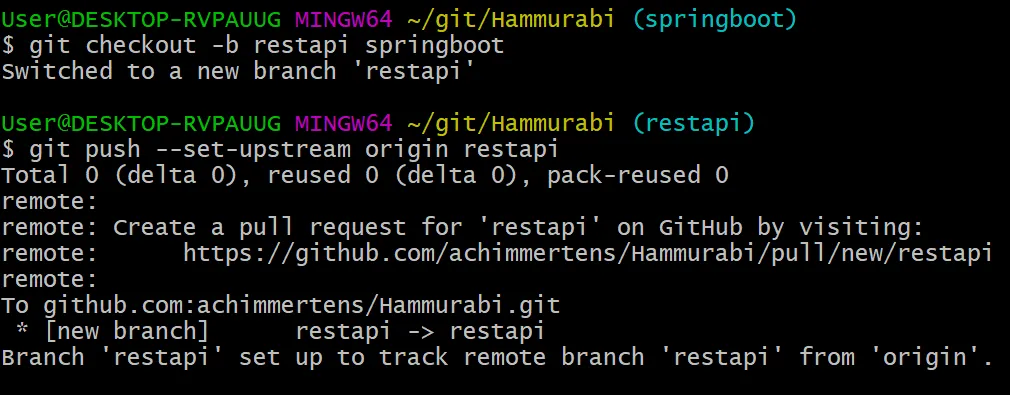
First I create a new branch from my springboot-branch in git and push it to github:
git checkout -b restapi springboot
git push --set-upstream origin restapi
Add the new classes and files
I have found some good documentation for my case How to connect to Elasticsearch from Spring Boot Application - Spring Data Elasticsearch - Part 1
I played a little bit with it until I could use it for my situation. Here, as a result, I created the following files:
application.properties
Here we describe our elasticsearch server and the port. In my case it is:
Resources/application.properties:
elasticsearch.url=raspi:9200
Config.java
This config file uses the spring framework. I didn't change anything from the example I was given, execept:
@EnableElasticsearchRepositories(basePackages = "org.chary.repository")
@ComponentScan(basePackages = { "org.chary.service" })
Org.chary.config/Config.java:
package org.chary.config;

import org.elasticsearch.client.RestHighLevelClient;
import org.springframework.beans.factory.annotation.Value;
import org.springframework.context.annotation.Bean;
import org.springframework.context.annotation.ComponentScan;
import org.springframework.context.annotation.Configuration;
import org.springframework.data.elasticsearch.client.ClientConfiguration;
import org.springframework.data.elasticsearch.client.RestClients;
import org.springframework.data.elasticsearch.config.AbstractElasticsearchConfiguration;
import org.springframework.data.elasticsearch.repository.config.EnableElasticsearchRepositories;

@Configuration
@EnableElasticsearchRepositories(basePackages = "org.chary.repository")
@ComponentScan(basePackages = { "org.chary.service" })
public class Config extends AbstractElasticsearchConfiguration {

    @Value("${elasticsearch.url}")
    public String elasticsearchUrl;

    @Bean
    @Override
    public RestHighLevelClient elasticsearchClient() {
        final ClientConfiguration config = ClientConfiguration.builder()
                .connectedTo(elasticsearchUrl)
                .build();
        return RestClients.create(config).rest();
    }
}
AccountEntity
This is the file that describes the fields we want to add to the database. Be aware, that the getter- and setter- method names must have the same names as the fields and that the fields must have the same names as in Elasticsearch shall appear (or exists). (In this case: "id", "name", "nickname", "logindate")
Org.chary.model/AccountEntity.java:
package org.chary.model;

import org.springframework.data.annotation.Id;
import org.springframework.data.elasticsearch.annotations.*;

@Document(indexName = "account")
@Setting(settingPath = "static/es-settings.json")

public class AccountEntity {

    @Id
    @Field(type = FieldType.Keyword)
    private String id;

    @Field(type = FieldType.Text)
    private String name;

    @Field(type = FieldType.Text)
    private String nickname;

    @Field(type = FieldType.Date, pattern = "uuuu-MM-dd'T'HH:mm:ss.SSSZZ")  //, patternexample = "2022-05-02T06:26:01.489+00:00"
    private String logindate;


    //getters and setters

    public String getId() {
        return id;
    }

    public void setId(String id) {
        this.id = id;
    }

    public String getName() {
        return name;
    }

    public void setUsername(String name) {
        this.name = name;
    }

    public String getLogindate() {
        return logindate;
    }

    public void setLogindate(String logindate) {
        this.logindate = logindate;
    }

    public String getNickname() {
        return nickname;
    }

    public void setNickname(String nickname) {
        this.nickname = nickname;
    }
}
AccountRepository
This is the interface for the repository. I just adapted the class names.
org.chary.repository/AccountRepository.java:
package org.chary.repository;

import org.chary.model.AccountEntity;
import org.springframework.data.elasticsearch.repository.ElasticsearchRepository;
import org.springframework.stereotype.Repository;

@Repository
public interface AccountRepository extends ElasticsearchRepository<AccountEntity, String> {
}
AccountService
This accountservice is the implementation of the interface, which is hidden in the spring framework. This class is the connection to the REST-API world. I just adapted some class names.
org.chary.service/AccountService.java:
package org.chary.service;

import org.chary.model.AccountEntity;
import org.chary.repository.AccountRepository;
import org.springframework.beans.factory.annotation.Autowired;
import org.springframework.stereotype.Service;

@Service
public class AccountService {

    private final AccountRepository repository;

    @Autowired
    public AccountService(AccountRepository repository) {
        this.repository = repository;
    }

    public void save(final AccountEntity account) {
        repository.save(account);
    }

    public AccountEntity findById(final String id) {
        return repository.findById(id).orElse(null);
    }
}
es-settings.json
Resources.static/es-settings.json:
{
  "index": {

  }
}
Overview
This shows my structure of the code:

It works
After finishing this code, I have put it to my raspberry Pi, as described here.
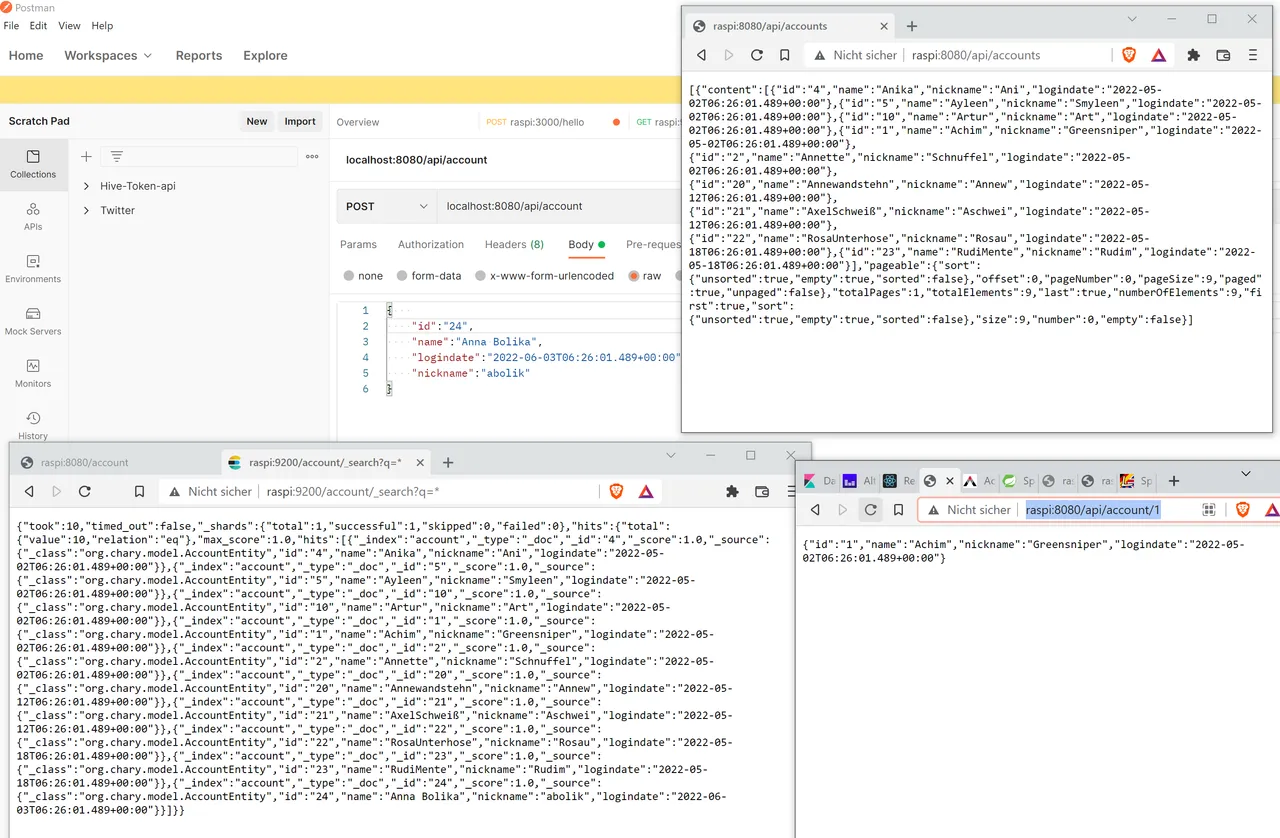
The class Accountcontroller defines how we can access our Java application. There are four possibilities to reach our app:
- http://raspi:8080 -> Hello World, Achim was here! (defined in "HelloController")
- http://raspi:8080/api (only via curl or postman, to put the data)
- http://raspi:8080/api/accounts -> shows all accounts
- http://raspi:8080/api/account/1 -> shows the content of account 1 (or another account)
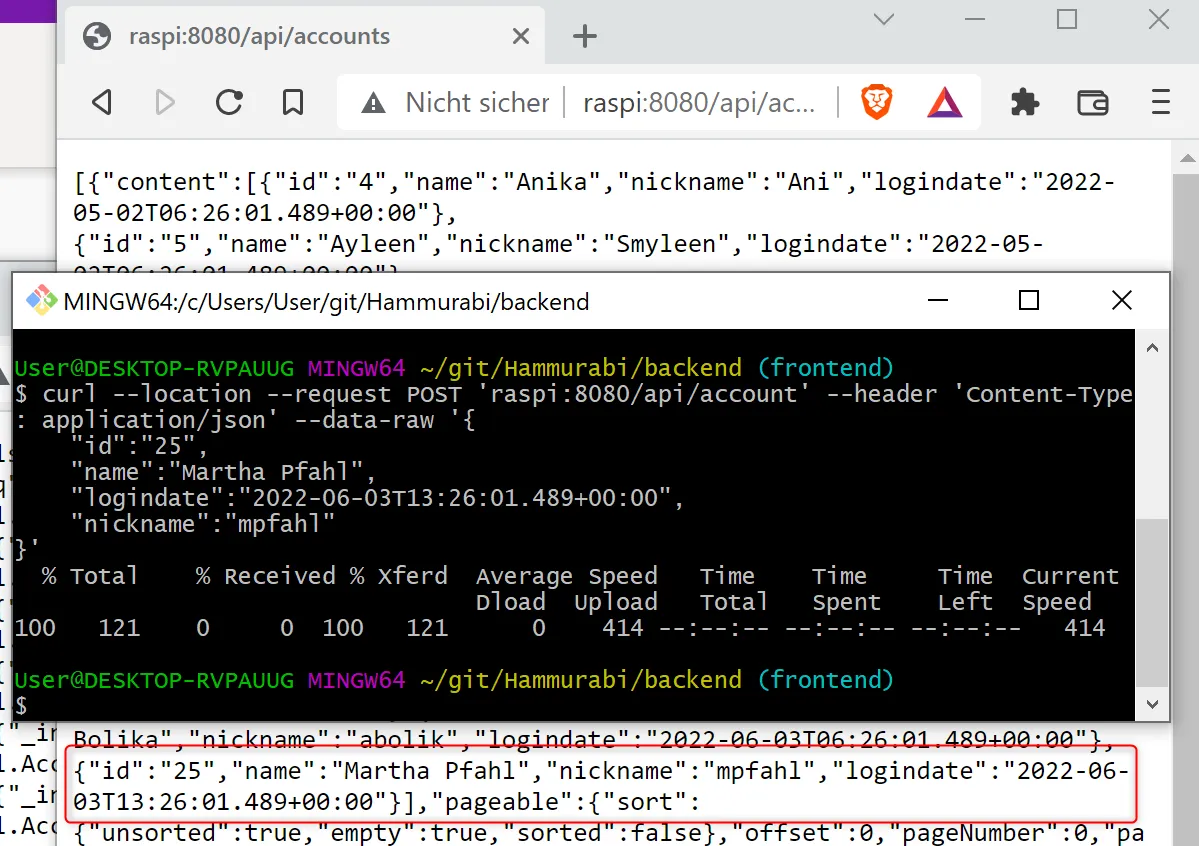
curl --location --request POST 'raspi:8080/api/account' \
--header 'Content-Type: application/json' \
--data-raw '{
    "id":"25",
    "name":"Martha Pfahl",
    "logindate":"2022-06-03T13:26:01.489+00:00",
    "nickname":"mpfahl"
}'
Conclusion
Now we have a Java application, that can fill our elasitcsearch database.
The next step will be the creation of a frontend, which can communicate with the Java code. This will come soon, so stay tuned.
You can also find my (not finished yet) code on github.
Regards, Achim Mertens