Hello Hive-, Java-, node.js-, docker-freaks,
Hello all others,
In this documentation I want to show, how I have connected a REACT node.js server with a simple Java Springboot server via REST API commands. With this I can create a website where a user can change the content of some fields. Then this content is send to the Java (backend) server and the result can be shown on the website.
In the long run I want to create a simple game with the name "Hammurabi", which uses hive content to influence the run of play.

Precondition:
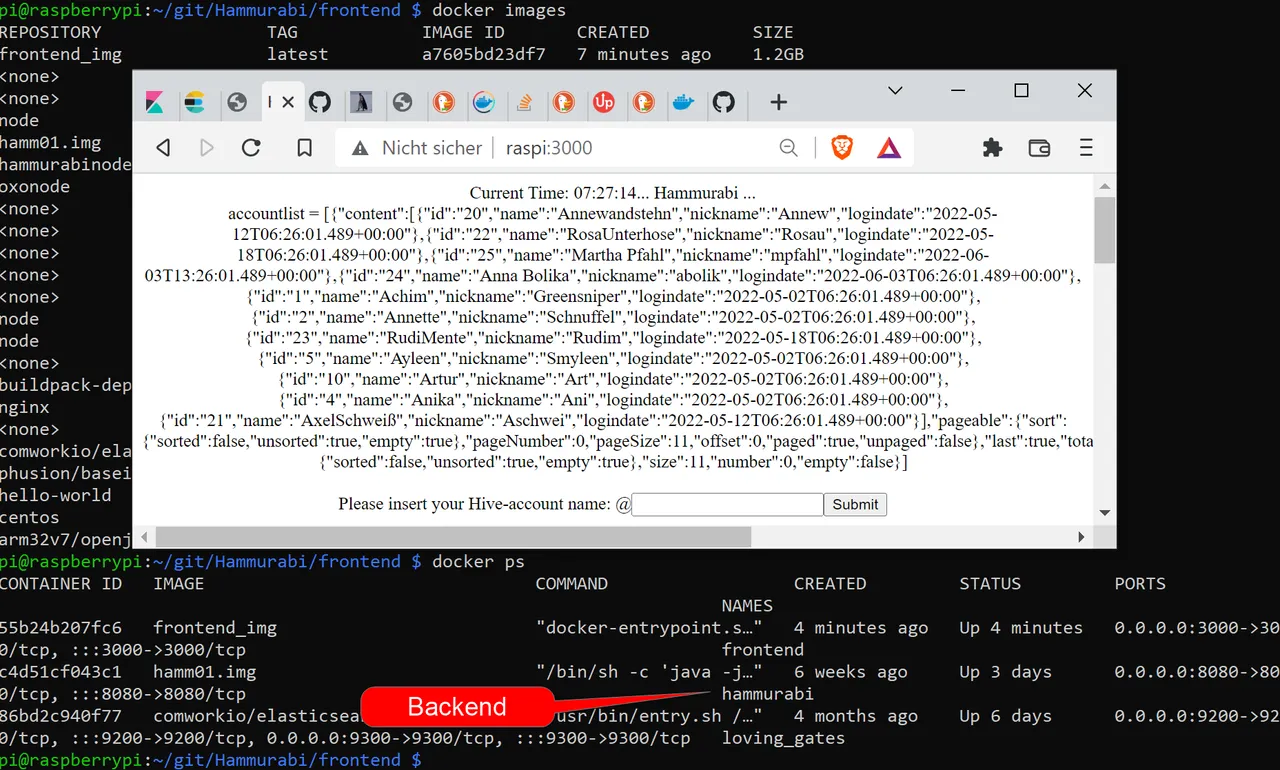
We have a docker container running, that has the basic java backend-code and frontend-code and both can be accessed via http:
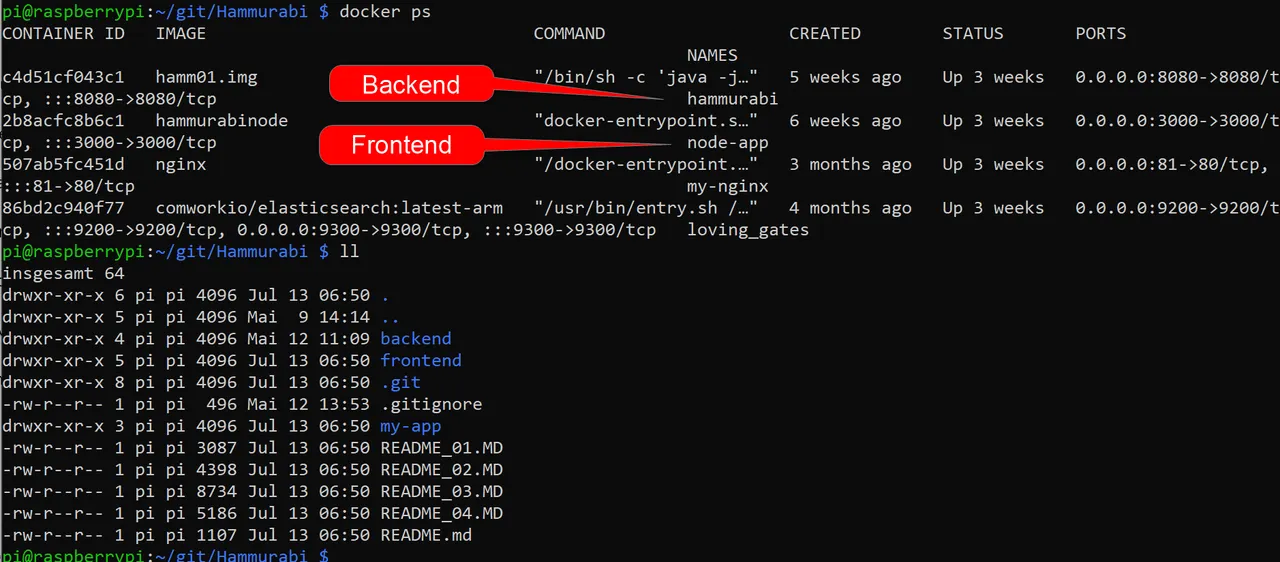
Backend:

Frontend:

Here is described, how I got there.
Adapt these four react files:
Now we need to adapt the hello world node.js code so, that it connects to the backend webservice.
For this, we adapt/create index.js, index.html, App.css and App.jsx.
(This is just an example and what it means is descriped further down in this post.)
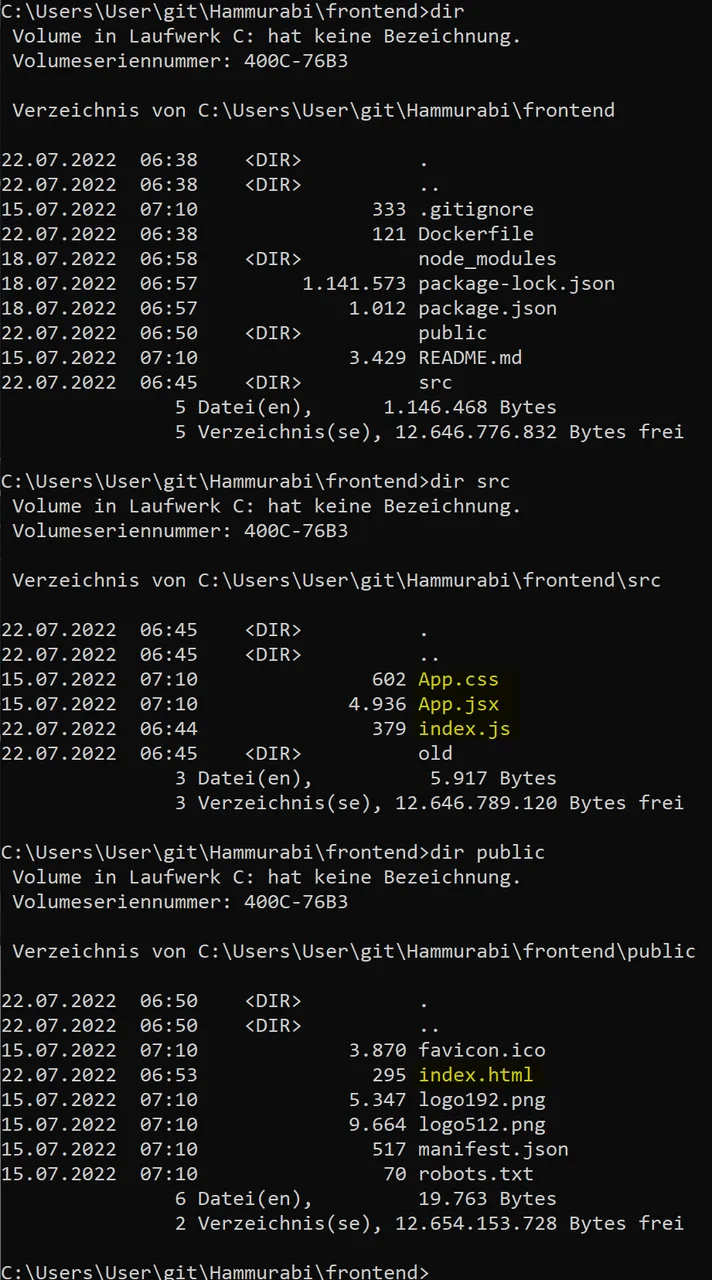
public/index.js:
import React from 'react';
import ReactDOM from 'react-dom';
import App from './App.jsx';
ReactDOM.render(<App />, document.getElementById('app'));
src/index.html:
<!DOCTYPE html>
<html lang = "en">
    <head>
        <meta charset = "UTF-8">
        <title>Hammurabi App</title>
    </head>
    <body>
        <div id = "app"></div>
        <script src = "index.js"></script>
        <div id="my-fruit-list"> Hier könnte ein anderes Script ausgeführt werden.</div>
    </body>
</html>
src/App.css
.App {
  text-align: center;
}
.App-logo {
  height: 40vmin;
  pointer-events: none;
}
@media (prefers-reduced-motion: no-preference) {
  .App-logo {
    animation: App-logo-spin infinite 20s linear;
  }
}
.App-header {
  background-color: #282c34;
  min-height: 100vh;
  display: flex;
  flex-direction: column;
  align-items: center;
  justify-content: center;
  font-size: calc(10px + 2vmin);
  color: white;
}
.App-link {
  color: #61dafb;
}
@keyframes App-logo-spin {
  from {
    transform: rotate(0deg);
  }
  to {
    transform: rotate(360deg);
  }
}
src/App.jsx:
import './App.css';
import React from 'react';
import ReactDOM from 'react-dom';
class App extends React.Component {
constructor(props) {
super(props);
this.state = {
account: 'Achim',
id: null,
error: null,
isLoaded: false,
accountList: [],
accounts:[],
content: [],
data: []
};
this.onInputchangeName = this.onInputchangeName.bind(this);
this.onInputchangeId = this.onInputchangeId.bind(this);
this.handleGET = this.handleGET.bind(this);
}
componentDidMount() {
this.handleAccounts()
this.handleGET()
}
onInputchangeName(event) {
this.setState({
account: event.target.value
});
console.log("Id von " + this.state.account + " ist: " + this.state.id);
}
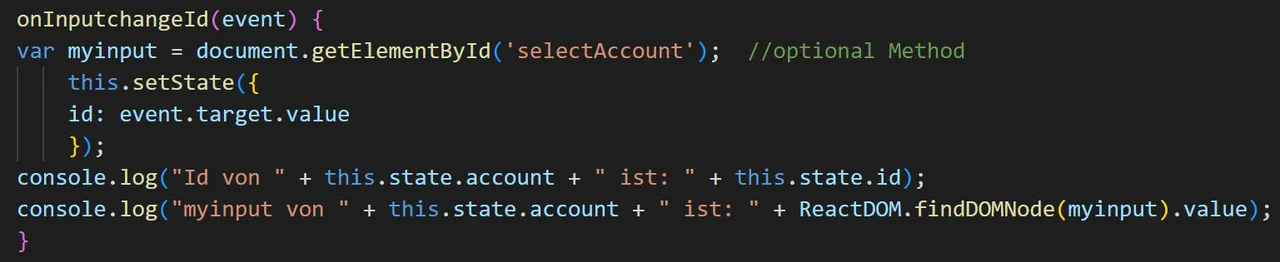
onInputchangeId(event) {
var myinput = document.getElementById('selectAccount'); //optional Method
this.setState({
id: event.target.value
});
console.log("Id von " + this.state.account + " ist: " + this.state.id);
console.log("myinput von " + this.state.account + " ist: " + ReactDOM.findDOMNode(myinput).value);
}
handleAccounts() {
fetch("http://localhost:8080/api/accounts/")
.then(res => res.json())
.then(
(result) => {
this.setState({
isLoaded: true,
accountList: (result)
})
},
(error) => {
this.setState({
isLoaded: true,
error
});
})
.then (console.log("Fetch accountList: " + JSON.stringify(this.state.accountList)))
}
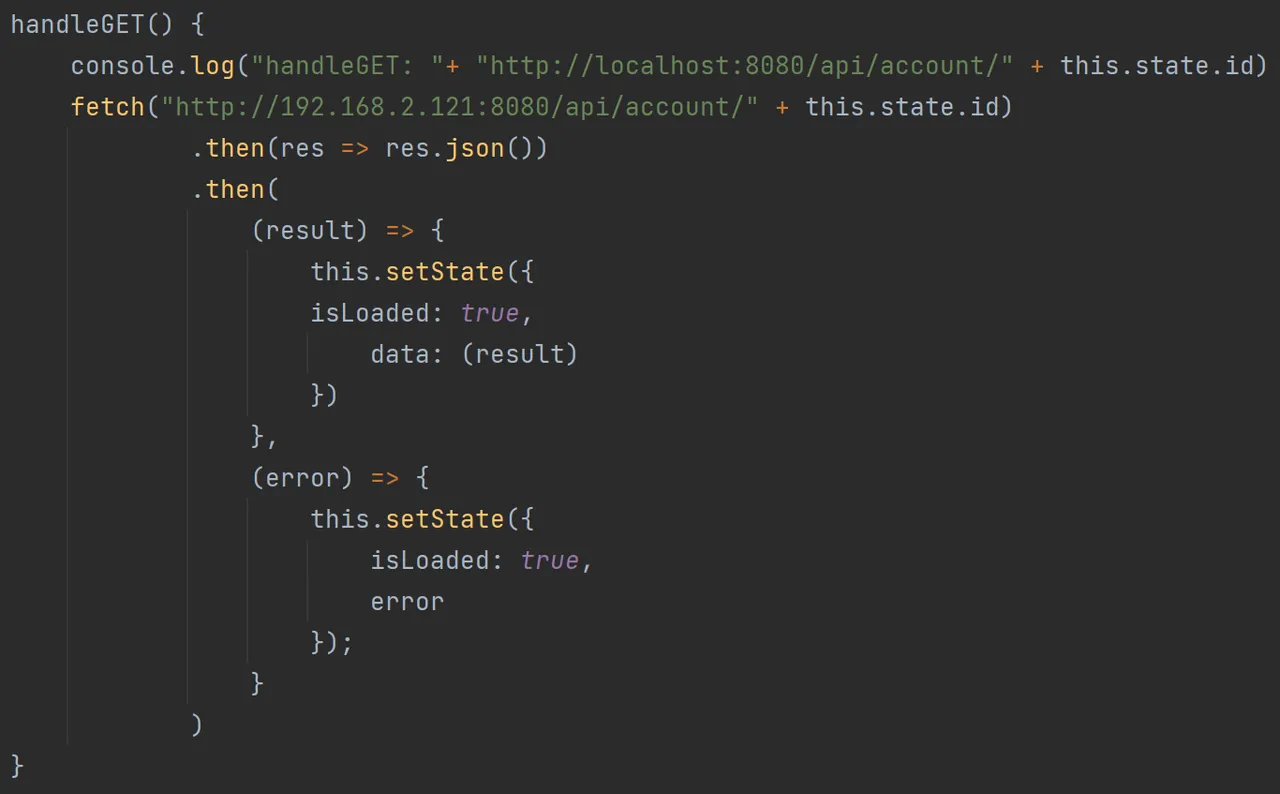
handleGET() {
console.log("handleGET: "+ "http://localhost:8080/api/account/" + this.state.id)
fetch("http://localhost:8080/api/account/" + this.state.id)
.then(res => res.json())
.then(
(result) => {
this.setState({
isLoaded: true,
data: (result)
})
},
(error) => {
this.setState({
isLoaded: true,
error
});
}
)
}
render()
{
const { error, isLoaded, data } = this.state;
var accountlist = this.state.accountList;
var accountString =JSON.stringify(accountlist);
var greensniperimg =" console.log("accountlist: " + JSON.stringify(accountlist));
if (this.state.isLoaded) {
return (
<div className="App">
Current Time: {new Date().toLocaleTimeString()}
... Hammurabi ... <br/>
accountlist = {JSON.stringify(accountlist)}
<br/><br/>
Please insert your Hive-account name: @
<input
name="account"
type="text"
//value={this.state.account}
onChange={this.onInputchangeName}
/>
<button value={this.state.account} onClick={this.onInputchangeName}>Submit</button>
<br/> <br/>
<div>Der Name lautet: {this.state.account} </div>
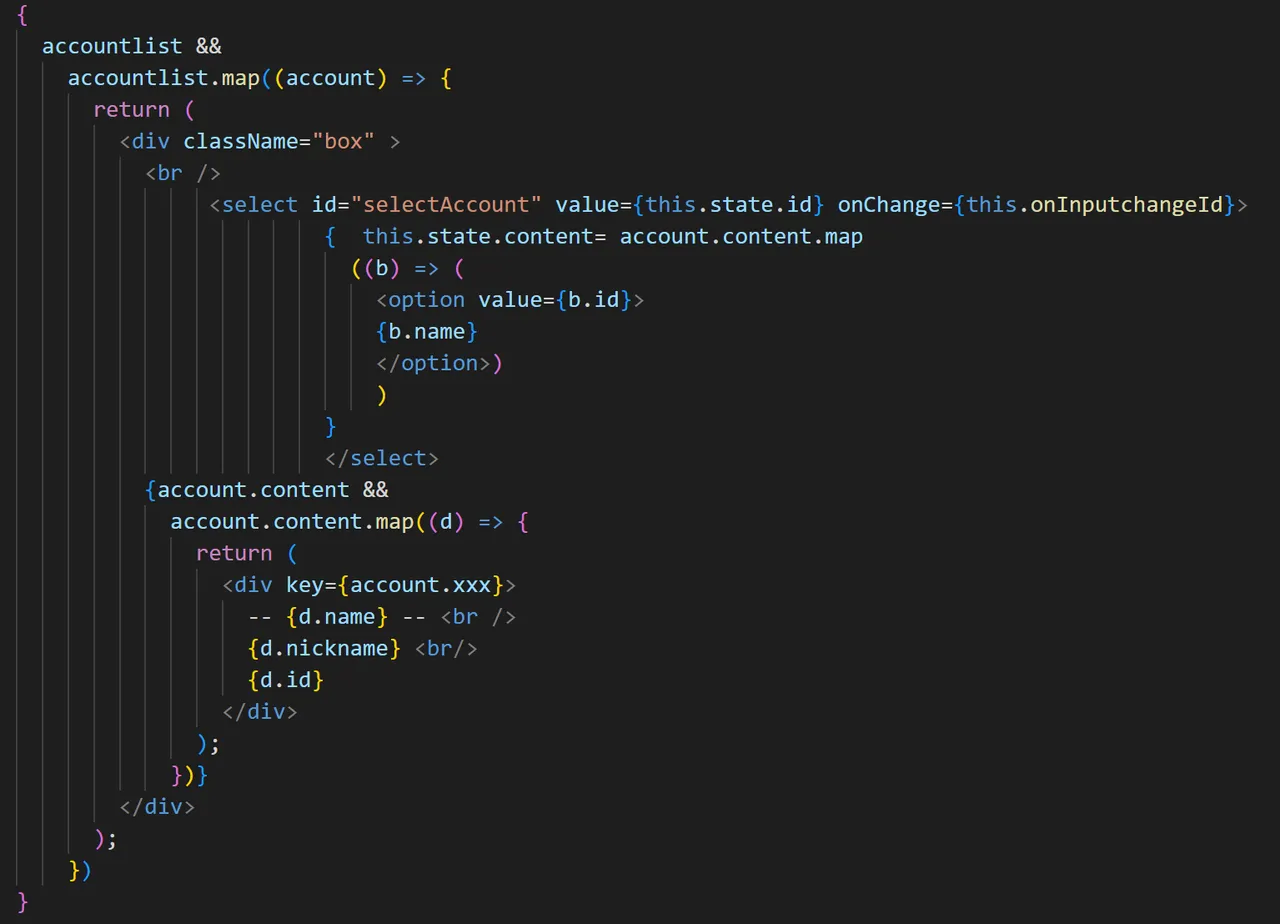
{
accountlist &&
accountlist.map((account) => {
return (
<div className="box" >
<br />
<select id="selectAccount" value={this.state.id} onChange={this.onInputchangeId}>
{ this.state.content= account.content.map
((b) => (
<option value={b.id}>
{b.name}
</option>)
)
}
</select>
{account.content &&
account.content.map((d) => {
return (
<div key={account.xxx}>
-- {d.name} -- <br />
{d.nickname} <br/>
{d.id}
</div>
);
})}
</div>
);
})
}
<button onClick={this.handleGET} className="btn btn-primary">Account</button>
<hr />
ID = {JSON.stringify(data.id)} <br/>
Name = {JSON.stringify(data.name)} <br/>
Nickname = {JSON.stringify(data.nickname)} <br/>
Logindate = {JSON.stringify(data.logindate)} <br/>
<img src={greensniperimg} />
<hr />
</div>
)
}
}}
export default App;
console.log("accountlist: " + JSON.stringify(accountlist));
if (this.state.isLoaded) {
return (
<div className="App">
Current Time: {new Date().toLocaleTimeString()}
... Hammurabi ... <br/>
accountlist = {JSON.stringify(accountlist)}
<br/><br/>
Please insert your Hive-account name: @
<input
name="account"
type="text"
//value={this.state.account}
onChange={this.onInputchangeName}
/>
<button value={this.state.account} onClick={this.onInputchangeName}>Submit</button>
<br/> <br/>
<div>Der Name lautet: {this.state.account} </div>
{
accountlist &&
accountlist.map((account) => {
return (
<div className="box" >
<br />
<select id="selectAccount" value={this.state.id} onChange={this.onInputchangeId}>
{ this.state.content= account.content.map
((b) => (
<option value={b.id}>
{b.name}
</option>)
)
}
</select>
{account.content &&
account.content.map((d) => {
return (
<div key={account.xxx}>
-- {d.name} -- <br />
{d.nickname} <br/>
{d.id}
</div>
);
})}
</div>
);
})
}
<button onClick={this.handleGET} className="btn btn-primary">Account</button>
<hr />
ID = {JSON.stringify(data.id)} <br/>
Name = {JSON.stringify(data.name)} <br/>
Nickname = {JSON.stringify(data.nickname)} <br/>
Logindate = {JSON.stringify(data.logindate)} <br/>
<img src={greensniperimg} />
<hr />
</div>
)
}
}}
export default App;
Create a docker file from it
Adapt the Dockerfile:
cd ~/git/Hammurabi/frontend
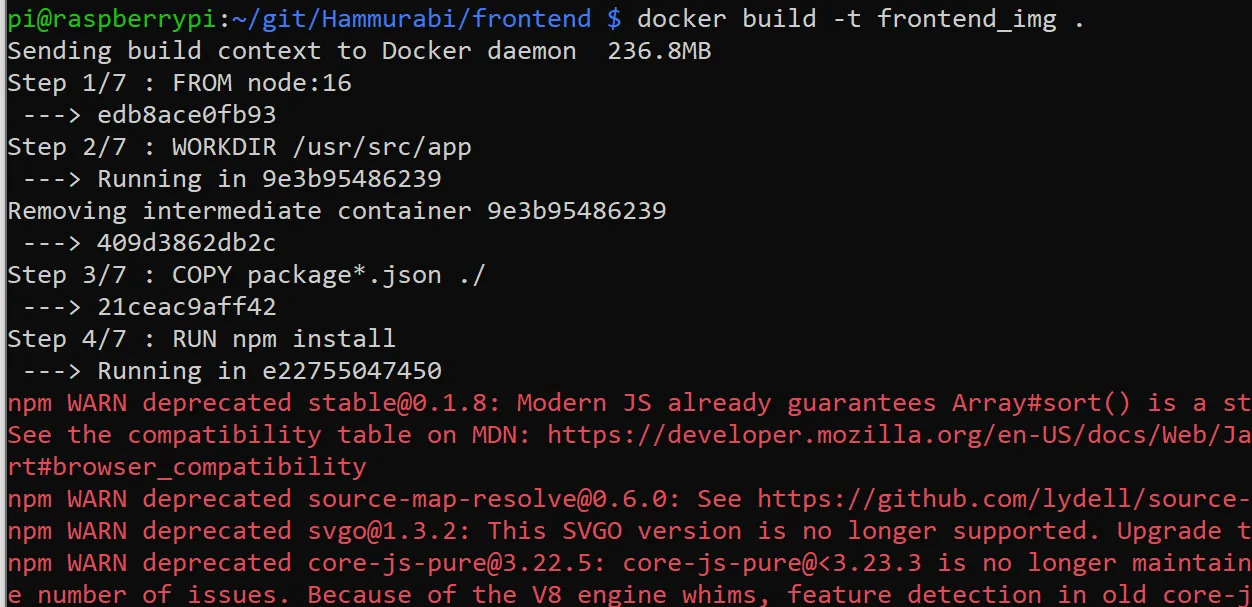
Now let's create a Dockerfile with the following content:
FROM node:16
WORKDIR /usr/src/app
COPY package*.json ./
RUN npm install
COPY . .
EXPOSE 3000
CMD ["npm", "start"]
(stop and delete if it exists, to redeploy the stuff:
docker stop frontend
docker rm frontend
docker rmi frontend_img
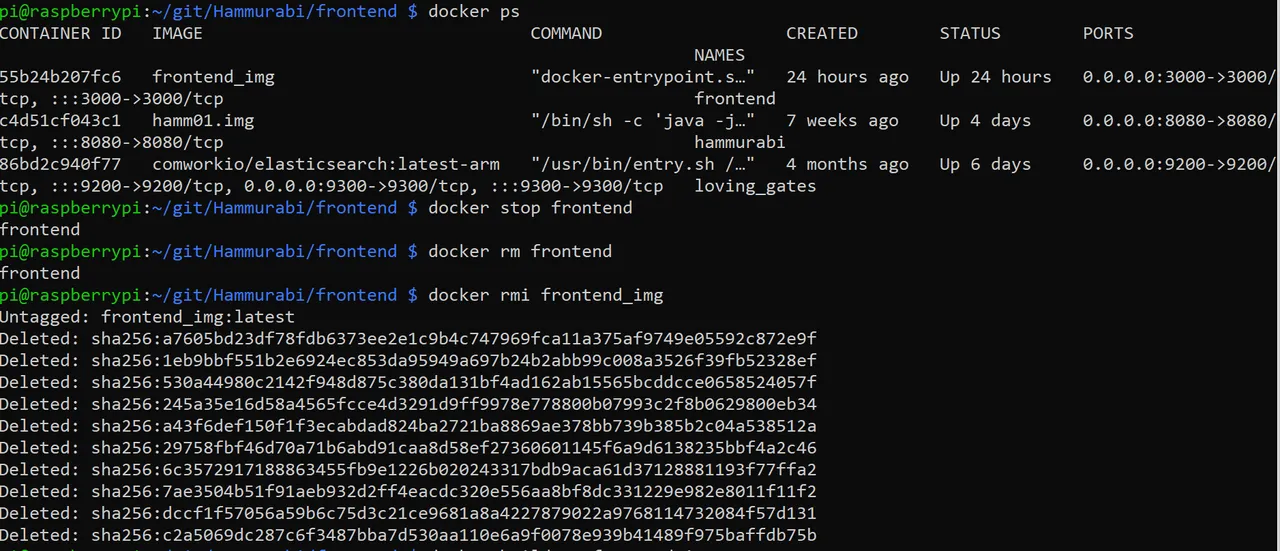
)
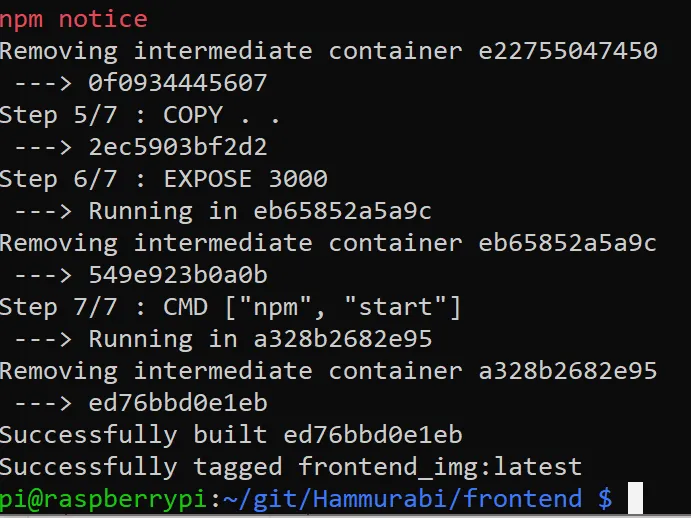
docker build -t frontend_img .
(This takes about five minutes at the first time.)
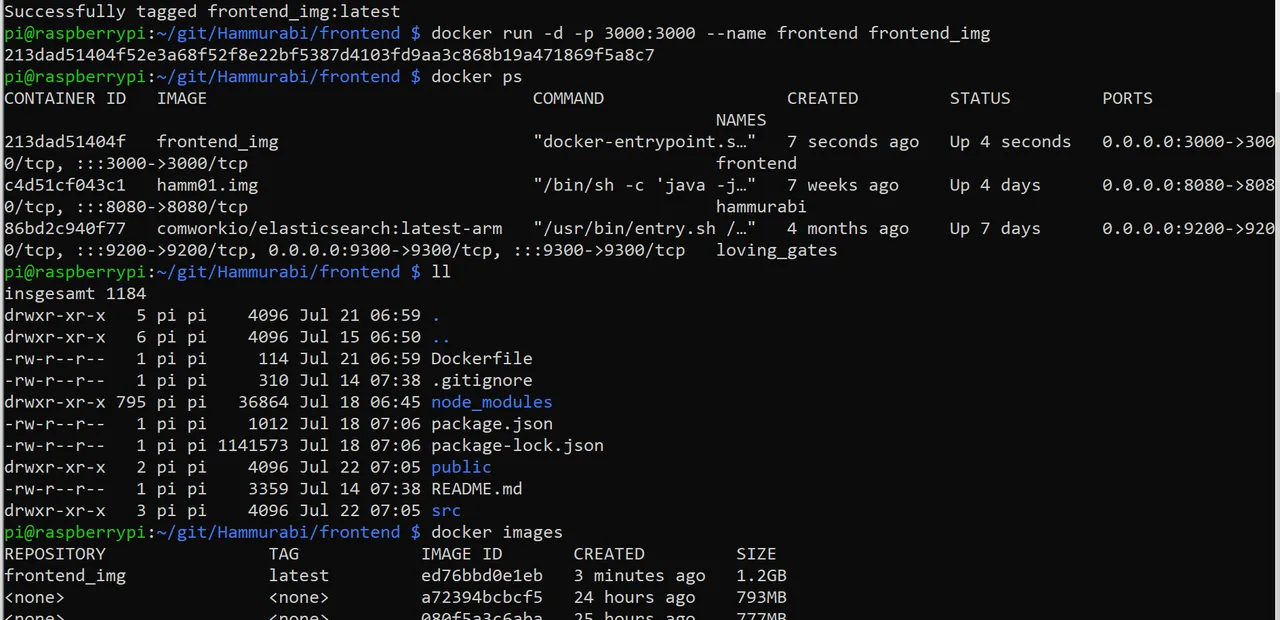
docker run -d -p 3000:3000 --name frontend frontend_img
(or, if you want to see what is happening:
docker run -p 3000:3000 --name frontend frontend_img
)
You can see the result on the browser:
What is the result and what does it mean
We get a page that looks like this:
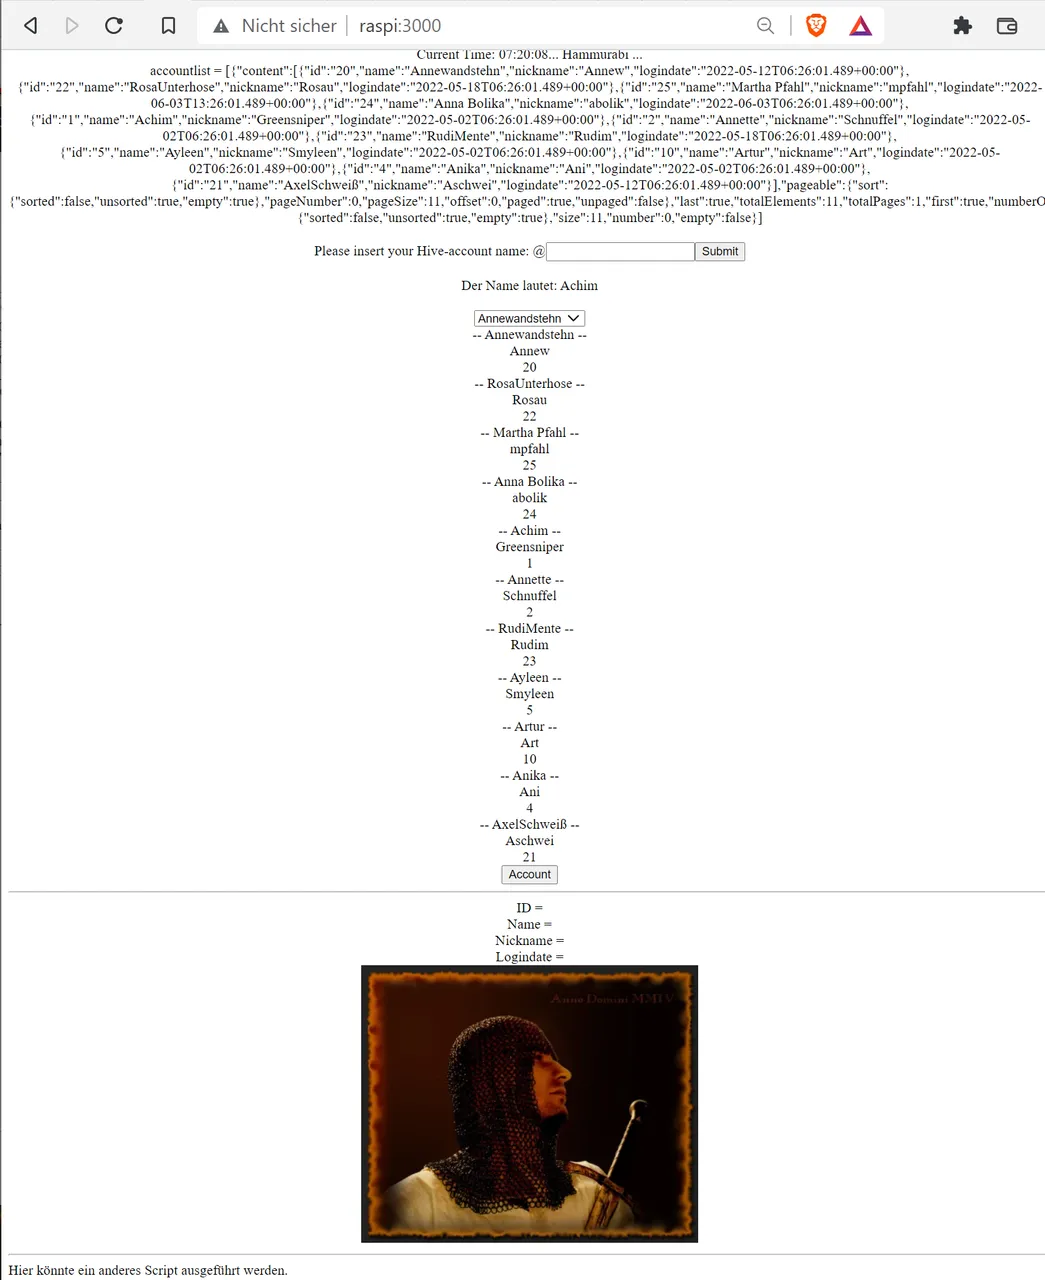
So, this is just a proof of concept.
Let's go through the parts:
In our browser we can see on the top of the page the following:
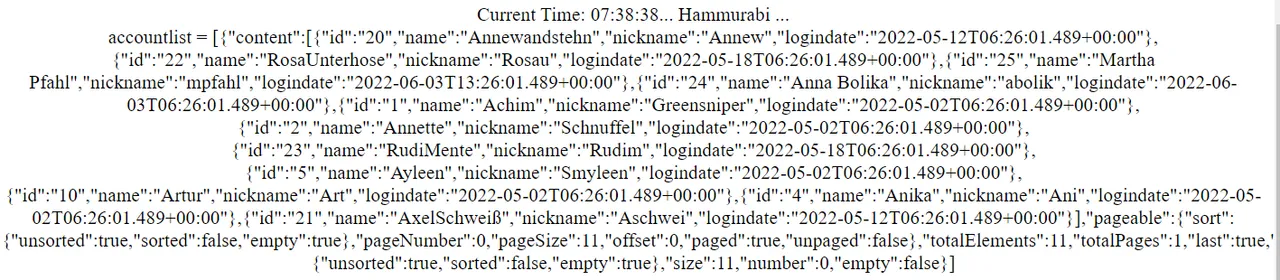
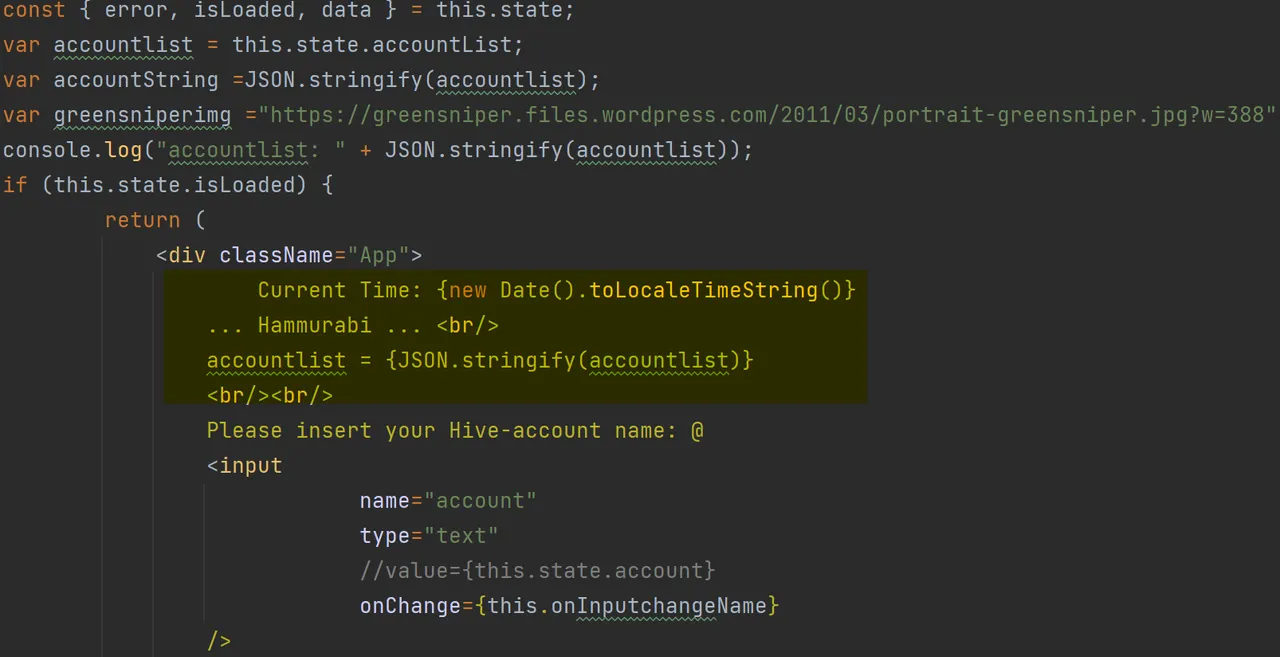
This part is created in App.jsx in the render method at the beginning:
At first we see the current time, followed by a "… Hammurabi …" and a new line.
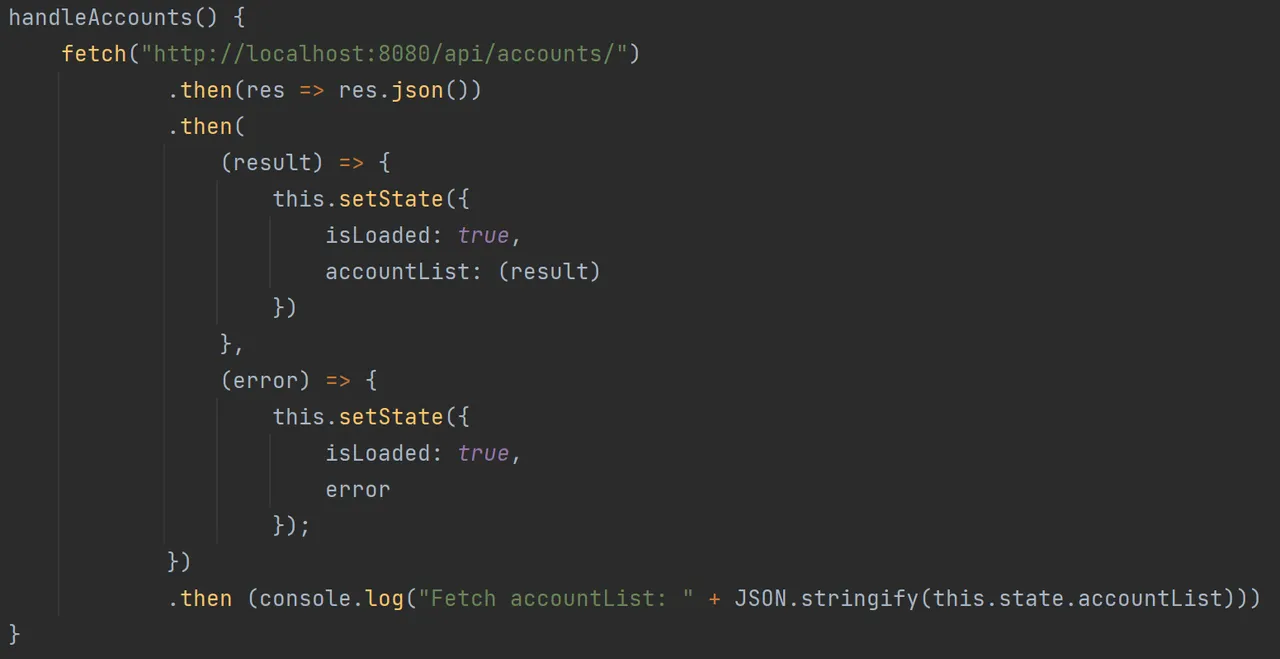
Then the content of "accountlist" is shown. This is the content of "this.state.accountList". We can see the string of the JSON result, that was fetched via the method handleAccounts.
http://localhost:8080/api/accounts is the address of our backend, which is running in another docker container.
Then we see some text and an input field:

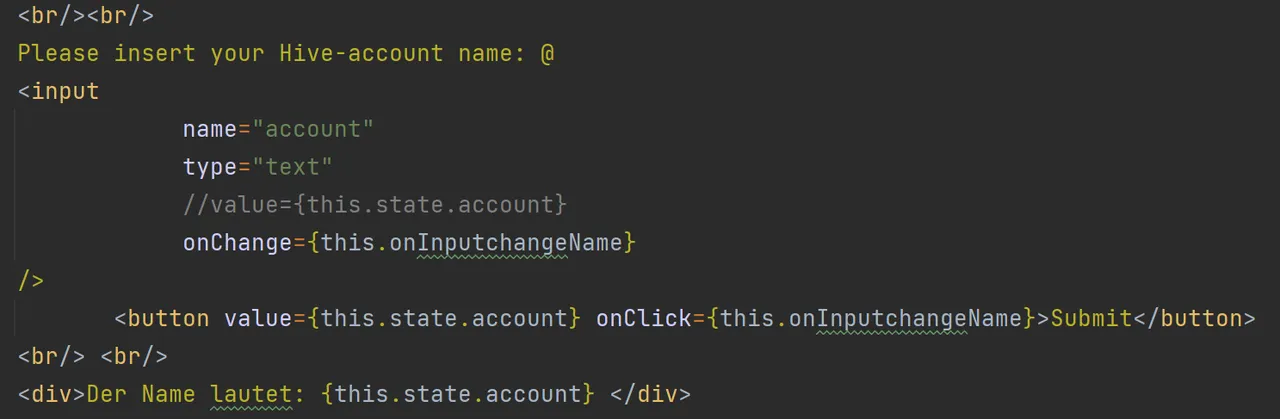
The content of the name is changed directly, when we type in something into the input field (without clicking on submit):
This is because with each change we trigger "onInputchangeName", which changes the content of this.state.account:
So the button is redundant and obsolete, and doesn't work here.
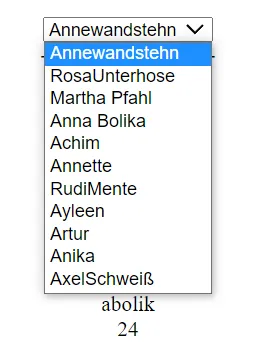
Now we see:
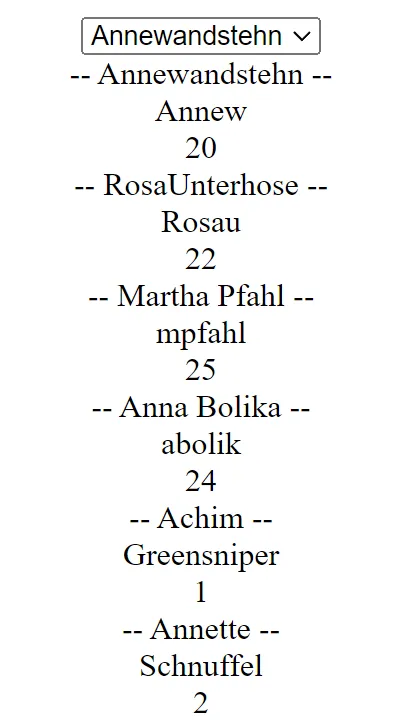
This comes from:
This was the hardest part. I wanted to have a) a list of accounts and b) I wanted to select one of them and c) I wanted to get more information about the selected item.
I worked with cascaded json data, so that I can get the content of i.e. "JSON.stringify(this.state.content[0].id[2]". But this workes (for me) only for test-data (read from a file) and not with real data, taken from an API.
So I took this workaround:
The select-function creates a list of accounts (account.content.map, iteration level 1). This list contains the ids of the accounts and exchanges, for the selection menu, the id-list into a name-list:
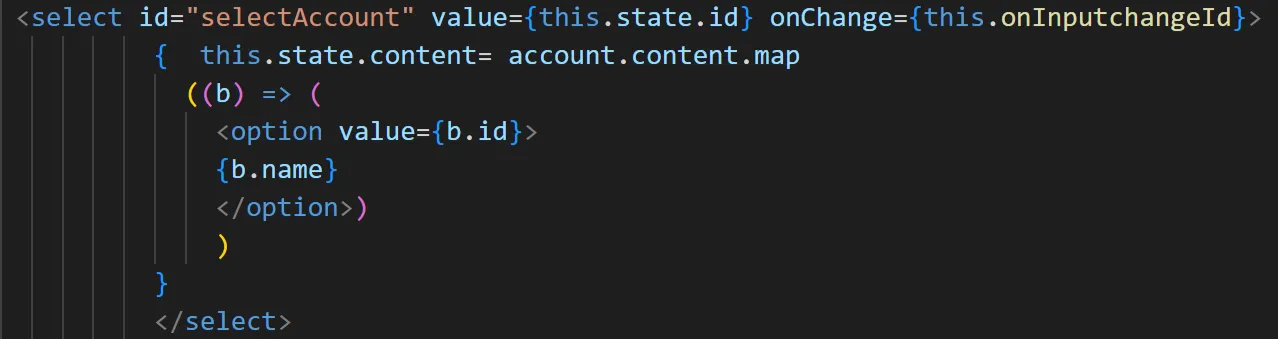
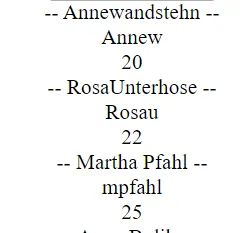
This part displays for each entry the name, nickname and ID:

When you select a person in the selectfield, the function {this.onInputchangeId} is called. It fills the variable "this.state.id" with the selected id:

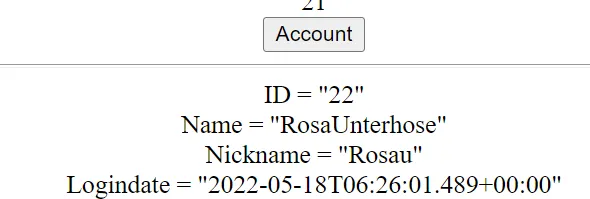
Now, when you click on the button "Account", the whole dataset for this id is fetched from the API (via this.handleGET).
And now we can read the rest of the dataset:

And at the end, just as a small gimmick, a picture from the web is displayed:

Conclusion
It took several month for me to get that "far", as I am a total beginner in Javascript and node.js
It is not mutch, but it is a proof of concept, that I can create a website, which connects to a REST API and reads some content. This content is then displayed and the user is able to interact with the data. The user can select something and more data is fetched from the database.
The next topic is to put some new created data into the database. So, stay tuned!
Regards, Achim Mertens