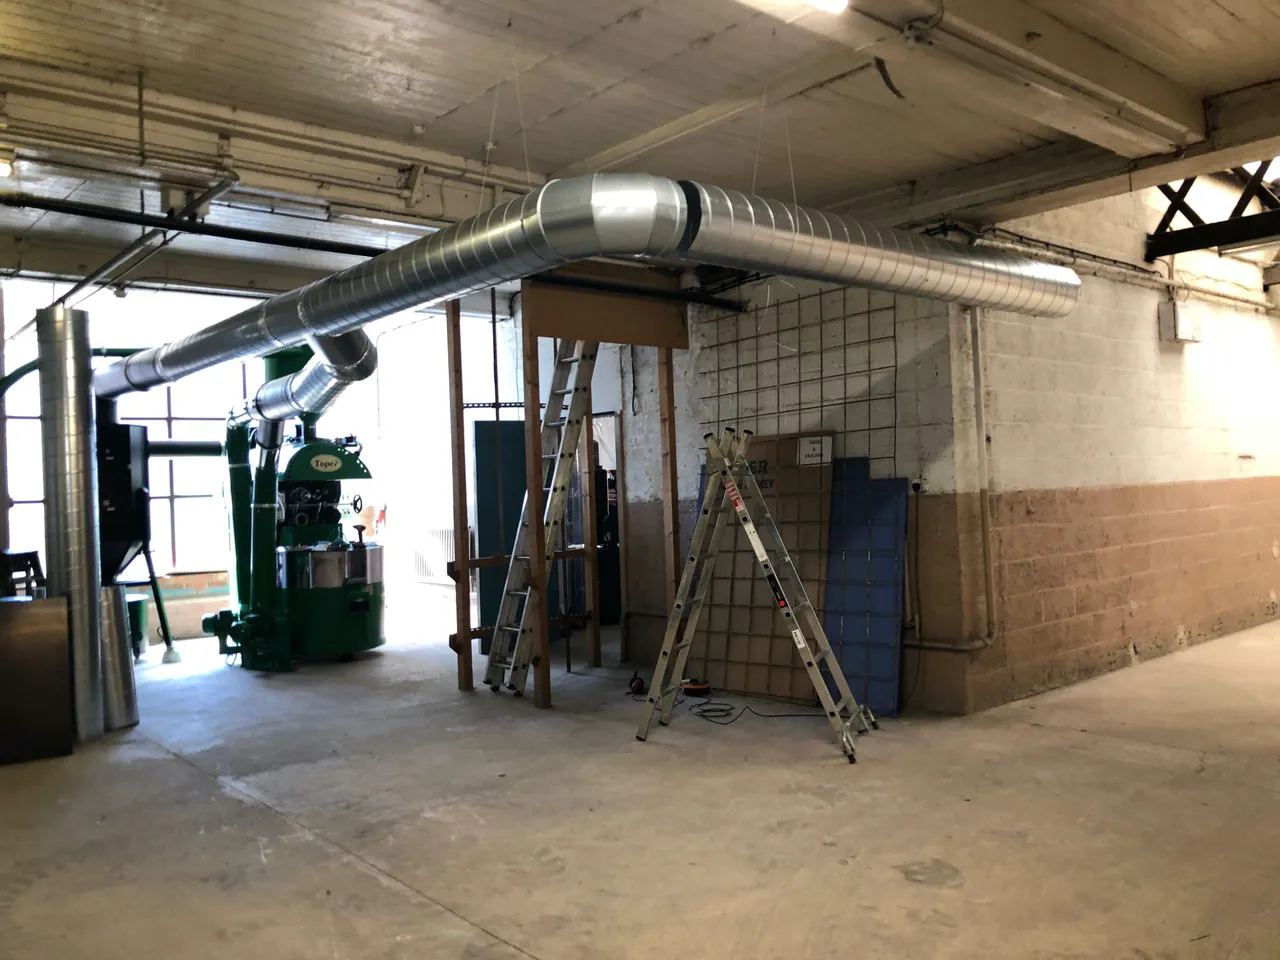
Last Friday night this was the position of my ducting hanging progress,I had run the 300mm ducting straight from the roaster chaff collector, added a Y connector to patch in the cooling feed which was 300m but lower, joined them up to make one outlet stream and run enough length that I could then fit a 90 degree elbow to then head to point I needed to reach to take the ducting up and out through the roof and outside.
But working until late on Friday night I had the full 3m section of 300mm ducting hanging to the right - but persuading it to push fit onto the 90 degree elbow was frustrating me. That 3m section is not light, and it is swinging around on 2mm steel wires I have cut and clamped to get the correct height - but height is not the only challenge - angle is important too the ducting has to meet the 90 degree at perfect face on to have any chance of sliding the two together. Plus - it would be easy with a second person at the far end holding up and pushing the pipe into place while I guided it and levered the pipe over the elbow narrower fitting. It is designed to be tight - you have to push in the elbow joining section while levering out the straight section to join them. And if that long 3m section wants to pull itself away it will never happen.
Friday night it was not happening, I was tired and frustrated and while standing precariously at the tap of a ladder that is not a good place to be. I left it alone and resumed Saturday after lunch - refreshed and in a better mood.
And the old adage of taking on a challenge with a fresh outlook worked, adding an extra supporting wire to pull the ducting slightly towards us and a considerably amount of luck and effort pulling the pipe with one hand and the elbow with the other - plus trying to lever the two together - after only a few tries it slipped into position. BUT - as soon as I started to let go it wanted to start sliding away gain and detach. So a few more minutes were spend sliding it back into place, then trying to release it very slowly so it would not slide out - to give me time to get down the ladder, cut a section of high temperature aluminium tape and then head back up the ladder and tape it into place. It did slide a little while I was cutting the tape, but I was able to slide it back into position and then fit the tape which will hold it fast. That was the hardest piece of the whole build to fit in.
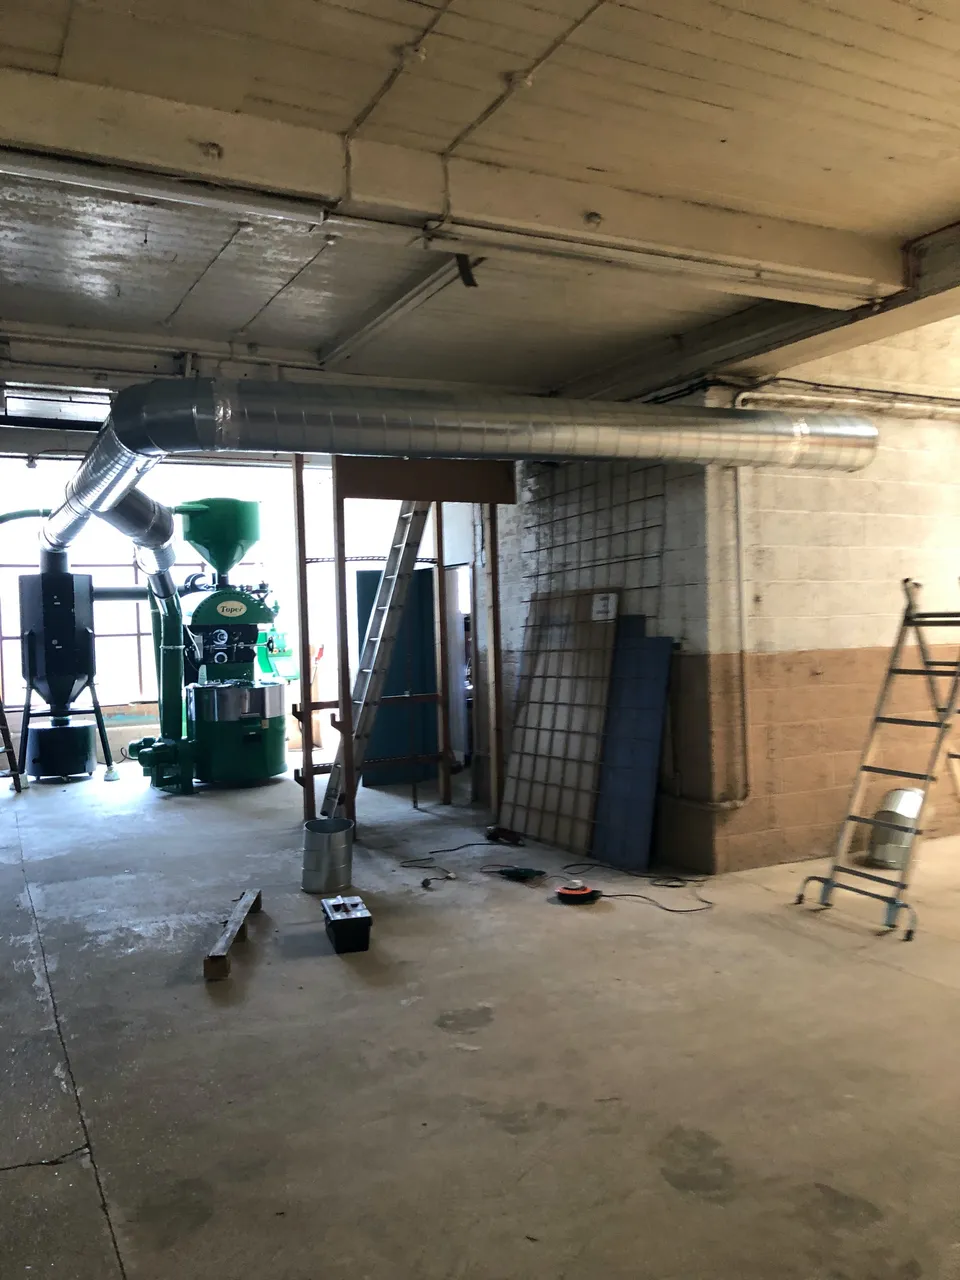
Now I had hoped the single 3m section of ducting would pass the mantle and I could just attach the next 90 degree elbow to go up through the ceiling. But of course it was a tiny bit too short - so I had to cut a smaller section of left over ducting to length so it would then pass the little. So squeeze in a joining piece, hold the ducting section in place and then mark off just past the little. Mark off the line on the ducting and get to work with the Angle Grinder. Once done and I had it fitted the extra section wanted to pull down from the joining section when I let go - so yet another section of 2mm steel wire needed cutting, joining and hanging to keep that in place. Especially as the elbow is quite heavy on it's own, and I would then be dropping onto it a 2.5m section of ducting through the ceiling.
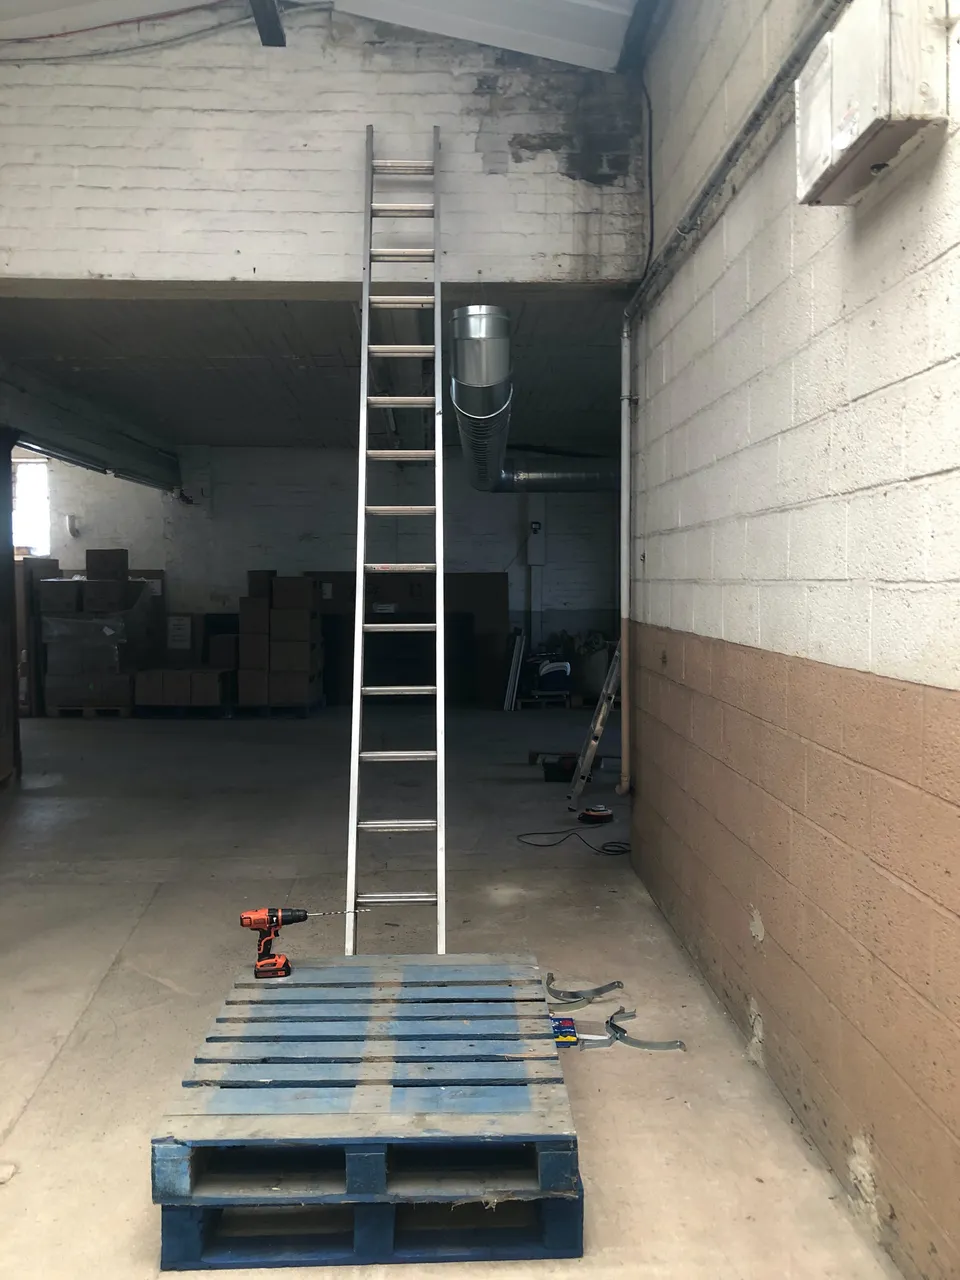
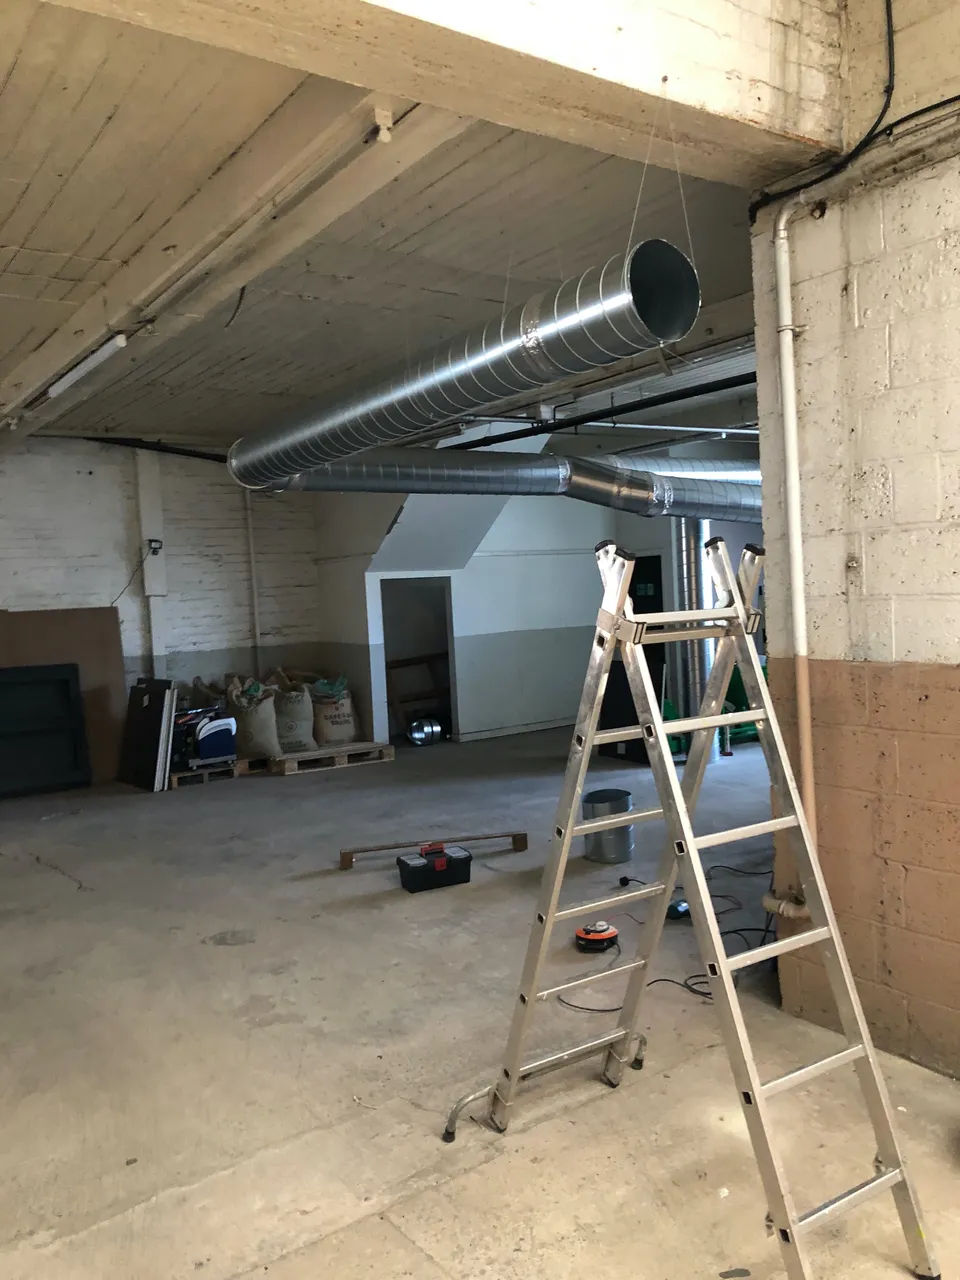
Things are looking up, or at least the ducting is. So for this part of the job I'm using longer ladders to reach the higher metal roof in the courtyard. Safety first - when using long ladders it's important to have someone foot them so they can not slip away when you are at the top. My buddies blue pallet 1 and blue pallet 2 are looking after me today - we have had many interesting chats over the past five weeks alone in the warehouse, it's important while in Lockdown isolation to stay coherent with learned discourse with your peers. Let me tell you those two pallets have some wild stories to tell!
So the challenge is to cut a 300mm hole in a double skin metal roof, which I can walk on from above. Cutting from above is obviously going to be so much easier then standing atop a ladder waving an angle grinder about while having hot sparks hitting you in the face. But how do you know where to cut above when you can not see what is below?
The solution is you climb the ladder with a battery drill and a very long metal bit, hold the drill over what you can judge is the centre of the ducting upright - or as well as you can judge the centre while stood on a ladder. Press the drill bit against the roof where you are guesstimating the centre of the ducting is - drill through layer one. Once you are though, and presuming you did find a drill bit long enough to reach through the gap between the layers - continue drilling to make a hole in the top roof panel - which you can find from the top! It's a plan and I'm sticking with it, plus both blue pallets agreed it was an awesome idea and said I was an incredibly creative dude.

And those of you that thought that will never work - Proof of Brain once again - here is that drilled hole, I then placed the left over short section of ducting over it so the hole is in the centre - and then drew a not very circular circle around it.

I'm not going to lie, getting through the top metal was harder then I would have liked. not helped by the fact the hot sparks bounced off the window panels and hit me on the head. Combined with angles and the window ledge piece stopping the grinder reaching where I wanted made it a challenge. Drill with a thick metal bit helped open up the hole. Once through, and with the insulation removed that smouldered a little while I was firing sparks at it - I then put the ducting section in place again and drew a new circle on the lower metalwork from the inside this time.

The theory behind the inner line is to make a tighter hole that will help grip the ducting I am dropping through and support some of it's weight.
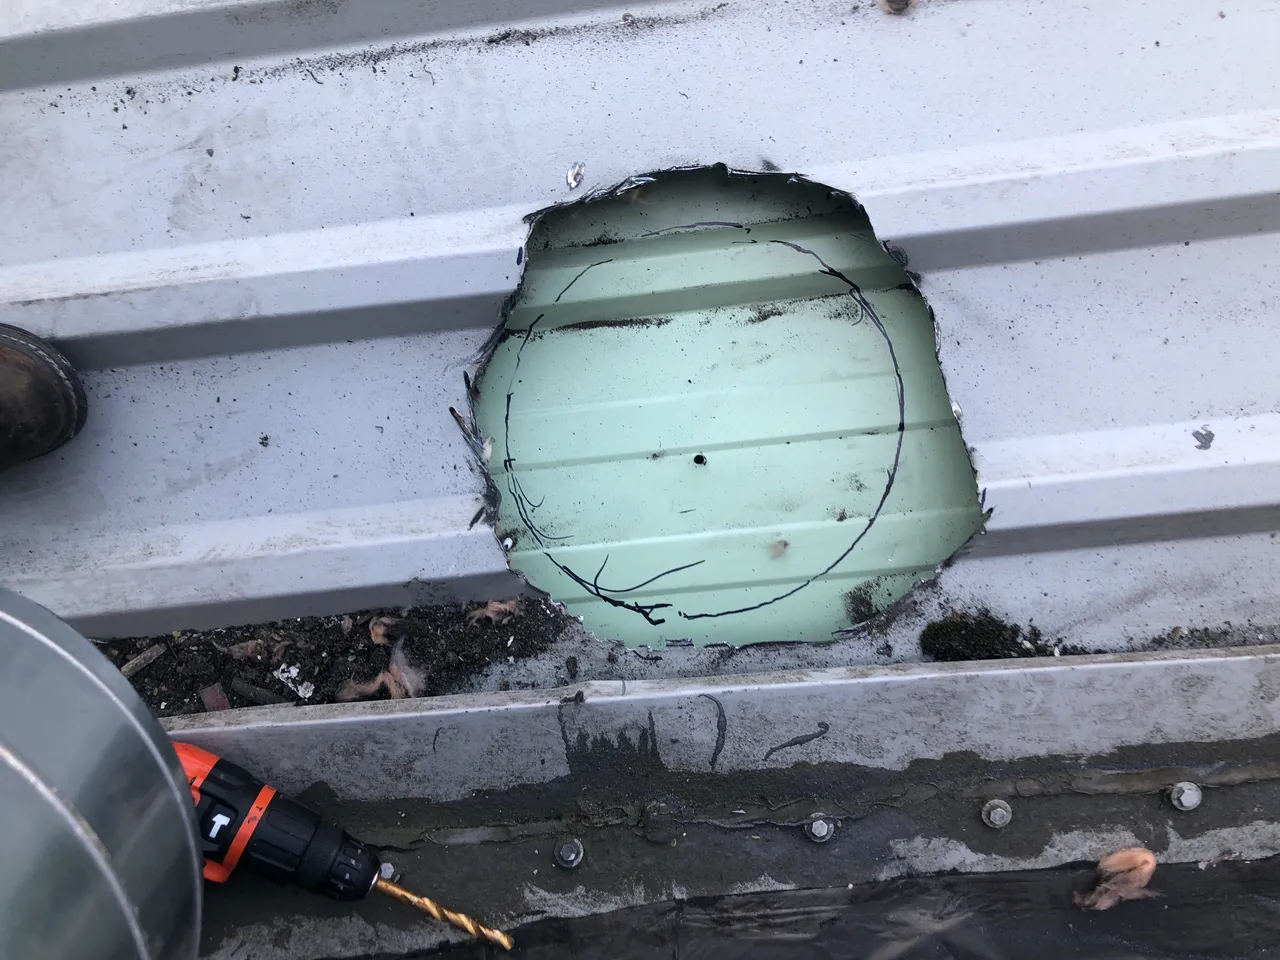
The second cut challenge is set, let's face it whatever happens it will be rounder then the first try 😂
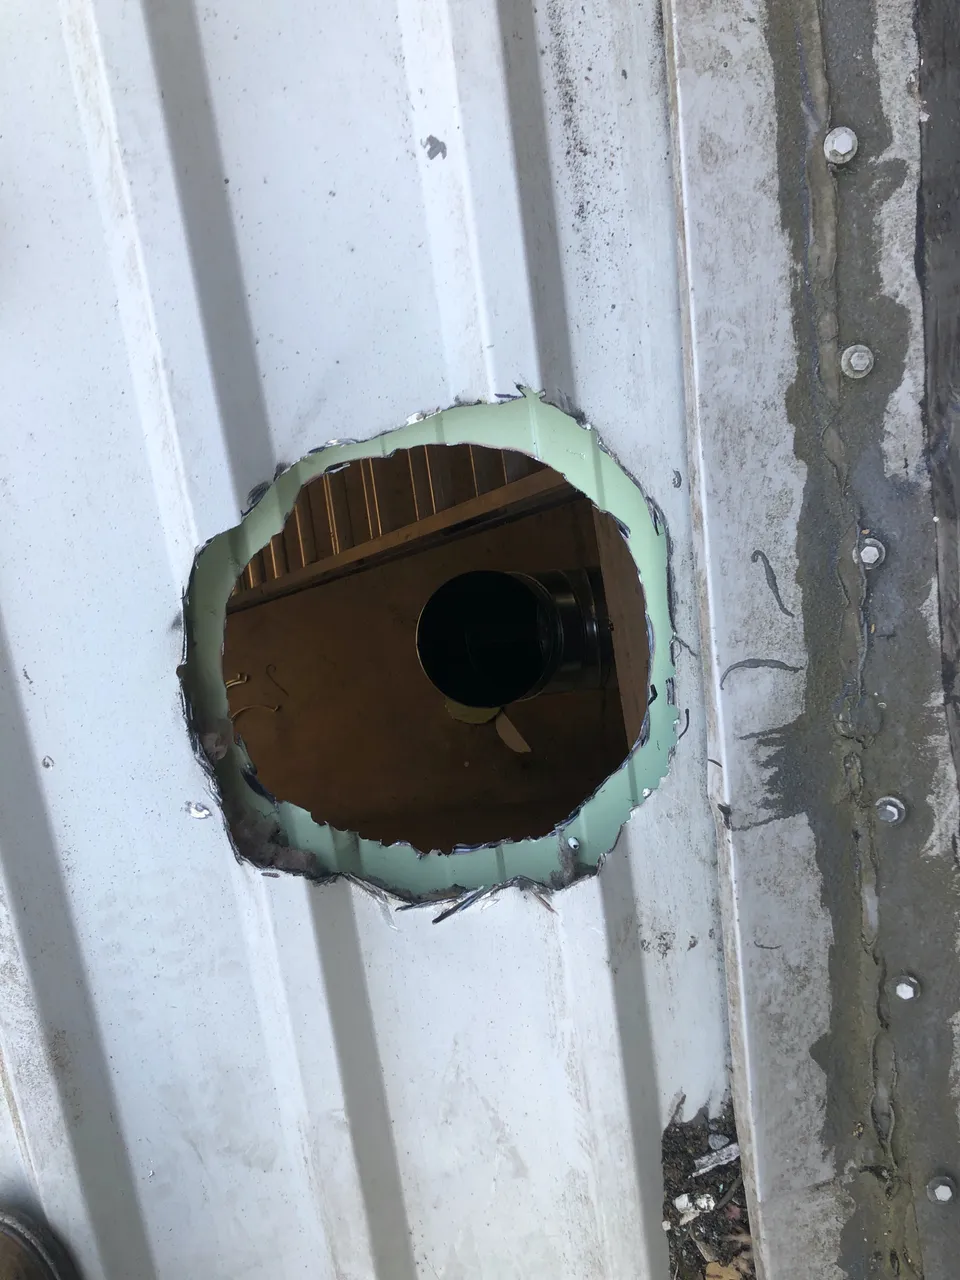
It's a double win, a round hole and it's exactly over the top of the ducting I need to connect to. Next is connecting this section of ducting, and for optimum simplicity I am going to slide it down from above.
A double check from below - yes it is definitely looking good.

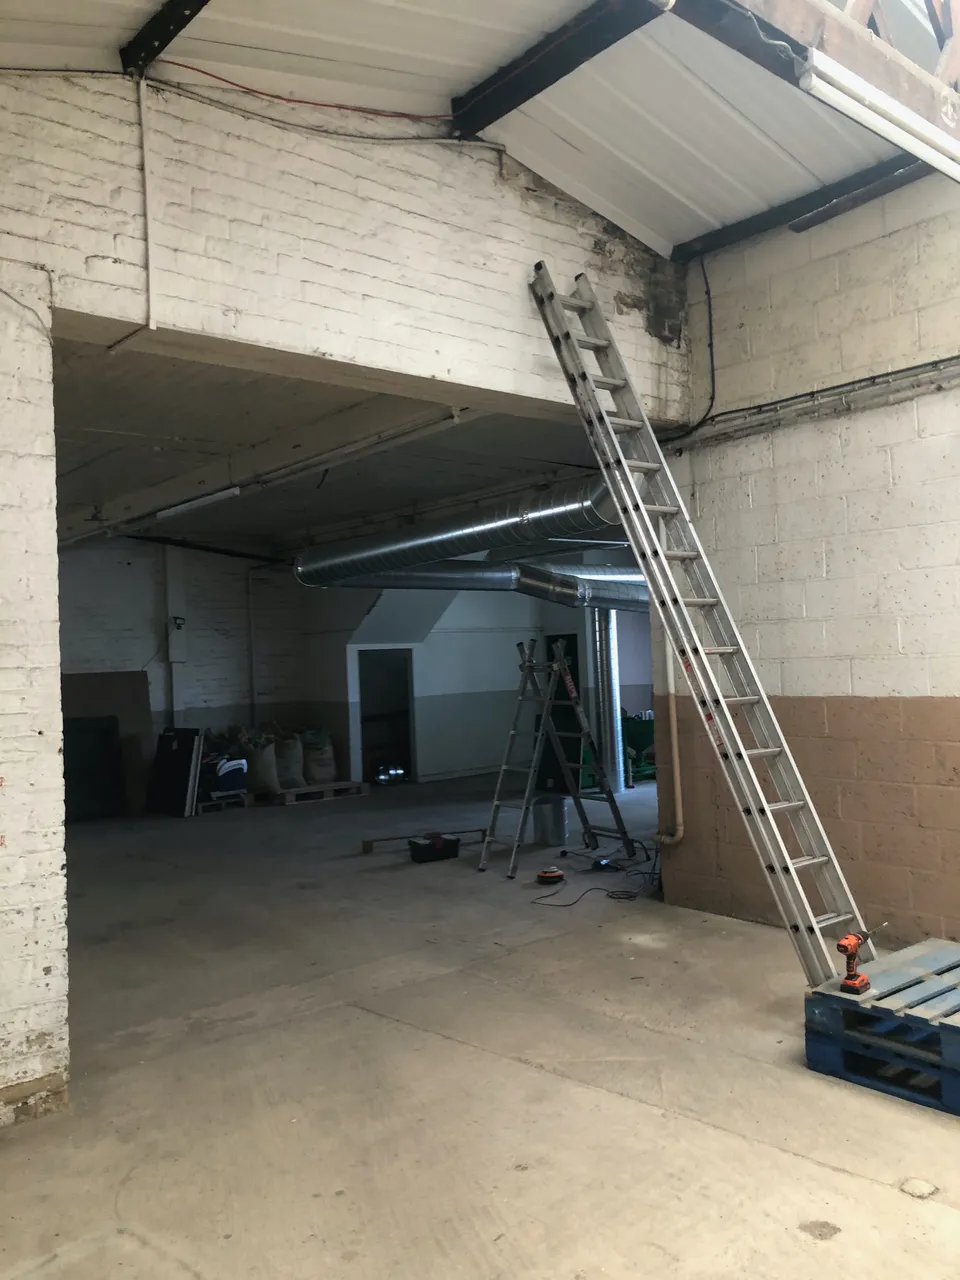
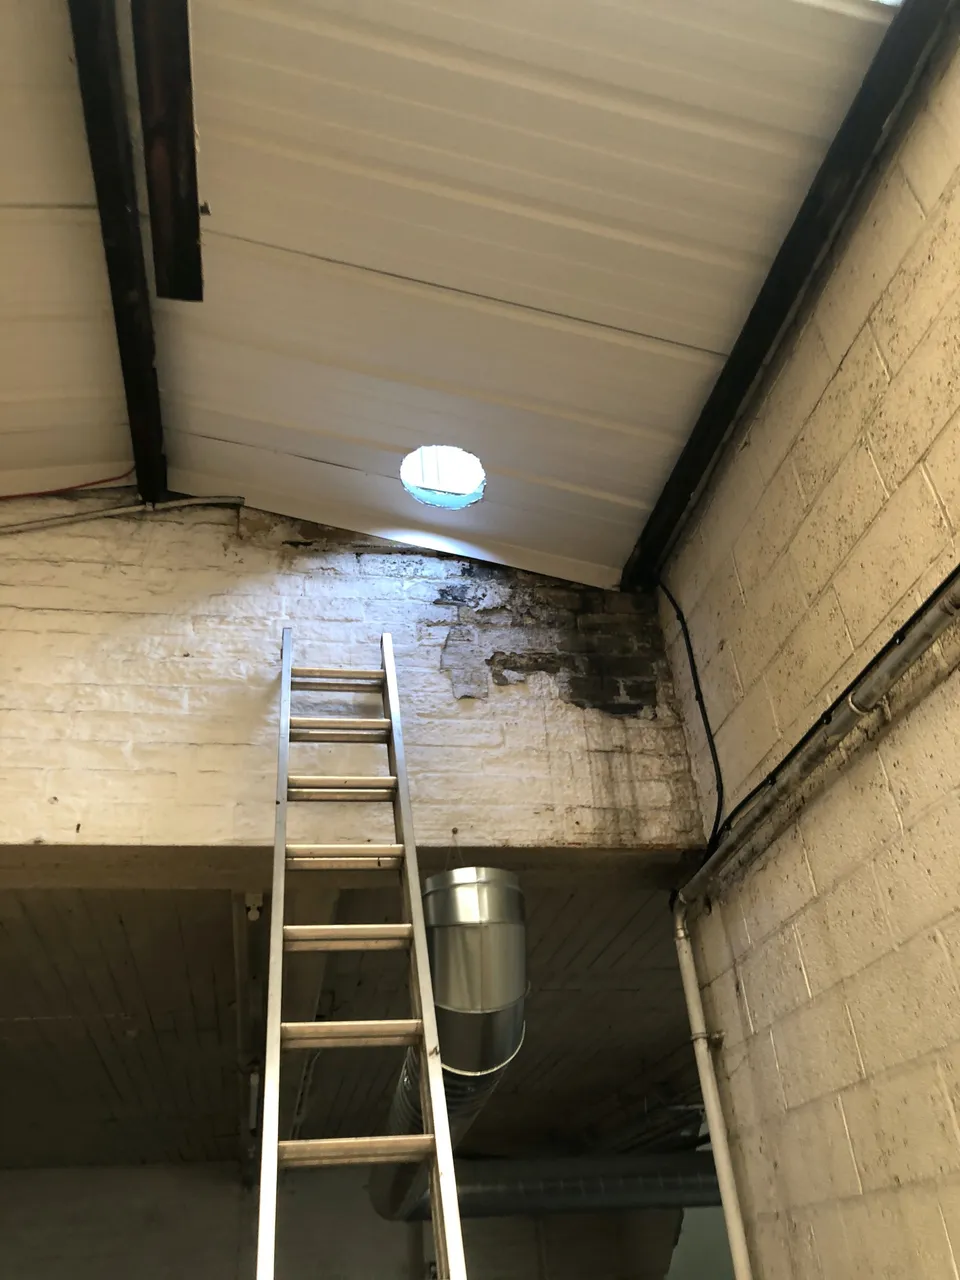
And the result, a perfect fit. In fact I cut the lower hole so tight I had to screw the ducting through it following the spiral on it - which was ideal because it means the metal roof is supporting the weight. Sunday I fitted a wall bracket for extra support.
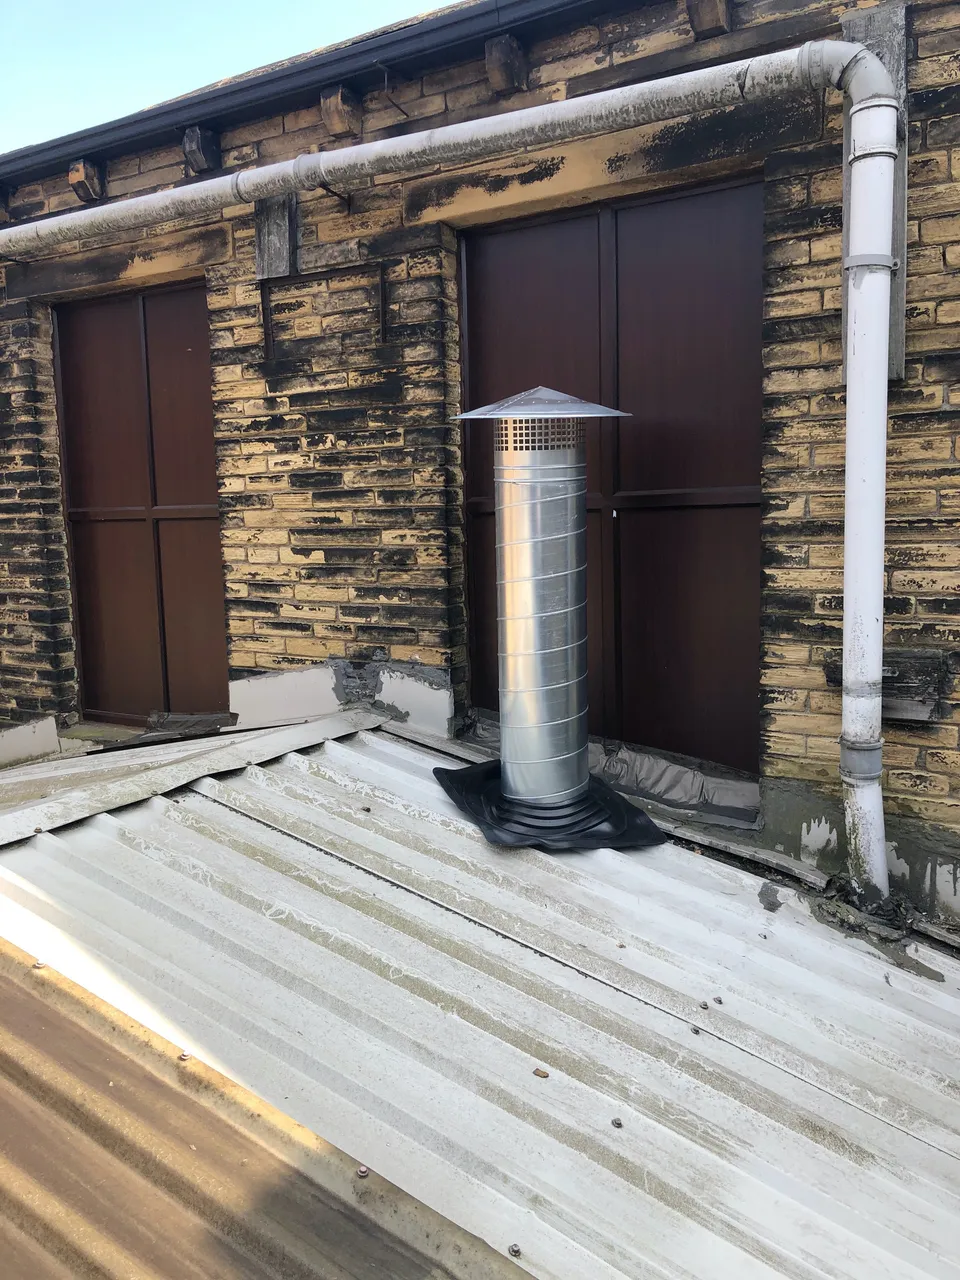
And top side, I will take the outlet above the gutter line of the slate roof, but I need to order an extra section of ducting for that. And the flashing I just dropped in place - because it was Saturday afternoon and sunny so I wanted to get home to sit out in the garden in the sun a bit!
At least it is all ready for the gas engineer to fit the gas line, and then we can test the new roasters burner.

Active HIVE Witness alongside @derangedvisions, if you appreciate the effort and work we put into the HIVE blockchain please consider giving us a Witness vote.

Proud sponsor with @derangedcontests of @brosino , free to play and cash out HIVE rewards, head to Brosino Website now and start playing.


I distribute coffee roasting machines and also espresso coffee machines and roast my own Speciality Coffee Range. being one of the premium coffee suppliers Yorkshire including a wide range of filter coffee sachets. Finally I have a dedicated website to my Artisan small batch roasted coffee featuring roast and post packs and super easy coffee subscriptions.

The Coffee Break Discord Voice Chat Show, in @thealliance Mondays 10pm UTC hosted by @c0ff33a and @enginewitty