As we had a petrol station we also wanted to have a charging station for electric cars on our model train layout.
You can buy one by Faller (180280) but 16.50 EUR were too much for us so we decided to build one by ourselfes.
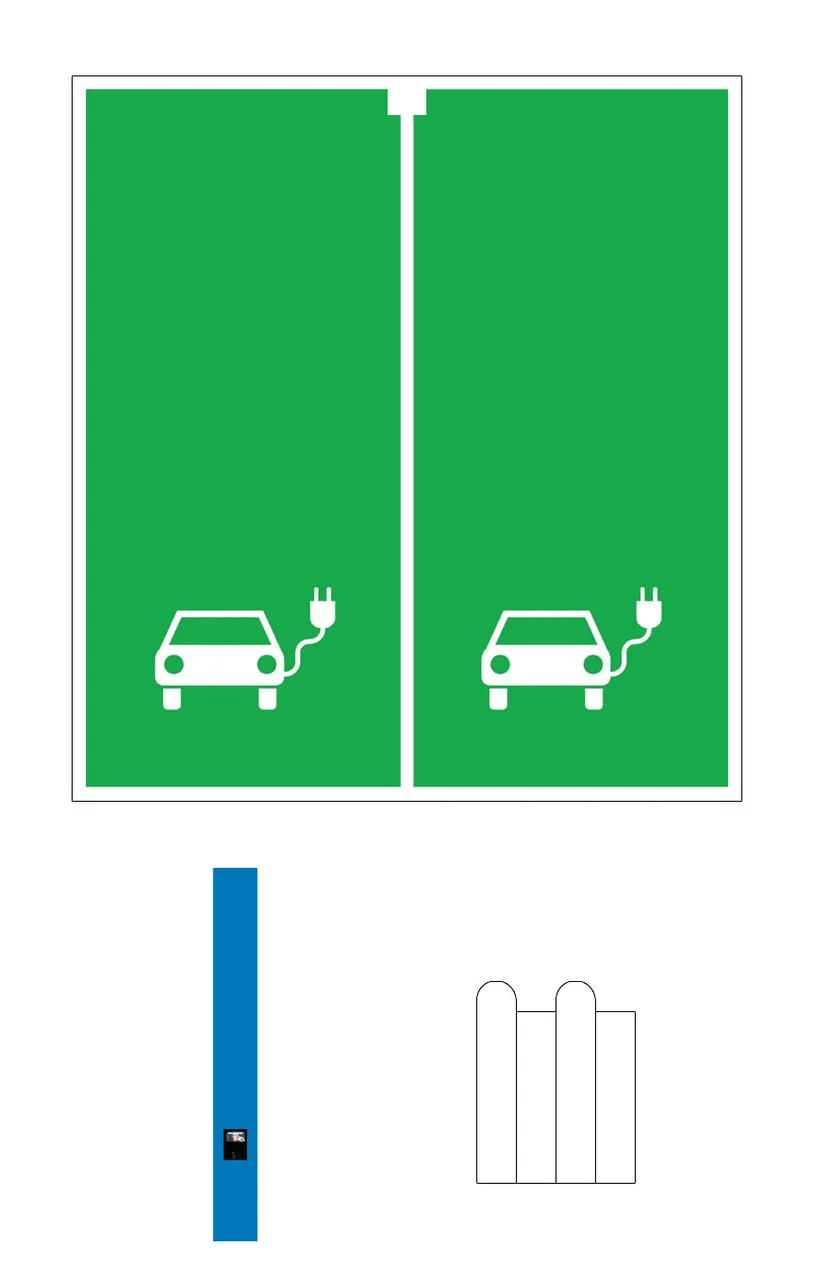
First I designed it on my PC. If you want to have a charging station on your model train layout you can download this photo, print it out on paper with 300 dpi (I recommend 160 g/m² paper). You can also download it in other colours and in various scales here!
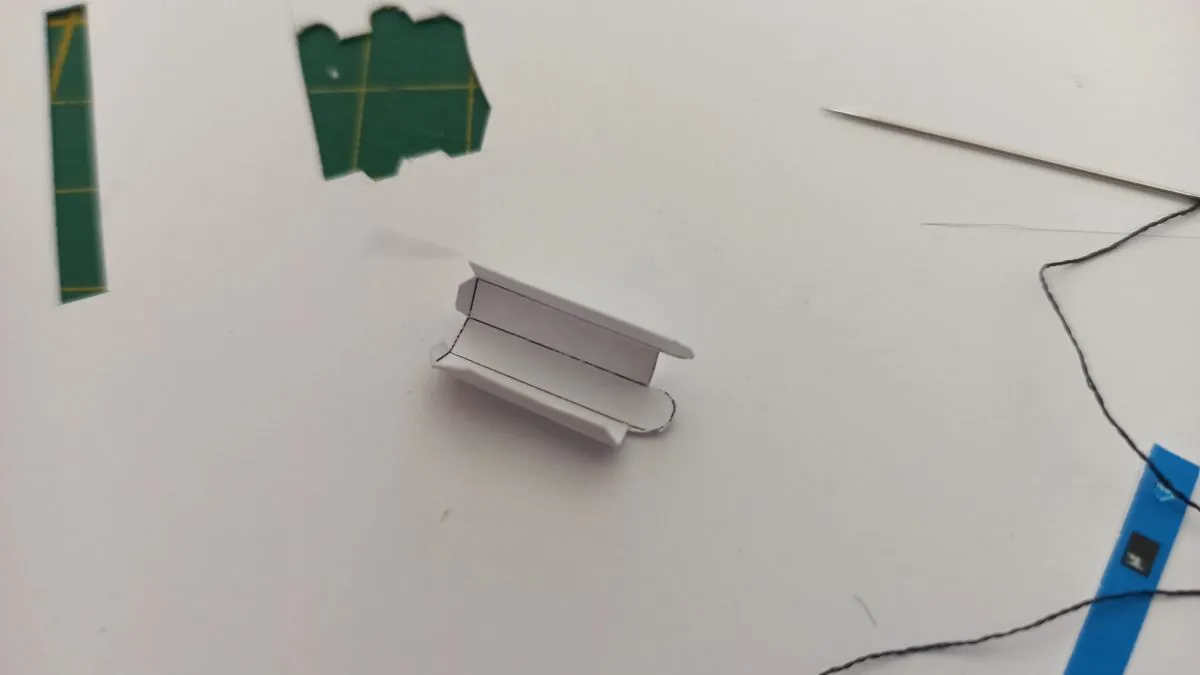
Then I cut everything out with the thinnest knife I had. Take care: There are no glue tabs on the printout!
Then I folded the charging station the other way round so that the lines are on the inside.
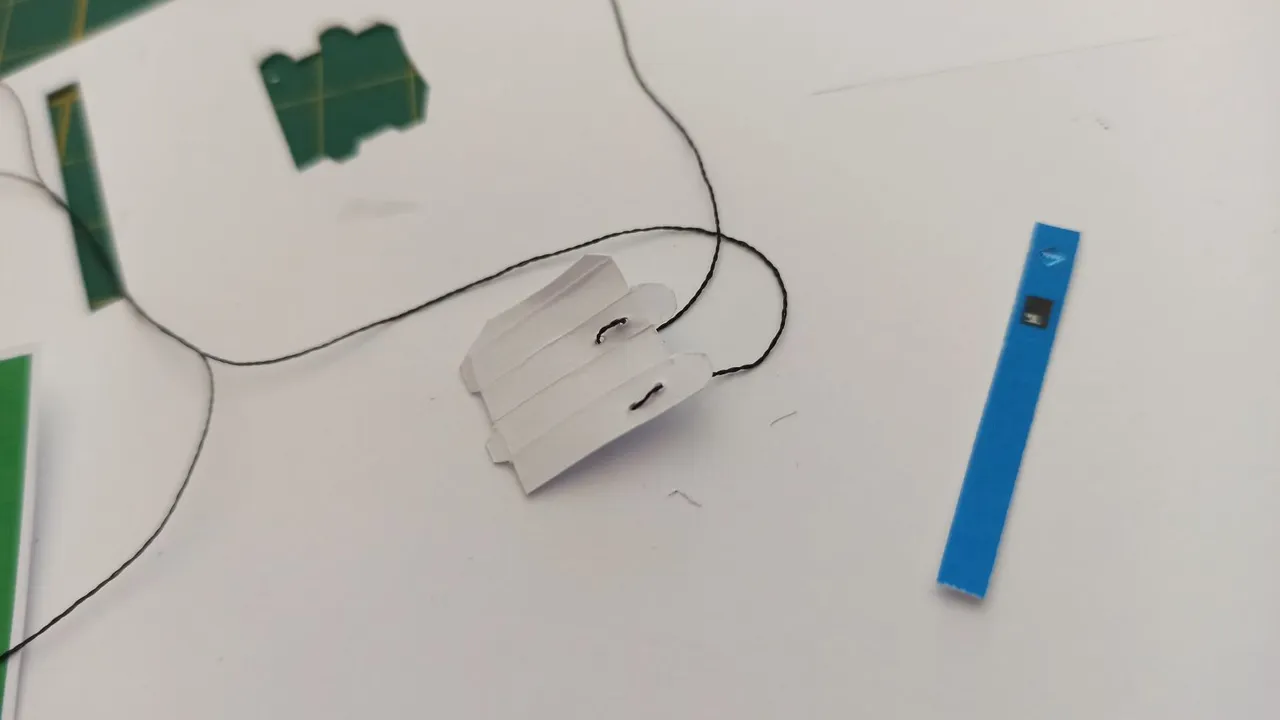
With the finest thread I found and the thinnest needle I created the cables.
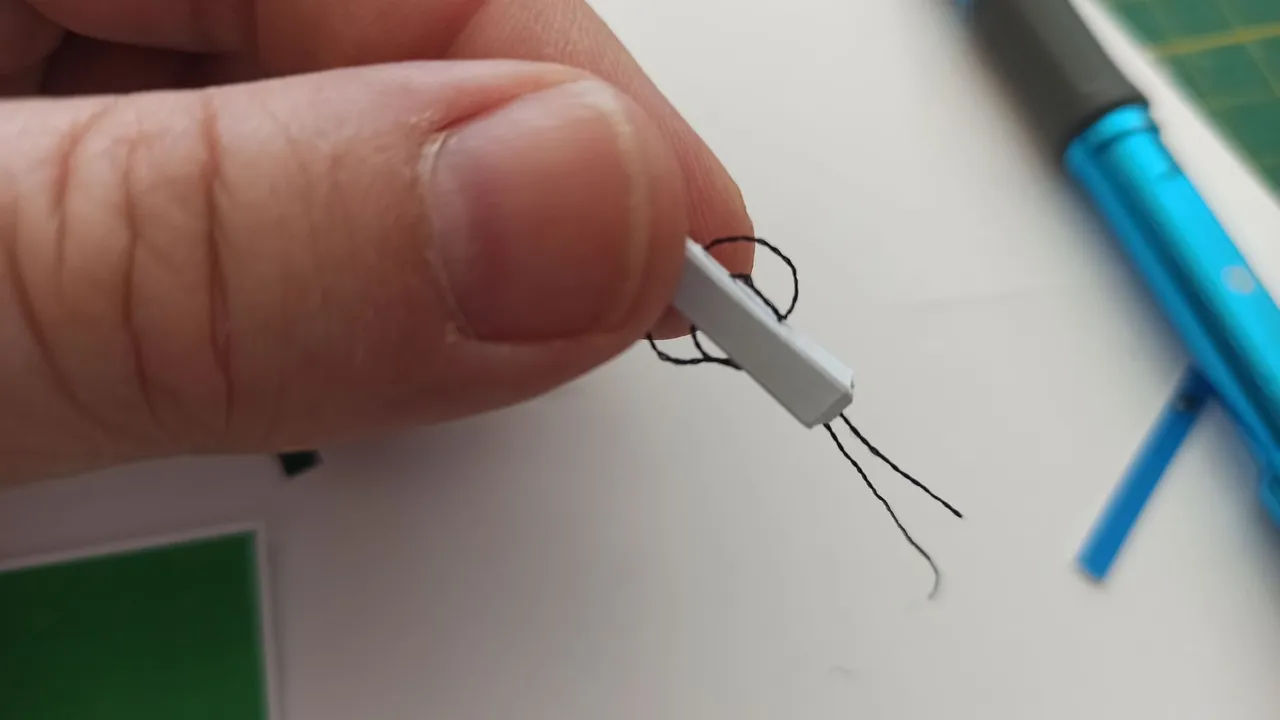
With some glues I fixed the "cables" on the charging station so that they do not stand away too much.
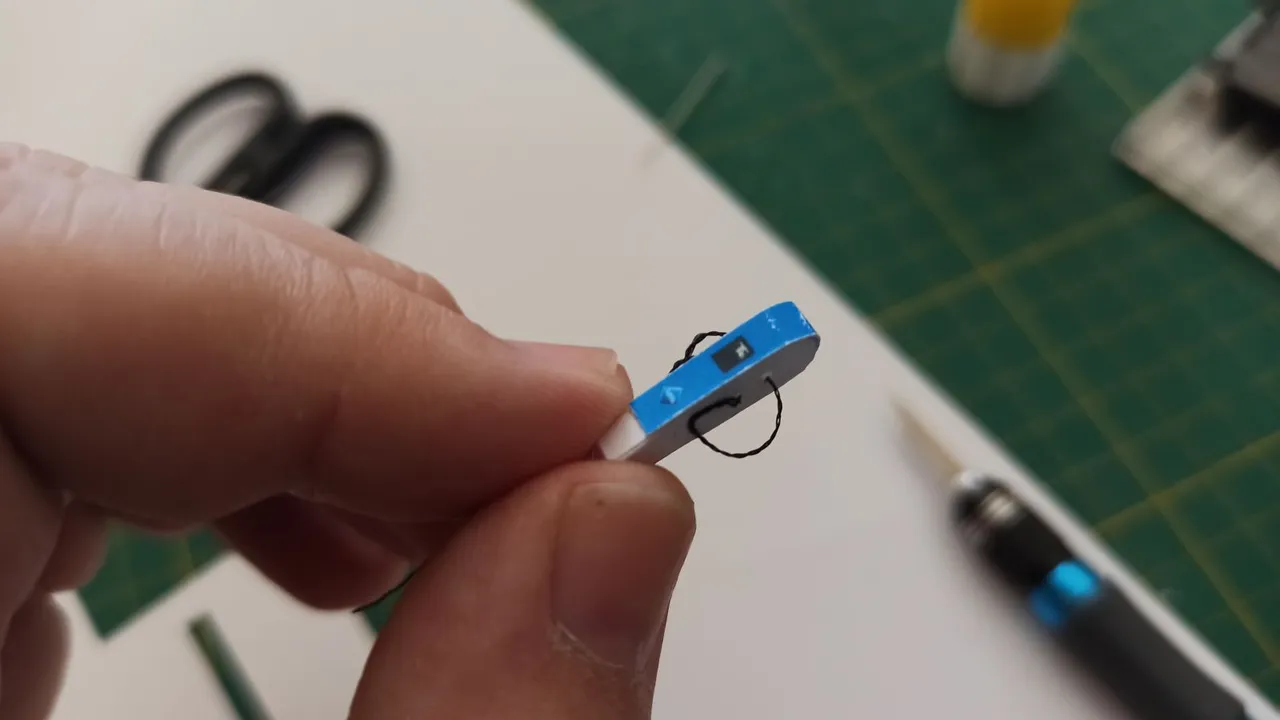
Then I glued the blue "strip" with the "display" on the charging station.
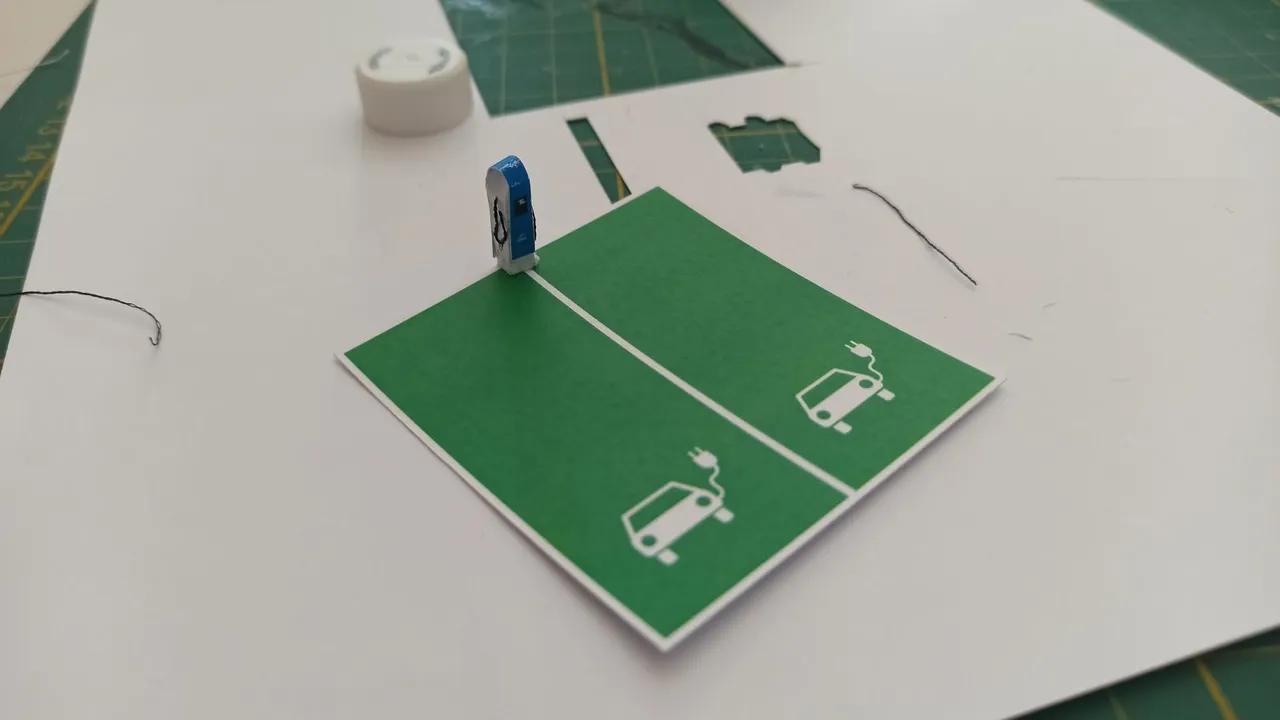
Then it was time to glue everything on the parking lot…
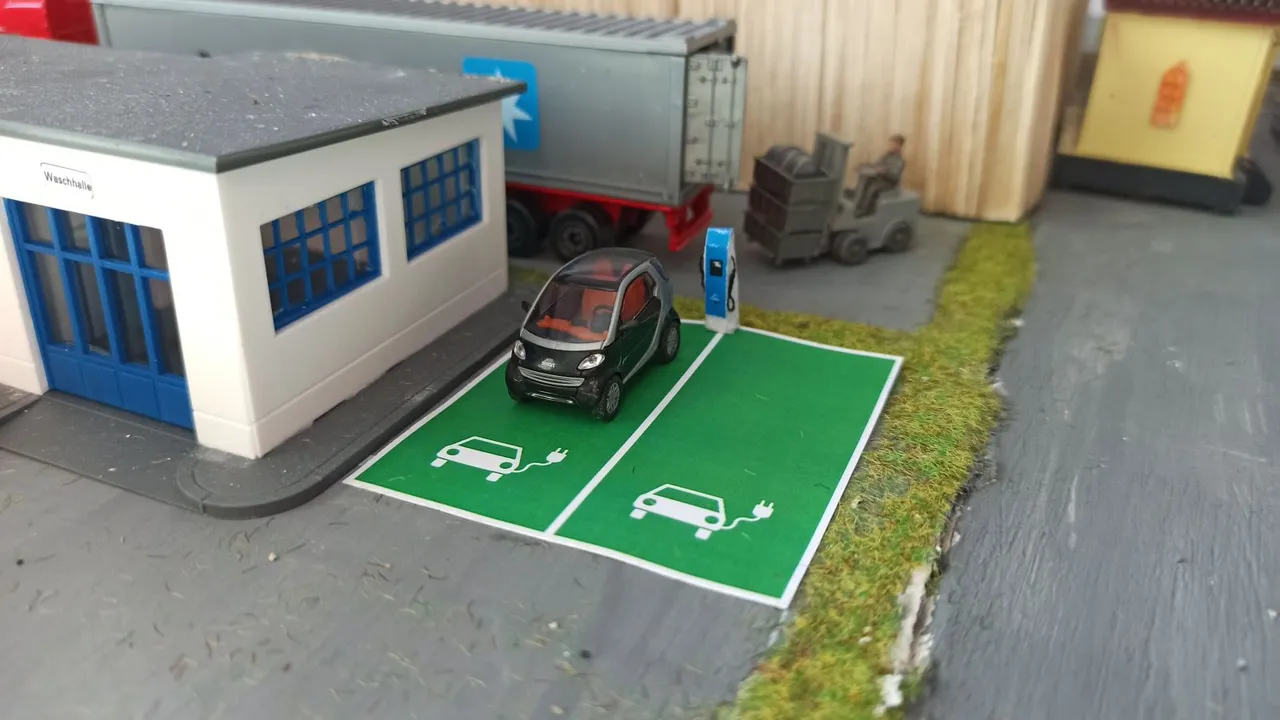
Finally I put everything on our model train layout - and found out that I don't have any electric car in scale 1/87. But at least I have a Smart ForTwo in 1/87 and used this model car for the photo.
Previous posts:
Part 1: The Christmas present
Part 2: The petrol station
Part 3: How it all started
Part 4: My model car collection
Part 5: The farm
Part 6: My GDR collection
Part 7: The base plate
Part 8: Basic electricity
Part 9: Mounting the tracks
Part 10: DR railroad cars
Part 11: Electrifying the railway switches
Part 12: Electricity for the lights
Part 13: Another DR passenger car
Part 14: An electric drive for the second railway switch
Part 15: My website "scalemodel.photography"
Part 16: The self-made protective pad
Part 17: Moving the base plate to the final position
Part 18: The campground
Part 19: The petrol station and the farm
Part 20: The railway crossing
Part 21: Our PIKO Junior set