Ruleset Focus
HEALED OUT ruleset.
The HEALED OUT ruleset completely removes all healing abilities from the battle, including those of summoners 🤕
This ruleset discourages the use of support units that usually provide team sustainment through their healing abilities, as those abilities are rendered ineffective in this battle. Instead, players tend to prioritize high-damage units to swiftly secure victory 😝

HEALED OUT ruleset.


Heal - Monster's health in each round is being replenished by an amount equal to 1/3 of its maximum health, rounded down.
Tank Heal - Monster in the first position has its health restored in each round by an amount equal to 1/3 of its maximum health, rounded down.
Triage - The back-line Monster that has suffered the most damage is healed by an amount equivalent to 1/3 of its maximum health, rounded down (with a minimum of 2).
HEALED OUT ruleset 😅

Life Leech - Monster's health increases proportionally to the damage it inflicts on an enemy Monster's health.
Scavenger - Whenever any monster perishes, this Monster gains 1 maximum health.

The Battle
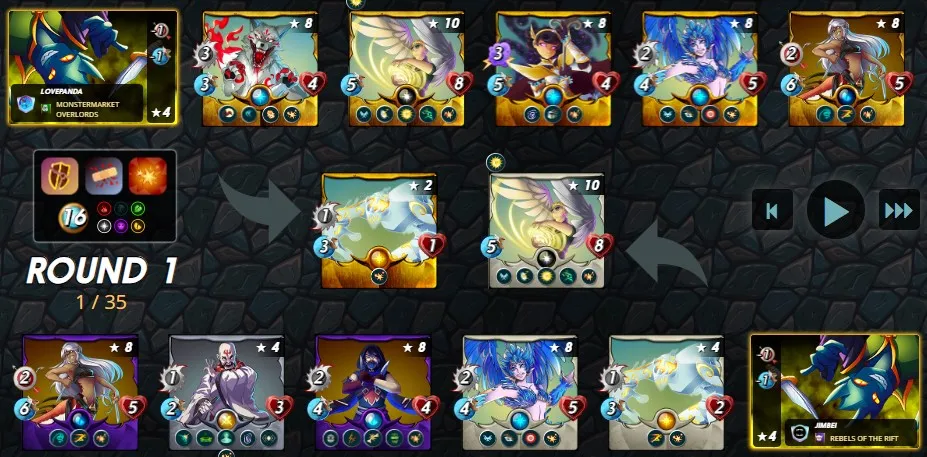
In my alt account, jimbei, I was able to engage in a battle that involves the HEALED OUT ruleset. To get right into the action, the battle link can be found here. Otherwise, do read on as I go into more detail regarding the lineup and fight.

Let's start by examining the ruleset implemented in this battle. The Unprotected ruleset eliminates all armor, rendering units susceptible to all attacks. Next up, the main highlight of this challenge is the extensively discussed HEALED OUT ruleset. Lastly, the Explosive Weaponry ruleset that provides the Blast ability to all monster units. The battle imposes a low mana cap of 16 and restricts the usage of the Water Splinter.
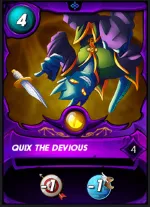
Summoner, Quix The Devious
Given the presence of the Explosive Weaponry and Unprotected rulesets, it becomes evident that selecting Quix The Devious is a logical decision. Particularly in battles involving Explosive Weaponry, it is advantageous to have a team that can swiftly execute their attacks before the opponents to capitalize on the Blast damages. Therefore, the -1 Speed debuff provided by Quix The Devious is of utmost importance in this particular lineup ✌️

First Position, Pelacor Conjurer
Pelacor Conjurer stands out as an excellent choice for a low-cost tanker in the game, making it well-suited for this specific battle. With a mere mana cost of 2, it possesses impressive Speed and Health attributes, accompanied by a variety of abilities that prove highly effective against opposing monsters. Magic oppositions often tremble in its presence due to its Magic Reflect and Phase abilities. Moreover, the Divine Shield ability enables Pelacor Conjurer to withstand the first hit unscathed, adding to its resilience on the battlefield. 💪

Second Position, Soul Fiend - As previously stated, the key strategy for this battle revolves around outpacing the opponent to secure the first strike. This is where the Swiftness ability of the Soul Fiend proves invaluable. By positioning it in the second slot, it serves the purpose of absorbing any potential Blast damage when attacks actually lands on the Pelacor Conjurer successfully, thereby safeguarding the team's damage dealers 😵
Third Position, Celestial Harpy - The Celestial Harpy is another mana-efficient monster that the Life Splinter is able to offer. Its standout feature is the Opportunity ability, which allows it to target the weakest enemy, often concealed in the backline. This strategic advantage enables the Celestial Harpy to capitalize on Blast damage, inflicting additional harm to adjacent units and effectively maximizing its offensive impact 😅

Fourth Position, Dhampir Infiltrator
The Dhampir Infiltrator holds a special place among my preferred units, especially in battles with a low mana cap. It is an exceptionally aggressive unit, capable of swiftly eliminating the enemy's backline. With its Double Strike and Sneak abilities, the Dhampir Infiltrator could potentially deliver a powerful offensive onslaught. Due to the presence of the HEALED OUT ruleset in this battle, the Affliction ability of the monster becomes irrelevant 😌

Fifth Position, Venator Kinjo
Venator Kinjo is a common choice in battles featuring the Explosive Weaponry ruleset due to its Reflection Shield, which protects it from Blast damage. I strategically positioned it in the second last position, anticipating the possibility of the enemy targeting my backline with Sneak abilities. By doing so, Venator Kinjo can effectively nullify any potential Blast damage. Additionally, its Slow ability aligns with my overall strategy of maintaining a faster pace than the opponent 😤
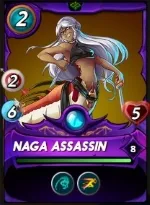
Last Position, Naga Assassin
The Naga Assassin is a remarkably fast monster known for its speed. I strategically positioned it in the last position to take advantage of its Backfire ability, which inflicts damage on any enemy monster that misses its attack while Sneaking on the Naga Assassin. Additionally, its Swiftness ability boosts the overall speed of the team, increasing the chances of the enemy's monsters missing their target 👊
The Analysis
Unsurprisingly, my opponent also chose Quix The Devious and the Life Splinter combination for this battle. Even though there is only a ban for using the Water Splinter, the low mana cap restriction made our options limited, hence these choices were the most suitable.
Similar to my strategy, my opponent aimed to strike quickly and take advantage of the Explosive Weaponry ruleset, which grants additional damage through the Blast ability. The only difference that differentiated the speed in our team was the level of our Soul Fiend, mine being at max level gave the Swiftness ability and allowing my team a slight speed advantage 😁
While I managed to strike first and eliminate some of my opponent's lineup early on, the battle still proved to be challenging. As mentioned earlier, there is an unconventional way of "healing" even in the HEALED OUT ruleset, demonstrated by the enemy's Vulguine and its Life Leech ability. This monster slowly replenishes its health by feeding on fallen monsters, making it difficult to defeat 😣
Although I ultimately emerged victorious, the battle was a close call towards the end. It was one of those rare instances where luck favored me, thanks to the RNG gods. I won't spoil the details in writing, as it's best experienced by watching the battle if you're interested 😂
Do you guys have any better recommendations for setting up the team in this particular ruleset? Do share them with me in the below comments 😜

If you made it this far, I sincerely appreciate your time and value your encouragement. Please feel free to leave any comments or suggestions so that we can discuss about other strategies. Thinking about giving Splinterlands a try but haven't signed up yet? Feel free to use my referral link: https://splinterlands.com?ref=ak08, and be sure to reach out to me if you have any questions!
Are you interested in reading some of my future writings? Don't forget to follow me! In the meantime, here are some of my most recent blogs if you'd like to view them:
 |  |
 |  |
All banners, dividers card and battle images used in this article are open source and obtained from the Splinterlands team or made by flauwy. Do check out his link for other amazing designs.