Monster Focus

In this week's Social Media Challenge, I want to bring our attention to a hidden gem from the Fire Splinter: the FORGOTTEN ONE. Often overshadowed by Grum Flameblade and underutilized, this monster definitely deserves a second look 👀
While its Immunity ability makes it a popular choice in the Noxious Fumes ruleset, the FORGOTTEN ONE is capable of so much more. Join me as I explore its arsenal of abilities and uncover its true potential in battles. Prepare to be amazed by what this powerhouse can bring to your strategy. Don't let it be forgotten any longer! 😜

Ability Focus


Monsters with Retaliate have a chance of attacking their attacker
the remainder will damage the target's Health
Ruleset Focus
FORGOTTEN ONE.Keep an eye out for these rulesets and unleash the full potential
of the
FORGOTTEN ONE in these battles to greatly enhance your chances of victory! 😉


The Battle
In my alt account, jimbei, I was able engage in a battle that showcased the effectiveness of using the FORGOTTEN ONE especially in a Up Close & Personal ruleset. To get right into the action, the battle link can be found here. Otherwise, do read on as I go into more detail regarding the lineup and fight.
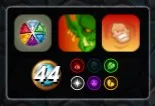
Now, let's examine the ruleset that governs this battle. Firstly, we have the Taking Sides ruleset, which prohibits the use of monsters from the Neutral Splinter. Secondly, the Up Close & Personal ruleset mandates the use of monsters with Melee attacks exclusively. Lastly, the What Doesn't Kill You ruleset grants all monsters with the Enrage ability. The battle is capped at 44 mana and the only the Water Splinter is banned from being used.
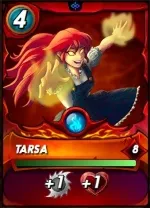
Summoner, Tarsa
With the Up Close & Personal ruleset, it is evident that this battle will be dominated by Melee monsters. In such scenarios, the Fire Splinter stands out as a strong choice. Utilizing Tarsa with its beneficial +1 Melee attack and +1 Health stat buff becomes an advantageous strategy, especially since the Water Splinter which possess equally stronger and faster Melee units is not allowed in this battle 😏
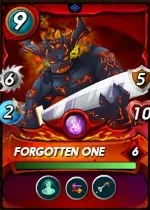
First Position, Forgotten One
The blogpost was specially written to highlight this formidable monster, FORGOTTEN ONE. The Retaliate ability grants the FORGOTTEN ONE a chance to counterattack when struck with a Melee attack, adding a defensive advantage. Additionally, its Piercing ability allows it to deal damages in excess of the target's armor. Lastly, the Immunity ability that is so crucial in this match as it would be unaffected by any negative status effect, e.g. Demoralize, which I believe would be present in this battle 💪
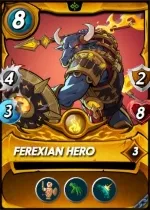
Second Position, Ferexian Hero
Placing the Ferexian Hero in the second position offers strategic advantages, thanks to its Reach ability. Thankfully, I was fortunate enough to have this Soulbound Reward Card upgraded to Level 3, granting it the additional Reflection Shield ability. This particular ability proves valuable, especially when facing an enemy tanker with the Thorns ability, since the Reflection Shield prevents any retaliatory damage 😤
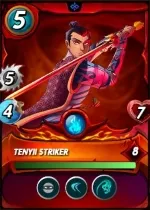
Third Position, Tenyii Striker
The Tenyii Striker occupies a special place in my preferred lineup whenever I opt to use the Fire Splinter. With its Sneak ability, this unit can unleash a devastating offensive attack, swiftly eliminating the enemy's backline. Additionally, its Dodge and Backfire abilities work in harmony, increasing the likelihood of enemies missing their target and incurring damage in return 😅
Fourth Position, Ferox Defender
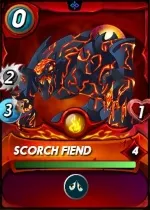
Fifth Position, Scorch Fiend
Although positioned in the backline, both the Ferox Defender and Scorch Fiend play important roles in the battle despite their inability to directly contribute to the attack. The Ferox Defender's Protect ability, providing a +2 Armor boost, proves invaluable, and its Repair ability allows for the restoration of damaged armor each turn.
On the other hand, the Scorch Fiend's Demoralize ability effectively reduces the power of enemy melee attacks with a -1 debuff. Moreover, it comes at no cost to include this monster, so there's no reason to complain, right? 😁
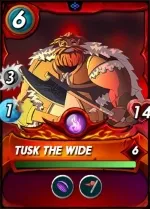
Last Position, Tusk The Wide
Like the previous two monsters in the lineup, Tusk The Wide does not directly contribute to the attack from the backline. However, it plays a significant role by providing a valuable +1 Melee attack through its Inspire ability. With its high health, Tusk The Wide is strategically positioned in the last position to act as a resilient backline tank, eliminating the risk of having a vulnerable backline 😝
The Analysis
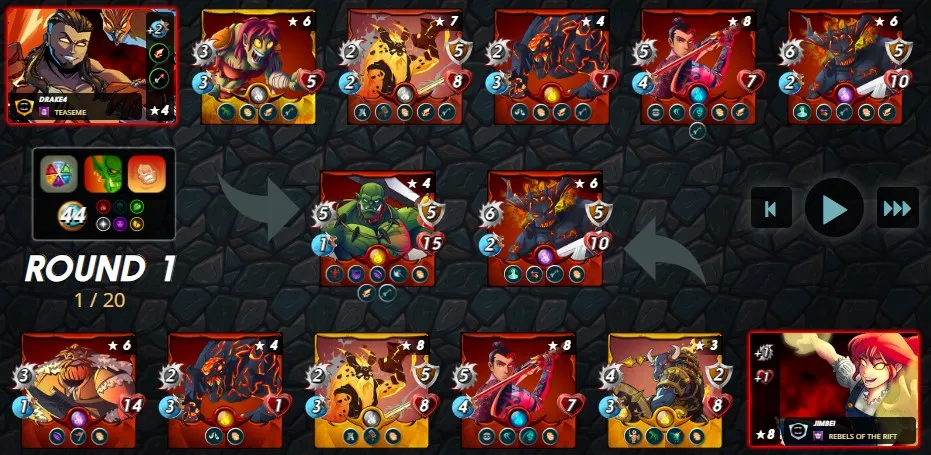
Similarly to my strategic approach, the opponent also chose the Fire Splinter, believing it to possess the strongest Melee attackers for this battle's rulesets. However, they took a different path by prioritizing Speed with the +2 Speed buff from Conqueror Jacek as their Summoner, while I opted for Tarsa to enhance my team's Melee attack by +1, aiming to overpower the opposition through sheer strength 💪

Our team lineups share similarities, as we both included the Ferox Defender to provide +2 Armor and Armor Repair capabilities. However, what set my team apart and led to victory was the positioning of my monsters, particularly the FORGOTTEN ONE. Placing it in the first position as a tank, it absorbed attacks and Retaliated in defense. With the advantage of an extra turn to attack when Retaliating, the FORGOTTEN ONE effortlessly swept aside the opposition, obliterating any monster that stood in its way. At one point in the battle, the FORGOTTEN ONE's Melee attack reached an impressive 12 damage, and when combined with the Piercing ability, no opponent could withstand its might 🤣
Do you guys have any go-to strategy as well? Do share them with me in the below comments 😎

If you made it this far, I sincerely appreciate your time and value your encouragement. Please feel free to leave any comments or suggestions so that we can discuss about other strategies. Thinking about giving Splinterlands a try but haven't signed up yet? Feel free to use my referral link: https://splinterlands.com?ref=ak08, and be sure to reach out to me if you have any questions!
Are you interested in reading some of my future writings? Don't forget to follow me! In the meantime, here are some of my most recent blogs if you'd like to view them:
 |  |
 |  |
All banners, dividers card and battle images used in this article are open source and obtained from the Splinterlands team or made by flauwy. Do check out his link for other amazing designs!